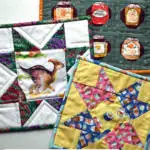
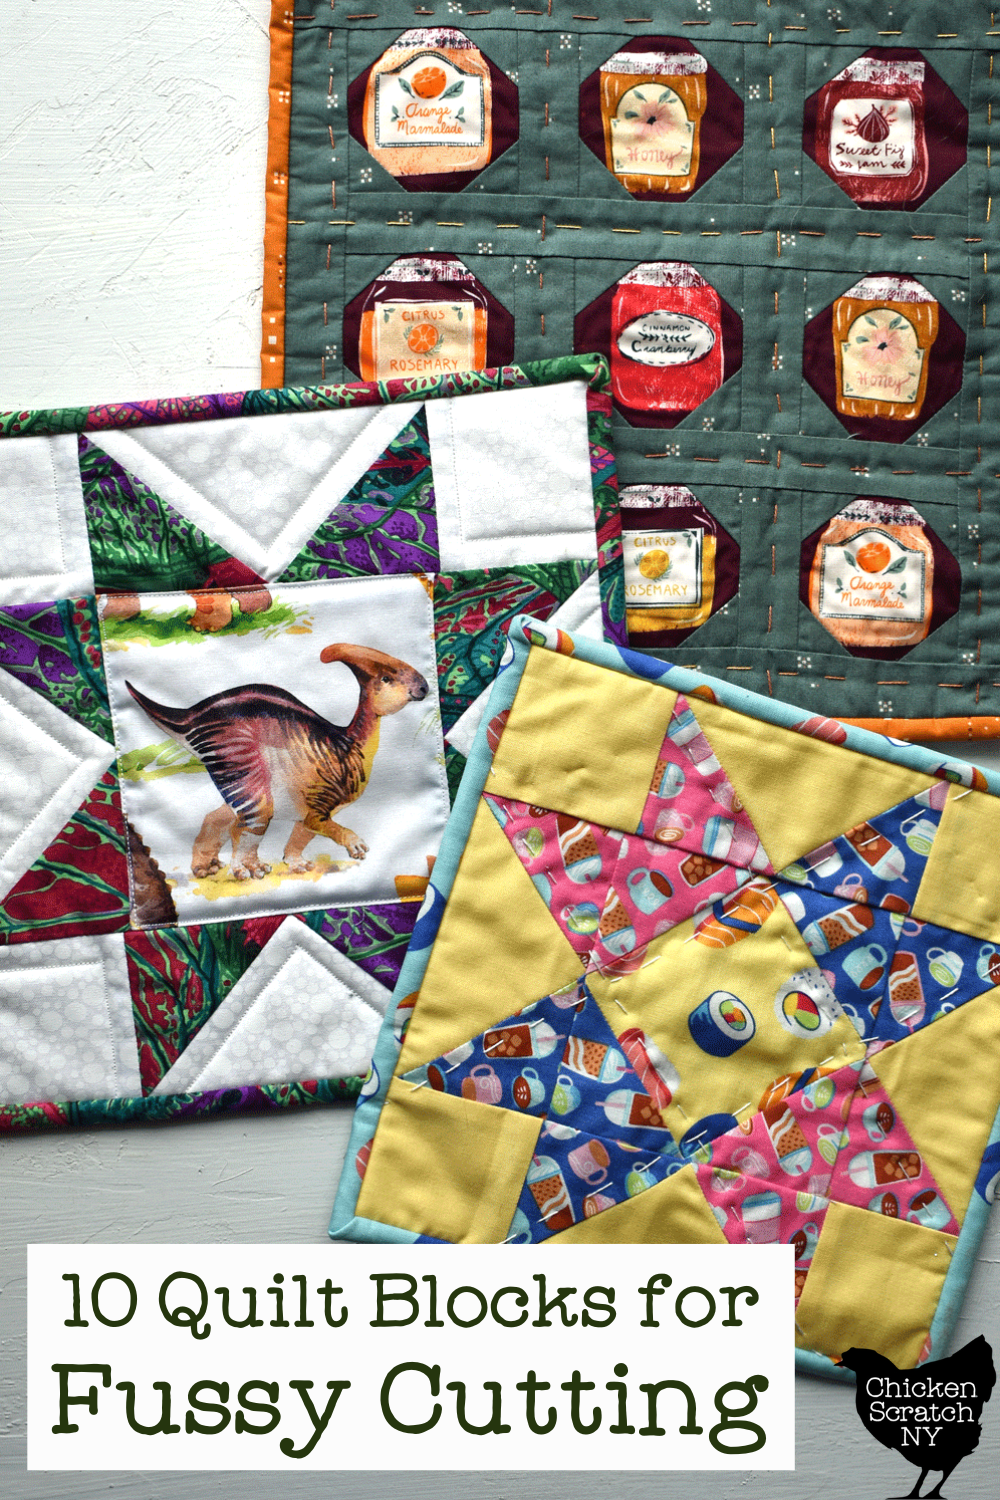
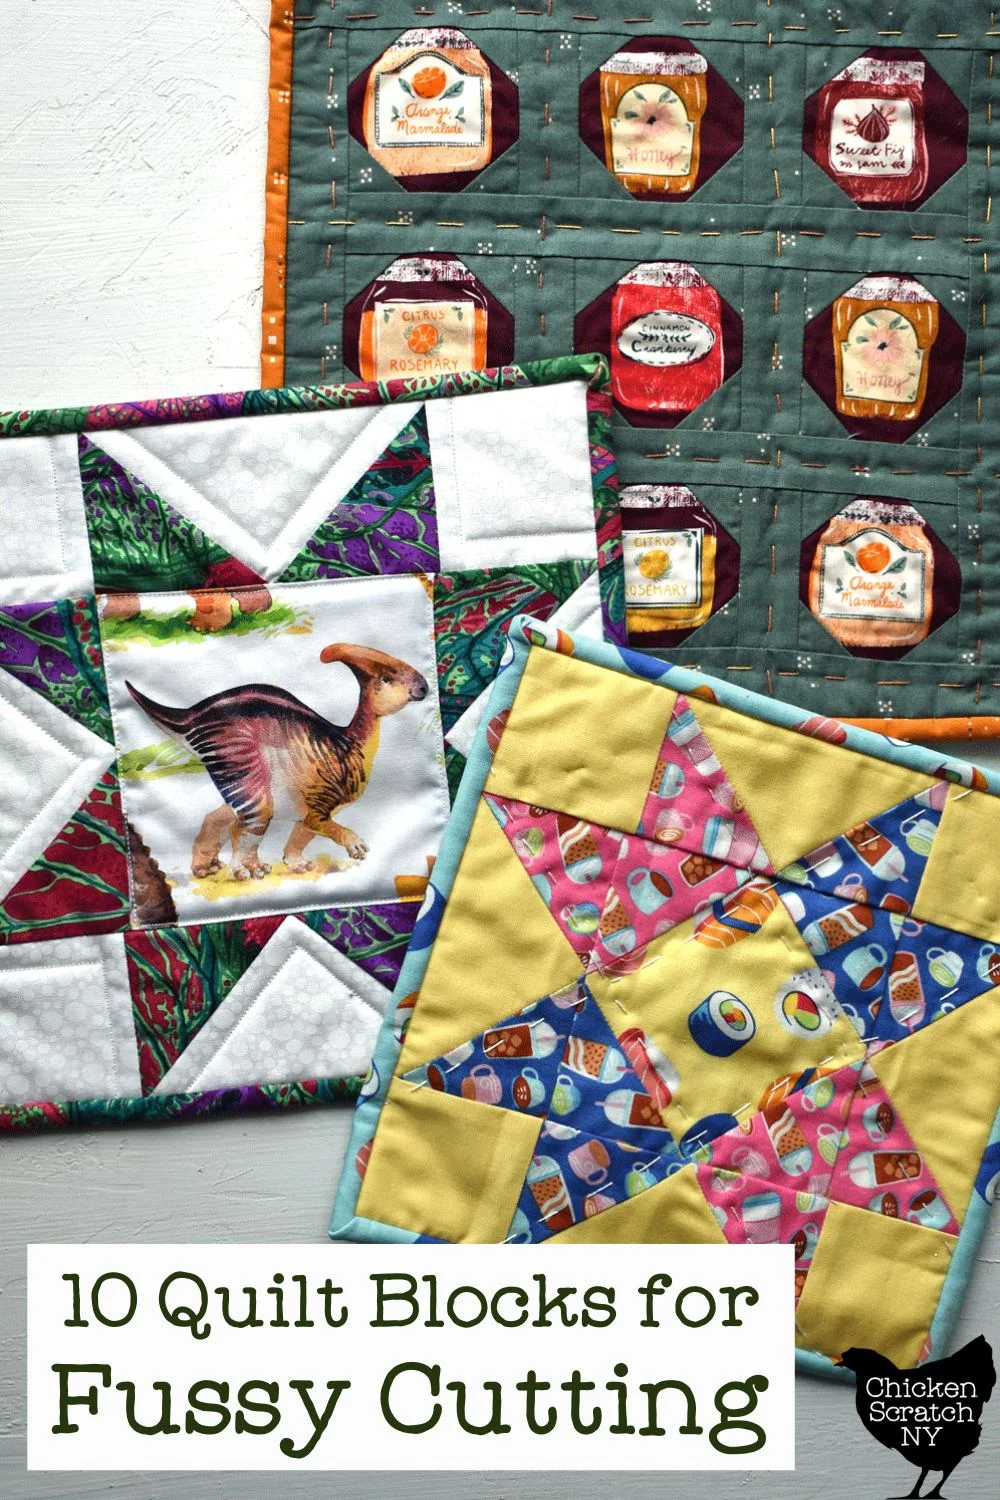
Fussy Cutting fabric is perfect when you want to show off a favorite print or focus on a specific motif. Here are 10 quilts blocks perfect for fussy cutting!
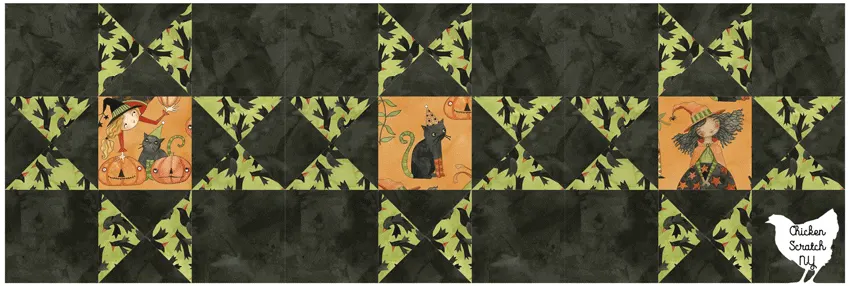
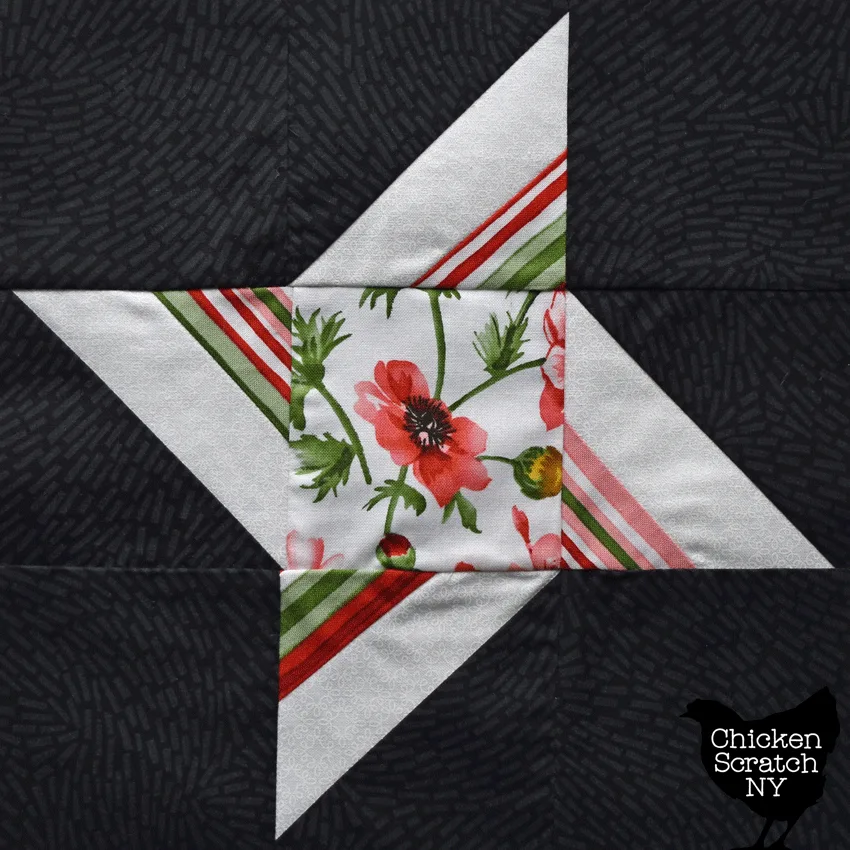
Sawtooth Star
If I had to pick a favorite quilt block, the sawtooth star would easily take the blue ribbon & the gold medal.
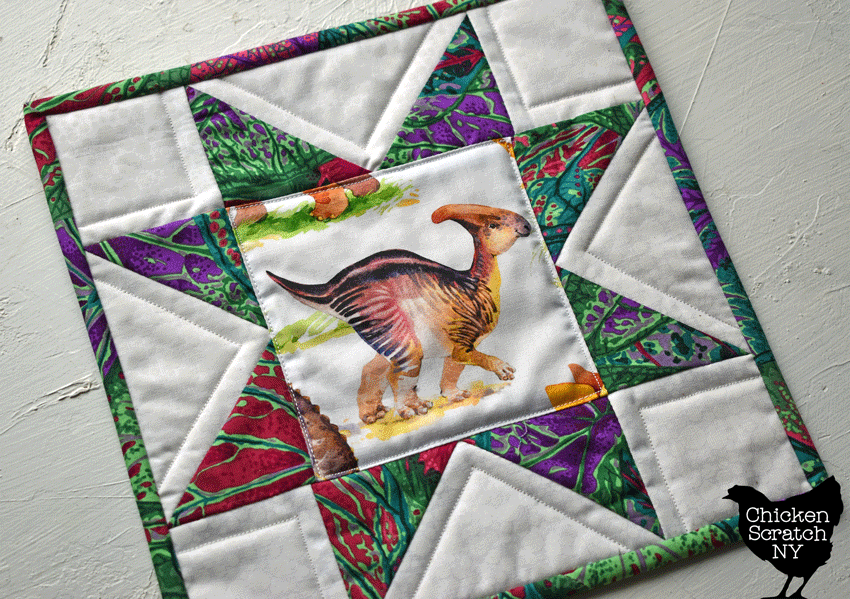
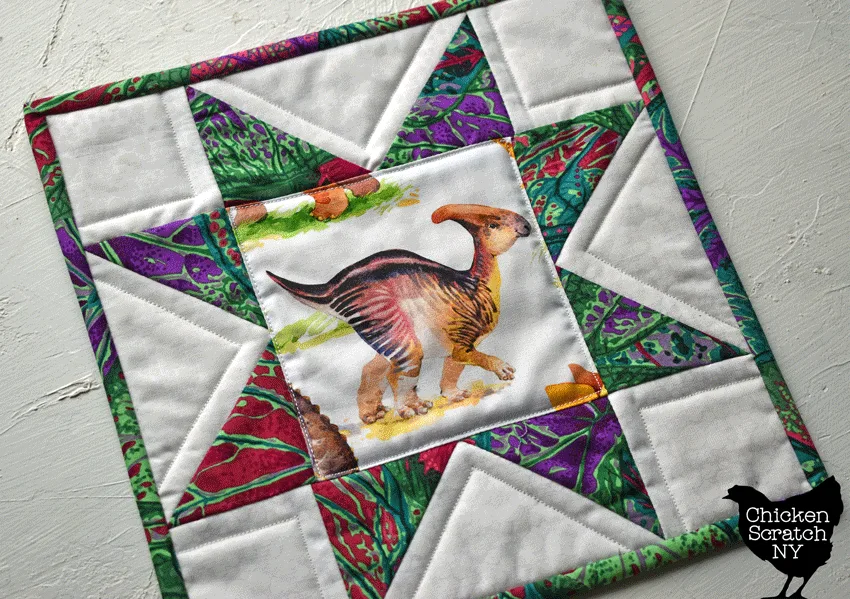
The Sawtooth Star is built on a 3×3 grid with a large center, solid corners and flying geese. It’s really easy to resize and as a result, it works great for fussy cutting pieces from panels.
You can use either a coordinating fabric or something contrasting for the star points depending on what look you’re going for.
I made this mini-quilt to show off this adorable watercolor dino from a piece of fabric I got in an ends box full of random prints. This little guy has pockets on the back to hold magnets and he happily lives on my fridge.
Ohio Star
The Ohio Star has very similar vibes, it’s another star built on a three by 3 grid but this time all the squares are the same size.
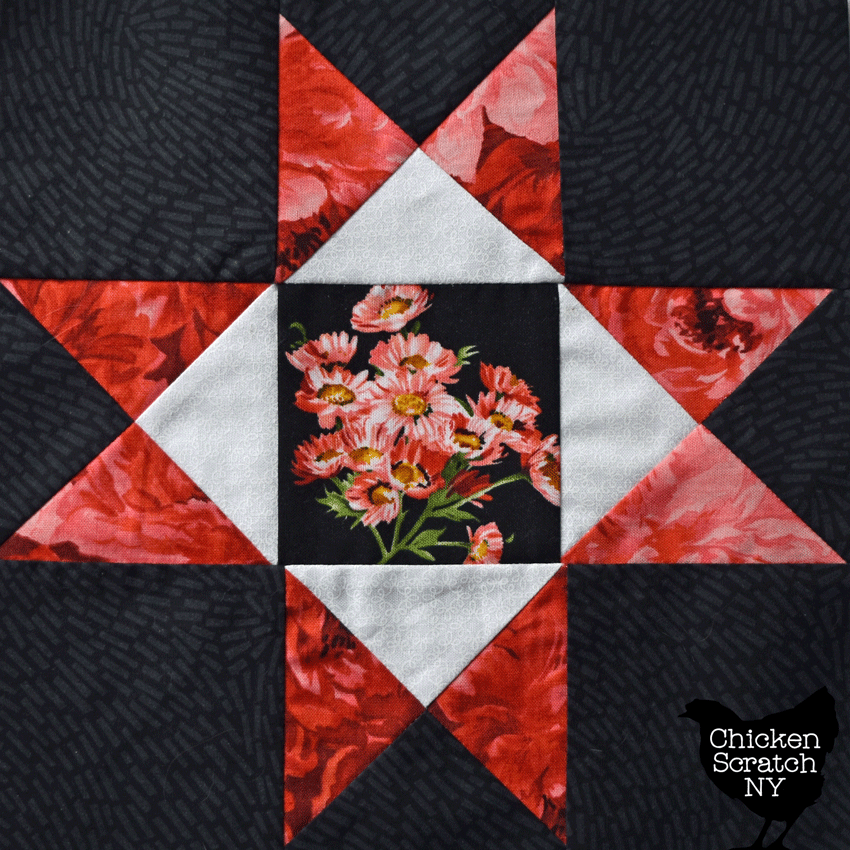
The flying geese are replaced with quarter square triangles. If you’ve never made QSTs before I can promise they’re easier than they look.
If you’ve mastered the 2 at a time half square triangle you can make quarter square triangles.
There are a few red floral, black and white blocks in this post, they’re all from my attempt at Moda Blockheads 4. A sample quilt put out by Moda that I had every intention of finishing, I just never got there.
I was using an old layercake from my stash and I took every opportunity to fussy cut that I could find!
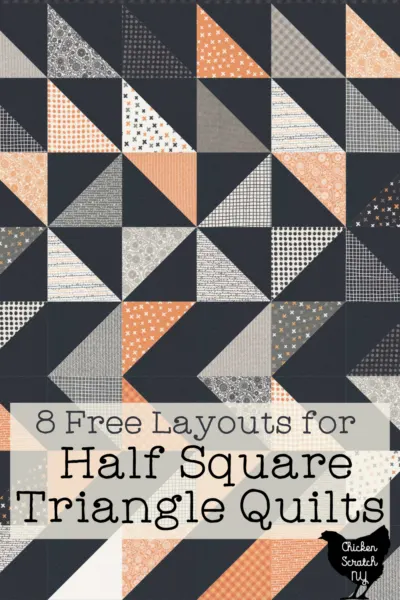
Learn Four Methods for Making Half Square Triangles and Sewing Tools for Faster & Easier Half Square Triangles
One of my favorite things about the Ohio star is the frame the star creates around the center block. I’m too lazy to set blocks on point (setting triangles hurt my brain) so anytime I can get that diagonal look without any effort I’m down for it.
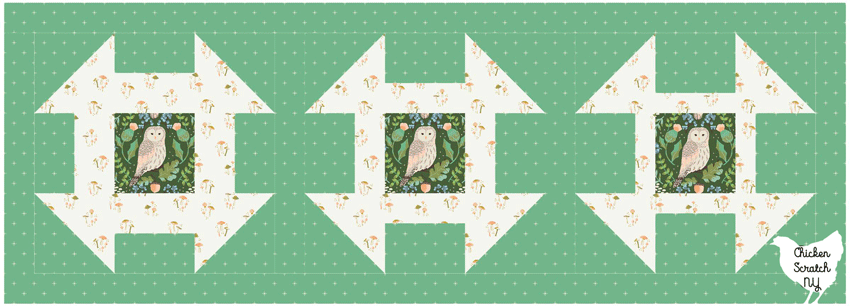
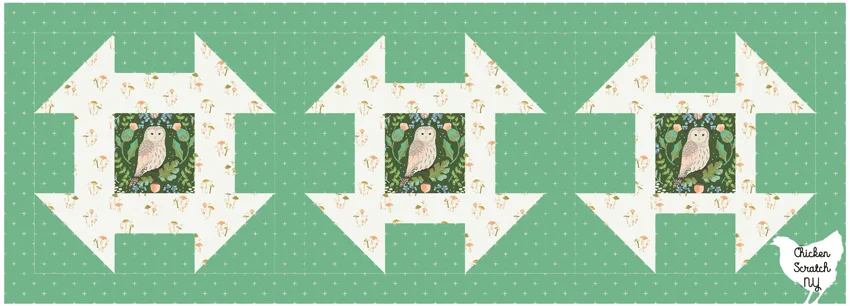
In the example above I mocked up 3 blocks in Electric Quilt using the same fabric for all of the centers, I just moved it around a bit to feature a different character.
This is a great example of a fabric that would lose almost all of it’s magic when randomly chopped into smaller pieces (unless you enjoy disembodied feet in your patchwork).
Friendship Star
When it comes to star blocks, the Friendship Star is about as simple as you can get. It has a classic charm that works really well for showing off fussy-cut fabrics.

It’s another, say it with me, star built on a 3×3 grid. Just like the Ohio Star all of the blocks are the same size.
Instead of quarter square triangles the Friendship Star uses Half Square Triangles. The hardest part of this block is making sure your HSTs are oriented the right way.
This is another block from my failed Blockheads experiment, this time I added in a little pizzaz by snowballing the striped fabric over the white one white.
Thanks to the simplicity of the block this is another one that’s really easy to resize. In my opinion, it does lose some of its charm when it gets too big but you do you.
If you’re looking for a quick project that used a Friendship Star check out this free pattern for my Simple Stars Table Runner.
Economy Block or Square in a Square
Moving away from stars, the economy block is a simple way to really highlight a fussy cut square.
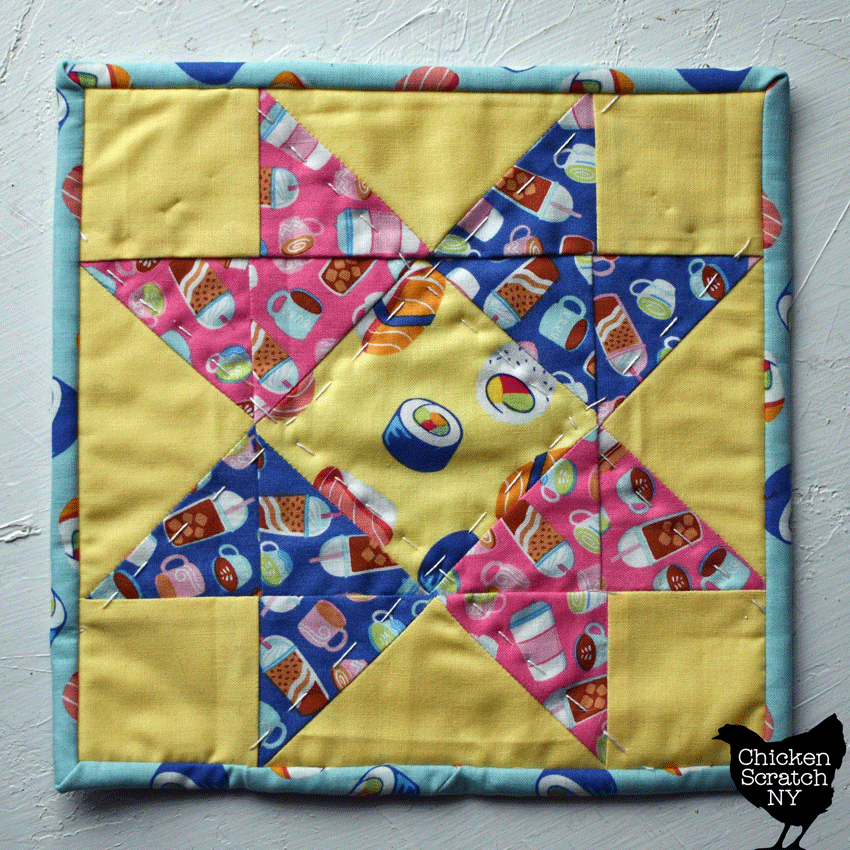

There are a few ways to make an Economy block; sewing 4 triangles around a square, sewing 4 squares across the diagonal to a larger square (my favorite method) or by using Economy block paper.
The center of this miniquilt is an economy block made with the sushi print and surrounded by the cute little boba fabric in two colors. Technically this is a double feature for this post, I plopped the eceonomy block inside a sawtooth star!
It’s really easy to lose your points with this block, especially using the more traditional method. Using the foundation paper makes it really easy to get perfect and consistent blocks which is awesome if you’re treating this like a long-term scrap project.
Check out 10 Ideas for Scrap Quilts
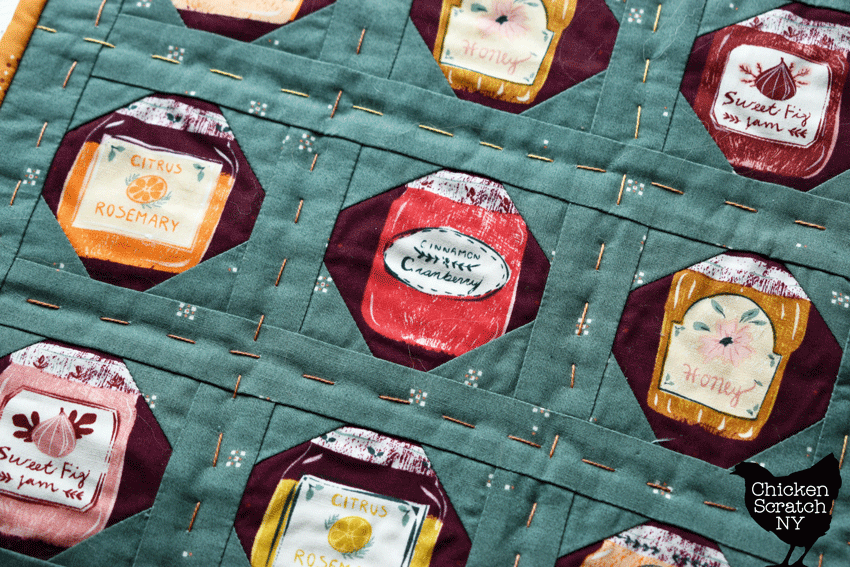
Snowball
This is the easiest block on the list and it’s the classic go-to for an I-spy quilt. “Snowball” is treated as both a noun and a verb in the quilting world.
It’s both the title of a block and a technique that can be used in making other, more complex blocks.
To make a snowball block you’ll need a larger center square (this is where you pull out the fussy cutting) and 4 smaller, identical blocks.
Draw a line across the diagonal of the smaller blocks, match them up with the corners of the large block, and sew across. Press the smaller blocks to the outside and then trim off the excess fabric in the back.
When you’re making a snowball block the smaller squares should be less than 1/2 of the width of the large block, the goal is to round off the corners, not to make a point.
This is a great place to play around and experiment with different-sized corner triangles for different looks.

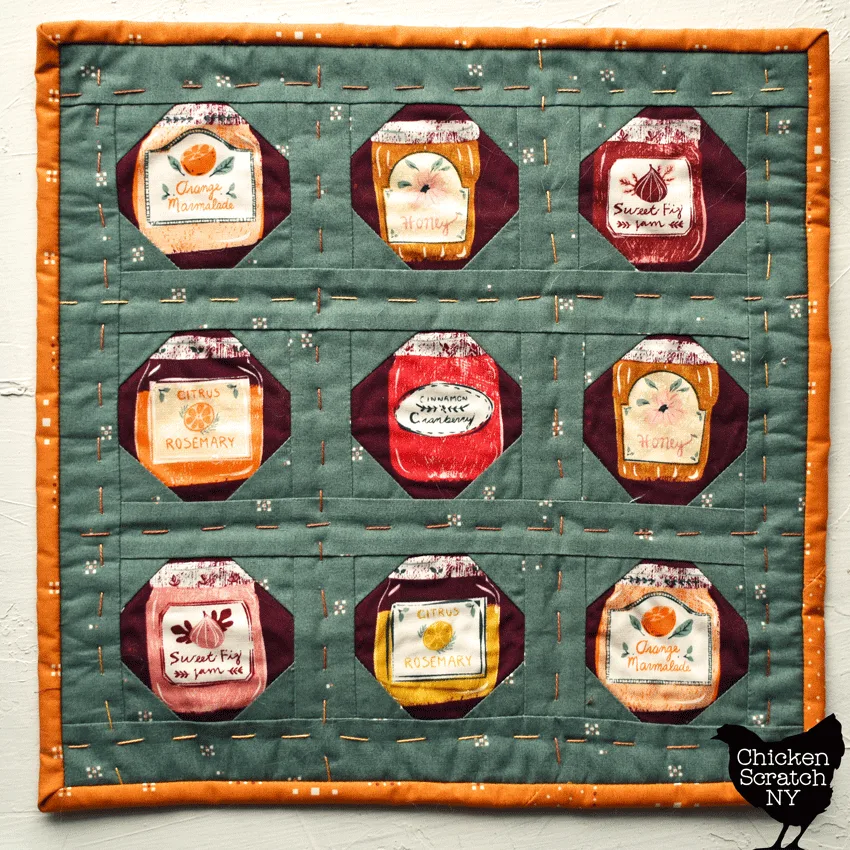
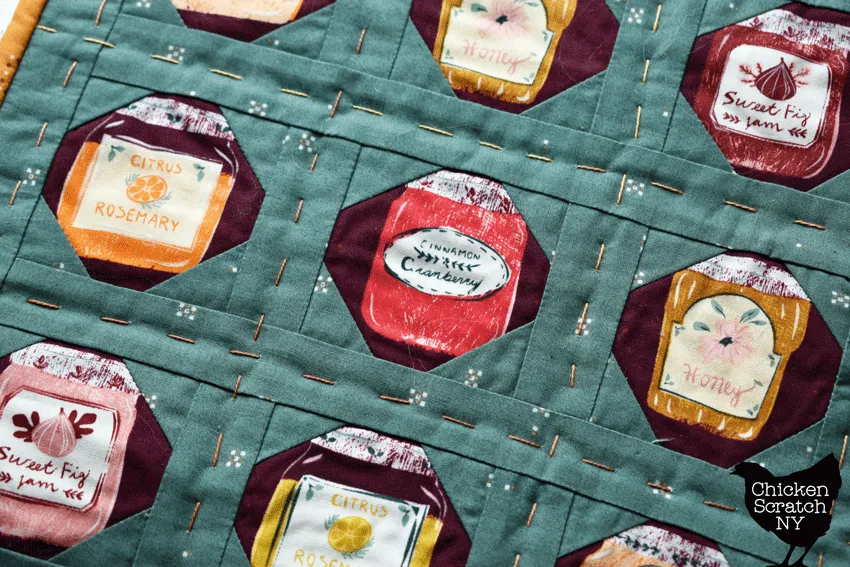
If we’re being honest, I cut the centers too small for these blocks and it sort of ruins the effect. I was trying to work with scraps from my Black Diamonds Quilt and it is what it is, I still love my little jam jar miniquilt!
One of my favorite things about the Snowball block is how easy it is to resize, whatever size you start with for the center, that’s what size your block will be.
Churn Dash
The Churn Dash is another really traditional block that is easy to overlook. I’ve been working on a quilt made with 4″ churn dash blocks for 95 years but that doesn’t make me love it any less!


The large open square in a Churn Dash is the perfect place to show off some fussy cutting. Make sure you’re using a contrasting color for the frame and it will really let your block shine.
Here we have one more from my Blockheads set, I was trying to get the white and black fabric into every block so I had to get a little creative on the simpler ones. That’s where there are little green triangles set into the corners of the HSTs.
You can really change the feel of this block by adjusting the width of the bars, in the example above I think the middle option looks the best but with a different fabric choice I might prefer the wider or narrower option.
Bear Paw
The Bear Paw is a very traditional quilt block and one that I’ve avoided until it made an appearance in Mini Quilt Monday on Instagram. It’s actually the block that inspired this entire post.

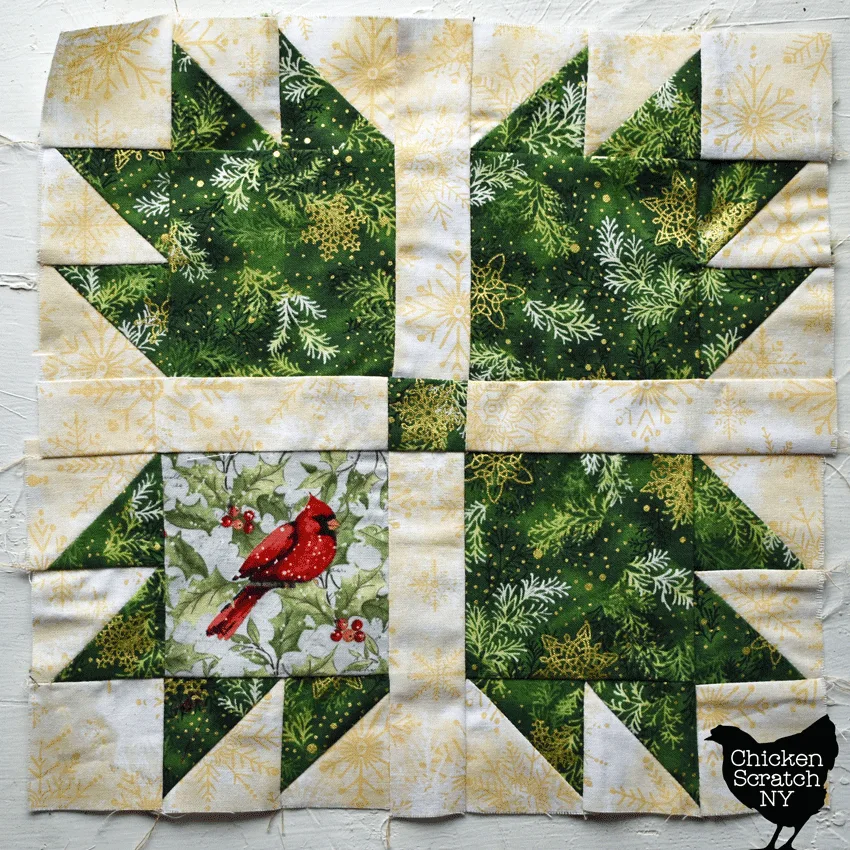
Bear Paw quilt blocks offer up 5 spots for fussy cutting, the 4 large squares, and the tiny center block.
I wasn’t planning to do any fussy cutting for this block, I just ran out of the green snowflake fabric and decided to make the unmatched block look intentional and not like a mistake.
Log Cabin & Courthouse Steps
I’m putting these together because in my brain they’re the same block just sewn together a little differently (though to be fair that’s pretty much the definition of the quilting).

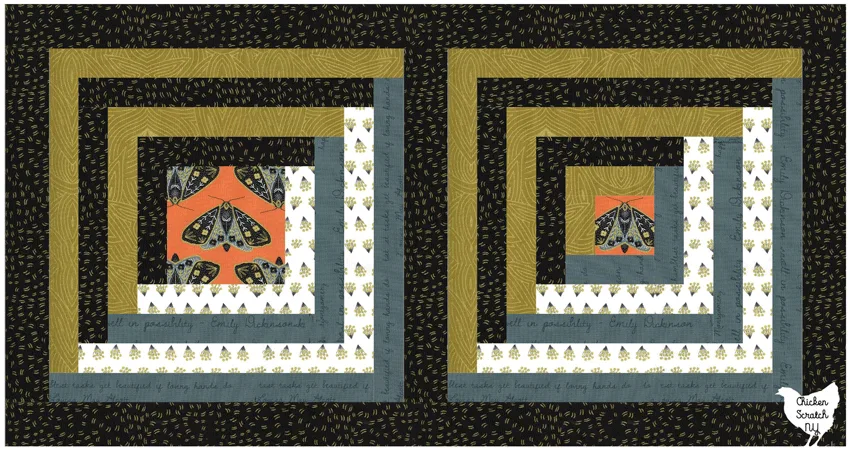
Usually, these blocks are made with small centers, and that can work great for tiny fussy cutting. But you can also bump up the size and feature a larger motif.
The example blocks above are almost exactly the same, the only difference is the size of the center block. If you were fussy cutting your prints from yardage and you had a lot of different size options you could combine both of these blocks into one quilt.
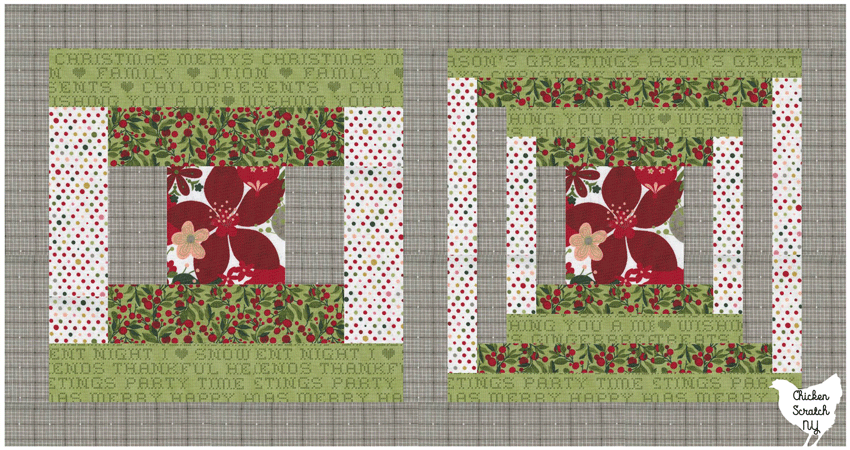
Courthouse Steps blocks are by adding strips to opposite sides, instead of in a spiral like with Log Cabin blocks. You can change the size of your center square to show off your fussy cut print or change the width of the strips around it for a different look.
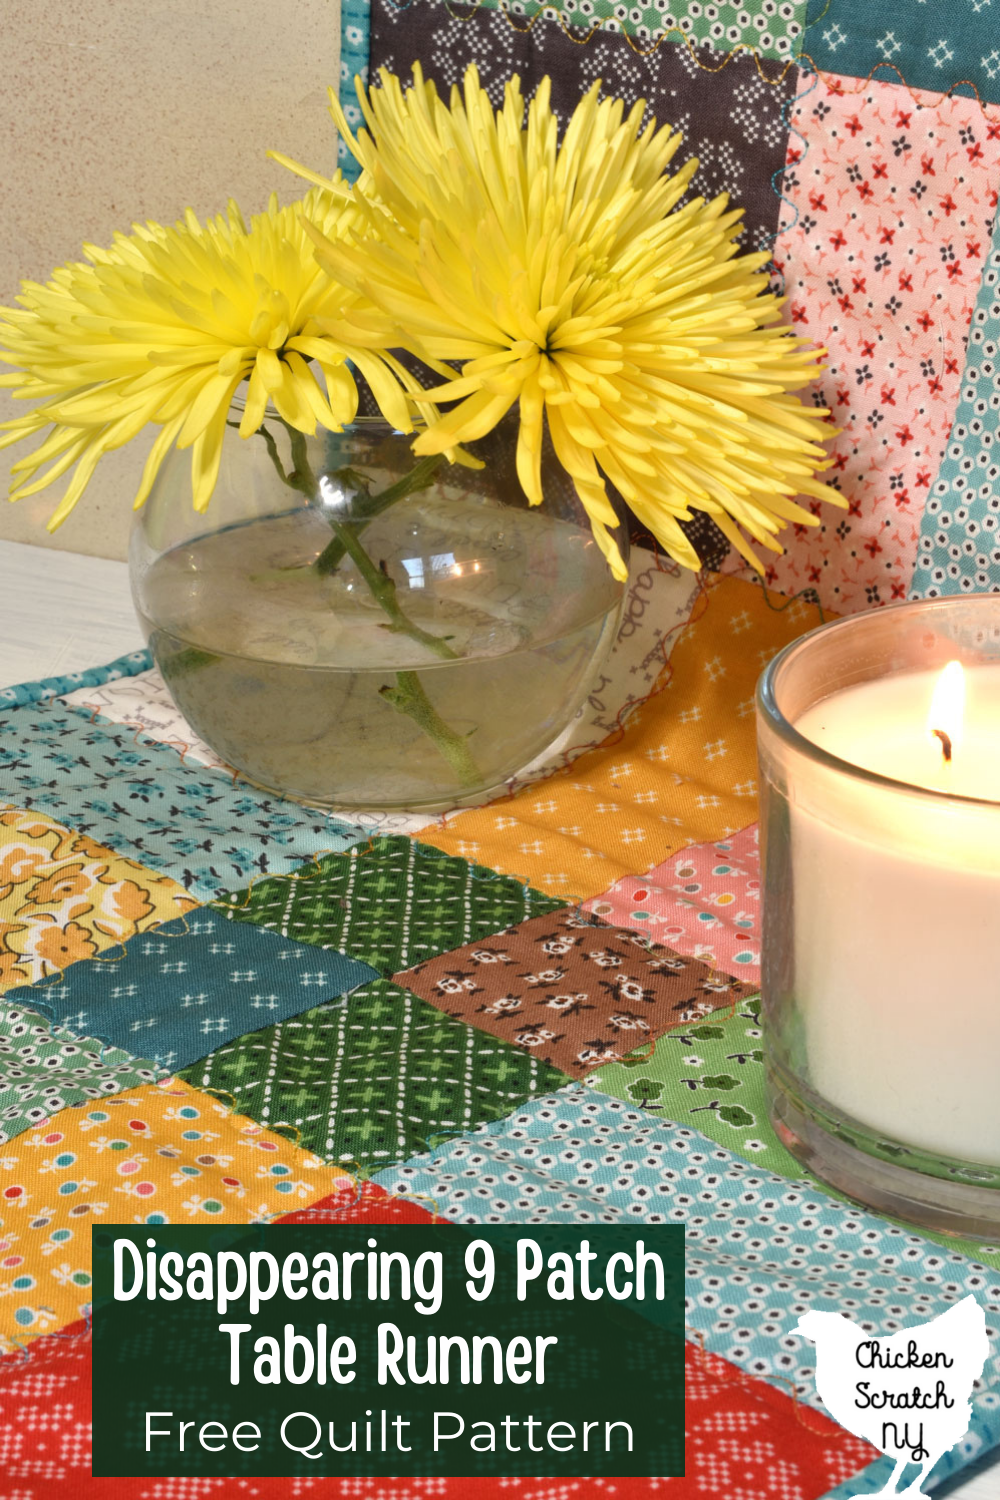
Disappearing 9 Patch
I love quilts that look like more work than they are. One of the best examples of this is the disappearing 9 patch.
Learn more about Disappearing 9 Patch Blocks & how to use them in a quilt
To make this block you make a basic nine-patch and then cut it down the middle in both directions. The 4 blocks you place in the corners aren’t cut at all and are the perfect place for some fussy cutting.

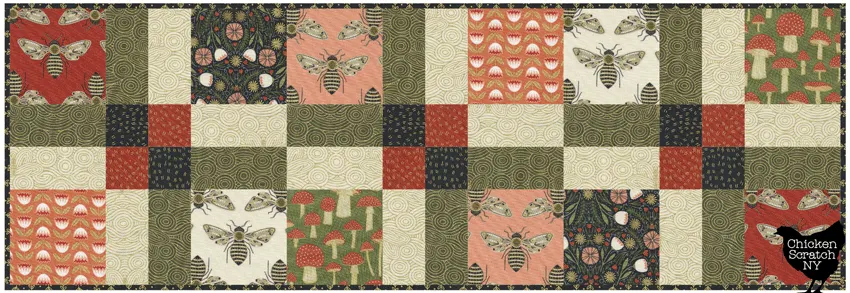
You do have to be careful if you’re using directional prints. Make sure you know the final orientation of your blocks before you sew your squares together and you’ll be golden.
The example above is a recoloring of my free Disappearing Nine Patch Table Runner in the fabric line Meadowmere. I used the largest motifs in the corner squares (including the fussy-cut bees) and filled in the rest with smaller prints.
Check out my Quilting page for more info or start here: