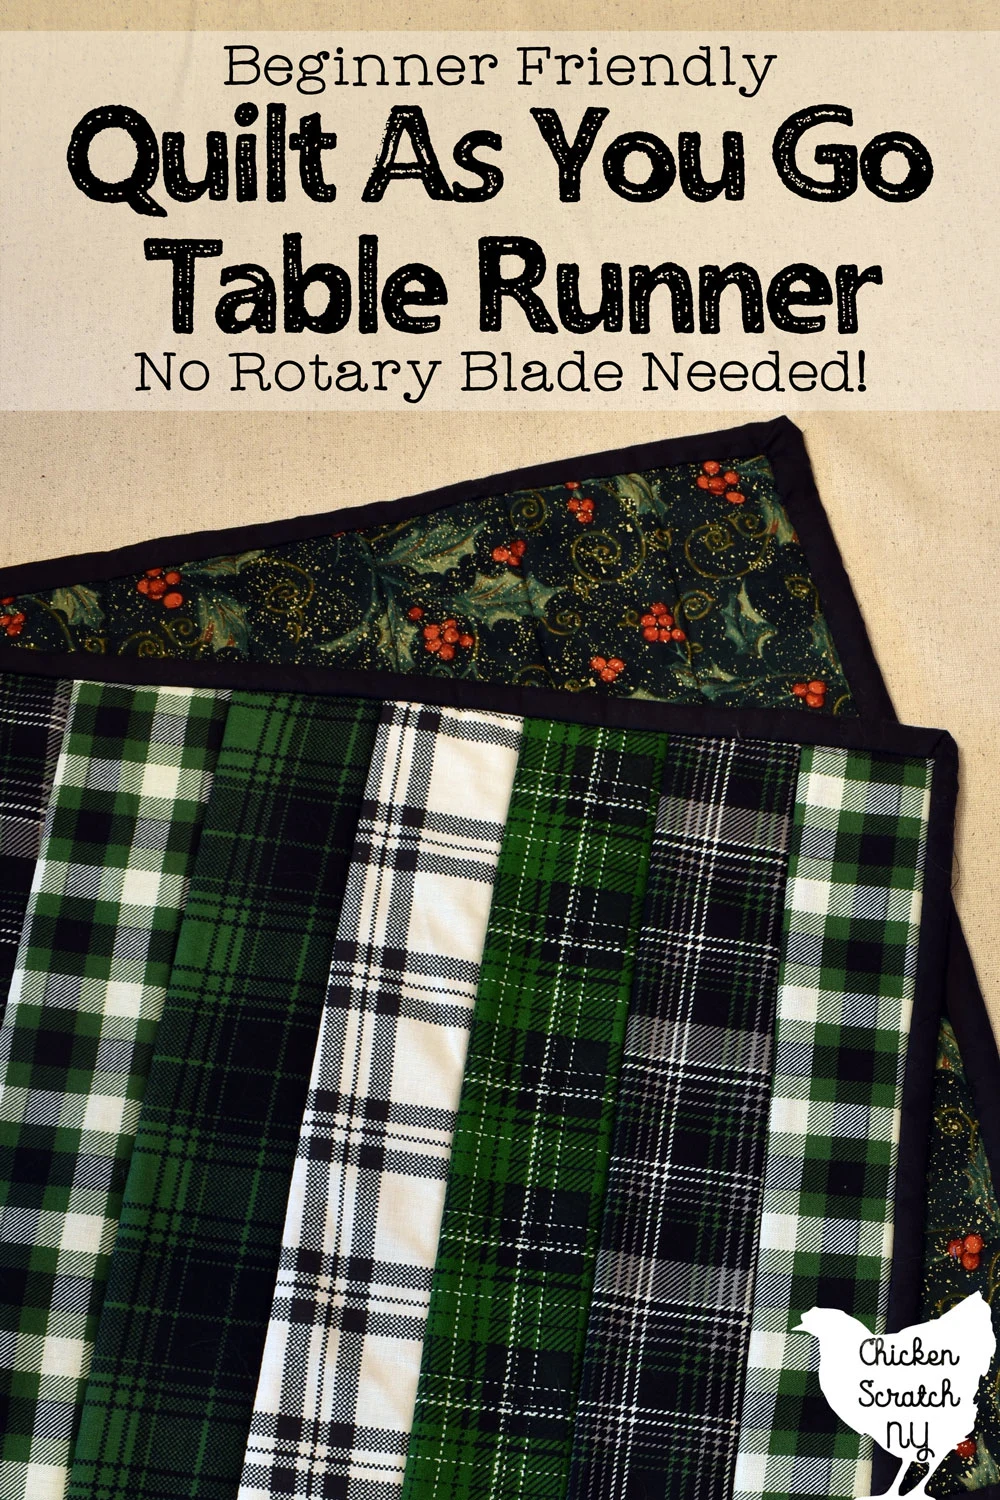
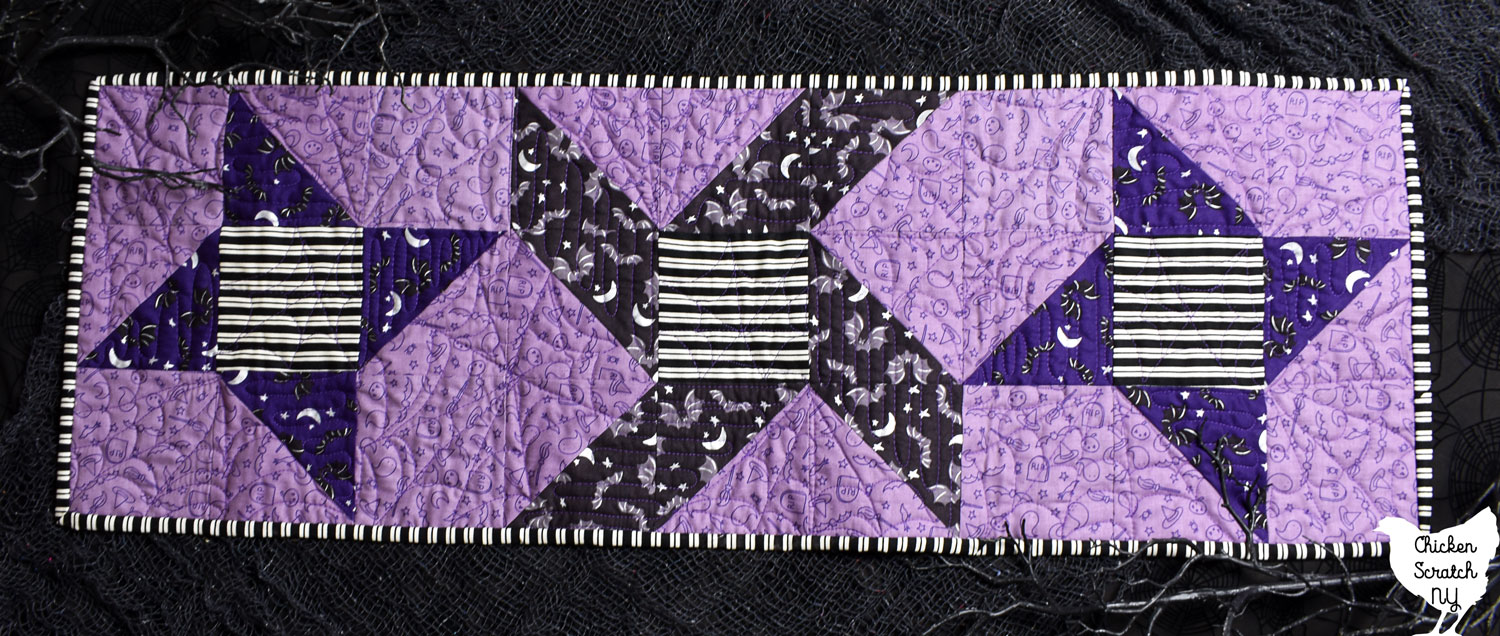
This simple quilted table runner uses half-square triangles organized into two different star shapes for a festive table covering you can whip up quickly. Start with a charm pack or grab the scrap bin and get your home holiday-ready fast!

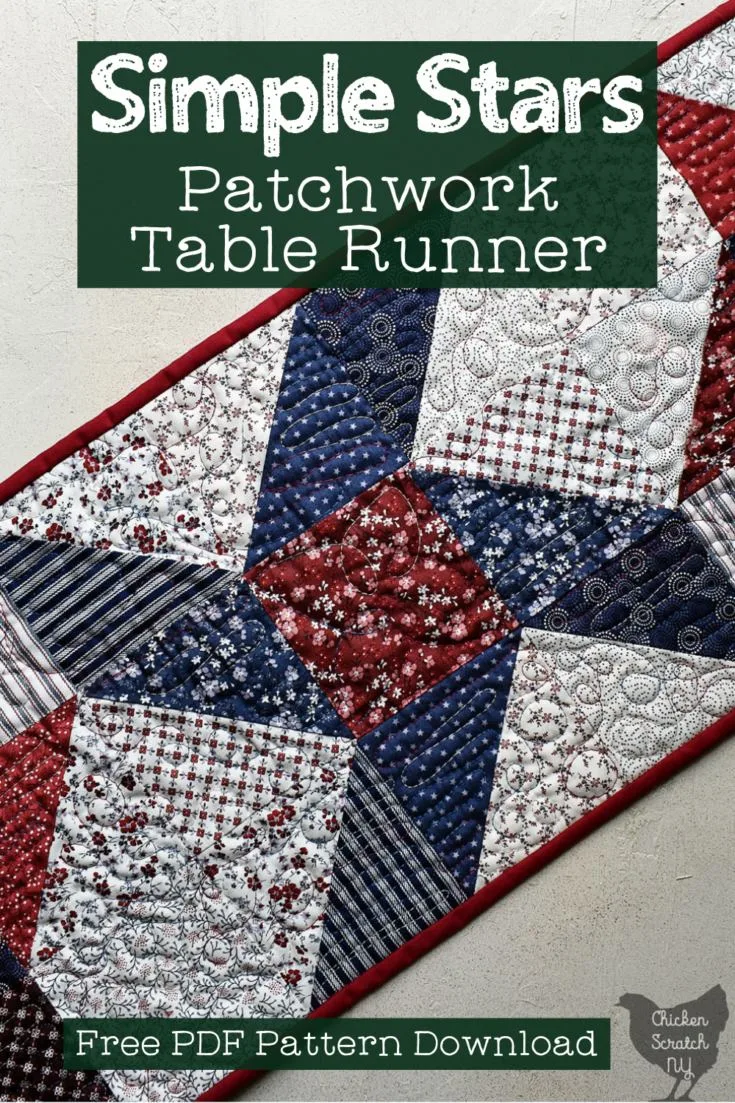
Table runners are a great way to get into quilting for new sewists but they’re also great scrap busters for experienced quilters. I have the attention span of a fruit fly and I love doing quick projects that can be cut, pieced, quilted, and bound before the wind changes direction.
This is a very beginner-level tutorial going into making HSTs and construction tips. If you’re just after the pattern head over to my shop and get the Free PDF Simple Stars Table Runner Pattern.
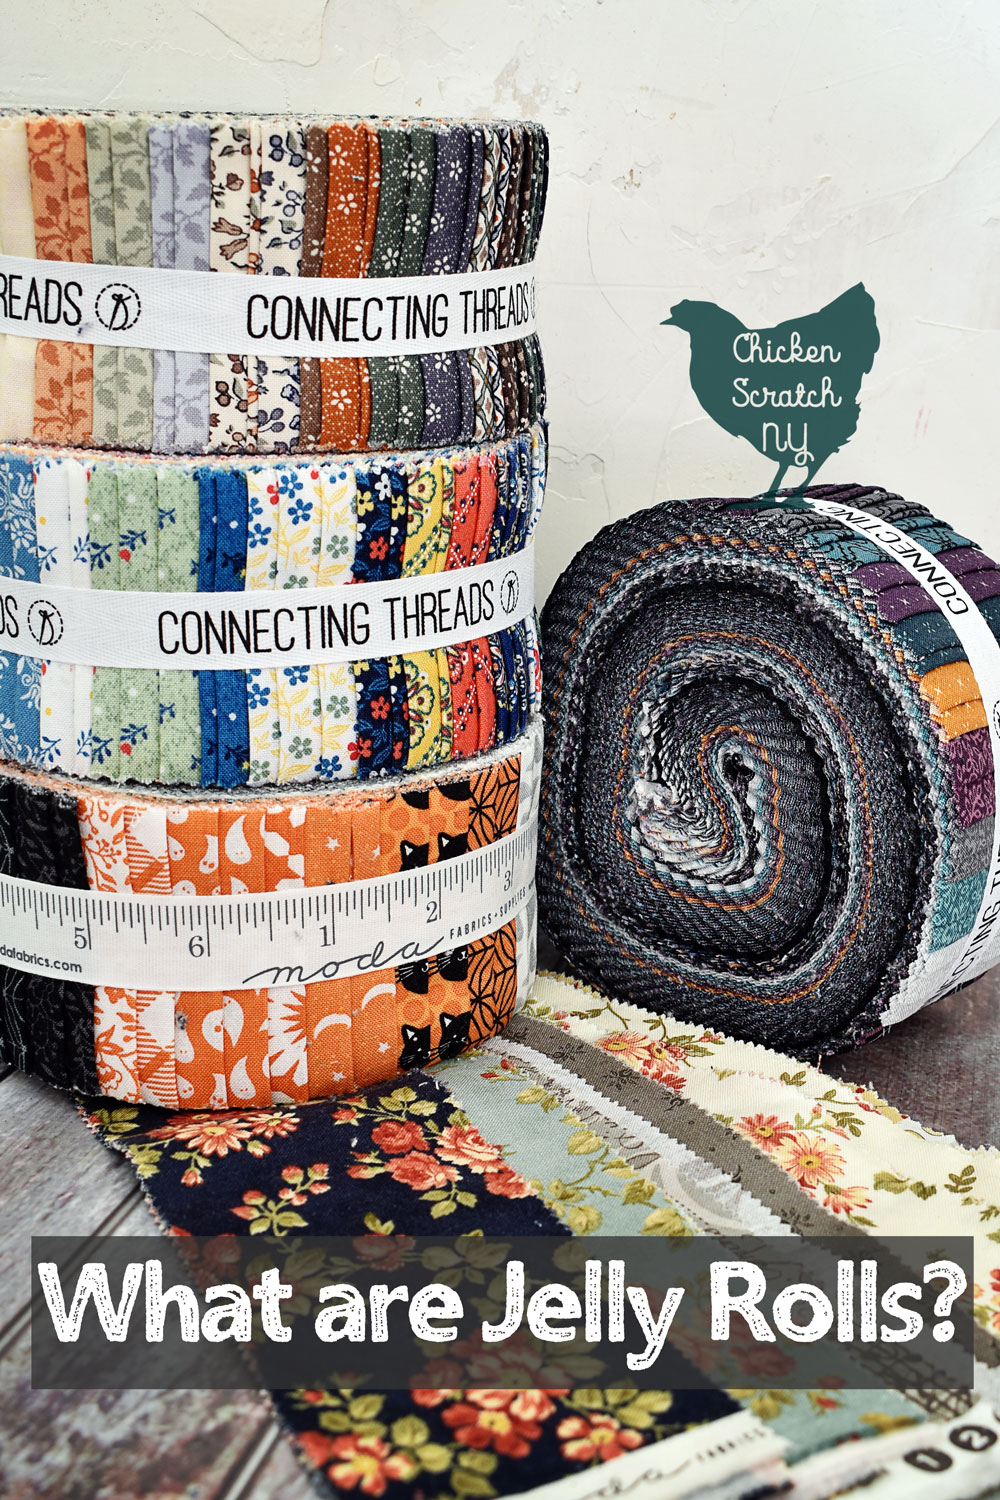
This table runner is made up of three 12×12 blocks made from solid squares and half-square triangles (HST). The HST blocks are made from 5″ squares, also known as charm squares or charm packs.
Charm squares are a popular member of the precut fabric family. Other family members include Jelly Rolls (2.5″ strips), Layer Cakes (10″ squares), Honey Buns (1.5″ strips), and Mini Charms (2.5″ squares).
Read more about Jelly Rolls & Jelly Roll Quilts
Precut fabric packs feature a single line of fabric and usually include 40-42 individual pieces of fabric. I love scrappy quilts and I hate cutting so they’re perfect for me.
Charm packs are more expensive than buying yardage but like precut watermelon, you’re paying for someone else to do the labor! Another thing to keep in mind is that most online fabric shops have a 1 yd minimum right now so if you want that scrappy look you’re looking at spending a mortgage payment on a single project.

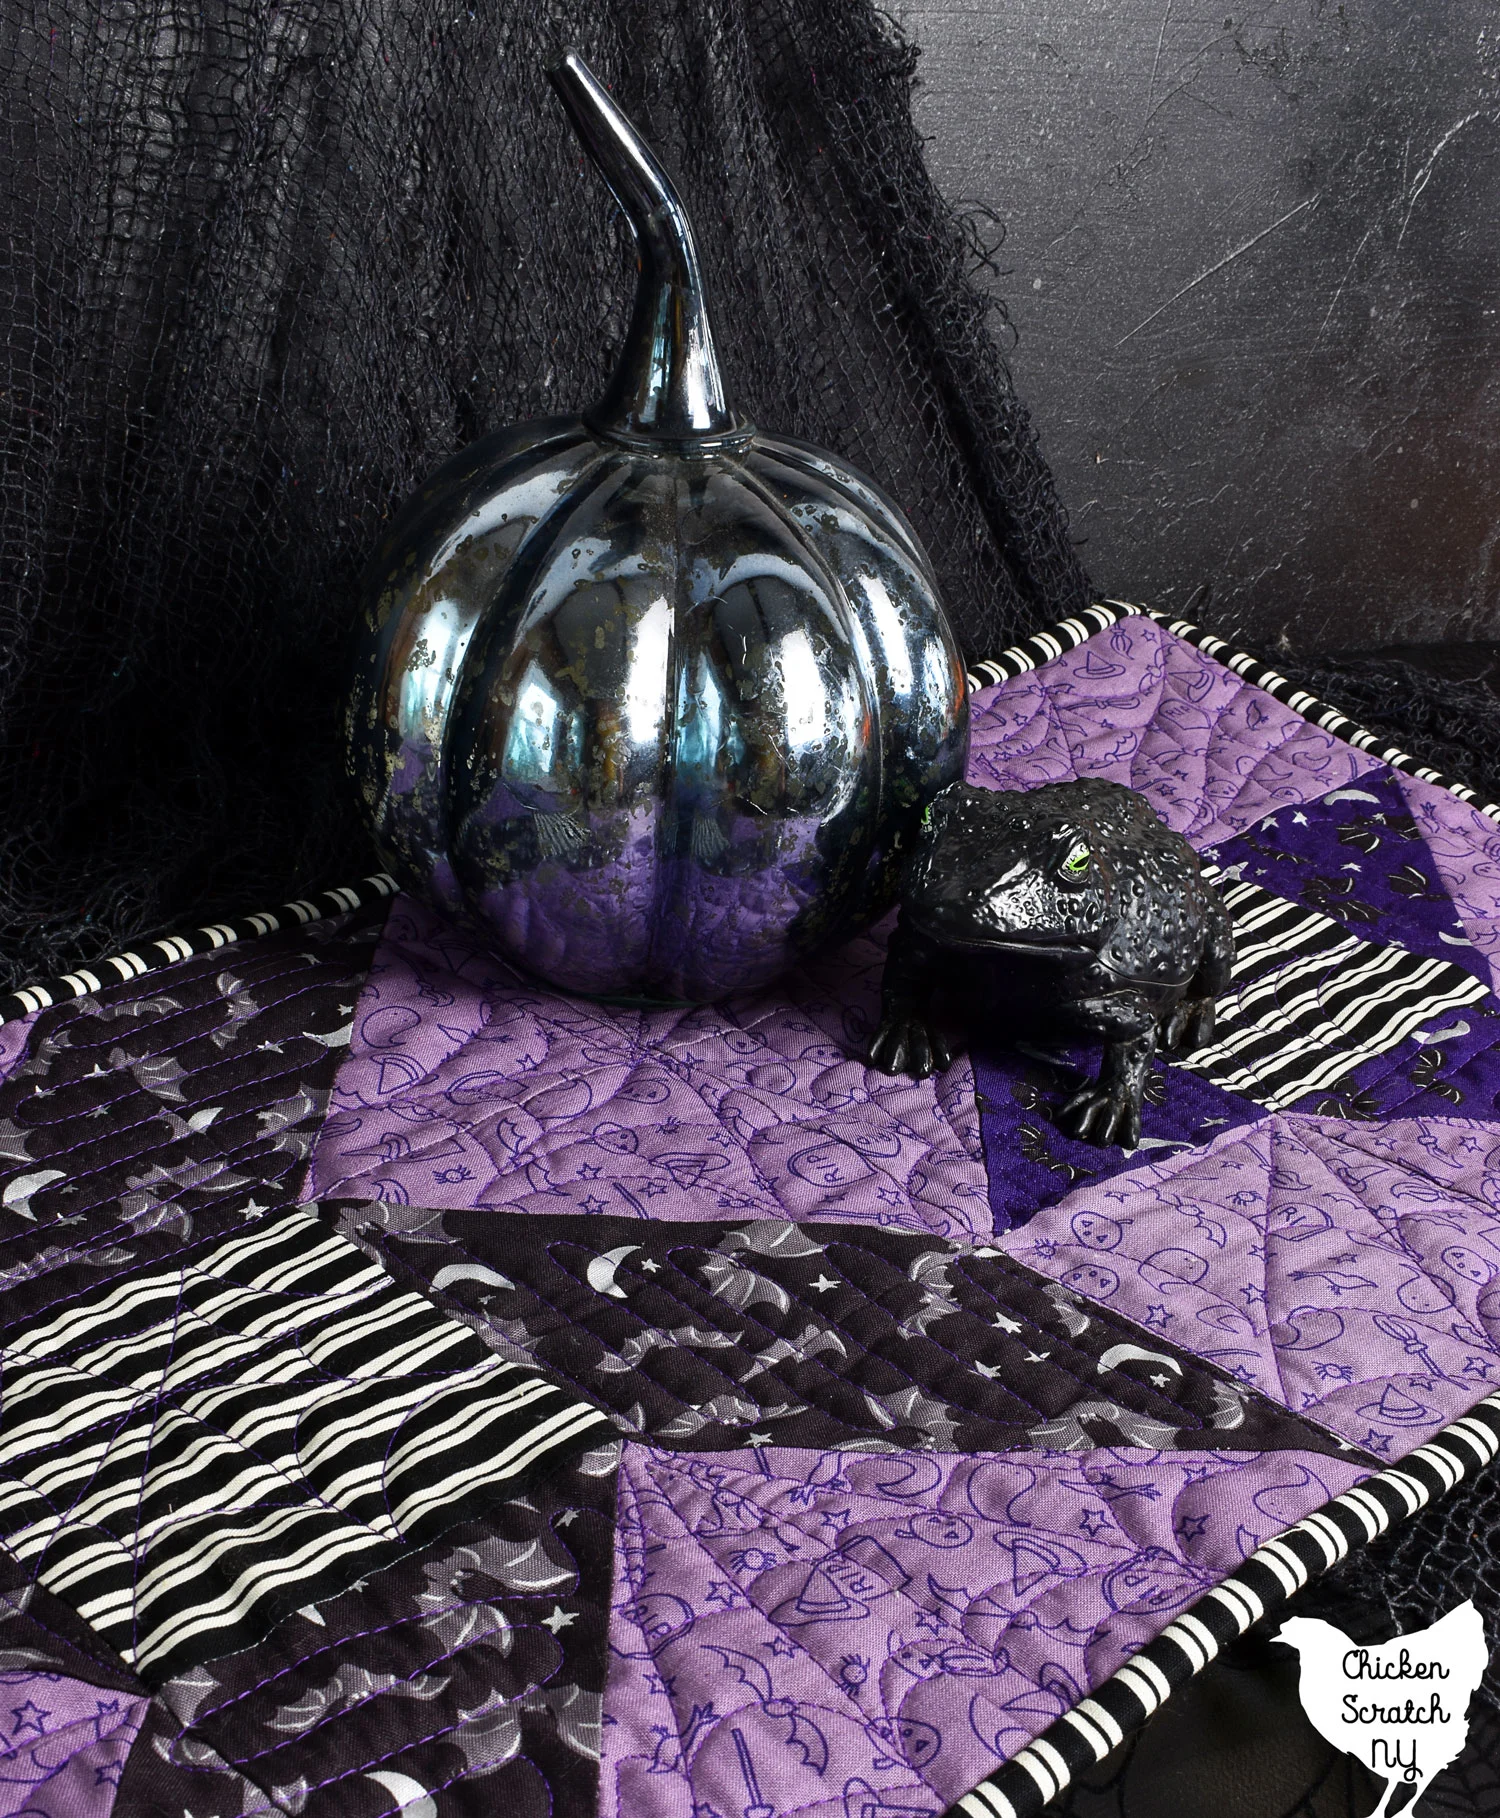
I recreated my original pattern for Halloween with leftover layer cake squares for a less scrappy look. You’ll need 4 10″ squares along with 8 – 4.5″ background squares and 3 – 4.5″ squares for the centers of the stars.
Charm Square Half Square Triangles
One of the most common blocks used in quilting is the Half Square Triangle. It is exactly what it sounds like, one square cut in half across the diagonal making two triangles.
There are 4 main ways to make HST blocks but today we’re just going to focus on the two-at-a-time method. I make a lot of quilts and a lot of HSTs and this is my go-to method.
This table runner is made with 5″ squares but this method can be used with any size block. And unlike most things in life the math is actually pretty simple.
The finished size of your HST block (after it’s been sewn into your quilt) will be 1 inch smaller than the size of your original square.
For example, a 5″ square will give you two 4.5″ HST that will end up at 4″ in a quilt. A 10″ square will give you two 9.5″ HSTs that will end up at 9″ in a quilt.
Easy Two-at-a-Time HST
For each set of half-square triangles (the name gives it away, two at a time means you get two) you’ll need 2 squares in contrasting fabrics. For this runner half of the HSTs are made with Red & White and the other half are made with Blue & White.
You will also need either a pencil, a chalk pen or a Frixion pen and a ruler. I use a Creative Grids 1/2 inch ruler because I love my gadgets but any ruler will work.
To make things even more complicated there are a few ways to draw the lines. I’m going to show you both ways so you can pick which is best for you.
First things first, make sure your squares are pressed flat. Then use your marking tool to draw a line or lines on the back.
Method 1 – Single Line
Draw a line across the diagonal of the lightest color square. You will then sew 1/4 inch away from that line on either side.
This method is the fastest because you’re only drawing one line. And it’s easier if you’re using a regular ruler.
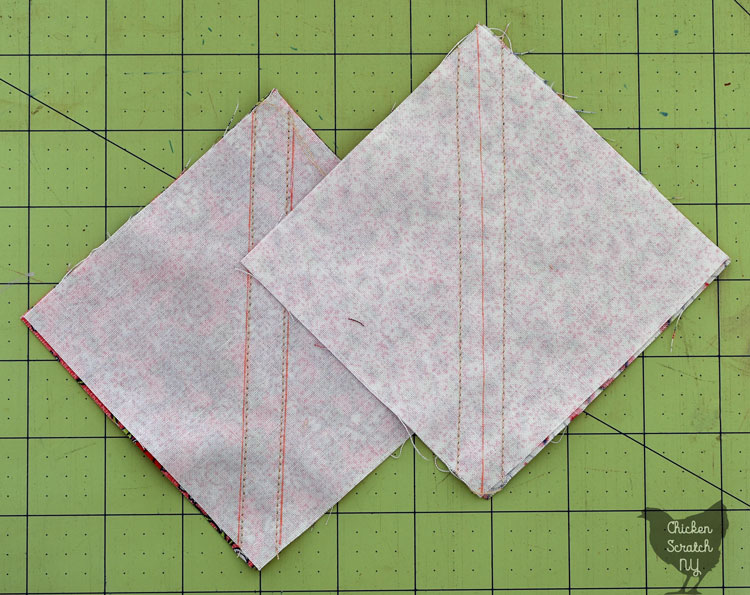
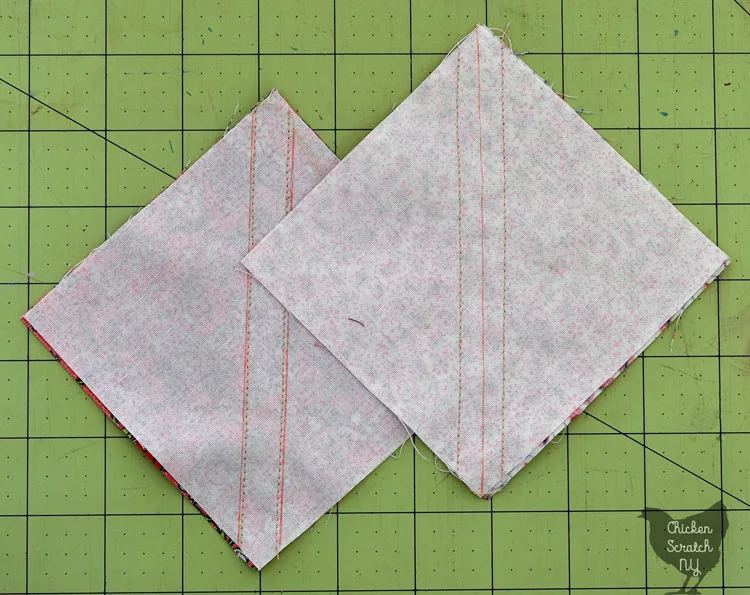
Method 2 – Double Line
With the double line method, you’ll be drawing two lines, each 1/4 away from the center. I use my 1/2 ruler and I can do a full stack of blocks pretty quickly.
I like this method because I like having lines to sew along. When I sew I try to get my needle just inside the lines I drew.
At this point, you’ll have two lines of stitches going across each block no matter which line method you used.
If you’re struggling to get your blocks squared up you can add an extra pressing step and use your iron to press the blocks open before you cut them apart.
The extra fabric on the outside of the seam helps to stabilize the bias seam and helps hold the block in the right shape. I usually skip this step because I sew like a hurricane is on its way (or just like a hurricane) but it is a helpful tip if you’re having problems.
The next step is to cut the two blocks apart, you can use scissors or grab your rotary blade, mat, and ruler. I use my scissors if it’s a few blocks and grab the rotary blade if I’m doing a lot.
Squaring Up Half Square Triangles
This is another one of those things where we have a bunch of options but for the sake of your wallets, I’m just going to cover the basic squaring method with a regular old square ruler.
Press your HSTs open, I recommend pressing towards the darker fabric just because you’re less likely to see the seam allowance through the fabric.
Try to keep the iron either in place or only moving up and down or side to side. Pulling the iron on the diagonal is going to stretch the fabric and your blocks won’t lay flat.
The squaring up process is done one block at a time and it can get boring quickly. But skipping this step is going to make your sewing so much harder so just do it.
Lay your ruler over the block, if it has a diagonal line match that up with the diagonal seam. Trim the block on all four sides. And just keep repeating this until all of your blocks are the right size.
If you just can’t get enough half-square triangle action be sure to check out:
- 4 Ways to Sew Half-Square Triangles
- 5 Tools for Easier Half-Square Triangles
- Basic Half Square Triangle Quilts
- Free Cozy Corners Layer Cake Quilt Pattern
- Charm Pack Crispies Quilt from Fat Quarter Shop
Sewing the Star Blocks
Both of the star blocks are made from nine 4.5″ squares combining half-square triangles and solid blocks. I recommend laying the block out and then sewing them together row by row, one block at a time, to keep everything where it should be.
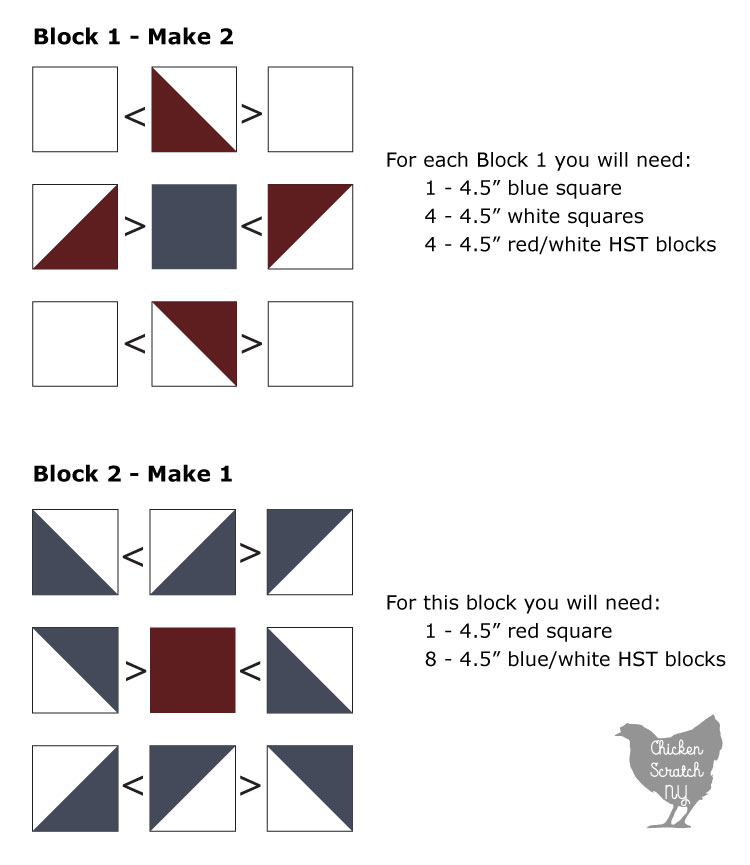
Sew the horizontal rows together and press according to the diagram. The top and bottom rows are pressed outward and the middle rows are pressed to the center.
Next, match up the top and middle rows, the seams should nest together, this keeps your points lined up and helps keep the blocks square. Repeat with the bottom row.
Press the blocks open with the seams going toward the center. When all of your blocks are finished it’s time to sew them together.
Making the Table Runner
The secret to getting the blocks lined up perfectly is to rotate the center block 1/4 turn so the seams will nest together. Sew the blocks and press towards the outside where you have fewer seams.
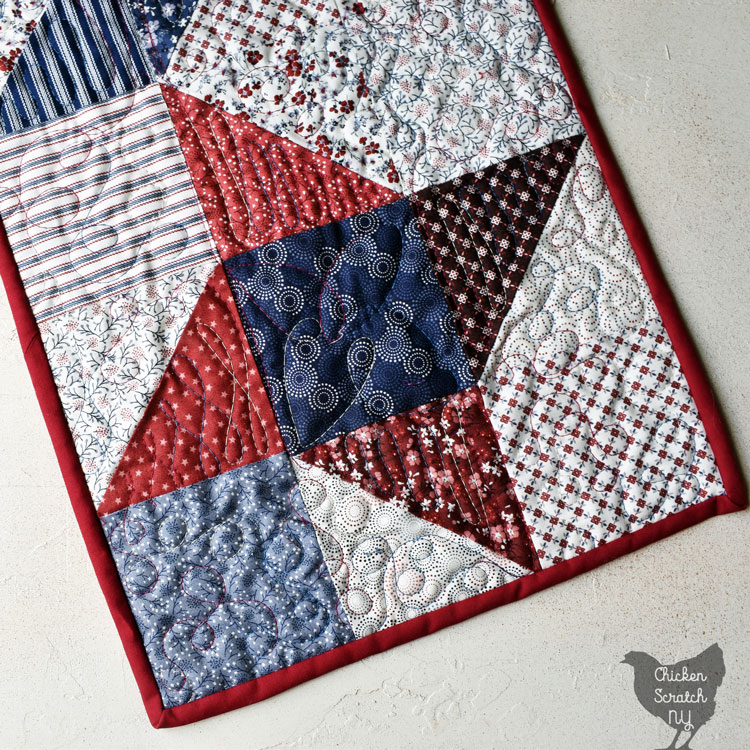
Give the runner a quick press and then make your quilt sandwich by layering the quilt top you just made, batting, and a piece of backing.
Small runners like this are perfect for straight-line quilting with a walking foot (or a regular foot if you either don’t have a walking foot or it’s too much of a pain to switch feet).
I ended up popping my runner on my quilt frame and did some loopy meandering in the background and back-and-forth U’s on the HSTs. I also did terrible freehand flowers in the center but let’s not focus on those.

The final step is to add your binding and you’re all ready to set the table with your new quilted table runner.
Don’t forget to pop over to my shop and grab the Free PDF Simple Stars Table Runner Pattern
Check out my Quilting page for more info or start here: