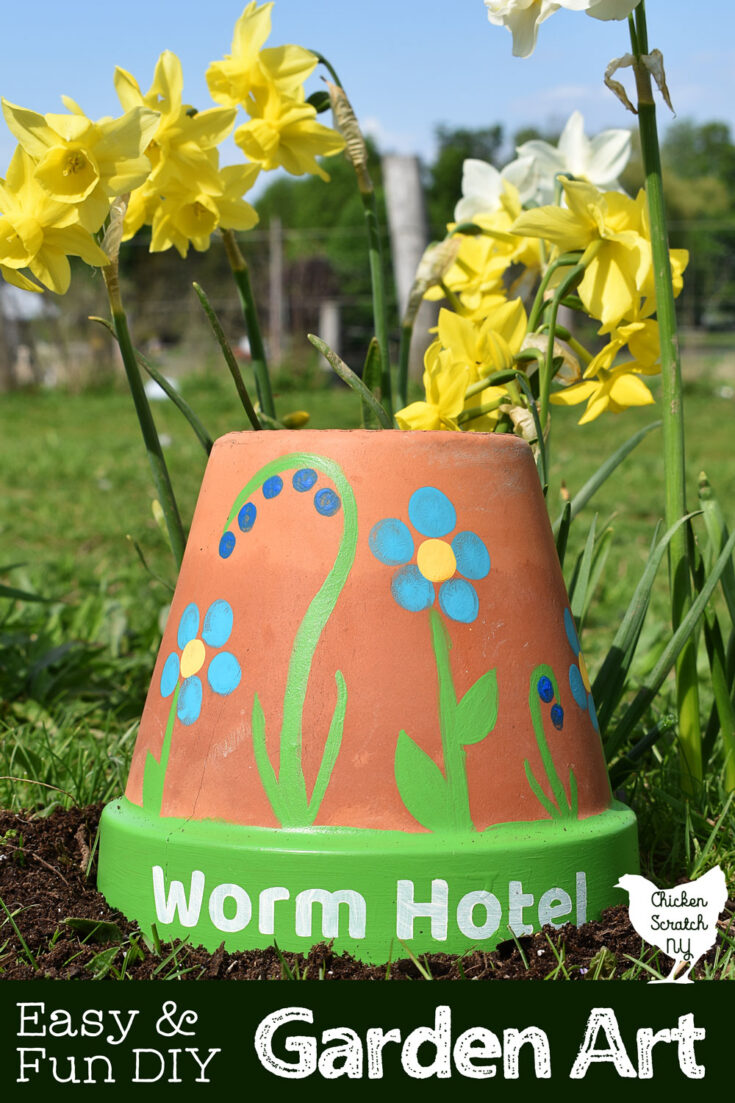
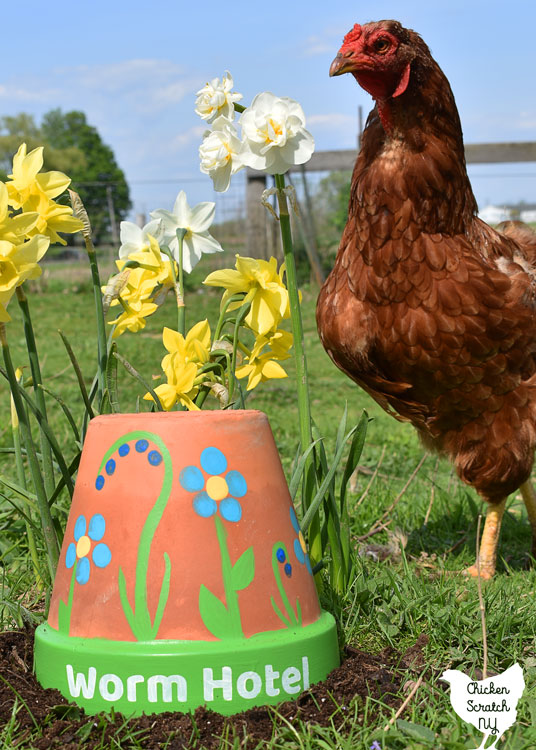
Add some whimsical charm to your garden while keeping your worm friends safe from hungry chickens with this easy DIY Worm Hotel. Paint the pot for some added flair or leave it plain for a rustic earthworm retreat.

To the best of my knowledge, a Worm Hotel isn’t really a thing. But I’ve been spending a lot of time in the garden and I’ve been digging up lots of worms.
It’s a pretty normal thing, especially if you’ve got decent worm-friendly soil. The problem I’m having is the daily Worm Battle between my 4-year-old and my chickens.
Every time my cape cod weeder pulls up a worm it’s a race between them for custody. If the worm is injured my daughter usually gives it to the chicken but if it’s not, she grabs for it.
This has led to her sitting next to me with a bucket collecting worms. Which is great until it’s time to go inside and she has a bucket full of worms.
I may let them bring the occasional chicken in the house but I draw the line at a couple dozen earthworms. Not that I have anything against earthworms, even though they were responsible for an epic garden mystery.
Looking for a weird garden mystery? Find out Who Was Moving my Onions
In an effort to prevent any more hysterical outbreaks we decided to make a few worm hotels for the garden. It’s a win-win-win, I get some new garden art, the girls are occupied for 10 minutes and Kat has a chicken-proof place to release her garden friends.
Worm Hotel Supplies
All you really need is a flower pot, for some reason I have a bunch of them even though I never use them. I’m not good at watering things so I prefer to keep my plants in the ground.
If you want to turn it into art or at least a craft project you’ll also need craft acrylics, brushes, and a terracotta sealer if you want some extra insurance for your artwork. If you want to add words you can also use letter stickers or a vinyl cutter to make a stencil.
No Silhouette or Cricut? Add Lettering Without a Vinyl Cutter
I found all three pots in my garage, gave them a quick once over with a stiff brush and called it good. If you’re using new pots you won’t have to worry about any spider webs or soil remnants.
Decorate the Flower Pot
This garden art turned into a family craft time. I showed the girls how to make easy finger print flowers and let them loose in my extensive paint supply.
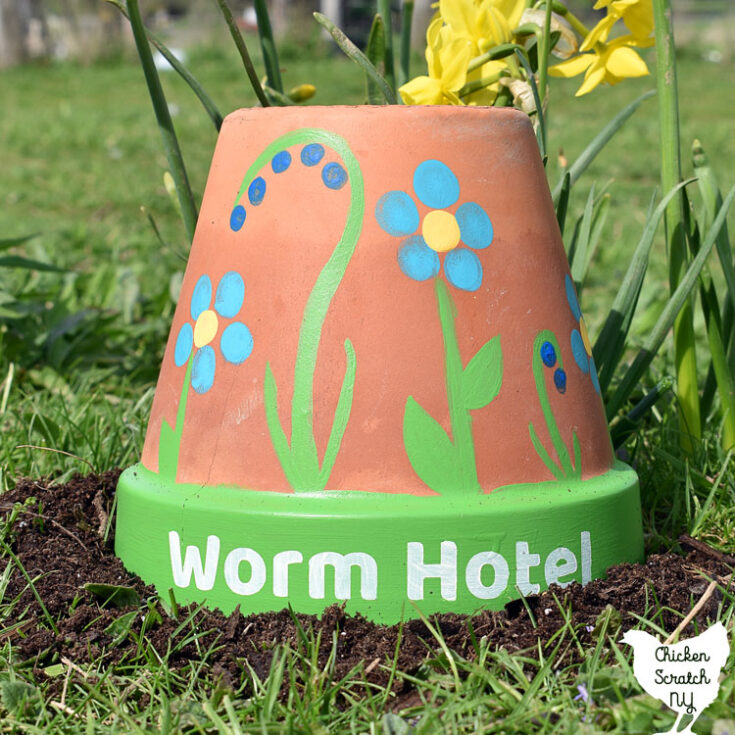
We decided to go with a garden theme, with fingerprint flowers around the pot with one color in the center and different colors for the petals.

I used DecoArt Satin in True Blue & Turquoise for the petals and Leprechaun for the rim and stems. The centers are dark yellow from Michael’s CraftSmart line.
For the finger print flowers you can make the centers or the petals first, I did the petals because I thought it would be easier to see the final spacing. If I had started with the centers I would have gone overboard.
After the flowers dry go in with the green and added stems and a few leaves. It’s easier to add the flowers first and go back in later with the stems than to try and get them in the right place.
The dangling flowers started off with a simple open question mark shape painted with a thin brush. I used a pencil eraser dipped in paint to add the small flowers.

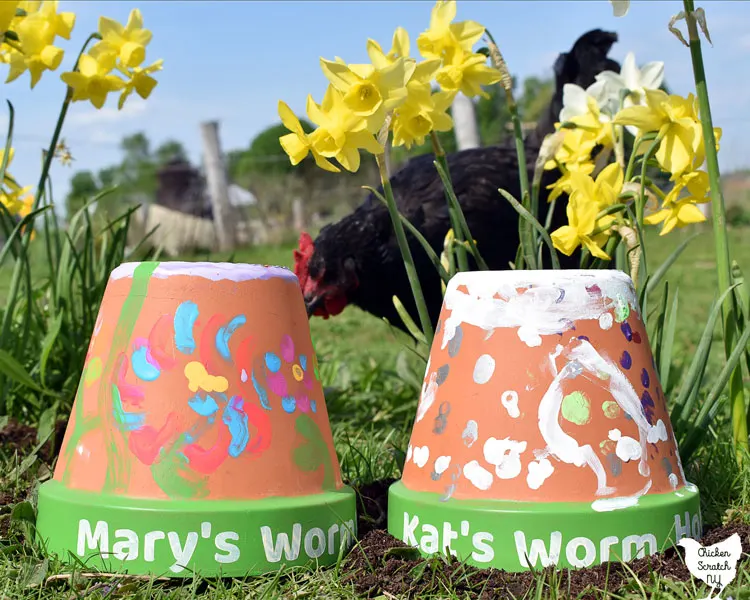
My 7 year old did a good job making recognizeable flowers, the 4 year old went rouge. After I thought we were all done she decided it needed more and gave everything a good coat of white “clouds”.
I used the font Baloo which is free from FontSquirrel for my text, I’ve added an SVG file but you’ll need that if you want to add your own names.
I added the Worm Hotel text to the rim of the pot. The pot rim is slightly angled so the letters will curve a bit but it’s a worm hotel and they aren’t picky guests so don’t let it bother you that much.
When I added the girls names I found it was easier to cut the words apart and add them to the pot rim individually.
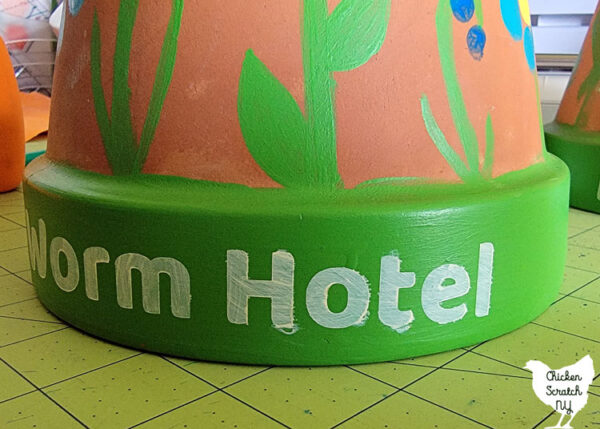

I had a little bit of bubbling (probably from using 7 year old cheap vinyl that wasn’t that good to begin with) and fixed the small spots of bleeding around the letters with more green paint.
Once everything was dry I gave the pots a few coats of terra cotta sealer to help the paint stick around.
Worm Hotel Garden Art

This adorable Worm Hotel fills a void you didn't know you had! It's a simple craft, perfect for a rainy day indoors with your little one, that adds a sweet and whimsical touch to any garden bed.
Materials
- 1 Terra Cotta Pot
- Craft Paint (green & white plus colors for flowers)
- Terra Cotta Sealer (optional)
Tools
- Thin Paint Brush
- Pencil Eraser
- Vinyl Stencil {Vinyl, Vinyl Cutter + SVG File}
Instructions
- Paint the rim of the pot green
- Grab the little ones and start making flowers all the way around the pot. Use your fingers to add one spot for the center and 5-6 spots around it in a contrasting color
- For a dangly flower, paint a green question mark shape and add small circles with a pencil eraser dipped in paint.
- When the finger print flowers are dry add the stems and leaves with more green paint
- Use the vinyl stencil to add text to the rim of the pot
- When all of the paint is dry use the terracotta sealer according to the directions on the can to protect your art work
Notes
Terracotta will absorb water and will break when that water freezes. Remember to bring this in from the garden during frosts and freezes
Using the Worm Hotel
When the worm hotel is painted and sealed you can plop it out in the garden. When you find a worm just stick it under the pot.
Both craft stores and dollar stores seem to be over flowing with fairy garden furniture so if you’re feeling extra fancy pick up a bed, bench or table for a secret surprise!
Make DIY Fairy Houses with wood scraps and natural items from a scavenger hunt
The Worm Hotel offers a temporary safety net to keep the worms safe from the hungry chickens and the open bottom lets them escape into the ground where they can get back to work improving your soil structure and breaking down organic matter into nutrient rich earth worm casings.
Looking for more kid-friendly garden art? Check out my Garden DIY page or start here: