
Water bath canning is an old school food preservation technique that can be intimidating but when done correctly it’s a perfectly safe way to make sauces, jams, jellies, pickles and more.
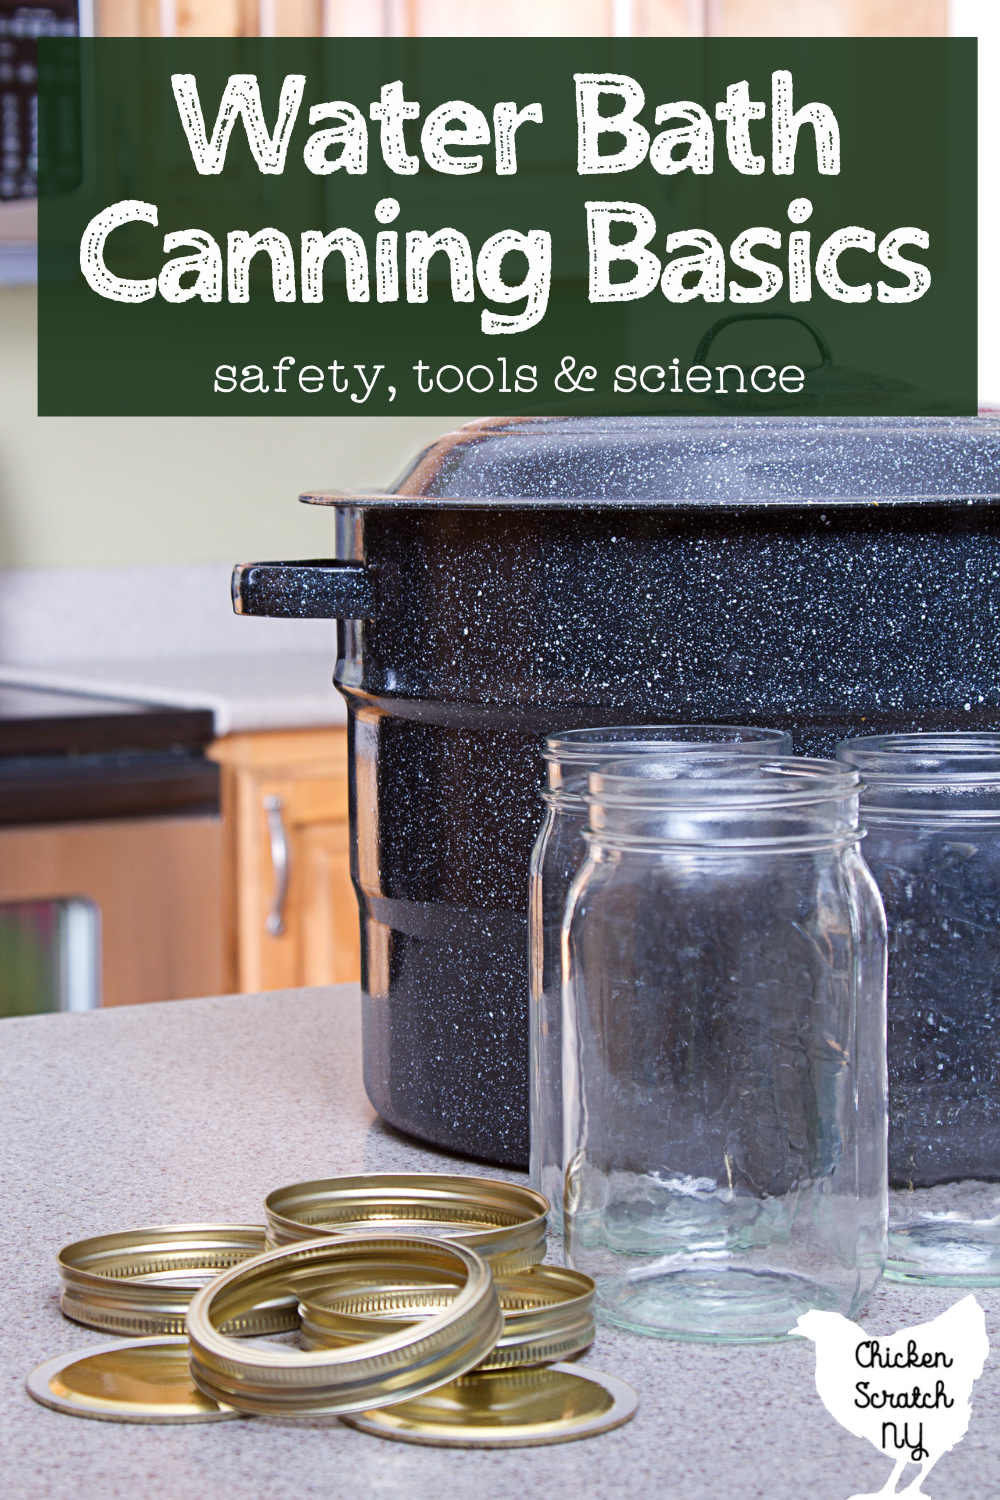
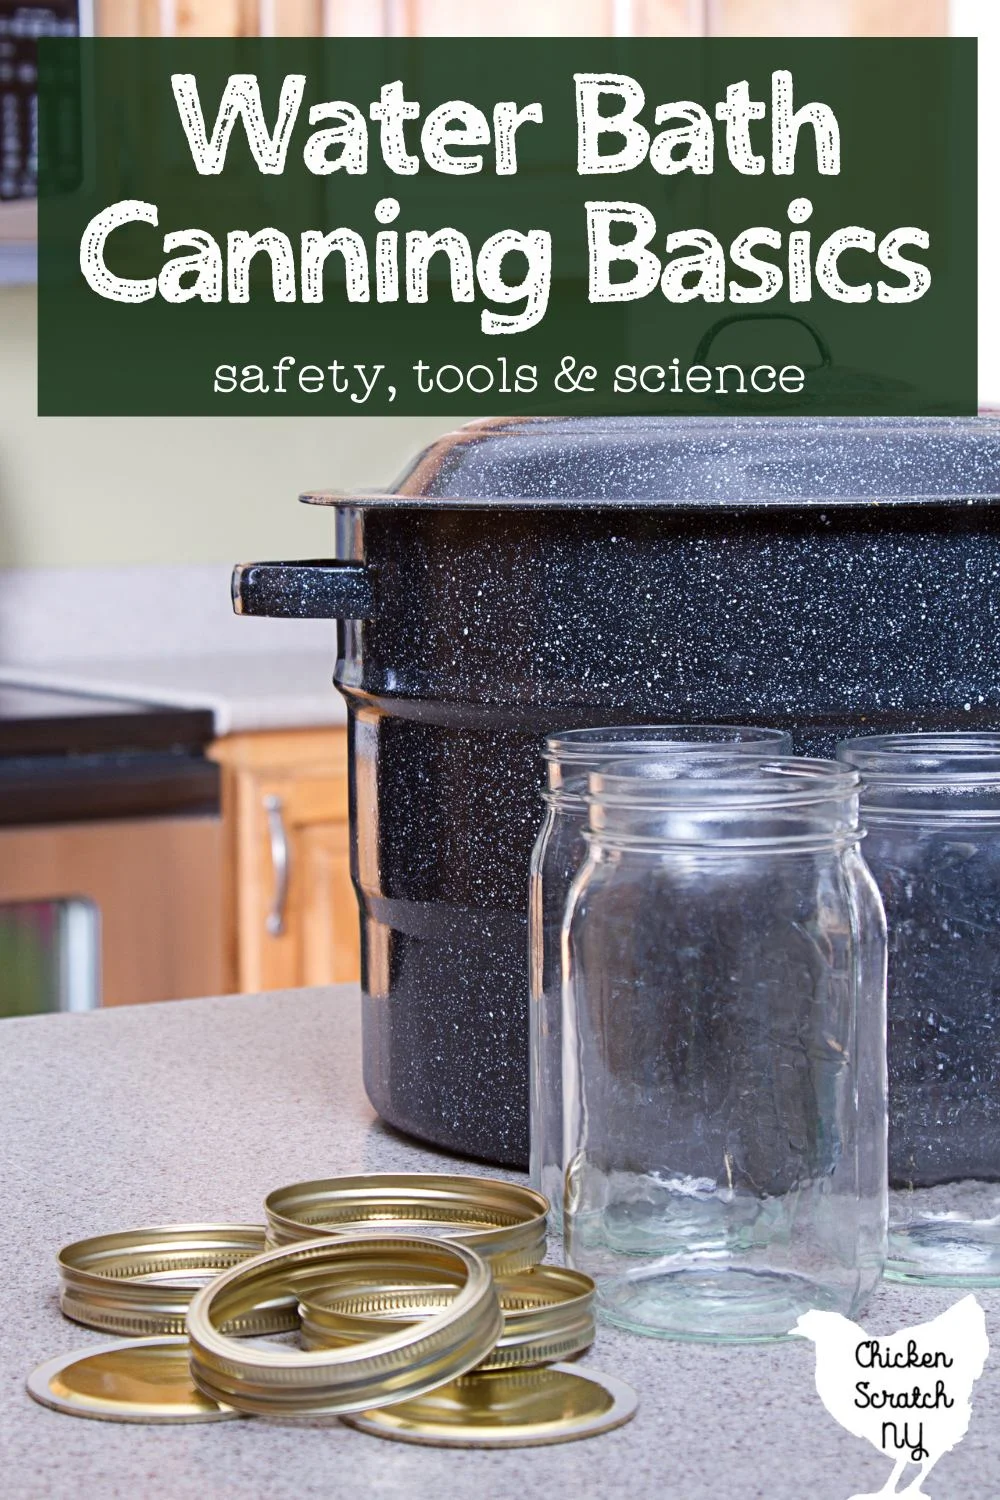
Unlike pressure canning where you need a special pot, you can do water bath canning in anything large enough to hold your jars plus a rack and an inch of water (and some extra space for boiling or you’ll have a mess on your hands!).
I have a giant water bath canning pot that takes up residence on the back burner for most of the summer but if you’re going to be focusing on smaller jars like half-pints you can get away with a deep pasta pot.
Looking to dip your toes into food preservation? Maybe Small Batch Canning is right for you
How Does Water Bath Canning Work?
The first time you try your hand at water bath canning it might seem like magic but it’s actually really simple science.
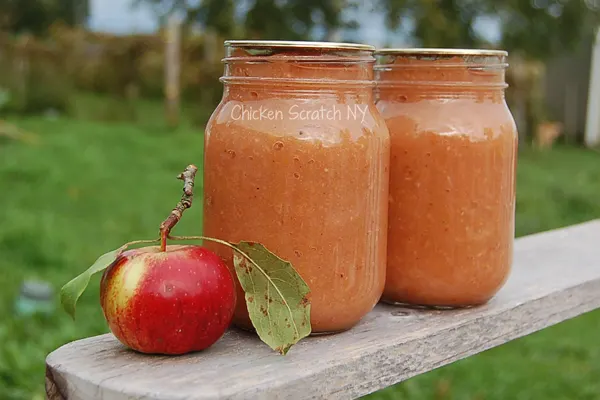
When you fill your hot jars with hot food you need to make sure to leave an open space at the top of the food, this is called the headspace. The amount of headspace you need to leave should be listed in each recipe, it’s usually between 1/4 and 1 inch.
That space is really important! After you fill the jars make sure you run either a knife, a thin spatula, or a wooden chopstick (that’s what I use) to remove any bubbles, and then double-check the headspace and add more liquid if necessary.
If the headspace is too small, or the fruit releases a lot of liquid in the canner “siphoning” can occur. When this happens the liquid in the jar pushes its way out through the lids, making a sticky mess and leaving a large gap in the jars
Siphoning can be prevented by using hot pack methods and paying careful attention to the headspace. As long as the jars properly seal the food in them is still safe to eat.
Add the lids and twist on the rings, just until “fingertip tight” you don’t want them to be locked on there. They need to be tight enough to keep the boiling water from getting in but not so tight that the air can’t escape.
When you put the canning jars full of food into the boiling water the food, liquid and air in the jars will heat up and expand. As they expand the excess air in the jars will be pushed out.
Start your timer when the water has reached a full boil. When the time is up let turn off the heat and let the canner sit for 5 minutes to allow the food in the jars to settle, it’s also easier to pull the jars out when the water isn’t vigorously boiling.
After you pull the jars out of the water bath canner set them in a draft-free area to cool leaving at least an inch of space between the jars.
As the jars cool the air in the headspace contracts and pulls the lid of the jar down, you’ll hear a pop when the jars seal. Let the jars cool completely and then you can remove the rings.
If the jars have properly sealed you should be able to push on the lids without any flexing or popping. There will be a slight indent in the top of the jar from the vacuum holding the lids down.
Is Water Bath Canning Safe?
Food canned in a hot water bath is perfectly safe if the jars seal properly and you are using recipes that are intended for water bath canning and not pressure canning.
Water bath canning is only safe for acidic foods, like pickles, tomato sauces & salsas, and jams & jellies. Meat and vegetables (unless pickled) need to be processed in a pressure canner where the food is put under higher temperatures to kill bacteria.
Most fruits are naturally acidic and can be processed in a water bath canner. Acidity is important with canning because it prevents the growth of anaerobic bacteria (like botulism) that could potentially grow in your home-canned foods and make you very ill.
Tomatoes are right on the line between acidic enough for safe canning and not acidic enough. There is also a large variation in natural acidity so most canning recipes for tomatoes will include either vinegar, lemon juice, or citric acid to increase the acidity and make the food safe.
Read more about Tomato Varieties
Whether you are canning pickles, crushed tomatoes, or salsa, make sure the vinegar you are using lists the acidity. I buy gallon jugs of distilled white and apple cider vinegar with a consistent 5% acidity for canning.
You should also use bottled lemon or lime juice for the same reason, consistent acidity. Save the fresh lemon juice for celebratory cocktails after your jars seal.
How Long Does Home Canned Food Last?
In theory, properly canned food should last as long as the lids are sealed. However, you should plan on eating your home canned goods within a year or so of canning.
Over time the food will get mushy and the nutrients will break down. I found a jar of pickled asparagus that was about 4 years old and when I opened it up the food looked normal but fell apart when you touched it.
Usually homesteaders are canning food to last until the next harvest or growing season so a one year shelf life works out pretty well.
Water Bath Canning Supplies
Water bath canning is easier to get into and more accessible to most than pressure canning. You can find all of the supplies online, at Target, Walmart or even at a large farm stand (I know I’ve seen them at a few around here)
With the exception of the lids everything can be used over and over until it breaks (jars) or rusts (some styles of racks and canners).
Canning Pot or Canner
The size of your canner will limit the amount and size of jars you can process.
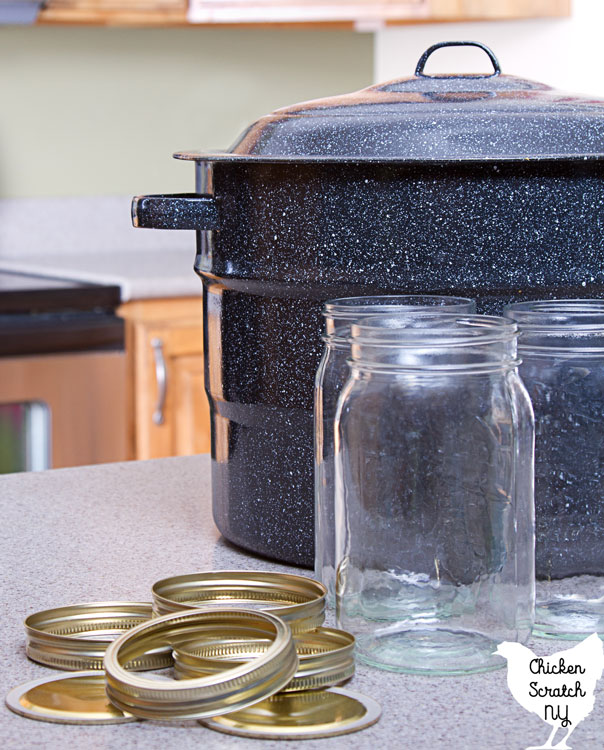

I use and recommend the Granite Ware 21.5 qt canner. It’s big enough to hold 7 quart jars or 9 pint jars and works really well. It comes with a rack but don’t expect it to last more than a season. It gets rusty at the joints and will need to be replaced.
You can use any pot for water bath canning as long as it is deep enough to hold the jars on a rack plus an inch of boiling water. If you’ll only be canning half pint jars the 21.5 qt canner might be over kill (even if you don’t fill it all the way) but a deep pasta pot might work.
Canning Rack
The canning rack serves two purposes. The first is to hold the jars up off the bottom of the pot.
This allows the water to get around the jar, both on the top and bottom and around the sides and keeps the jars from rattling and clanking together due to the vigorous bubbling.
It’s also used to both lower and raise the jars into and out of the water. most racks have a kink in the handles that allow you to rest the rack about 1/2 up in the pot. This way you can fill your jars and place them into the canner to stay warm while you fill the rest of the jars.
When all the jars are ready you can lower them at one time into the hot water.
Jars
Glass canning jars are available in multiple sizes. You’ll often hear them called Mason Jars or Ball Jars but there are other brands available as well.
The majority of canning jars have a ‘regular mouth’ meaning the opening is slightly less than 2.5 inches wide. The other option is ‘wide mouth’ canning jars with a 3 inch opening.

You can use them interchangeably for canning, functionally they behave the same way. Usually wide mouth jars are used for larger pieces of fruit or vegetables like pickle spears or dilly beans where the extra space makes the jars easier to pack.
Regular mouth canning jars come in the following sizes:
- 4 oz (1/2 cup)
- 8 oz (1 cup or 1/2 pint)
- 16 oz (2 cups or 1 pint)
- 32 oz (4 cups, 2 pints, or 1 quart)
Wide mouth jars are sold in the following sizes
- 16 oz (2 cups or 1 pint)
- 24 oz (3 cups or 1.5 pints)
- 32 oz (4 cups, 2 pints, or 1 quart)
- 64 oz (1/2 gallon)
Smaller jars are usually used for jams, jellies, salsas and salsas. Larger jars are used for crushed tomatoes, fruits in syrup, pie fillings and pickles.
You can find other sizes and variations in shape and color from Ball and others. Just make sure any jars you’re using for water bath canning are meant to be used as canning jars.
Lids
Unlike the rest of the tools you’ll need for canning lids are one time use item. Canning lids are made from a slightly flexible metal with a red plastisol ring around the underside.

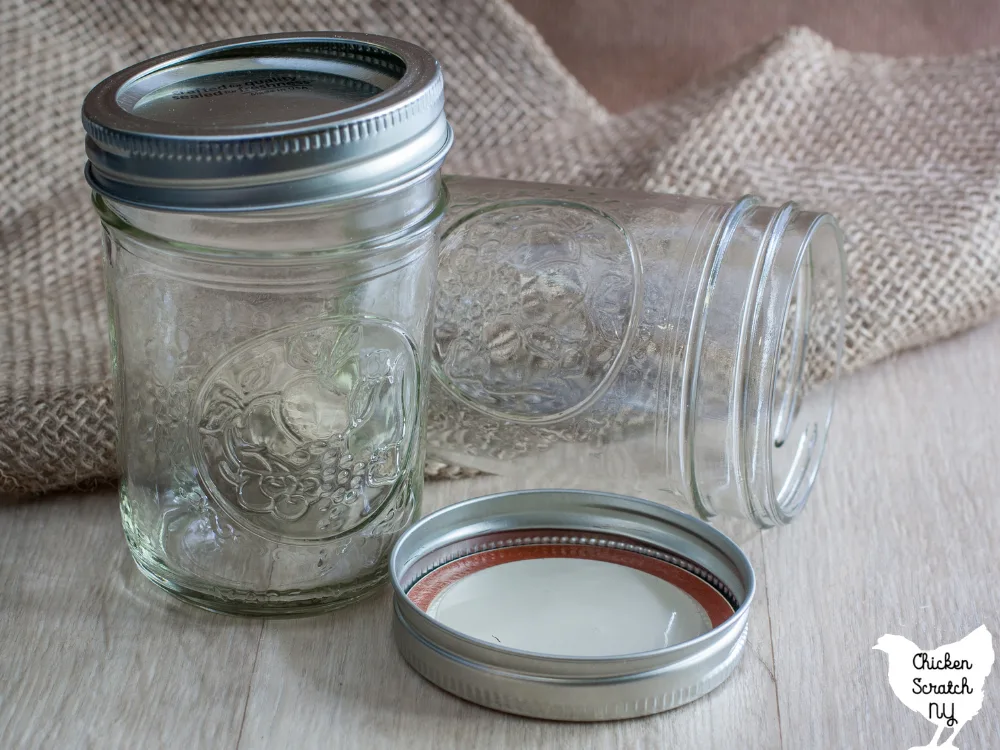
When I started canning in the 90’s we had to simmer the lids to heat up and soften the red rubber so the jars would seal. In 2013 the rubber was replaced with plastisol and the simmer step is no longer needed and can actually stop your jars from properly sealing.
Canning lids come in two sizes to match the mouth of the jar. The regular size will fit on half pint jars, and regular mouth pint and quart jars. The wide mouth size is used for wide mouth pint and quart jars.
Rings
Canning rings are used to hold the lids in place while the jars are processing in the boiling water and are removed after the jars have completely cooled.
Home-canned food should be stored without the rings, that way if a seal is bad you’ll know right away.
Rings come in two sizes, regular and wide mouth. They can be reused over however they do tend to rust after a while.
Jar Lifter
A jar lifter is a useful tool that would certainly win an award for the oddest-looking canning equipment.

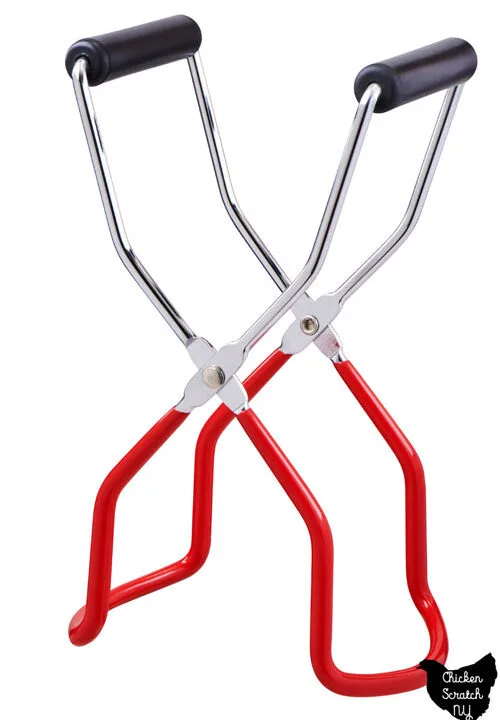
Jar lifters are used to add jars to the canner and to remove them when they are done processing. They have a coating on the part that grips the jar that helps prevent slipping.
Canning Funnel
The final tool you’ll need for water bath canning is a canning funnel. You can find them in either plastic or metal.
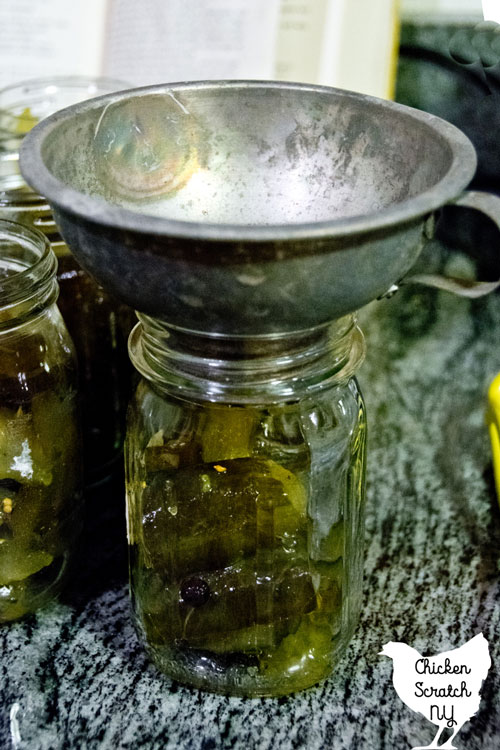
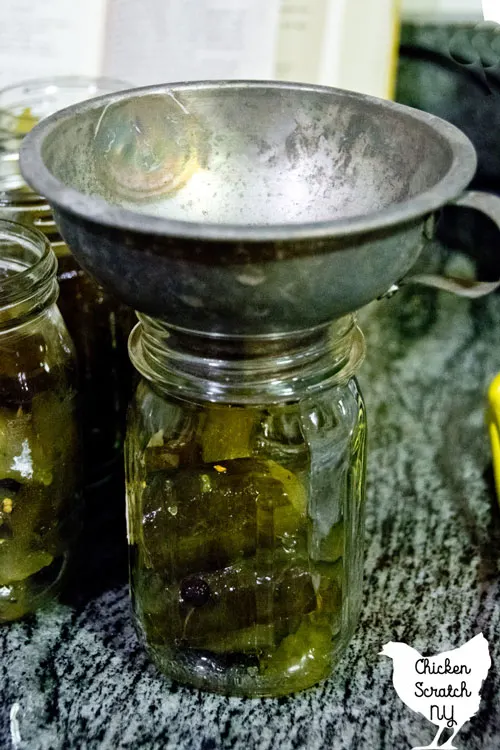
The funnel is used to get the food into the jars without making a mess of the rims. Any bits of food or syrup on the lid can interfere with sealing.
It’s also much easier to get the food in the jar when you have a larger target. You can find both wide and regular mouth canning funnels, I only have a regular mouth funnel and I’ve never had any issues with it.
Check out my Canning and Preserving page for more information or start here: