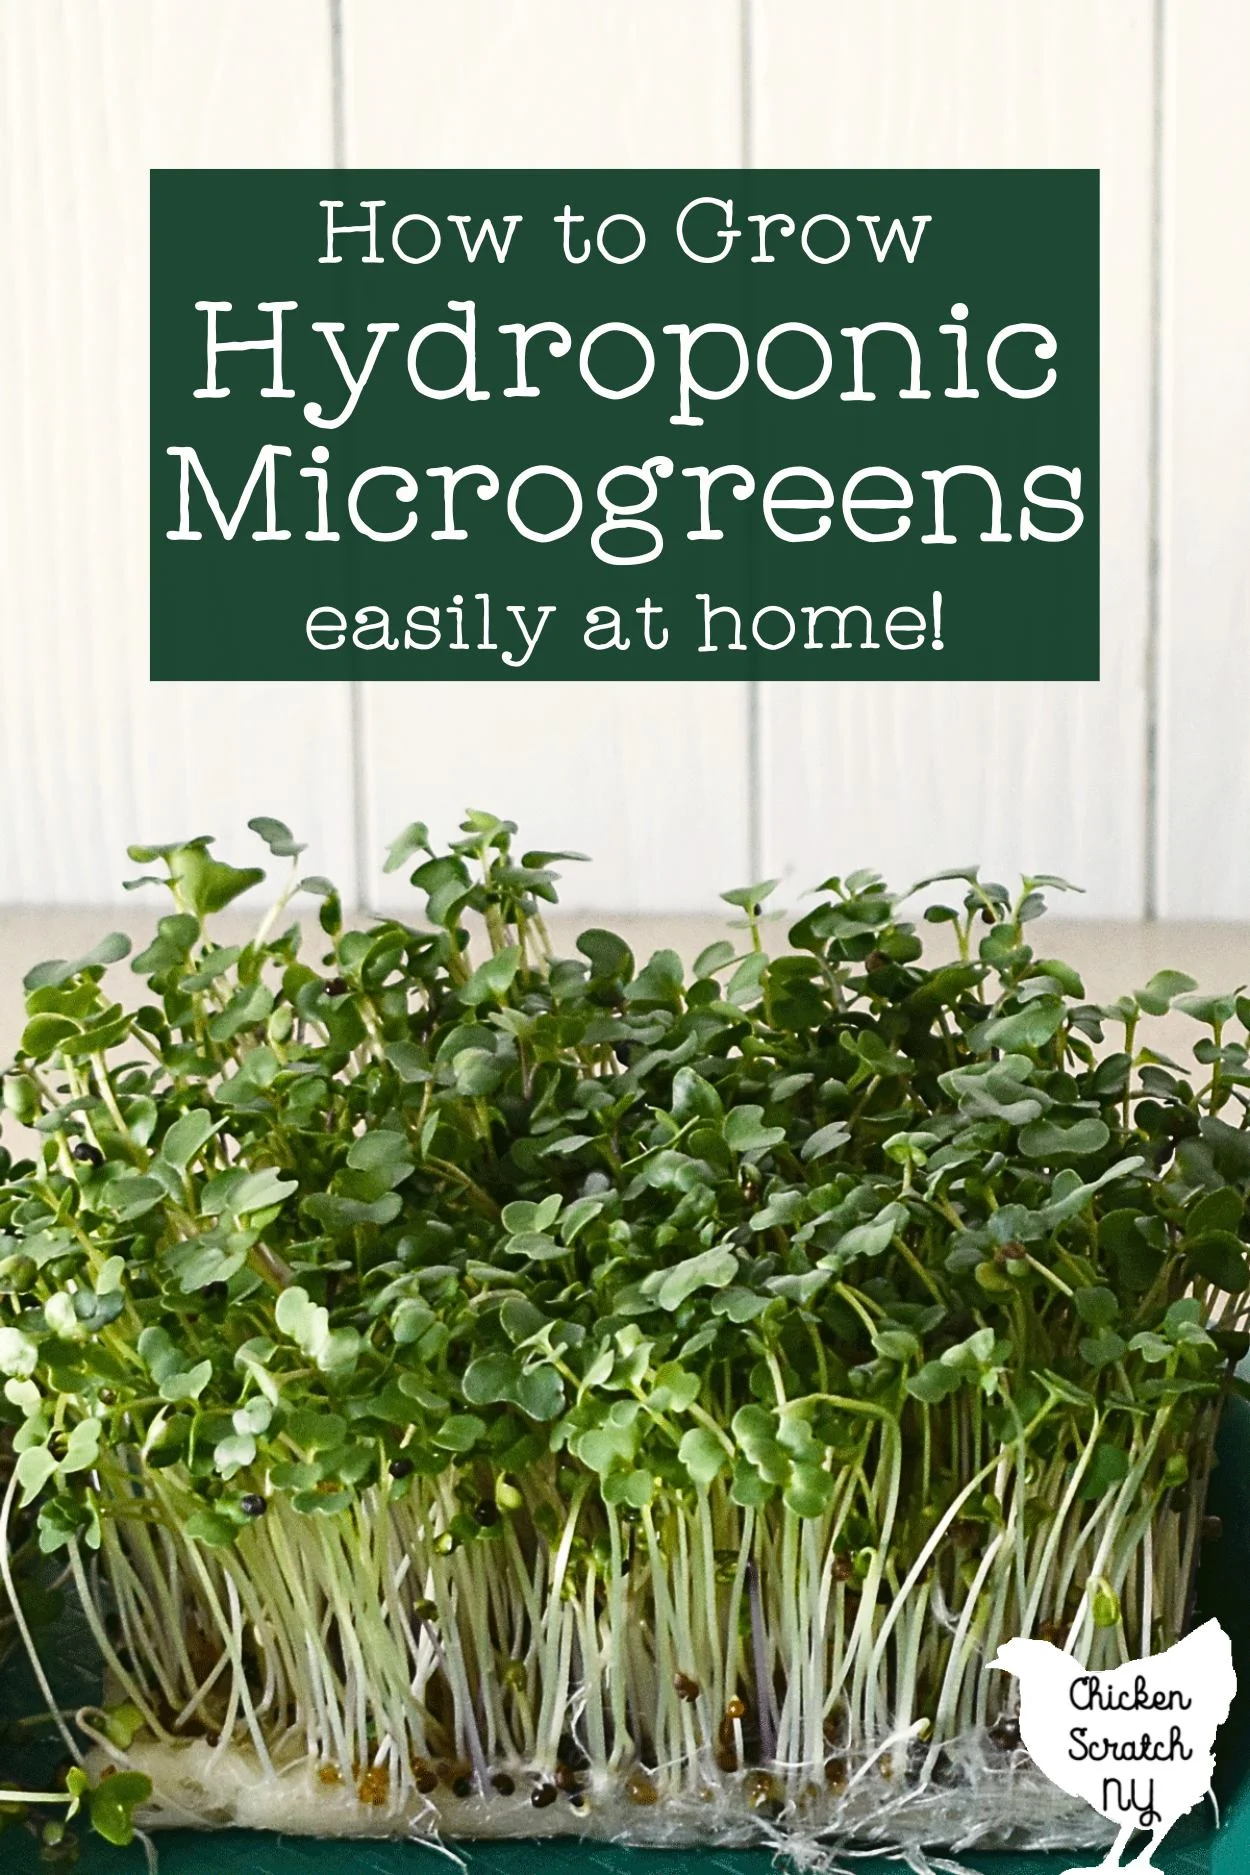
Growing microgreens is an easy way to get started with hydroponics and producing food in your own home! Today we’ll compare four hydroponic growing mediums to figure out which is the best.

A few things you should know about me, I’ve never met a rabbit hole I won’t throw myself down and I desperately want to grow food in the dead of winter when the ground is (or at least should be) frozen and covered in feet of snow.
I’ve been growing sprouts for years, and they scratch the itch (and taste great) but I want more! After perusing True Leaf Market for way too many onion seeds I was sucked into the hydroponics section and decided to make some poor financial choices.
My goal here is to try a bunch of things and tell you what worked so you can jump straight to successfully growing your own microgreens.
I’ve been gardening for long enough to be comfortable with absolute failure and it won’t discourage me the way it might ruin things for someone just getting started!
How to Grow Hydroponic Microgreens at Home
Hydroponic setups can get really fancy and really expensive but they don’t have to be, especially if you’re growing microgreens and not full-sized plants.


Microgreens are a step between growing sprouts and growing baby greens. They take a bit longer and grow bigger than sprouts but not as big as baby greens and they don’t need any extra nutrients which helps keep things simple.
Read more about Growing Sprouts for Fresh Food Anytime
In my opinion, they aren’t a great choice for a full salad (unless you’re me and growing 12 trays at once) but they make a great addition to a sandwich, smoothie or anything that needs a punch of fresh, green flavor!
I love stirring a small handful into ramen, especially the stronger flavored options like mustard greens and radishes.
They also help scratch the planting itch I start to get in January when I’m months away from starting my seeds, let alone planting them out in the garden!
You can grow microgreens in just about anything that will allow the seeds to be moist but not swampy.
I’ve used plastic takeout containers for small batches but I’m always looking for ways to make my life easier and I figured it was worth buying some smaller trays intended for growing microgreens.
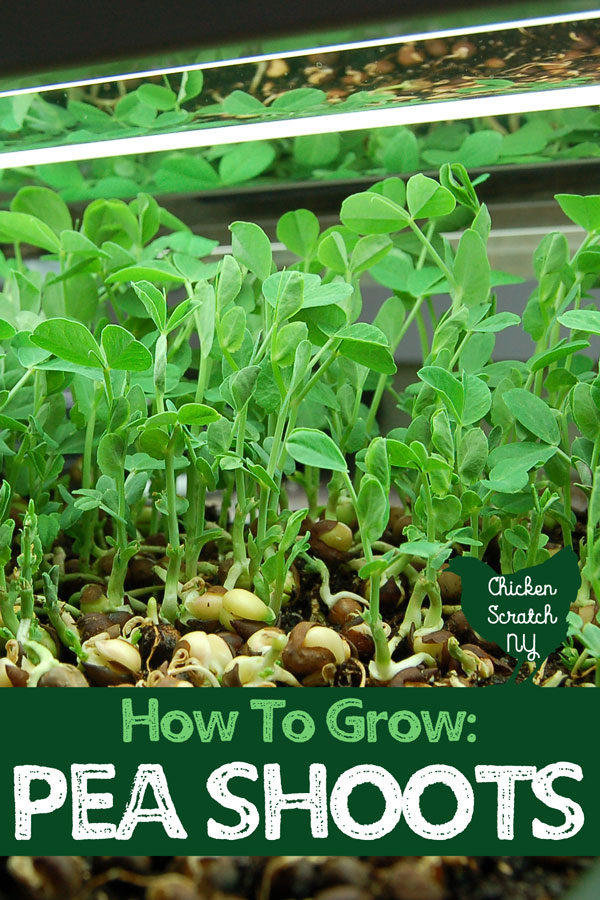
As much as I love pea shoots, I overdid it with a full 1020 tray and haven’t grown a batch since!
Read more about How to Grow Pea Shoots
If you’re looking for an easy countertop set up I recommend:
- 1010 tray (no holes)
- 5×5 trays (with holes)
- 4×4 Micromats (or whatever hydroponic medium you prefer)
Microgreens are at their best in a small window of time and you’re better off with multiple batches started a few days apart instead of one huge batch.
The first step to planting is preparing your growing media, which can be as simple as adding some water or it might require a longer soak.
Once it’s ready to go you add your seeds, I used a teaspoon per 5×5 tray, cover them up with another tray, and wait.
The darkness and pressure will help get the seeds growing, when your seeds have germinated you can remove the cover and set them under a grow light or in a bright south-facing window.
Keep the growing media moist but not soupy and in about 2 weeks you’ll have a fresh source of homegrown hydroponic microgreens!
Harvest your microgreens with sharp kitchen scissors and toss the mass of roots and used media in your compost or garden bed and you’re ready for round two!
Hydroponic Growing Mediums
When it comes to picking a hydroponic growing medium you have a lot of choices, I was able to eliminate a few right off the bat because I wanted something sustainable and compostable.
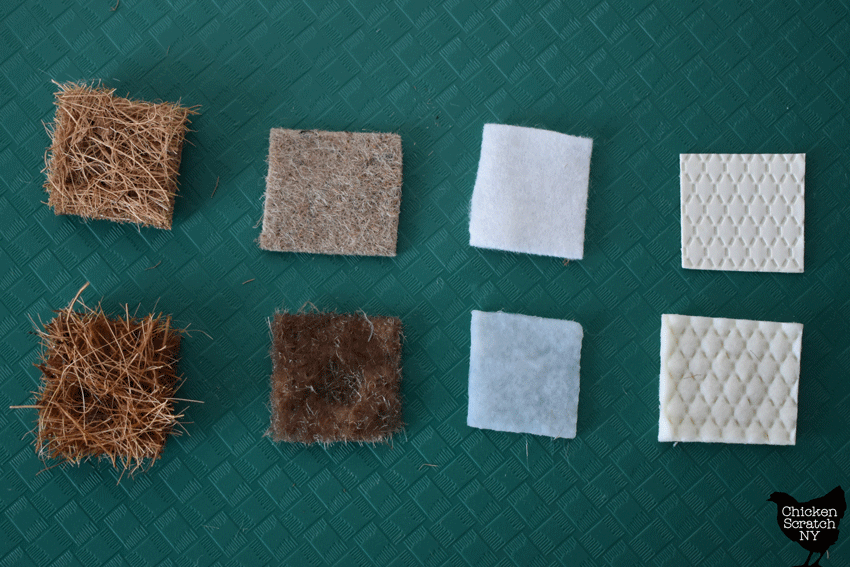

That immediately gets rid of anything plastic-based and non-renewable like peat, vermiculite or perlite and left me with four options.
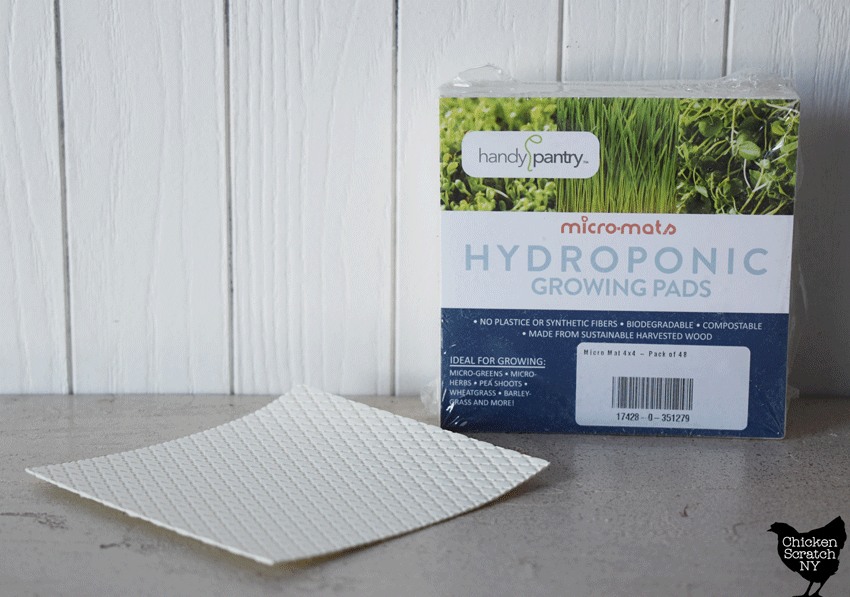
Micromats – Wood Fiber
Micromats come in different sizes including 4×4 (fits 5×5 tray), 10×10 and 10×20. The thin mats are really easy to store and take up less room than any of the other options.
This is the only hydroponic growing medium specifically made to fit 5×5 trays. The other options needed to be cut down from 10×10.
Their compact nature makes Micromats really easy to store, especially if you take advantage of the bulk pricing and order a 480 or 960 pack.
I ordered a 48-pack for $13.37 which works out to be about 28 cents per tray, so it’s basically tied with bamboo for the cheapest option.
The mats puff up quite a bit when they get wet and have the texture of wet pads of toilet paper. They get about as thick as the bamboo and jute but nowhere near as thick as the coconut coir.
They are also very fragile after they get wet so you want to make sure they’re in your trays before you start soaking them. They puff up almost immediately so you don’t have to plan your whole day around soaking a hydroponic mat before you can plant seeds.
I really like how easily the seeds stayed in place when dropped and how easy it was to see the dark seeds on the light-colored surface.
According to the manufacturer, Micromats are both biodegradable & compostable and made from sustainably harvested wood. They contain no plastic or synthetic fibers and are approved for use in organic gardens.

Going in, I wanted these to work the best and I was very happy with them. The only ‘issue’ is it’s tricky to lift the pad out of the tray to harvest the microgreens because it wants to fall apart.
The roots from a well-established tray of microgreens will do a fairly good job holding everything together long enough to get it out of the tray so you can do your harvesting as long as you move carefully.
If I could only pick one option this is what I would go with. A whole package of 48 is only about an inch tall and could not be easier to keep on hand! The microgreens grew really well and I just threw the roots and ‘leftovers’ in the garden when I was done.
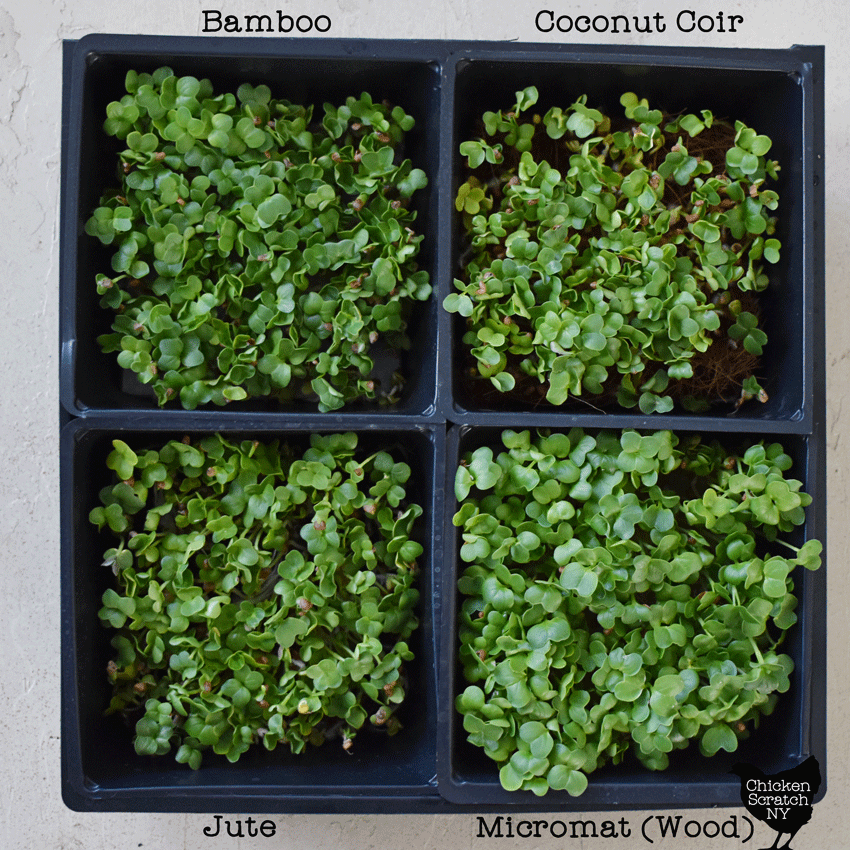
The micromats produced the best radish microgreens and were a close second to coconut coir for the two microgreen mixes. Overall I think the ease of use and low price point more than make up for a slightly slower growth.
Coconut Coir
If you’re at all interested in sustainable gardening you’re probably aware of coconut coir. It’s the most popular, stand-in for nonrenewable peat moss.
I’m used to seeing it in those compressed blocks that expand like magic when you add water but in this case, the long fibers are matter together to create thick pads of coconut coir fiber with a small amount of natural rubber to help it hold it’s shape.


There is 0 information on the package itself but according to the website, the mats are compostable but will take a while to break down due to the thickness of the material and should be soaked for several hours before planting.
When it comes to planting your seeds, this is the hardest medium to control. The seeds wiggle their way down into the mat and quickly become nearly invisible unless you’re planting larger seeds like radishes that just sit on top or roll over to the sides.

The Coco Coir Hydroponic Grow Mats are available in 10×10 mats that can be cut down to smaller sizes with scissors (it’s not fun through). A set of 10 costs $13.60 which works out to be 34 cents per 5×5 tray.
In my tests the smaller seed mixes grew the best in these mats, much better than the bamboo and slightly better than the Micromats and jute.
I’ll use up the rest without cutting them but since I prefer smaller batches it’s just one more step I don’t want to take.
At this point, I don’t think I’ll be reordering the coconut coil mats. Mostly because of the size of the thick and bulky mats along with the higher price.
If you plan to stick mostly to small seeds and you aren’t a fan of growing in wood pulp this would be my recommendation.
Bamboo
Another sustainable option, quick-growing bamboo has been turned into Bamboo Microgreens Grow Mats.
The white mats are very soft, and composable and are supposed to have a high water-holding capacity meaning you get to do less babysitting.
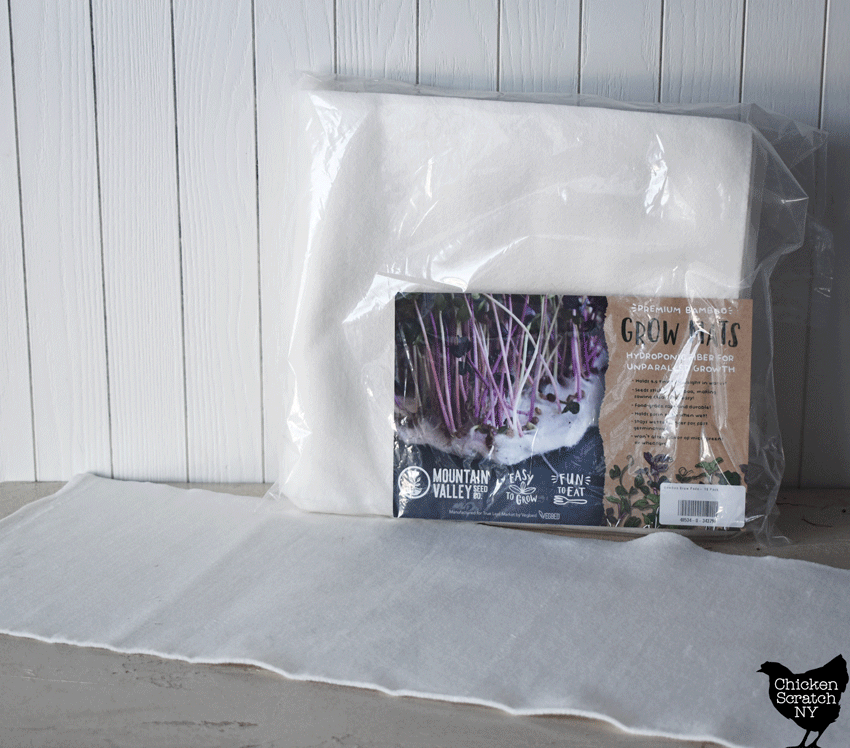
Another benefit is the color itself, it’s really easy to see how well your seeds are spread out on the white background unlike the darker jute and coconut options.
The bamboo grow mats are really easy to cut to size. I used my quilting ruler and rotary cutter to make quick work of the large mats.
They are available in 10×20 mats or as a 10-inch by 100-foot roll. A ten-pack of 10×20 mats costs $21.93 which works out to be 27 centers per 5×5 tray and is the cheapest option by one penny.
The bamboo mat is supposed to have a high carrying capacity so you can water less but I accidentally fried one of the tests by leaving it on a heat mat overnight. The entire 1010 tray was on the same mat but the bamboo was the only one that dried out.

I watered it really well, turned off the heat mat and you can see how it made a bit of a comeback but it’s not perfect.
Even giving it the benefit of the doubt, overall I had the worst growth on the bamboo mats and for that reason, I won’t be buying more bamboo grow mats and I can’t recommend you try them.
Jute Fiber
I use a lot of jute twine in my garden (I’m really bad at taking down my trellises and I like that it breaks down over the winter) so when I was researching different hydroponic growing mediums Jute Fiber hydroponic Grow pads caught my interest.
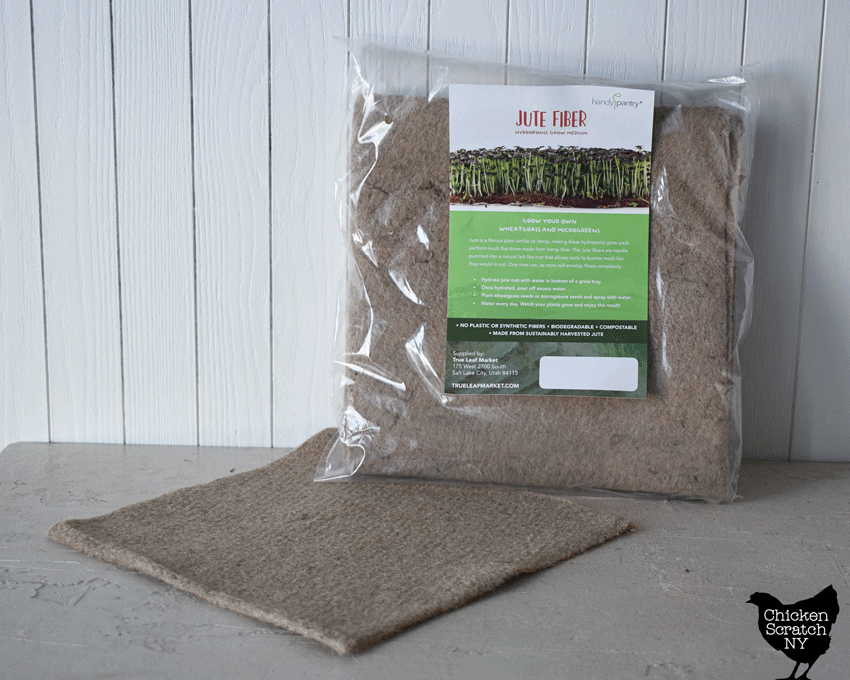
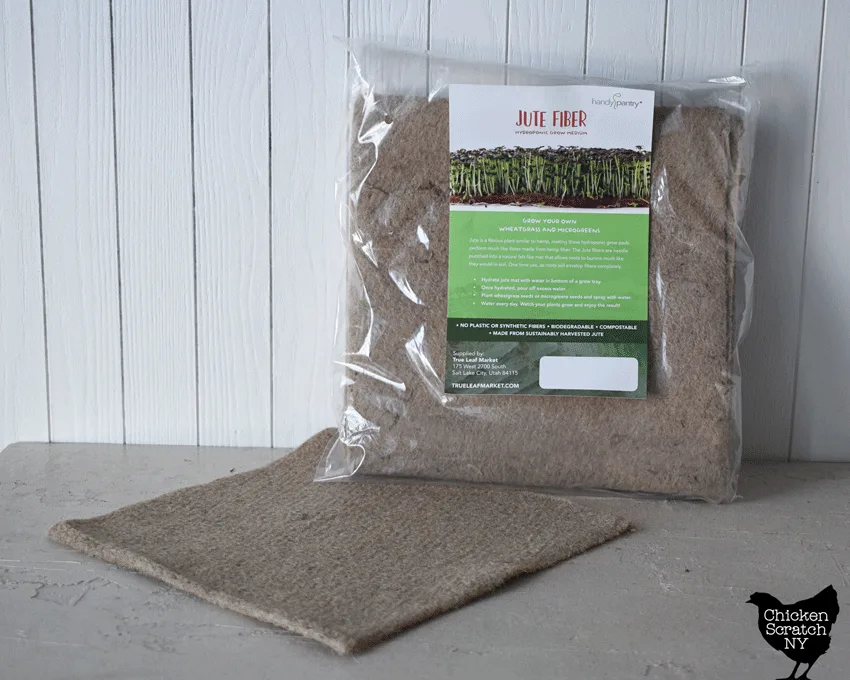
The thin brown mats are fully compostable and made from 100% all-natural jute fibers. The water-wicking material keeps your seeds moist and is easy to cut down to fit in your containers.
They do require a long soak before you can plant, the jute will turn from a lighter brown to a dark color when it’s sully saturated.
This is the most expensive option, a ten-pack of 10×10 grow mats costs $19.58 which breaks down to 49 cents per 5×5 tray.
I’ll be skipping the jute from here on out, based mostly on the much higher price, but also the need to soak before planting and needing to cut them down to size to fit the small mats.
I’d be willing to overlook those issues if the plants grew a lot better, but they didn’t, they were involved in the 3 way tie for last place for my radish microgreens and were pretty on par with the micromats and coconut coir for the smaller seeded microgreen mixes.
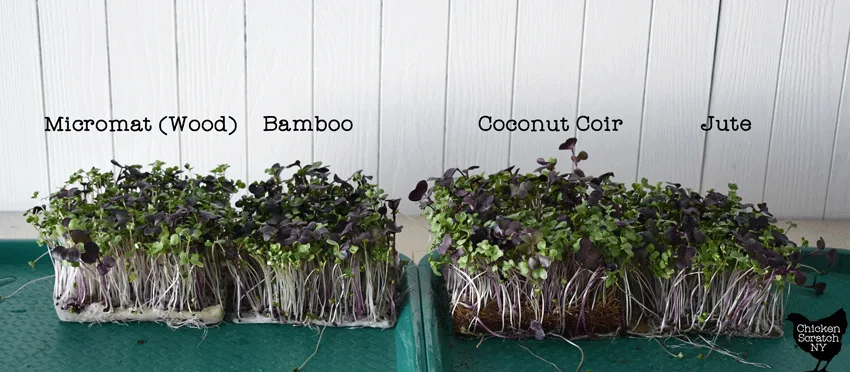
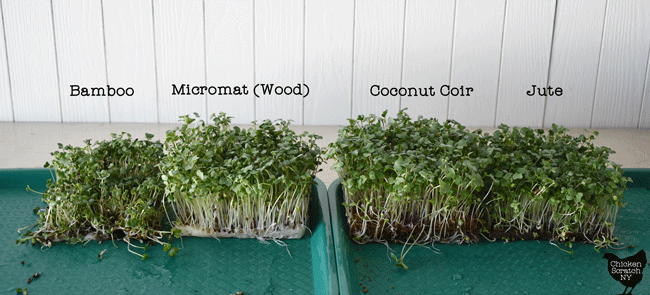
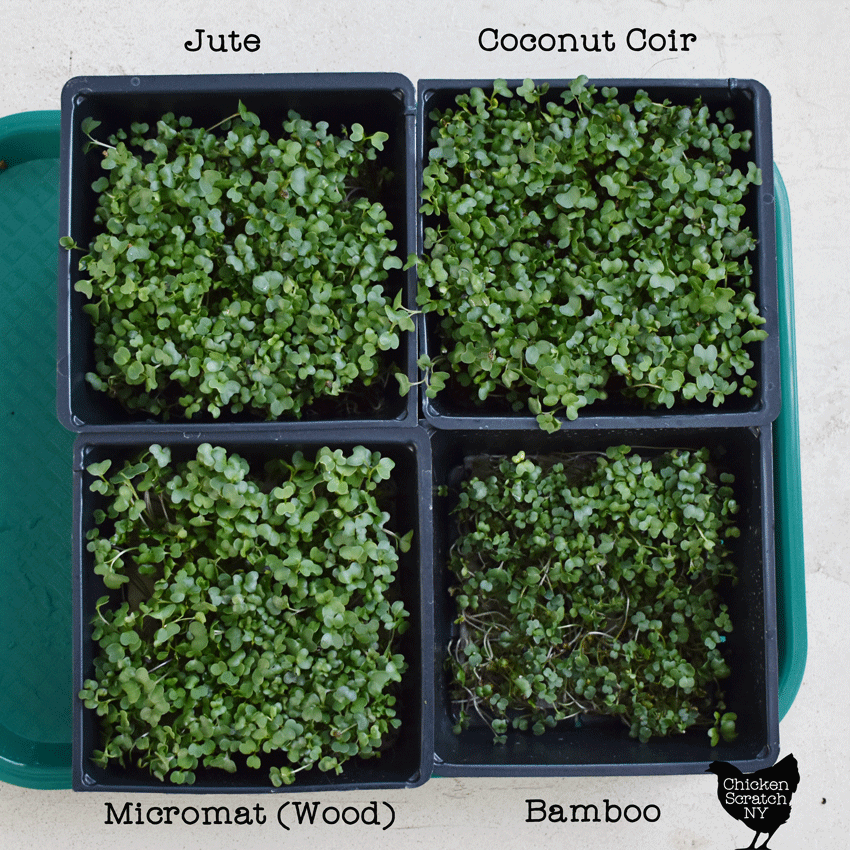
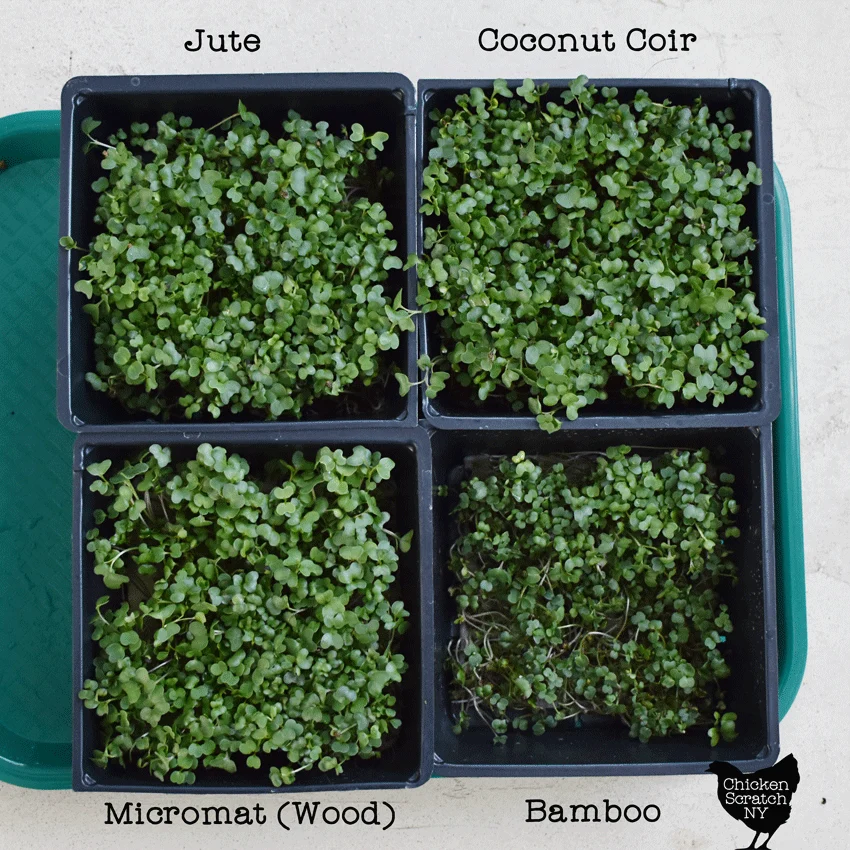
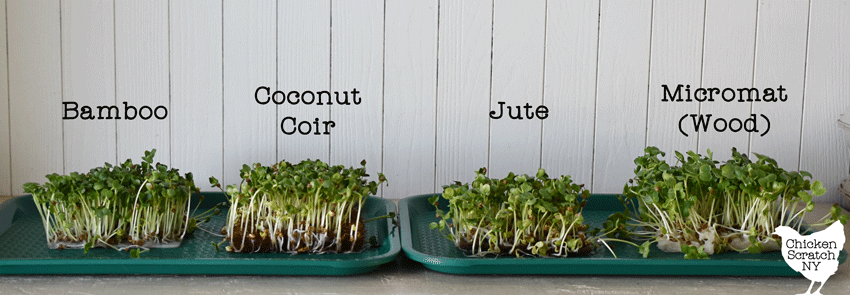
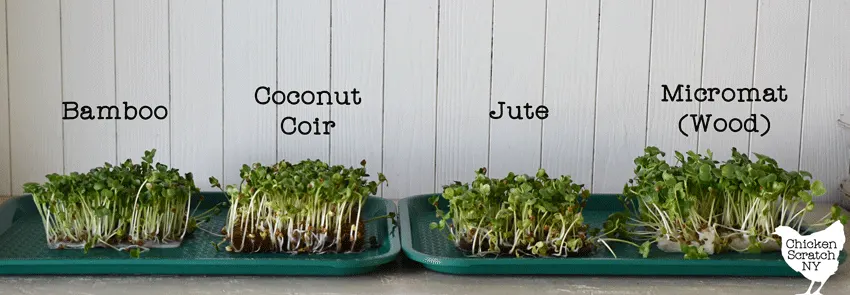
Growing Comparison
Now that we’ve gone over the different types of hydroponic microgreen growing mediums, let’s take a look at how I set up my mad scientist-adjacent test.
In an effort to keep things equal, I decided to grow one 1010 tray for each seed type with 4 – 5×5 trays each set up with a different growing medium.
I started 3 sets of microgreens, two were kept in my dining room with a cheap grow light (the big boy is in the basement and I’m not emotionally ready to fire him up yet), and the other was in front of a south-facing window.
All plants have different growing needs and preferences and I wanted to be sure I was giving the different planting mediums a fair shot at success.
I set up all the trays, watered them according to their specific instructions, sprinkled a scant teaspoon of seeds in each section, and covered them with an extra set of trays for the first few days to help with germination.
Microgreen Seeds
Microgreen seeds are easy to find, especially if you shop online. They’re available in large quantities, from 1oz to multiple pounds.

Retrainst has never been my strength so I picked up 4 oz packages of 3 types of seeds and I’ll be set for a while! Or I would be if I wasn’t addicted to growing all the things and I’ve already got my eyes on a few more options.
Before I started I set my scale up and did some weighing and it worked out to be about 3 grams per teaspoon of both the seed mixes so that’s what I used for each 5×5 section.
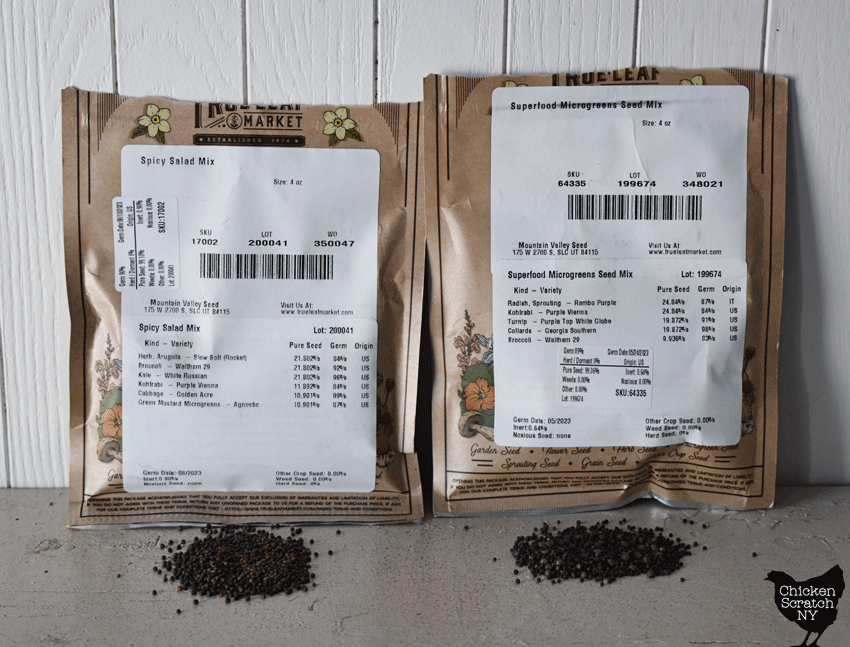
I have the same amount of seeds poured out in front of the seed packets.
Spicy Salad Mix
The Spicy Salad Mix includes Arugula (22%), Waltham 29 Broccoli (22%), White Russian Kale (22%), Purple Vienna Kohlrabi (12%), Golden Acre Cabbage (11%)* and Green Mustard (11%).
*When I was writing this up I noticed they list Red Cabbage on the website, I’m not sure if that’s new since I placed my order in January or if the website is wrong. There is no hint of red in my spicy salad mix.
All of these plants are in the broccoli family and have nearly identical seeds and similar fast growth rates. They’re also known for having a strong, pungent flavor with a bit of a kick from the peppery arugula and spicy mustard.
This is the poster child for a little goes a long way and they will take your sandwiches up a level or two!
Superfood Microgreen Seed Mix
The Superfood Microgreen Seed Mix is made up of Purple Sprouting Raddish (25%), Purple Kohlrabi (25%), Purple Top Turnip (20%), Georgia Southern Collards (20%) and Waltham 29 Broccoli (10%).
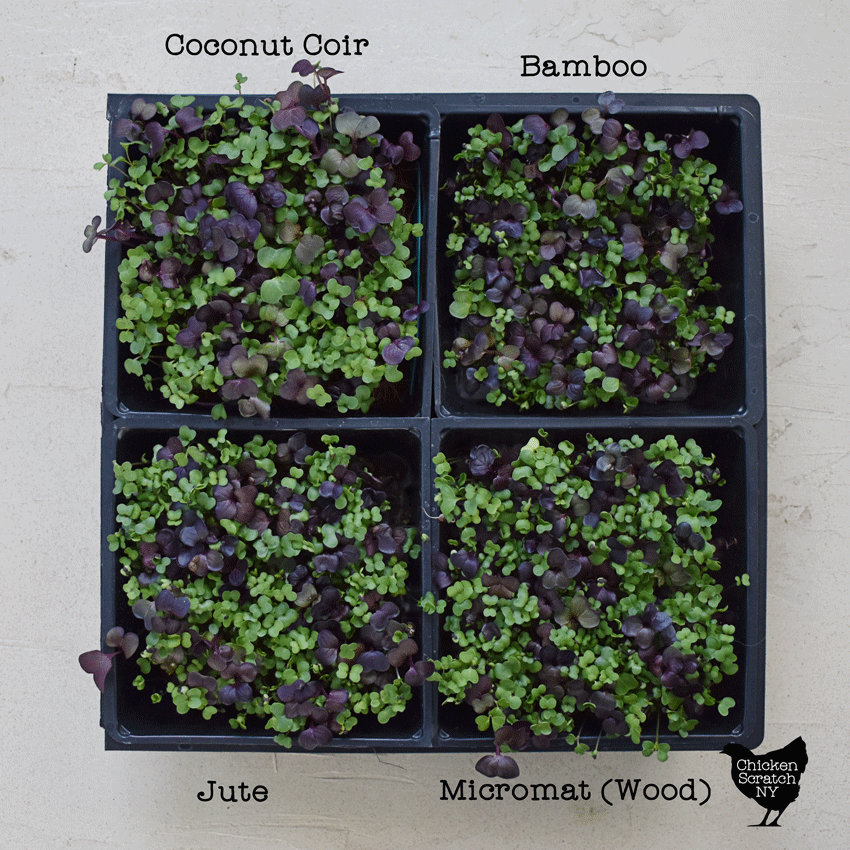
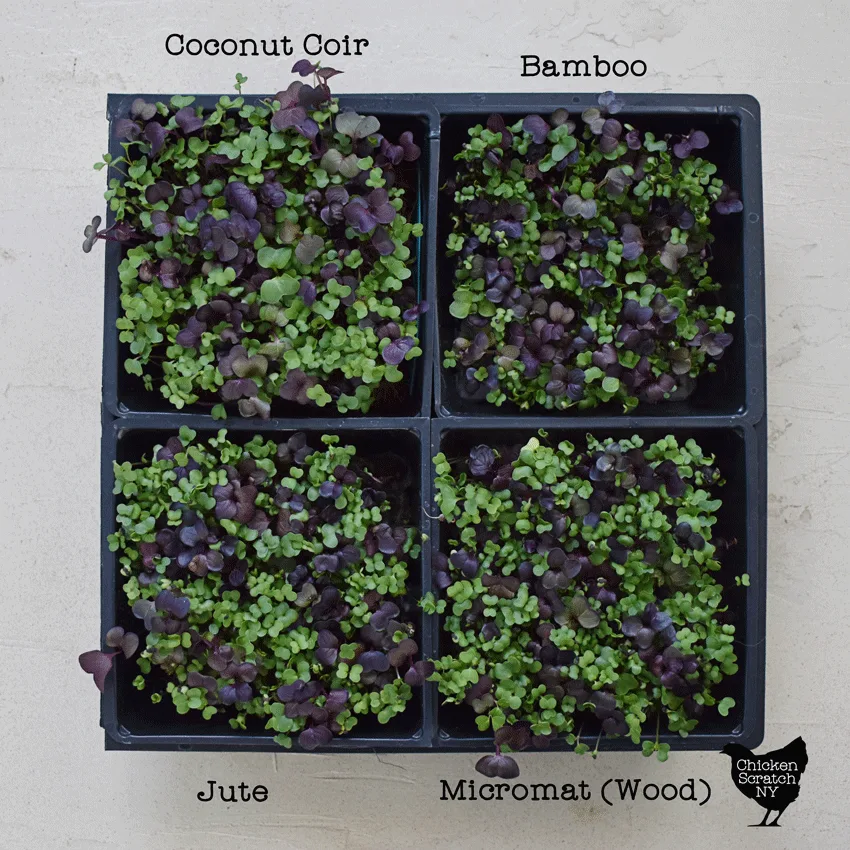
There is a bit of overlap with the spicy mix, specifically the broccoli and kohlrabi, but I thought I had a better chance of getting my kids to eat the less spicy greens. This mix also contains radishes which have much larger seeds.
If you’re looking for a mild mix with some crunch and flavor this is a great option. I was able to absolutely stuff my sandwiches with the microgreens without a tiny hint of the regret I had from overdoing the Daikon microgreens!
I set the tray with the Spicy mix under a grow light and the tray with the Superfood mix next to my south-facing sliding glass door.
Windows aren’t a great source of light for indoor gardening in New York, our days are too short but I wanted to give it a shot.
The trays grew at more or less the same pace but I had to turn the trays in the window a few times a day or they started to lean really hard to the window. This wasn’t an issue with the tray under the grow light.
Daikon Radish
For the last test, I wanted to stick to a single seed type and I picked Daikon Radish. I’ve been a big fan of growing radishes for a long time even though I don’t particularly care for the flavor.
Learn more about Growing Radishes and 5 Reasons you Need them in your Garden
There was a note in the description about daikon radish sprouts having a less aggressive flavor so I figured I’d give them a shot (after eating quite a few I can’t say that I notice them being less assertive than other radishes).
The other reason was I wanted to test growing the same seeds as sprouts and microgreens. I love a good multi-tasker!
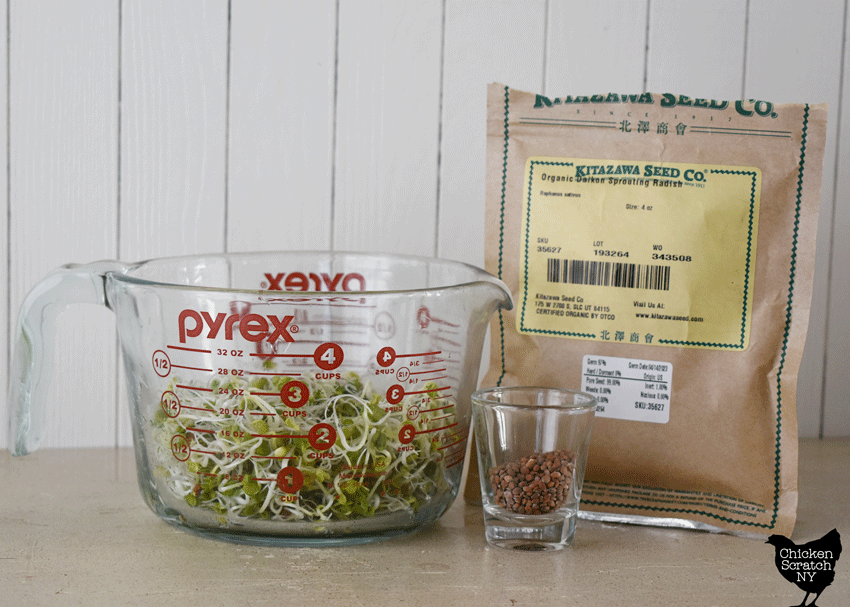

To kick off the experiment I started a tablespoon in a quart-sized mason jar with a seed-spouting lid and a 6-hour soak. After draining the seeds I do a rinse 2 or three times a day when I remember.
I prefer to use wide-mouth quart-sides canning jars for my sprouts, the square sides of the jar mean I can sit it on its side without worrying about it rolling off the counter and going on a journey.
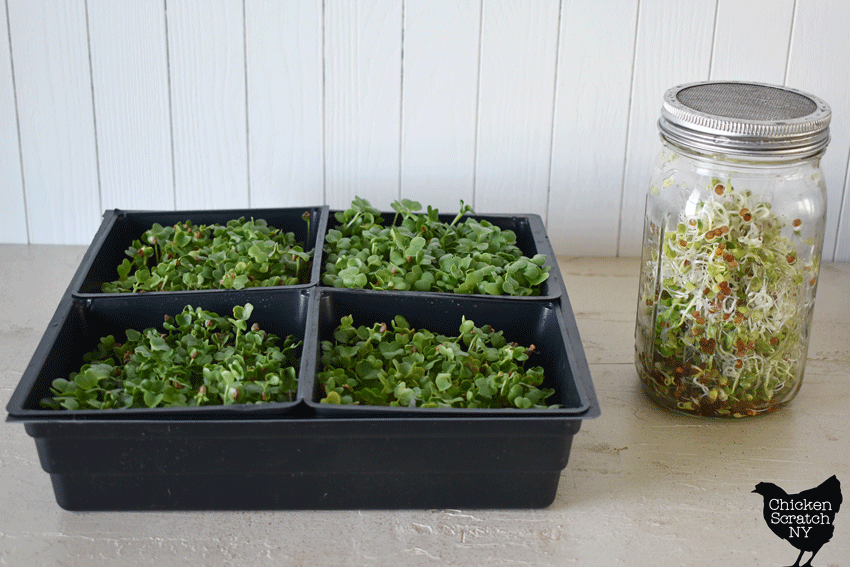

My favorite sprouting lids are a stainless steel mesh screen that you hold on with a canning ring but you can also find one-piece plastic options.
Back to the microgreens, I added a scant teaspoon (slightly less than a level teaspoon) to each 5×5 tray with the different hydroponic growing mediums.
Radish seeds are a lot bigger than the small brassicas and usually large seeds do better with a bit of soak but I was done soaking things so they went right from the seed package into trays.
I covered the trays with a set of empty 5×5 trays and stuck them in the corner, misting daily for 3 days until they had started growing and then I removed the covers and moved them under the grow light.

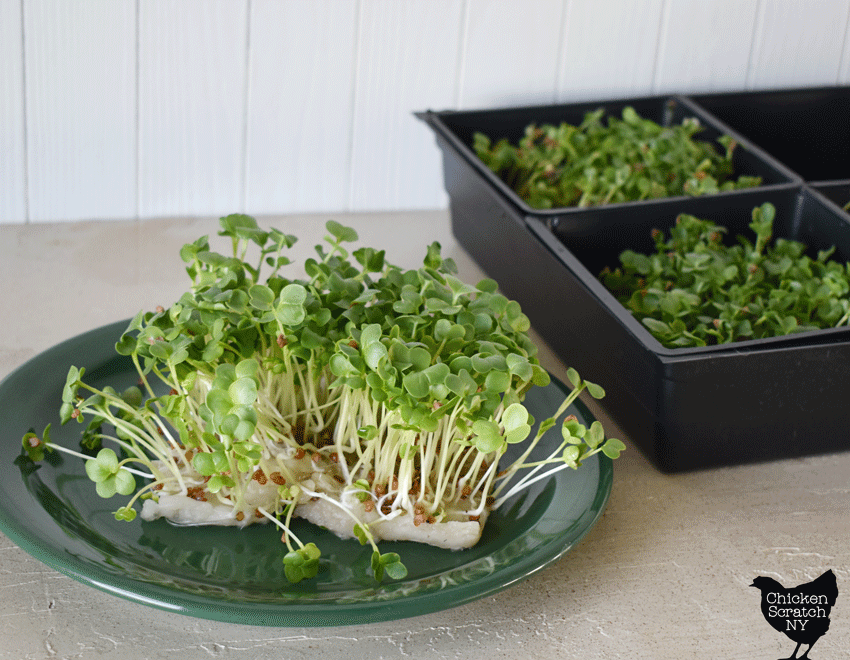
By the 5th day, the sprouts were ready to go and one of the radish trays was looking pretty tasty!
The plants were filling out nicely and had some strong stems and leaves going. I gave them one more day and then I took these photos.
Which one would you rather have growing on your counter? I know I’m on team Micromat!
It was also at this point that I realized I compared a teaspoon (microgreens) to a tablespoon (sprouts) and that I’m too tired to be a good scientist.
The leaves of the microgreens are much greener, more open, and have more of a leafy texture than the straight wet crunch of the sprouts.
I ate about a 1/4 of a tray on a wrap with chicken and ranch dressing and it was delightful! The radish on its own is.. aggressive but with everything else it was delicious.
The sprouts seemed even more aggressive than the microgreens and I ended up feeding them to my chickens. I probably would have eaten them myself if I didn’t have so many other options at the time.
Have I inspired you to grow some microgreens? Let me know what kind you’d like to try in the comments!
Check out my Vegetable Garden page for more ideas or start here: