
Growing sprouts is an easy way to add fresh food to your diet at any time in the year. All you need is the seeds, a jar, water, and a few days.


Sprouts aren’t a specific plant, it’s a life stage. Sprouts are basically newborn baby plants.
Seeds contain everything a plant needs to start growing, minus the water. When you add water and a little time those seeds turn into sprouts.
Since they’re eaten within a few days of sprouting you don’t need any growing medium like you would for microgreens or shoots. That means you can do all of the growing in a mason jar.
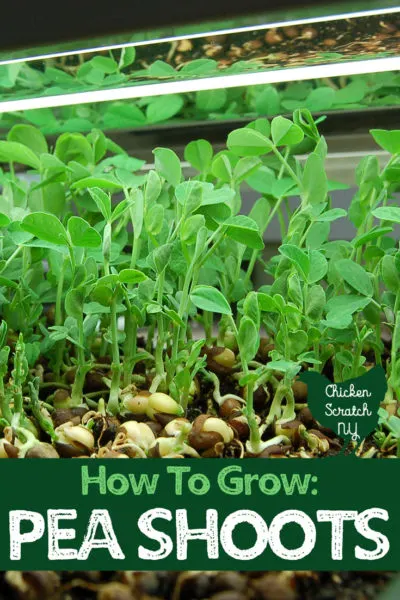
Learn How to Grow Pea Shoots Indoors
How to Grow Sprouts
There are only three steps to growing sprouts at home. The first step is to soak the seeds overnight, then you just keep rinsing until they’re ready to eat.

I like to keep my sprouts in the kitchen near the sink, out of direct sun but where I’m not going to be able to forget to rinse them twice a day.
Glass mason jars make great sprouting jars. I like to use wide-mouth quart jars, they’re the perfect size for 1 tablespoon of alfalfa seeds.
Quart-sized mason jars aren’t actually round, they have flat sides that are really stable when laid on their side. After rinsing and giving my sprouts time to drain I lay the jars on their side and gently shake them to distribute the seeds evenly across the bottom.
I made sprouts for years using mason jars and a metal mesh strainer but there are easier ways.
Mason Jar Sprout Lids
While the mesh strainer method is perfectly workable it does have its downsides, a big one being there isn’t any sort of lid on the jar and it’s easy to just dump everything into the sink (or on the floor).
There are a few different styles of lid, they all work pretty much the same way, they just screw on to the jar and let the water drain through either a metal mesh or through holes in the plastic.
My favorite sprouting lids are a two-piece all-metal set, there is a metal screen and then they’re held onto the jars with a regular canning ring. The only thing you have to pay attention to is the mouth of the jar, they come in regular or wide-mouth.
You can also buy sprouting lids that have legs on them to hold the jars up off the counter for easy straining. I bought a set of these and while they work I did have a few issues with them and I’m just as happy with my plain 2 piece metal lids.
The first issue I had was when draining the seeds, if you just set the jar down the sprouts form a mat over the mesh and stop the water from draining at all. The second issue came from leaving the jar standing up all the time, it ended up with lots of condensation and I feel like it would have gone moldy if given the chance.
I have seen special stands that hold the jars are a 45-degree angle for drainage and better airflow but I usually just lay my jars on their sides (with no lid) or stick them in my dish strainer with the lid facing down.
If mason jars aren’t your thing or you’re afraid of breaking glass you can buy a Sprouter. This option from Botanical Interests is made from plastic and has 2 levels for sprouts, optional divers, and a base to catch the water.
Grow Sprouts

Grow your own sprouts at home for fresh and delicious vegetables in no time!
Ingredients
- Sprouting Seeds
- Water
Instructions
- Add 1 tablespoon* of seed to a clean quart-sized mason jar and enough water to cover seeds by one inch for small seeds and 3x the height of the seeds for large seeds like mung beans.
- Allow seeds to soak for 8 hours or overnight
- Drain seeds and rinse with fresh water
- Rinse by filling the jar with cool water and swirling it around the seeds and then draining
- Keep the jars out of the direct sun in a warm room rinsing at least 2 times a day
- Sprouts are ready to eat when the leaves turn green
Notes
*One tablespoon of alfalfa seed will yield approximately 4-4.5 cups of sprouts. Yield will depend on the type of seeds you are using
Use sprouting seeds that have been tested for bacterial contamination
Harvest time depends on seed variety, check the packet for specific times and amounts
Recommended Products
As an Amazon Associate and member of other affiliate programs, I earn from qualifying purchases.
![Ball Wide Mouth Mason Jar 32 oz [6 Pack]](https://m.media-amazon.com/images/I/4107pM2hYKL._SL500_.jpg)


Cleaning Sprouts
One of the most annoying things about growing sprouts is cleaning out the seed casings. With smaller seeds like alfalfa or broccoli, it’s not as annoying to just eat them (even if the dark color isn’t that aesthetic) but with larger seeds like fenugreek or beans, they can be irritating.
Seed casings can also cut back on the storage time of your sprouts, they hold on to a lot of water and make it hard to keep things from getting swampy.


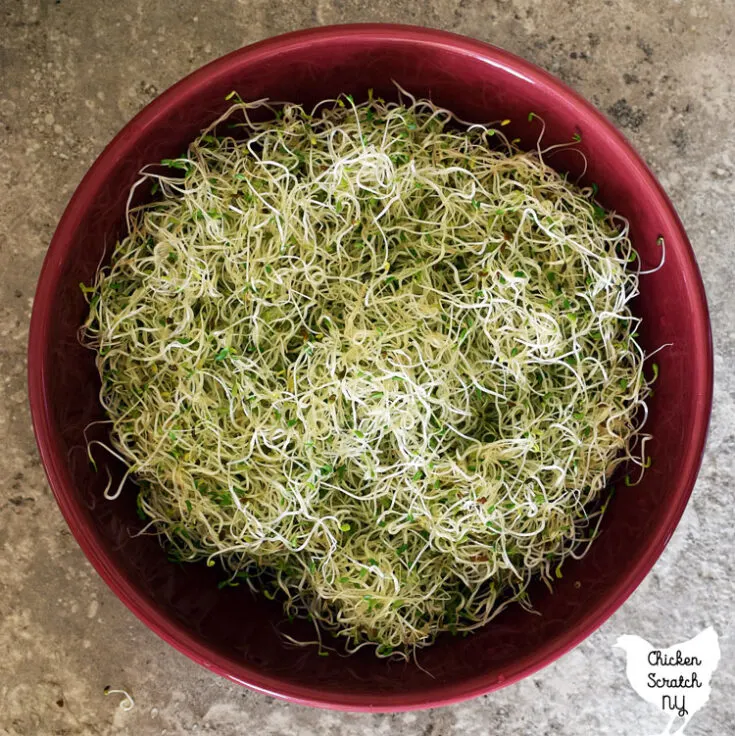
The best way I’ve found is by filling a large bowl with cool water and using your hand to vigorously swish and swirl the sprouts around the loosen up the seed casings and hopefully let them float to the top or sink to the bottom (yes, they do both). Then you can scoop them out using a mesh strainer.
In my experience, the sprouts tend to stick together in a giant mass when you dump them out of the jar (another reason wide mouth jars are the best!). Use this to your advantage and gently grab that clump and swish it in the water then pull it out and scoop out the seed casings.

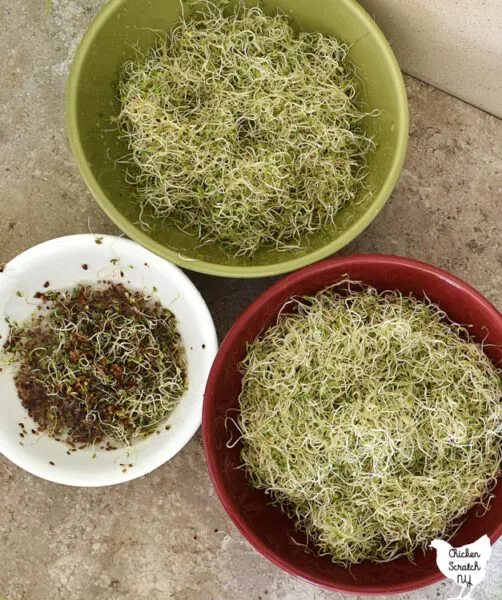
Do this a few times and you’ll have most of the seed casings, you’ll never get all of them! You’ll drive yourself crazy trying so unless you really like playing in giant bowls of water just do it a few times and then call it quits.
Storing Fresh Sprouts
Sprouts should be eaten pretty quickly, they are living plants and they’ll keep growing until they run out of that seed energy, and then they’ll die.
After your sprouts have reached your desired size give them a good rinse and move them to the fridge. The cool temperature and darkness will slow their growth.
If you’re growing your sprouts in mason jars just can just move the whole jar to the fridge. Sprouts should be eaten within a week, toss them if they get moldy, slimy, or start to smell off.
Homegrown Sprout Safety Concerns
When you’re going to grow your own sprouts it’s recommended that you start with seeds intended for sprouting. Regular garden seed might be treated with antifungals or contaminated with bacteria.
All seeds have the potential to be contaminated with bacteria but reputable sources for sprouting seeds will test them for E. Coli. Listeria, Staph, and Salmonella. Even with the extra testing, it’s recommended that people with compromised immune systems don’t eat sprouts unless they’re cooked.
As a person who gleefully eats homemade Caesar dressing made from raw eggs, I also eat my sprouts raw. It’s a decision you need to make for yourself.
If you are interested in learning more about the safety aspect of growing sprouts at home check out this article from UC Davis that describes in detail how to grow sprouts safely and how to disinfect sprouting seeds.
Types of Sprouts
The world of edible sprouts is surprisingly large. Like I said in the beginning, “sprouts” is a life stage and doesn’t refer to any specific plant.
You can sprout seeds from the onion family, the brassica family (radish, broccoli, etc), and the legume family (alfalfa, beans, lentils, etc). Considering how different the plants are there is some variation in how long they take to grow and the yield but the growing process is the same.
Alfala
Alfalfa sprouts are probably the most popular next to bean sprouts and the ones you’ll most likely find in a store.
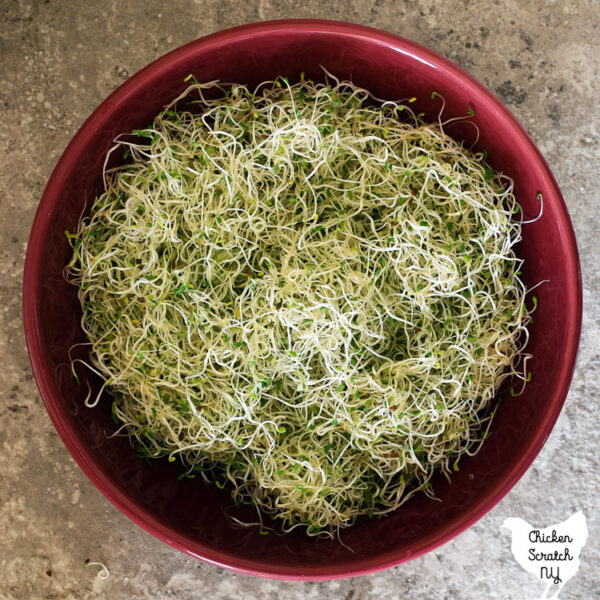

Alfalfa seeds are tiny but don’t let that fool you! One tablespoon of seeds will turn into a full quart-sized jar of sprouts.
They have a very fresh, green flavor, a little bit like fresh snap peas. The sprouts are tiny but surprisingly crunchy and make a delicious snack.
Beans
If I had to guess the most popular sprout I’d put my money on bean sprouts. There are several types of beans grown as sprouts including Mung Beans, Garbanzo Beans, and Lentils.
Bean sprouts are the chunkiest and crunchiest of the sprouts. Mung bean sprouts are popular in Asian cooking and make a tasty addition to a stir fry.
You can eat bean sprouts 4-6 days after soaking, when the seeds have swelled, even before the appearance of the root tip. Or when they reach about an inch in length.
Brassicas
If you’re at all familiar with growing a vegetable garden you already know that the brassica, cole or broccoli family is gigantic. This family includes broccoli, mustard, kohlrabi, cabbage, radish, cauliflower and more.
One thing they all have in common is a stronger flavor than other types of sprouts. If you’re looking for some bite with your fresh sprouts this is a good place to look!
Along with with the peppery flavor the brassica sprouts are also some of the prettiest, with reddish or purple tints on the leaves. They’re a great option if you’re looking for an attractive and flavorful sprout.
Radish sprouts are the fast-growing brassica sprout, they’ll be ready to harvest in 3-6 days or when the leaves turn to green (or greeny-purple depending on the variety).
Learn more about Growing Radishes and 5 Reasons you Need them in your Garden
Broccoli Sprouts, Kohlrabi Sprouts, and Kale Sprouts all take a bit longer and they will be ready to harvest in 5-9 days.
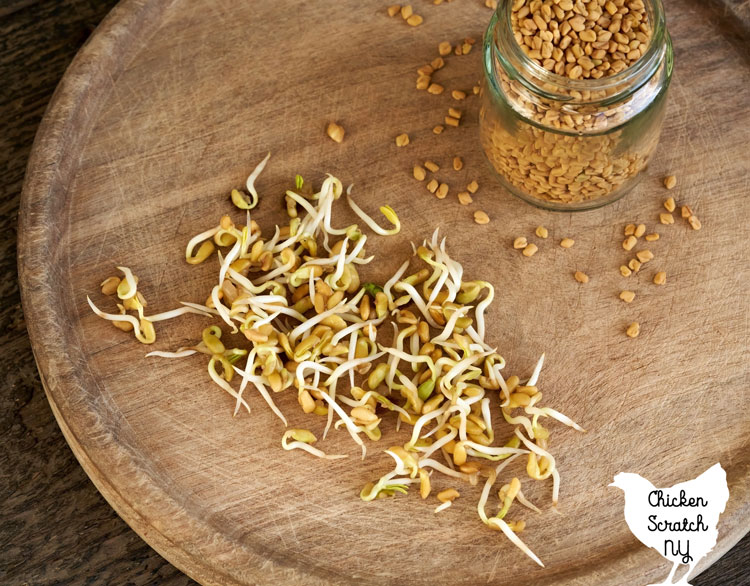
Fenugreek
Fenugreek is an uncommon sprout but they are quite tasty and they can serve an extra special purpose. Fenugreek has been clinically proven to increase breast milk supply.

I’ve spent about 3.5 years of my life nursing my two kids and eating fenugreek was something I started doing to help increase my supply after I went back to work and had to pump. I hate licorice and all of the milk supply teas I found had a strong licorice flavor.
On the other hand, fenugreek tastes like maple, it can be used to create artificial maple flavor. If you eat too much you can even start to smell like maple.
Fenugreek can cause uterine contrations so avoid this one when you’re pregnant.
You can have your own fenugreek sprouts quickly, in 2-4 days. I do recommend doing a good final soak with these guys to get rid of the large seed casings.
One tablespoon of seeds will give you about 1/2 cup of sprouts and you can eat them at anytime, they will be most tender when the roots are 1/2 to 1 inch.
Onion
Unsurprisingly, onion sprouts taste like onion. They have a pleasant, mild flavor and lack the actual leaves that other types of sprouts grow, instead, they look like long thin lime-green lines.
Onion sprouts take the longest time to grow, 12-14 days versus less than a week for all the other types. One tablespoon of seeds will give you 1.5-2 cups of fresh sprouts.
Sprouting Seed Mixes
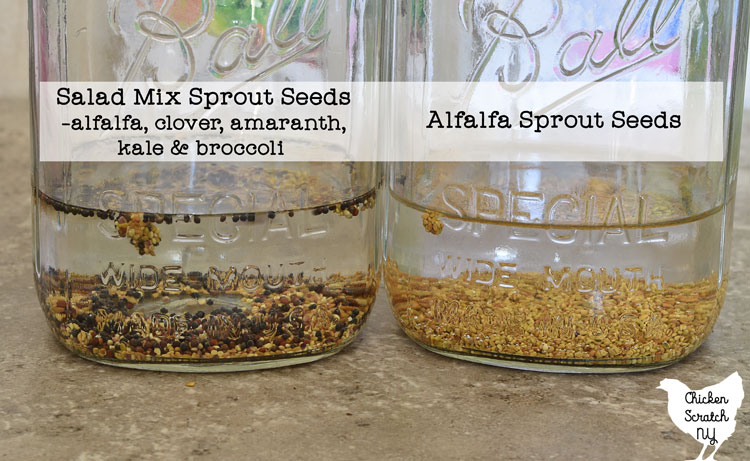
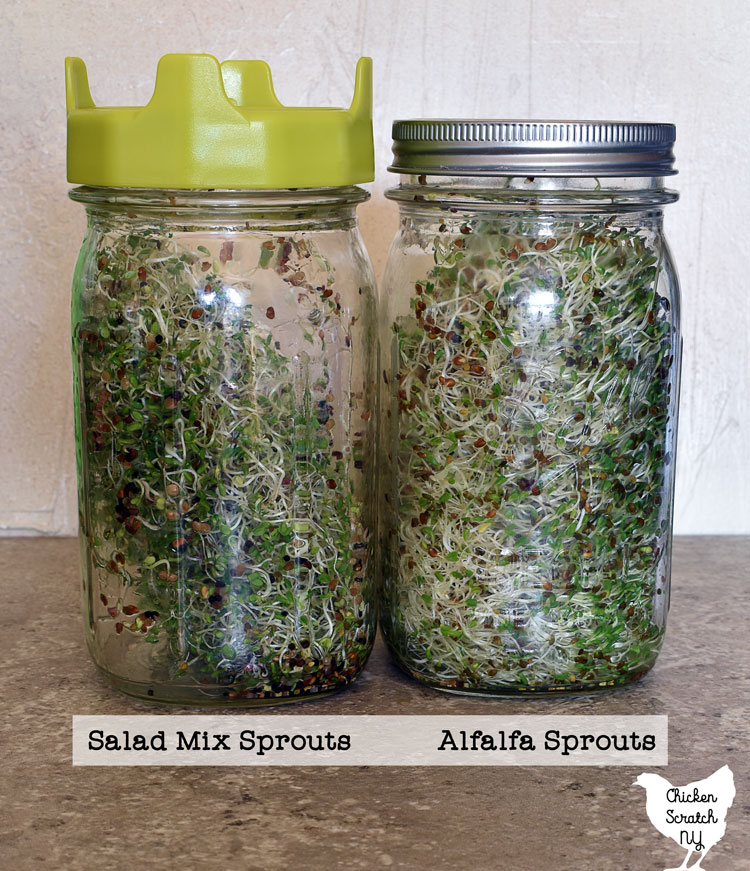
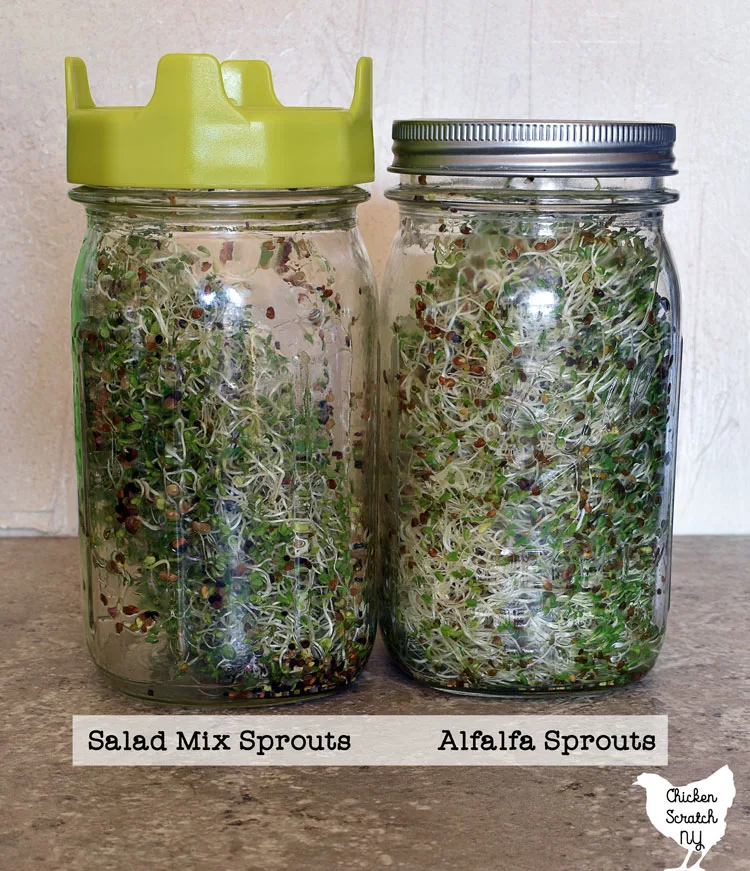
If alfalfa sprouts are a bit too boring but the brassica sprouts are just too much, you should try a sprout seed mix. Just like a regular seed mix, each packet contains a mix of varieties.

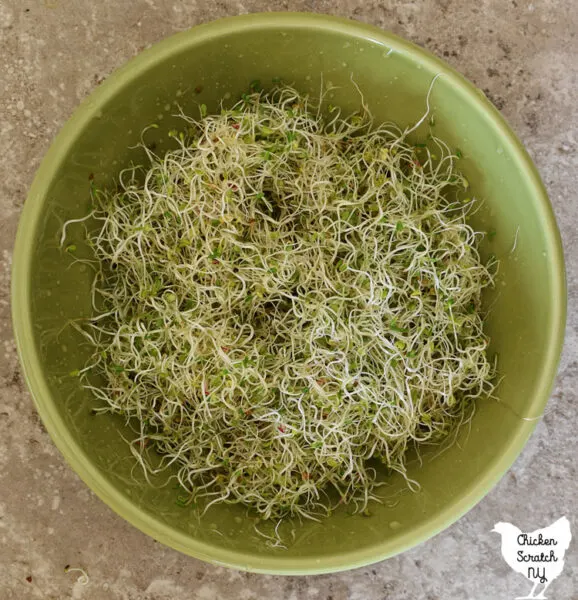
I grew the Salad Mix Sprouts for some variety. This mix has a base of alfalfa and clover but it adds in broccoli, kale, and bright red amaranth. This blend is ready to eat when the leaves turn green (or red) in 5-7 days.
If you want some more bite check out the Sandwich Sprout mix, this mix contains alfalfa along with red clover and radish for extra crunch and flavor. 100% radish sprouts are too much for me but mixed in with the other stuff I really liked the little bite. The sandwich mix is ready to eat when the leaves turn green in 4-6 days.
How to Eat Fresh Sprouts
With the exception of bean sprouts, most homegrown sprouts are eaten fresh. After my final rinse, I transfer them to a bowl and between the kids and me, they go pretty quickly without any additions. Especially in the winter, having fresh food is hard to pass up.
This morning my 7-year-old asked if she could eat them for breakfast (except she didn’t remember what they were called and asked me for the “long green things with the seed on the bottom” 8 times before my 1/2 awake brain figured out what she was asking for.
Sprouts are also a classic sandwich topping, they add the fresh crunch of lettuce but a better flavor and you can grow them in your own kitchen! And don’t be shy with them, you get 4+ cups of alfalfa sprouts from a tablespoon of seeds, add a nice thick layer of sprouts to your sandwich.
They’re equally as good on a tuna, ham, or turkey sandwich, or on a toasted bagel with a thick layer of cream cheese and a thicker layer of spicy sprouts. I would leave them off the PP&J though.
You can also add them to a salad or if you grow a big enough batch, turn them into their own salad by tossing them with a light vinaigrette. Don’t let the salad options end with lettuce either, toss fresh sprouts into a pasta salad for a hit of freshness.
For best results spread the sprouts out on a clean kitchen towel or paper towel to get rid of any extra moisture before adding the dressing. Test out all your favorite dressings but keep in mind the delicate nature of the sprouts before you drown them in 45 pounds of ranch dressing.
You can also add sprouts to just about any dish you might garnish with fresh herbs. You can toss a handful on a pizza when you pull it out of the oven as you’d do with basil.
I like to cut slices of bell pepper, dip them in hummus, and top with a hearty serving of fresh sprouts. The bottom line is sprouts are easy to grow at home and it’s easy to experiment and try new things.
Check out my Vegetable Garden page for more ideas or start here: