


Before you bring your first chicks home from the feed store or head to the post office to pick up a very loud box it’s important to have your brooder set up and ready to go.

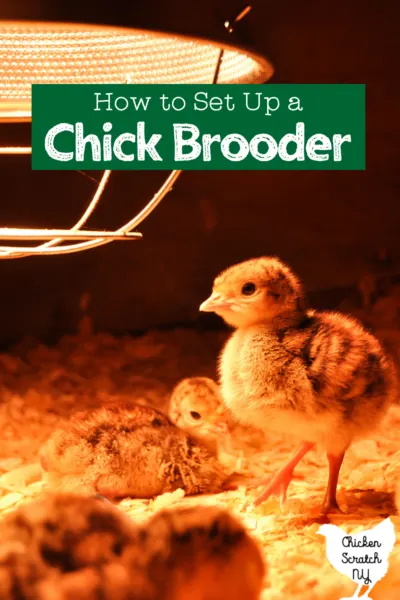
A brooder will be the home for your baby chickens, turkey poults, ducklings, goslings, or keets from the time you take them out of the box or incubator until they move out into the coop.
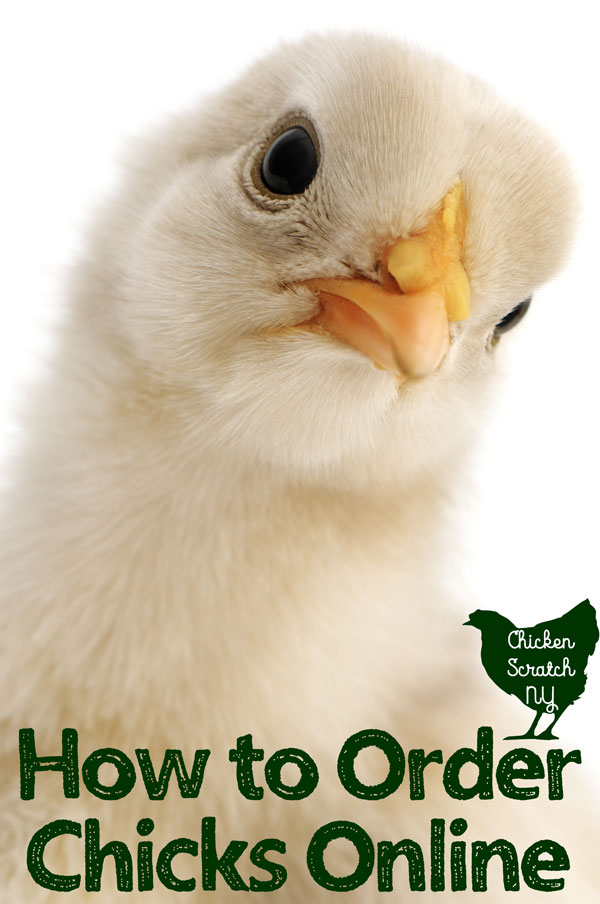
If you order online you should get a ship date well ahead of time and either an email or phone call when the chicks ship. You should expect a call from the Post Office very early on the day the chicks arrive.
When eggs hatch under broody moms they usually stay in the nest for a few days. The babies live off the remains of their yolk, this is the biological reason they can survive shipping immediately after hatching without food or water.
Read more about Ordering Chickens Online
When I lived in another, less rural town I would get a call very early in the morning but where I live now I got called a little after 7 am. Make sure you have the brooder set up and heated when you go to get the chicks.
Knowing when your chicks are coming in should give you plenty of time to prepare, if you impulse buy them at the feed store because you made the mistake of going into TSC with your kids during chick days (which has never happened to me…) you’ll need to get everything together much faster.
Read more about Chick Days at Tractor Supply and buying Live Chicks in Store
Setting Up a Brooder
There are a lot of ways to set up a brooder, what you decide on will depend on the type of bird you’re raising and how many you have.
It’s possible to mix turkey poults and chicks (even guinea keets if you’re raising smaller chickens) together in one coop but you should always keep waterfowl in their own brooder tub.
Read more about Raising Turkey Poults (aka baby turkeys)
Ducklings and goslings grow much quicker and they’ll need a lot more room per bird earlier and they make a huge mess in the brooder. Seriously, the whole thing will be a soggy mess from week 3 on.
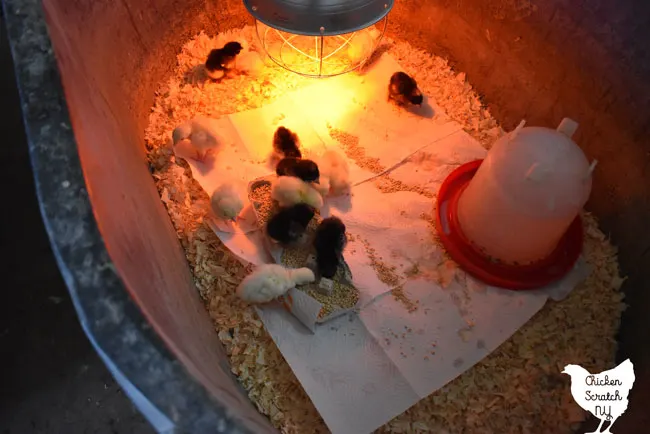
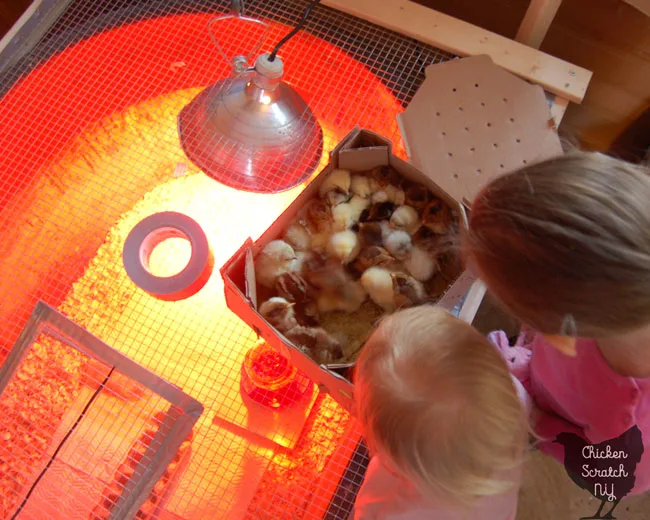
I use a large black 110-gallon livestock tank for my chicks. It’s big enough to hold a decent number of chicks, it’s sturdy enough to last forever and they’re easy to clean.
It’s important to keep your tub in a draft-free area, your chicks won’t have a mama hen to protect them! Tall sides will offer some protection but it’s best to keep them away from breezes if you can avoid them.
I built these hardware cloth covers for my brooders after a violent duckling massacre caused by rats that got into the breezeway where I keep the chicks.
I’d never bothered in the past but it only takes one pile of dead ducks to change my ways forever.
The covers also have the added benefit of keeping the chicks in the brooder, a few weeks in they’ll turn into tiny Houdini’s and they’ll start parkouring their way out of the brooder.


Unfortunately, they also make it really hard to take pictures… It’s a pain to take off right now because the light runs through it so I’m sorry for that.
I took this picture before I added in the waterer or any of the food but you get the idea.
The cover is built from 2×1 and 2×2 boards with 1/4 inch hardware cloth. I covered the edges of the hardware cloth with duck tape and used my super fancy pneumatic stapler to attach the cloth.
That stuff is sharp, miserable, and very wobbly but it does the job and the covers have lasted for years.
When I start my chicks early in the year I have to use lights for heating which means cutting a hole in the wire so I could get it low enough to hit the desired temperature. It makes it almost impossible to remove the lids so I had to add another door to get access to the birds and their food and water.
Hardware cloth can be pretty vicious so I added more duct tape around the cut edges, and then made a ‘door’ to cover the hole out of more hardware cloth edges in duct tape. I attached it with a zip tie and I keep a scrap of wood and a roll of duct tape on top to keep it closed. I’m a classy lady.
A few years ago I bought an air compressor combo kit with a stapler and two nailers. I’ve gotten my money’s worth with the stapler alone! That’s how I rebuilt the chicken coop, fenced the vegetable garden, and built the chicken run without going crazy.
Keeping Chicks Warm
Chicks can’t maintain their own body temperature until they are fully feathered, usually around 6-8 weeks. I try to start my chicks in mid to late April so they’re up against some pretty chilly New York weather.
You have two options for heating chicks, you can use heat lights or a plate brooder. They are very different in practice but they serve the same purpose.
I use lights in my brooders for a few reasons, the main one being plate brooders aren’t reliable in colder temperatures and if my (unheated but well insulated) breezeway gets down to 50 degrees the plate brooder isn’t warm enough.
The other reason is I tend to raise a lot of chicks at once and they outgrow the plate brooder really quickly. However, if you’re starting 3 chicks in your bathroom it’s a great option.


I use 250 watt red bulbs in a metal light fixture that I connect to eye bolts in the ceiling rafters with chains. These bulbs are a fire hazard and they NEED TO BE SECURED you need to use the metal guard so if the bulb does fall it won’t break.
The bulbs are 250 watts and you adjust the temperature by raising and lowering the bulb. That’s another reason you want to get everything set up well ahead of time. It can take some fiddling to get everything set up correctly.
ALWAYS KEEP EXTRA BULBS ON HAND
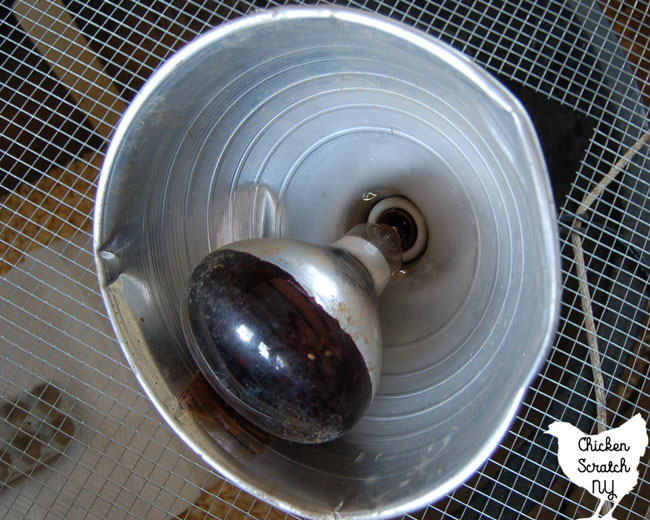
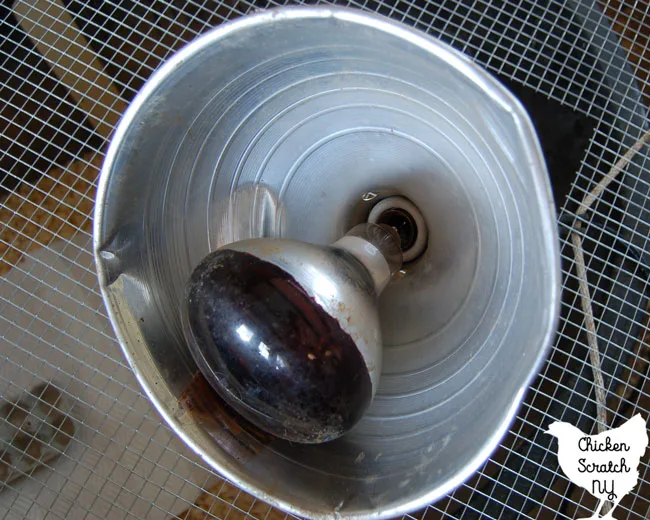
You never know when one will blow or even fall apart. That’s what happened to me on Monday when I was setting up. I went to adjust the light and the bulb separated from the socket. I unplugged the bulb and used pliers to remove the old bulb.
To check the temperature you’ll need your tub, set up with bedding, the heat lamp, and a thermometer. Confession time, I never keep a thermometer in with the chicks. If you keep a thermometer down with them they just poop all over it and you can’t read it anyway!
You’re supposed to do it but I find it much better to watch the chicks and adjust the light until they’re comfortable.
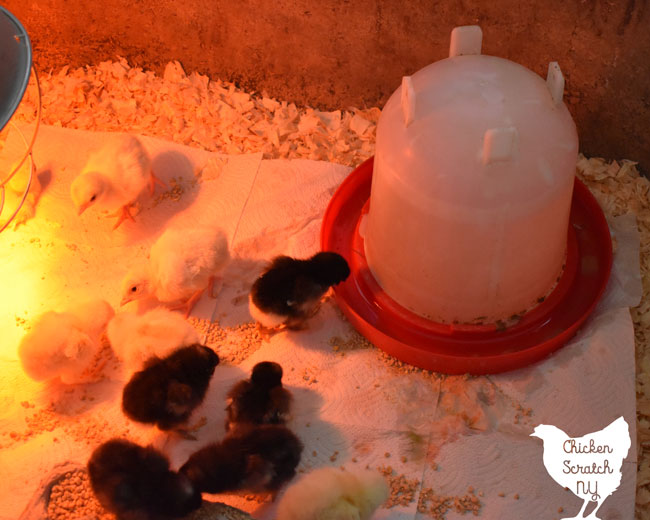
If the chicks are all clumped together crying their fluffy heads off they’re too cold. If they’re pressed to the edges of the tub as far away from the light as possible, it’s too warm. They should be scattered around doing chick things, like eating, sleeping, and pooping.
Gradually raise the lights each week, aiming for about 5 degrees. This lowers the temperature of the brooder and helps the chicks adapt to lower temperatures as they age.

Sleeping chicks very, very often look dead. You’re going to scare yourself once or twice until you get used to it. Sometimes they lay down all stretched out. They’ll usually sense you coming and jump up right as you’re about the plan the funeral.
Adult chickens play dead too, usually when dust bathing in the sun. I’ll never forget the day my sister came into my house almost in tears because she thought I had a pile of dead chickens on my deck. Nope, just a bunch of lazy fuzz butts that ripped open a bag of potting soil and took a dust-covered nap.
Set up your brooder tub so the light is on one end, put the food and water in the center, and then you a more open area on the other end.
If you think about the way chicks are raised by hens, they spend a lot of time out and about in the world where it’s not a perfect draft-free 95 degrees.
Read more about Broody Hens
Putting the light on one side creates temperature zones, where it’s warmest under the light and gradually gets cooler as you move to the other end. That’s a big reason it’s important to have a large brooder space, so the chicks can get away from the heat if they want to.
Brooder Bedding
Bedding plays an important role in the brooder, it keeps the chicks from standing in poop, provides traction, and helps to soak up any spilled water.
I use a thick layer of flaked wood shavings (white bag at TSC) for a nice fluffy chick bedding., The bags are easy to store and you can clean up any spills with a broom.
It’s important to check below the top layer of the bedding as time goes on. The poop and uneaten food filters its way down to the bottom of the tub where it stays off the chicks but it can get really gross down there without being obvious from the top.
I cover the shavings with paper towels for the first few days (I toss them when they get poopy) to make the food and water more obvious and easier to find.
I’ve seen people use towels but I don’t recommend them. Chickens love to scratch and dig from the very beginning and they can get their toes caught in the loops of the towels and break them or even lose a toe.
In a pinch I’ve used fleece blankets for chick bedding, the material isn’t slick and there are no loops to get trapped in. It’s not a great option for the long term because it gets dirty really quickly but it will work in an emergency.
If you are raising ducks or geese be prepared to change the bedding daily, they will spill all of their water and even if the top layer looks dry (thanks to the heat lamp) it’s going to be a disgusting, smelly soup at the bottom.
Do not use newspaper or anything slick for the bottom of the brooder. Chicks aren’t very strong and being kept on a slick surface can cause splay legs, where the legs stick out to the side instead of staying under the bird.
Other things can cause splay legs; I had a batch of semi-abandoned goslings that had to finish hatching in the house that ended up with splay legs. After a few days of vet wrap holding their legs in place, they all ended up fine.
While it is treatable you (and your birds) are better off avoiding it in the first place.
Find out what you need in a First Aid Kit for Chickens
You can use fabric like old fleece or felt blankets but avoid towels with loops. If the chicks get to digging and scratching they can get one of those loops wrapped around a toe and end up losing it.
Feeding and Watering Chicks
Chicks aren’t that smart and they don’t have a mom around to show them the ropes so it’s a good idea to give them some assistance in the beginning.
Some people cover all of the bedding with paper towels to stop them from eating it but I just cover the center where the food and water are. I like using paper towels because I can just toss them in the compost when they get gross.

Feeders
You can buy plastic or metal feed trays with head holes designed to cut back on food waste but I use old paper egg cartons for feeders. I rip off the tops and the side flaps and fill them with chick crumbles.
They don’t have a top so there is a little more food waste but I don’t have to scrub anything. When the feeder gets gross I just toss it in the compost and grab another.
For the first day or so I scatter a little bit of feed on the paper towels to entice them. I don’t have any evidence that it helps but I do it and I don’t have any reason to stop.
Chick Starter
Chick Starter can be purchased at tractor supply or a local feed store in small or large bags. Chick starter is specifically made for growing babies and should be the main source of food for the first 6 weeks. I feed starter until I move them into the main coop.
If you are raising chicks and turkeys or guineas in the same brooder you need to feed them game bird starter, which has a higher protein content. The chicks can tolerate the higher protein but the poults and keets can’t handle the lower protein found in chick starter.
On the flip side, geese and ducks shouldn’t be fed game bird starter. Instead look for duck starter or use regular chick starter and add extra niacin.
Medicated Chick Starter
When it comes to buying chick starter you can buy medicated feed, which has a coccidiostat (Amprolium) in the food, or regular, unmedicated food. Up until last year, I had never purchased a single bag of medicated starter.
Then I had my very first outbreak of coccidiosis and I had to pick some up. Coccidiosis is a potentially fatal disease caused by a parasite that can wipe out a whole batch of chicks.
The early signs of coccidiosis are a hunched ruffled appearance, inactivity and the birds will be standing off by themselves. If you notice your chicks showing these symptoms start them on medicated feed OR start a regimen of Corid in their water immediately.
Over time chickens develop a natural immunity through exposure and unless there is an underlying condition that affects the immune system adult mortality is rare.
Coccidicosis is usually found in overcrowded brooders, that’s what happened to me, the weather turned on me and our incubator babies ended up in the house a few weeks longer than they should have been.
I switched the whole group to medicated feed and most of them pulled through,but we did lose two of the smaller chicks.
One of those often repeated “common knowledge” facts about medicated chick starter was that you couldn’t feed it to ducklings. It turns out that that used to be true but they’ve changed the drugs in medicated starter and they no longer cause issues in ducks.
I still prefer to feel unmedicated feed and that’s what I use unless there is a problem.
Waterer
Along with a warm, dry space and food, water is critically important for chicks. In the beginning, I give them warm water, not hot but warm. They don’t have a lot of body mass and giving them cold water can chill them really quickly.
Read more about Caring for Chilled Chicks After a Rough Shipment
When you unbox the chicks dip the beak of each one into the water to get them drinking. This is also a great time to count the chicks and check them over.
I don’t know how helpful this really is, but it’s something my grandfather taught me to do and it doesn’t hurt them.

I prefer to use a quart-sized mason jar with a screw-on lid for water. Sometimes I use one-gallon gravity waterers but I think they take up too much space in the brooder.
I like to put my waterers up on a hard surface as the chicks get bigger, it helps keep the chicks from flinging as many shavings in the waterer and burying it. you don’t get as many shavings in the water. I have used flipped-over terracotta saucers or scraps of wood.
Chicks can go through a quart pretty quickly. I refill 2x a day, it’s usually down to a quarter remaining when I rinse and add more. If you are out of the house for most of the day go with the bigger waterer.
Observe from a Distance
Shipping or even the transition from the feed store to your home is a stressful experience. Don’t add to that stress them out by handling them the first day more than absolutely necessay. Give them a while to settle in.
Read more about Caring for Chilled Chicks After a Rough Shipment
Check on them throughout the day, mostly to make sure the temperature is right. They should be softly peeping, eating, drinking, zooming, and sleeping.
If you’re hearing a lot of screaming something is wrong, usually, the problem is that they’re too cold. Another sign of this is the chicks all being clumped together.
Clumping can lead to death, especially if you have smaller chicks in with bigger ones, so treat this like an urgent issue and not something to get to later.
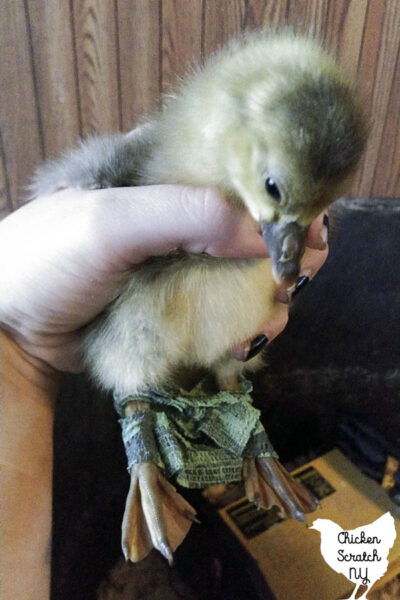
While they’re small and fluffy I do daily booty checks. You have to make sure the chicks don’t get any poop stuck on their butts covering the cloaca.
It’s easiest to see on light-colored birds and can be really easy to miss on dark-colored fluff.

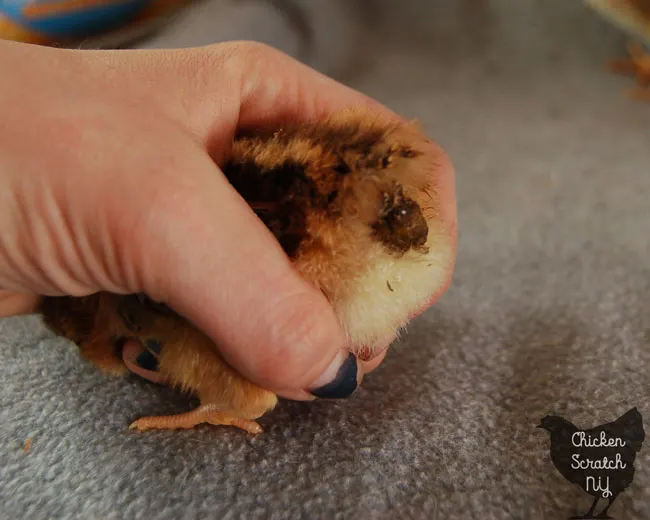
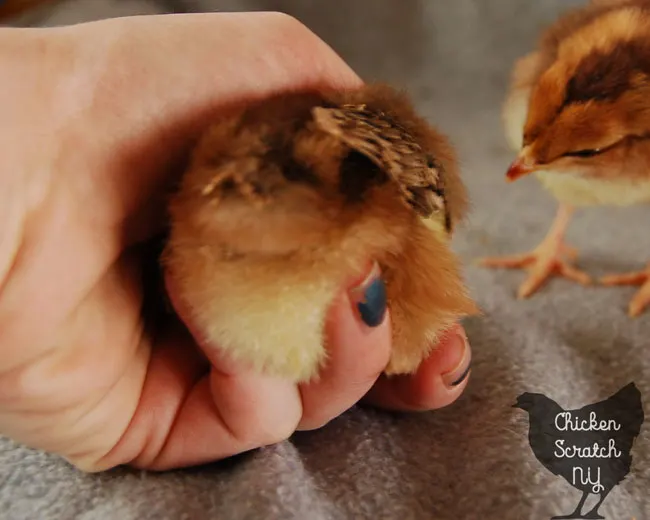
This condition is called pasty butt and it is pretty common. Usually, it will only be a few chicks and it’s caused by stress or uneven temperatures.
It’s most likely to happen in the beginning due to shipping stress but it can happen later. It starts small and then builds up until they can’t poop and have a giant honking poop nugget.
It is fatal if you don’t take care of it.
Soak the poop nugget with a warm wet paper towel to soften it up and snip it off with little scissors. Don’t try to rip it off, you could tear their skin.
Keep an eye on the bird for the next few days to make sure it doesn’t come back.
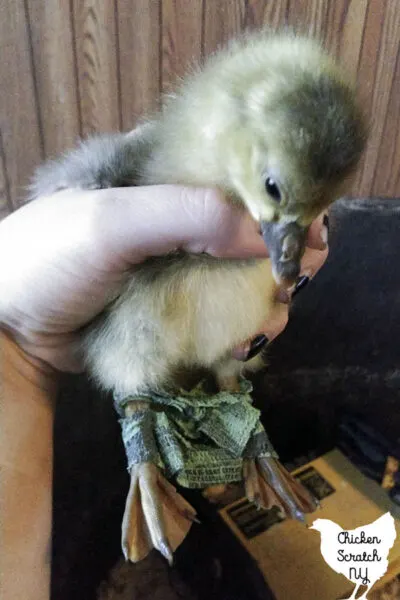
This is a healthy butt:

I hope you’re ready for your chicks! If you have any questions leave them in the comments.
Don’t forget to PIN this to your Chicken or Homesteading board!
Looking for more info? Check out my Chicken Keeping page or start here:


Deborah Vivona
Tuesday 23rd of April 2019
I'm a long time chick & hen owner and this year new batch of checks are my 4th to raise... In your pic above of the 4 mailing boxes, WHAT is the breed, the ones with the black spot outlines in white? I just lost this one...I kept it's butt washed but it just didn't thrive...today it was a week old. Two days after delivery I lost a tiny one that never thrived ...It had a leopard spot on his back...I don't know what it was either. My set up is exactly like yours. Not sure why these 2 haven't made it. I ordered these from Tractor Supply on-line, Hoover's Hatchery. 8 Chicks are thriving. (P.S. If you use your cell phone to take your chix pix, after taking the photo, go to EDIT> COLOR, and ease up on the COLOR. Then your color won't be so red due to the heat lamp. :) You can also then go to CONTRAST, and get sharper color of your chicks. :)
Alecia
Tuesday 23rd of April 2019
That picture is my surprise box from Cackle from a few years back, it had a little bit of everything in it! I do have a post on IDing chicks that you might find helpful: How to Identify Your Baby Chicks
Sadly sometimes chicks don't make it, hatching is rough business and most years I lose at least one, either from the mail order or that my bids hatch out themselves and I rarely have a reason.
Julianne
Tuesday 26th of February 2019
Great post and I'm sending my best wishes for your dog<3 I'm getting chicks this Saturday and I'm thinking a 40 or 60 watt bulb....they will be in our guest bedroom in a nice brooder...so I didn't want them too hot. I think I'll get it set up now and keep track of the thermometer before we pick them up. We're getting little Silkies since we can't "officially" have chickens here;) We'll argue that they are pets and 4-H projects for show. This was very helpful. Keep up the great work.