
Fleece blankets are an easy gift to whip up for your loved ones. You can turn some fleece yardage into a monogrammed fleece tie blanket in no time with these quick tips to make the process faster!

You can even abandon the traditional tie for a classier looking flip and twist that keeps the blanket flatter and more comfortable, thanks to a lack of knots.
I love making fleece blankets as gifts, I’d be lying if I said half the reason wasn’t the joy I get in searching out the perfect fleece pattern for the recipient. They’re also great because you don’t need to worry about getting the size right and who doesn’t love getting a blanket to cuddle under?
On a slightly gross track, if you’ve ever had a stomach bug rip its way through your family you should appreciate having a stack of fleece blankets on hand.
Lay one down over the couch, toss another over the kid and you no longer have to worry about scrubbing your entire couch every time they miss the bucket.
Fleece Tie Blanket Size
There isn’t an exact size for making a no-sew fleece blanket, I’ve made them for adults and teddy bears. The only thing that matters is your front and back pieces are the same size.
This should be simple, but printed fleece and solid fleece are often slightly different widths. So what you do is by the same length in both pieces and then deal with the excess side fabric when you’re cutting.
- Adults: 2 – 2.5* yards
- Kids: 1 – 1.5 yards
- Stuffed Animal: 12 inch – 24 inch square
If you want to add a letter buy an extra 1/4 yard of the solid fleece.
*2 yards is 6 feet, that will be long enough for the average person to cuddle under while (re)binge-watching The Mandalorian but if you’re making a blanket for a taller person you can bump that up to 2.25 or 2.5 yards without the blanket proportions getting really strange.
Fleece Tie Blanket Tips & Tricks
You’ll need to pick up fleece for this blanket, Joann’s carries a few different styles and they’re constantly on sale. Fleece is great for blankets because it doesn’t unravel when you cut it (that’s also my it makes a great monogram applique!).
Fleece is a ‘sticky’ fabric and it likes to stick to itself. That works to our advantage because once you get the fabric laid out and smoothed down the layers tend to stay together even if you’re moving it around.
Fleece doesn’t have a right or wrong side so it doesn’t matter which way the solid color fleece is oriented. I like to lay the printed fleece on top but it doesn’t really matter.
Fastest Way to Cut Fleece Strips
Last year I made one of these blankets for my daughters’ teacher, I took the fleece to work with me at the sewing studio and cut through both layers of fleece with one of our rotary knives. The whole thing was done in 3 minutes, it was glorious.
Unfortunately, most of us don’t have the fabric power tools at our disposal. The next best thing is to use a rotary blade and mat with a ruler for guidance.
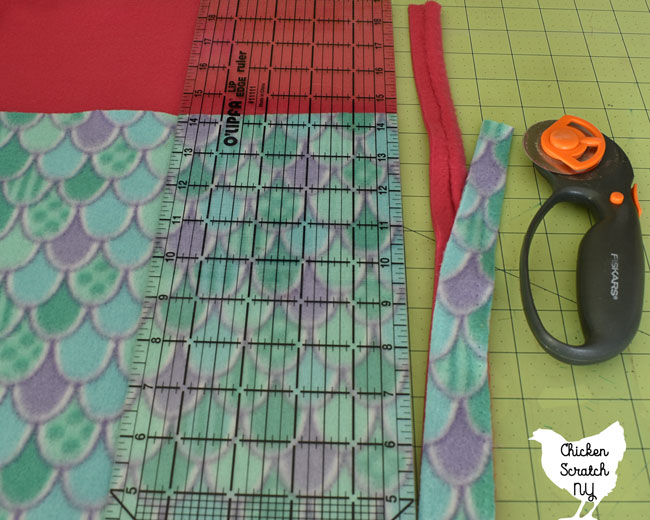

I used an 18 x 24-inch mat, I have a huge one for my quilting but it stays on my workbench. You don’t need a giant mat for this, a smaller mat just means you have to move it more.
Start by laying out both layers of fleece with the top and one side edge lined up. Place the mat underneath the layers and use the ruler and the rotary blade to cut off the selvage edges.
The selvage might be wider on one fabric that the other so make sure you’re cutting off the entire thing on both sides.
Fabric Tip: The selvage is the ugly .5-inch – 1.5-inch band on the sides of the fabric, usually featuring holes, leftover from the fabric production process.
It is often a different color or thicker weave and it is cut off before the fabric is used for a sewing project.
I did my cutting sitting on the floor, I don’t have a table big enough to hold everything (aka my sewing machine is on the kitchen table and I didn’t want to move it!) but you can do some careful folding and do this somewhere you don’t have to sit on the floor.
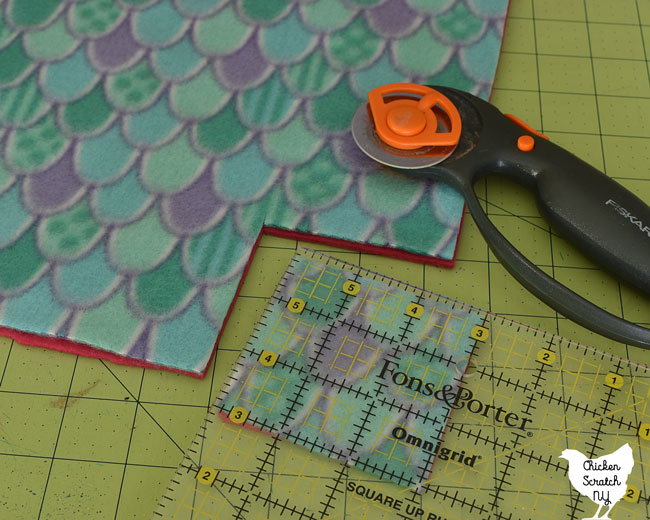
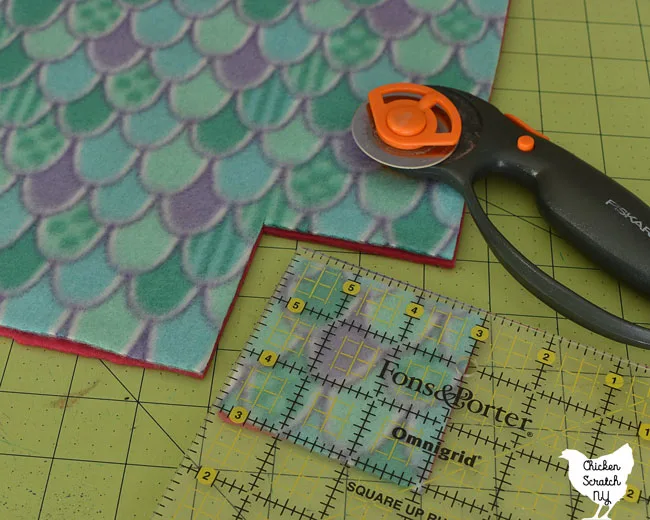
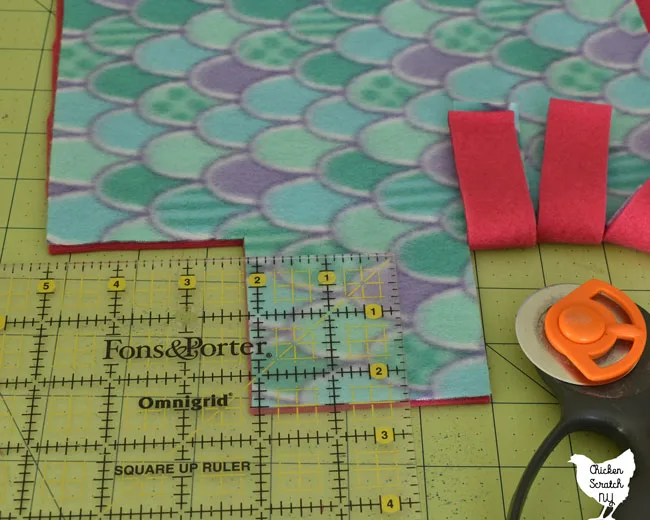
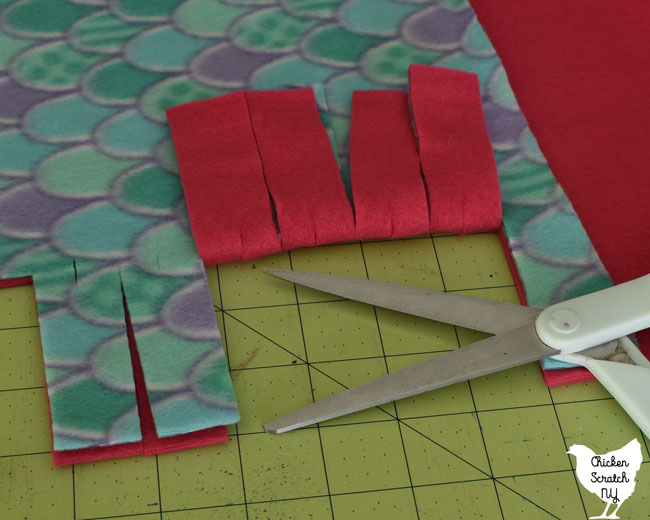
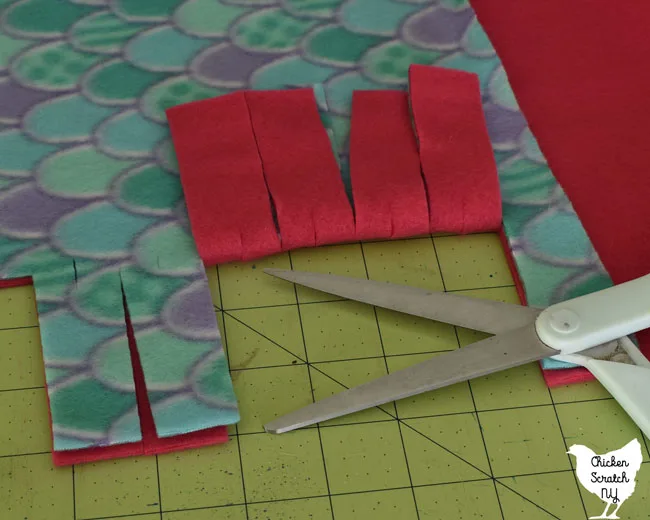
After you’ve removed the selvage cut a 3×3 inch square out of the corner. Then use the ruler to cut approximately 3-inch slices. They don’t have to be exact.
3 inches gives you a long fringe and if you’re tying the blanket it’s easier on your hands. If you’ll be flipping the blanket like I am you can cut a smaller slit but I wouldn’t go less than 2 inches.
Whatever size you’re cutting the slits that’s how big your corner squares should be. I switched to using a smaller square ruler for this, you can keep using the larger ruler if that’s all you have on hand.
I worked in sections, cutting and then flipping the layers together (I’ll get to that in a second don’t you worry) before moving on. You will find a direction that’s more comfortable to cut based on which hand you hold the rotary blade in.

I’m right-handed and I found it easier to work counter-clockwise. That way I could slide my ruler up and line up the 1-inch mark with the last line I had cut.
You might end up slightly off at the corners, it’s not a big deal just eyeball a cut in the middle for 2 slightly larger slices.
Make a Tie Blanket without Tying Anything!
So… I lied to you, I called this a tie blanket but the truth is I didn’t tie anything. The classic way to make the two-layered fleece blanket is to cut the strips and tie them together.
There are a few reasons why you shouldn’t do that:
- Tying takes more time and with a large blanket your hands will start to cramp up
- Tying makes an uncomfortable row of knots all around the blanket
- The blanket won’t lay flat
Instead of tying a billion knots we’re going to cut a little slit and pull the strip through it. I remember my mom doing the same thing with my hair in the 90’s.
The flipping method keeps the blanket flat, you don’t end up with a bubble on either side of the knots. It also creates a line of the solid back color on the front of the blanket.
Blanket Looping Tools
Unlike the tying method where you’ll only need your hands, you’ll need two tools to pull off the flip.
First up, you’ll need a sharp pair of scissors to cut a small notch. You can do this with the rotary cutter but it’s harder to control and way too easy to make a giant hole.
The second tool you’ll need is something to flip the fabric with. You can use a large paper clip, opening it up into an S shape for this. It works well but it’s a little hard on the hands because you don’t have much to grip.
The best thing I found was a bent piece of metal coat hanger. Any stiff wire would work.

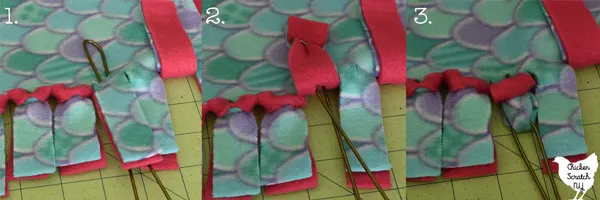
All you do is push the loop through the hole you made from the bottom (1), stick both pieces of fringe through the loop (2), and pull down through the hole (3). You might need to give the fringe a little tug to get it into place.
Then you just keep going all the way around the blanket. My 7 year old actually took over this part for me and had a blast.
We made 4 of these this year for Christmas, I did one with the paper clip method and then found the coat hanger in a junk pile and it changed my life.
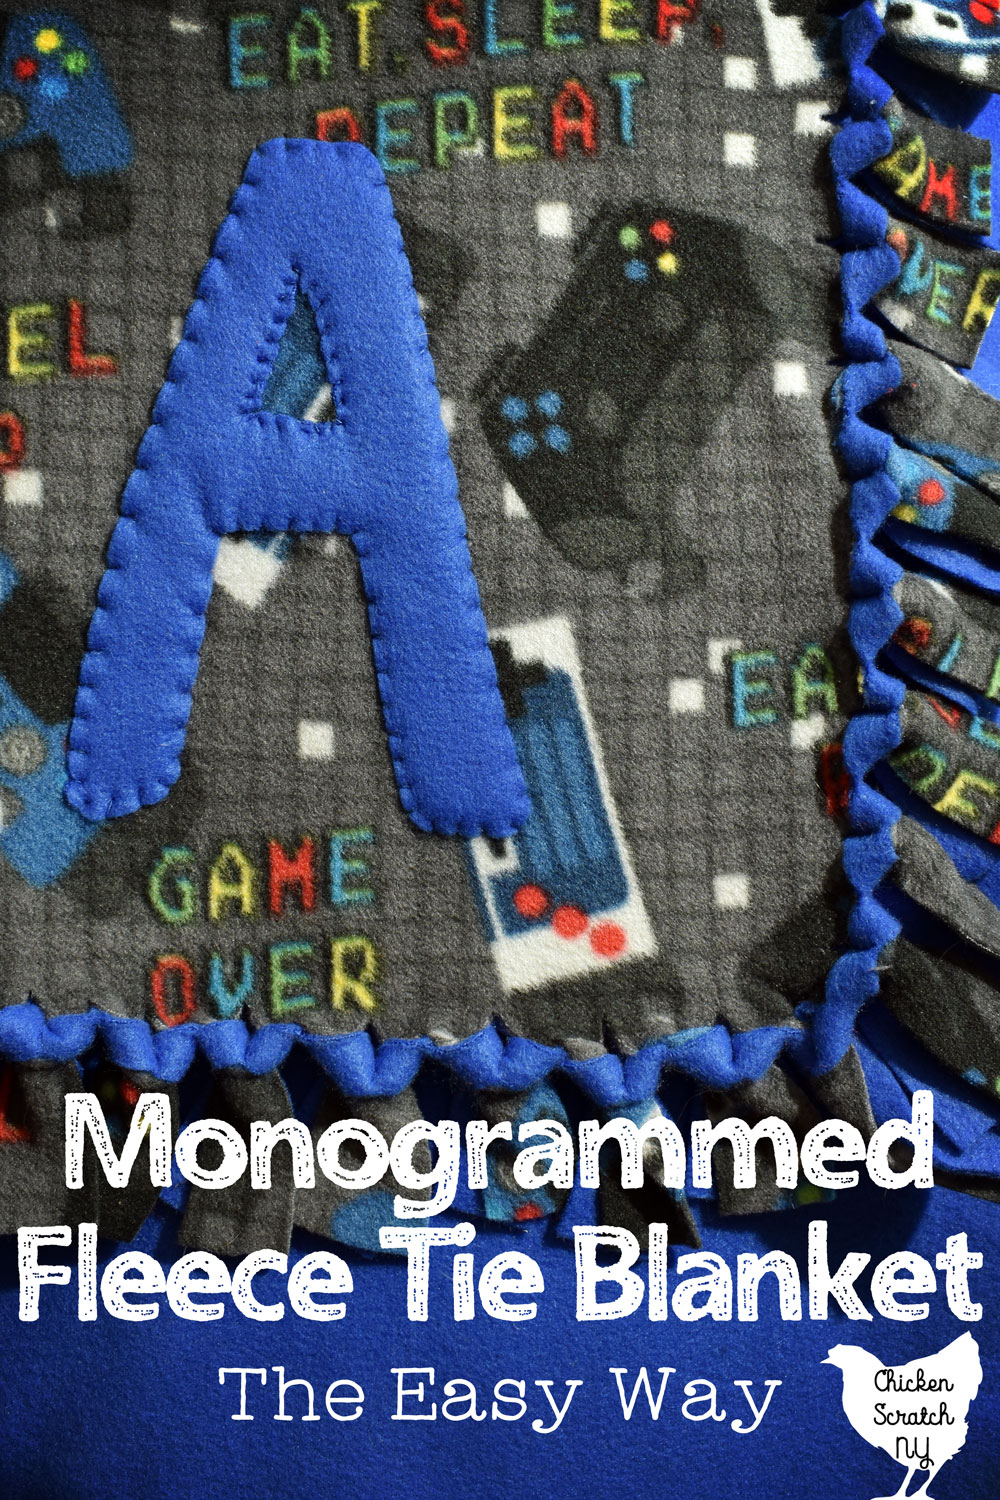
At this point your blanket is done! Of course, you can take it a step further (and use up all that time you saved) by adding a name or a monogram.
How to Add a Monogram to a Fleece Blanket
Adding a letter is a great way to take the personalization of your gift up a notch. If you’re feeling motivated you could add a whole name.
Fleece is a great fabric for an applique because it doesn’t unravel. It also has that “stickiness” we talked about that helps keep the letter in place while you sew.
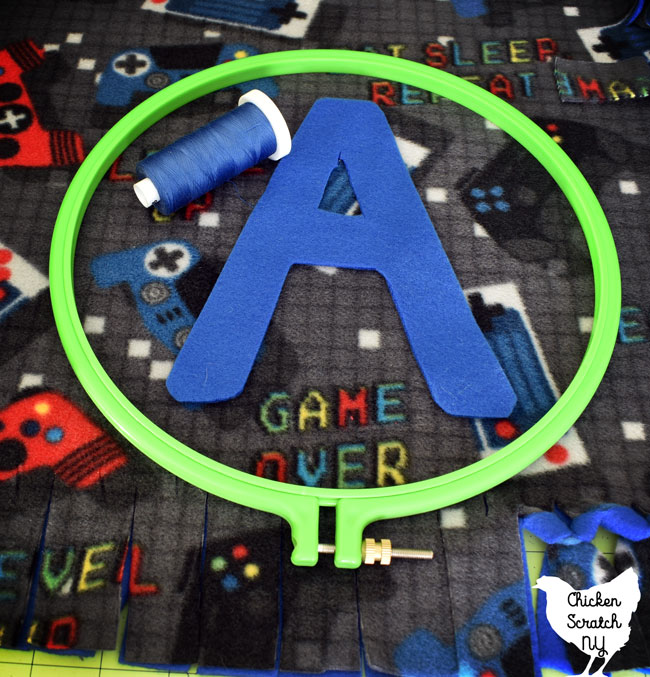

The easiest way to get a great looking letter is to print out a template using a basic font. Or you can eyeball it, which is much easier for some letters than it is for others (D & A were easy enough, B almost had me in tears!).
Learn the fastest way to Thread a Needle & Tie a Knot
Once your letter is cut out use a needle and matching thread to stitch the letter down. You can go through one layer of fleece of you want the back of the blanket to look cleaner or through both layers if you don’t care.

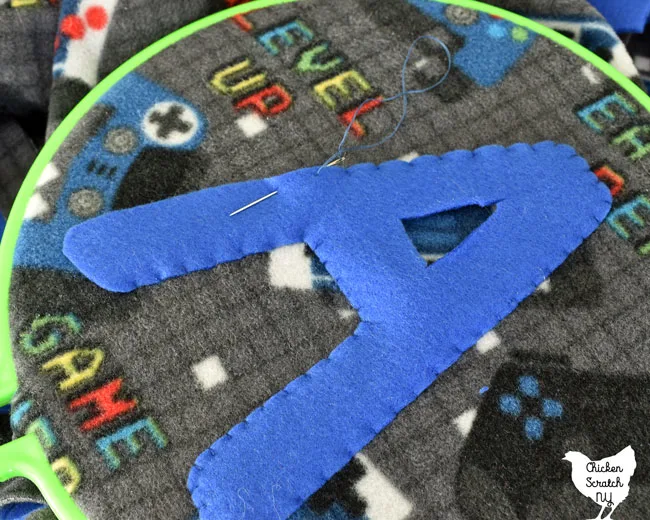
If you decide to go through the top layer I recommend you do it before you finish connecting the two layers. You’ll be able to use an embroidery hoop to hold the fabric flat (can’t do that with two layers, trust me I tried!) and you don’t have to be as careful about not catching the back layer of fabric.
You don’t need the hoop but it does make things easier. Than pull the hoop out and finish up the last section of strips and you’re done!
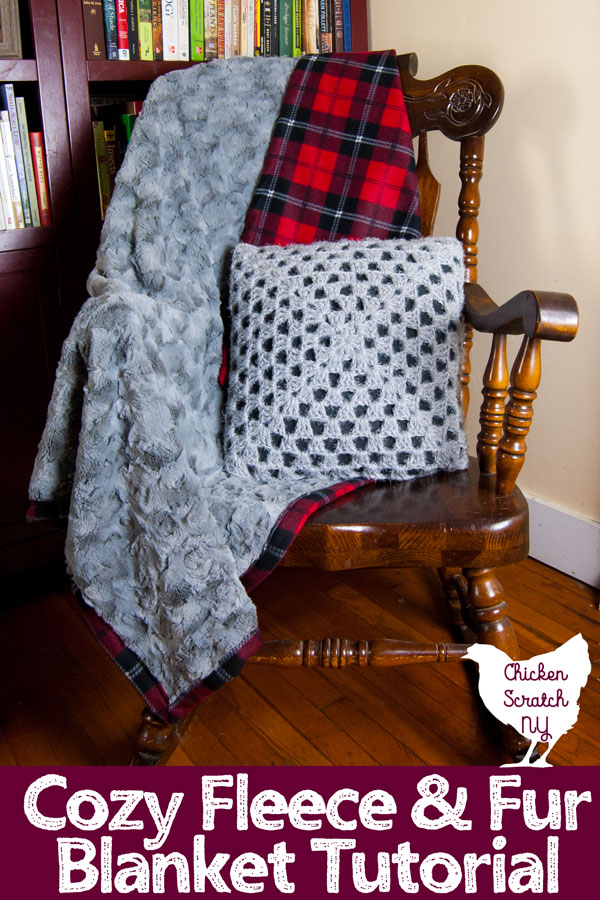
The piece I used for the demo pictures was a scrap of the Fleece & Fur blanket I made my daughter several years ago. I didn’t want to waste it so I turned it into a sleeping bag for one of their Baby Yodas.

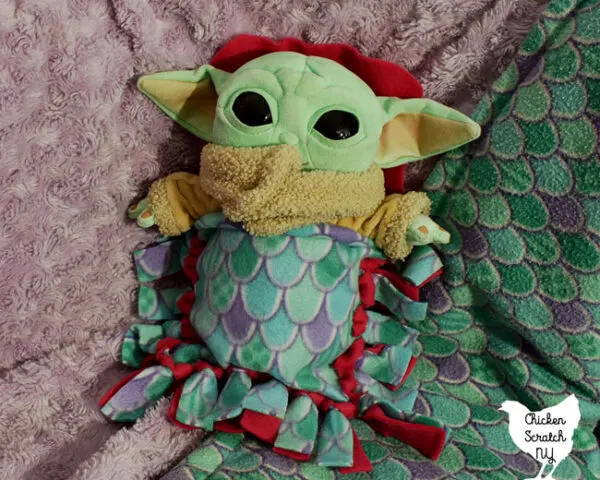
It shows how versatile this method is and how different fleece looks after being washed for 3 years! You also get a great look at the contrasting color strip you get from the flip method.
Check out my Sewing Page for more projects and ideas or start here: