
Precut squares are the perfect choice for these quick and simple quilts! Once you try this shortcut 4-patch method you’ll never go back to the traditional way!
I love the look of simple quilts with lots of little pieces and a delightfully scrappy color scheme. But I have the attention span of a goldfish drinking a pumpkin spice latte so the old-school method of piecing a 4 patch block by block is not gonna fly for me.
Anytime I can skip touching small pieces of fabric I’m going to. When I work with jelly rolls I’ll strip pieces the heck out of any pattern I create, and that’s kind of the idea behind this block construction method.
We’ll be sewing blocks together, cutting them apart, and sewing them back together. It seems counterintuitive but trust me, it’s less work in the end!
This is an ideal project for chain piecing, I like to get my blocks all paired up and then sit down to sew one side, flip it around and sew the opposite side.
Then you can take them all to the cutting table at the same time, then on to the iron, and finally back to the sewing machine to finish up the four patches.

You get all of the blocks made in two quick sewing sessions then you can move on to assembling your quilt top.
Is there anything better than a mindless project?
I love the look of a super scrappy quilt but there is no reason you couldn’t make this in 2 or 3 fabrics. And of course, you can take advantage of those large background squares for some fussy cutting or showing off a favorite large print!
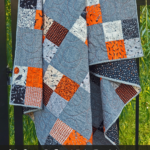
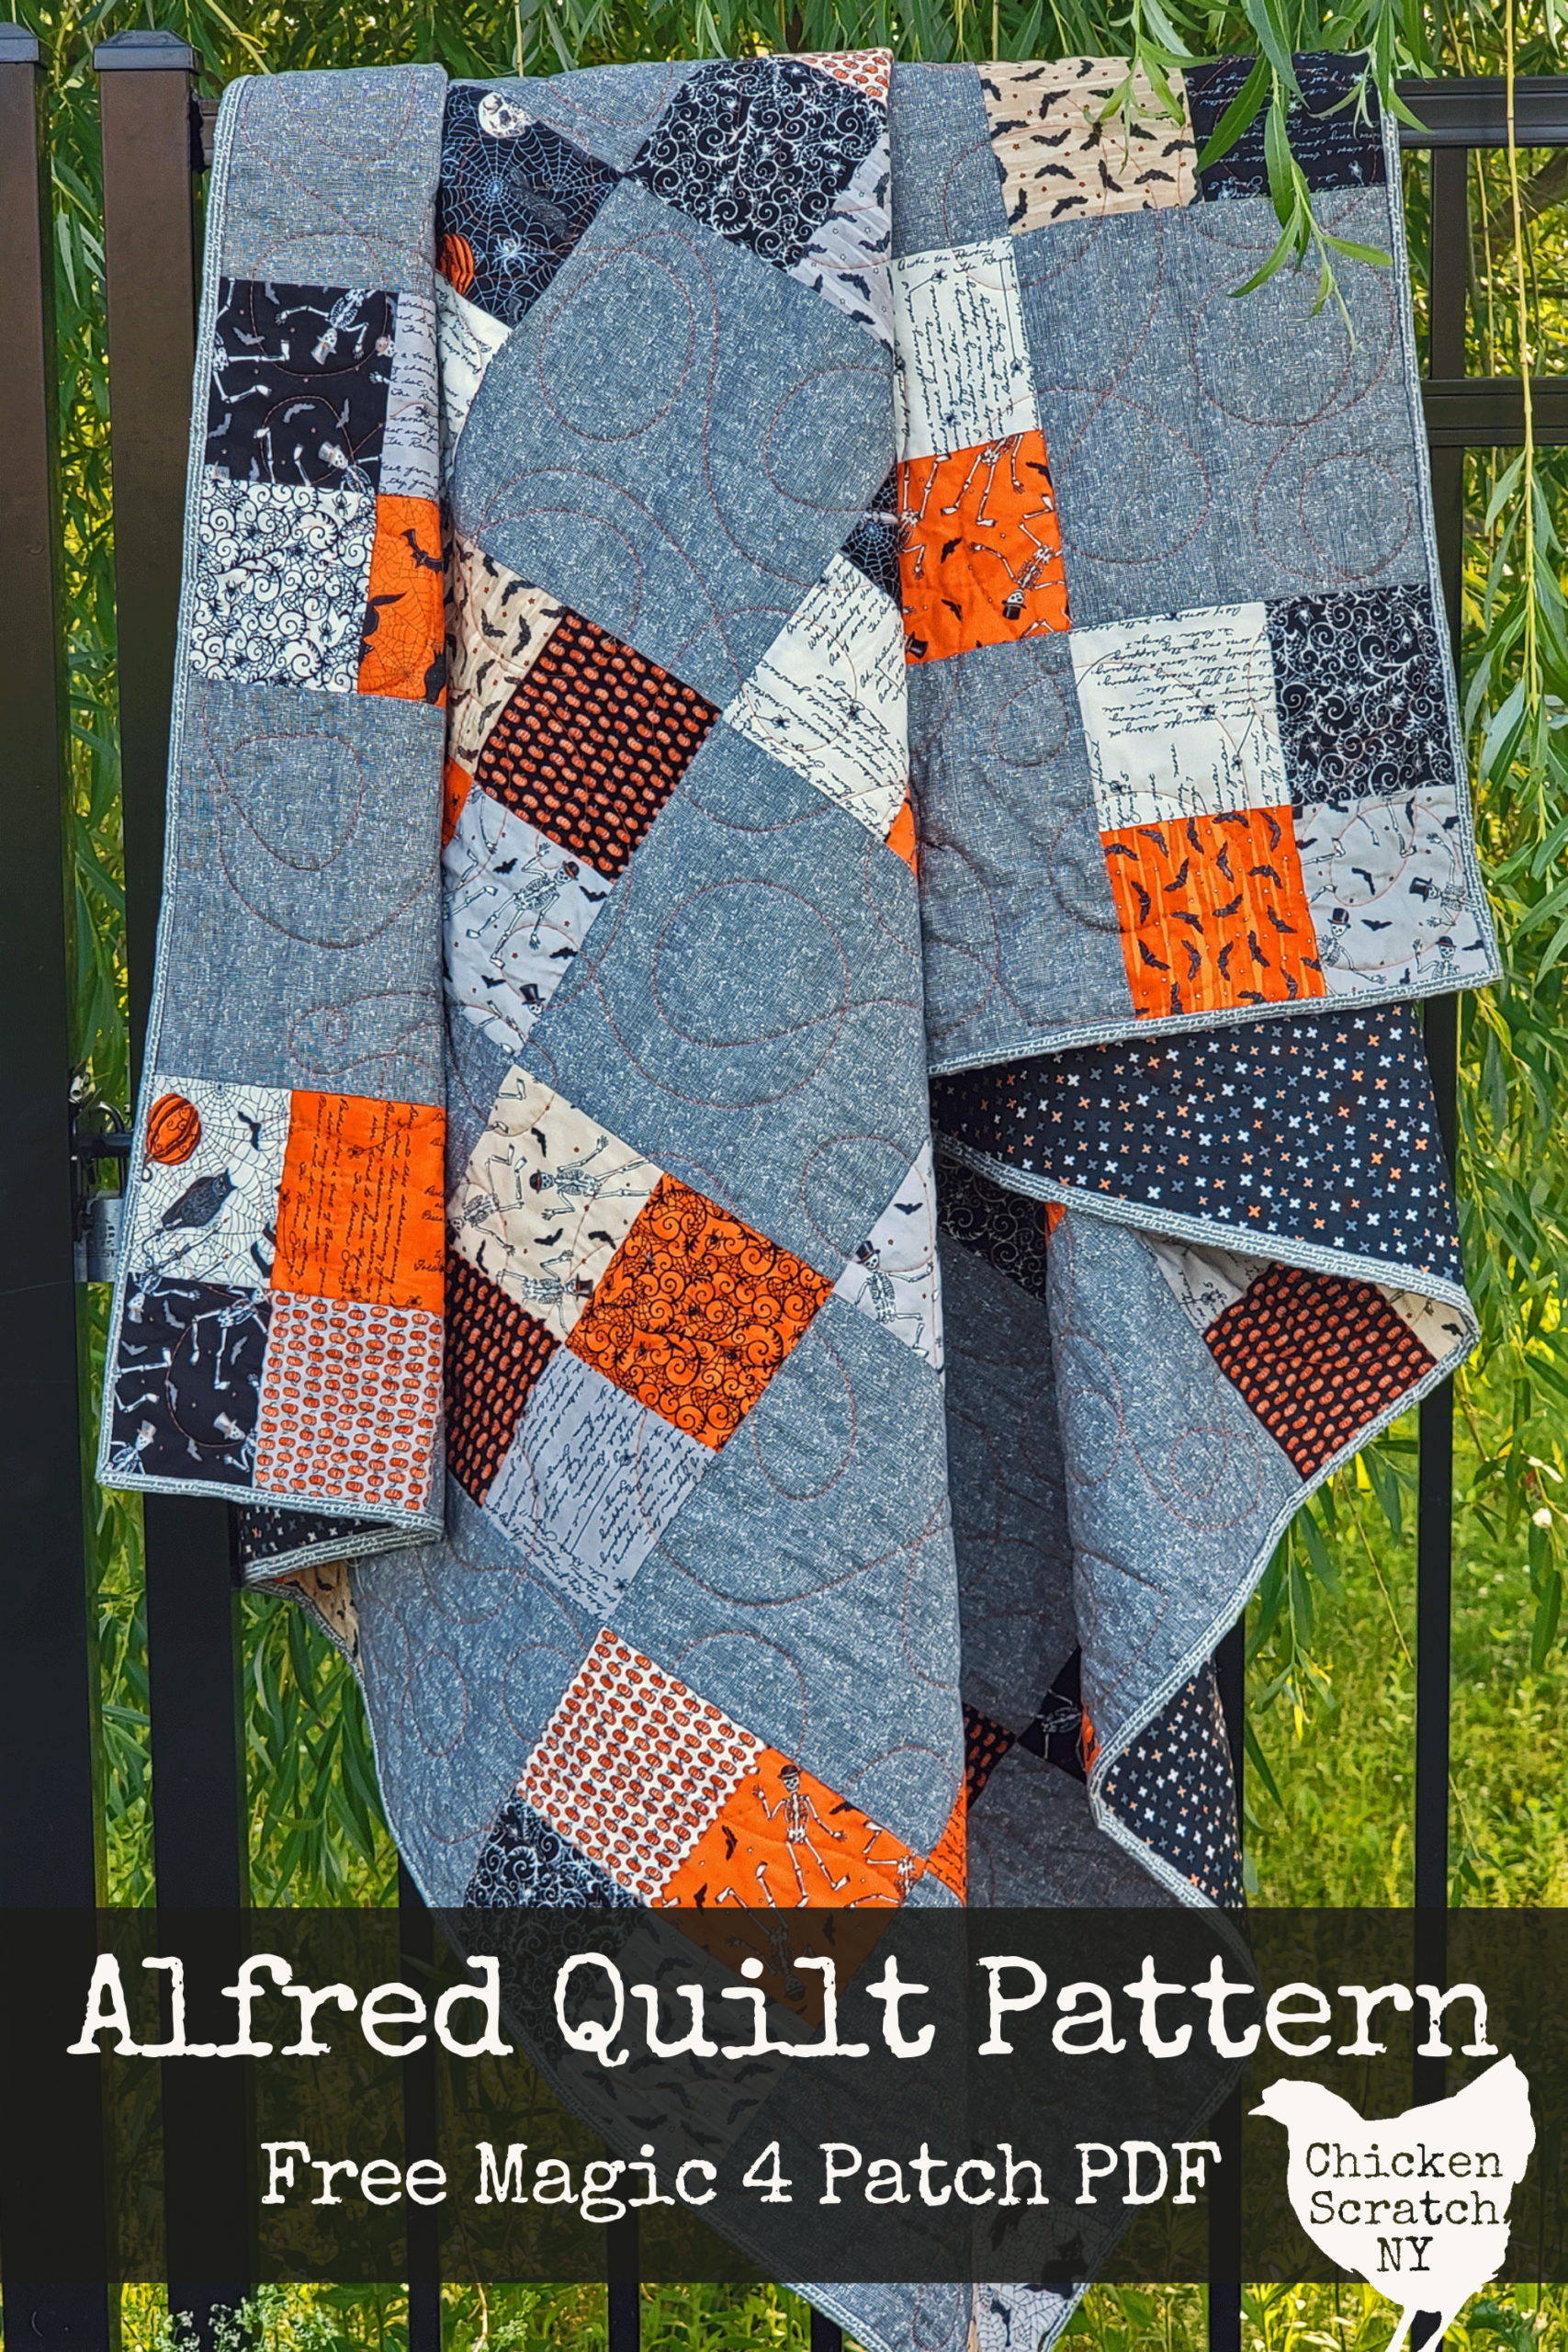
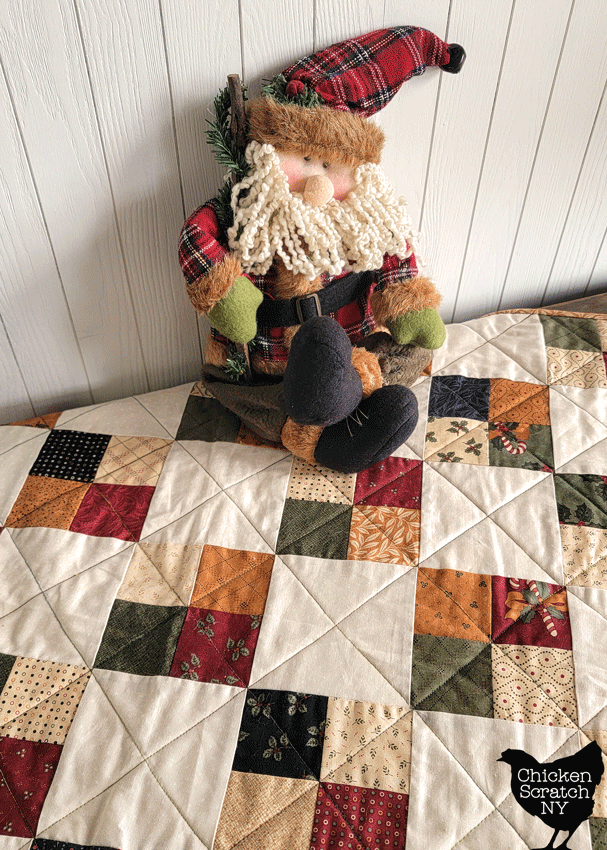
Magic 4-Patch Quilt Patterns
The charm pack 4-patch blocks turn into 4.5″ four patches (they’ll finish at 4″) and once you’ve got them made you can turn them into anything.
If you start with 10-inch squares your blocks will be 9.5″ and finish at 9″ (once they’re all sewn into the quilt)
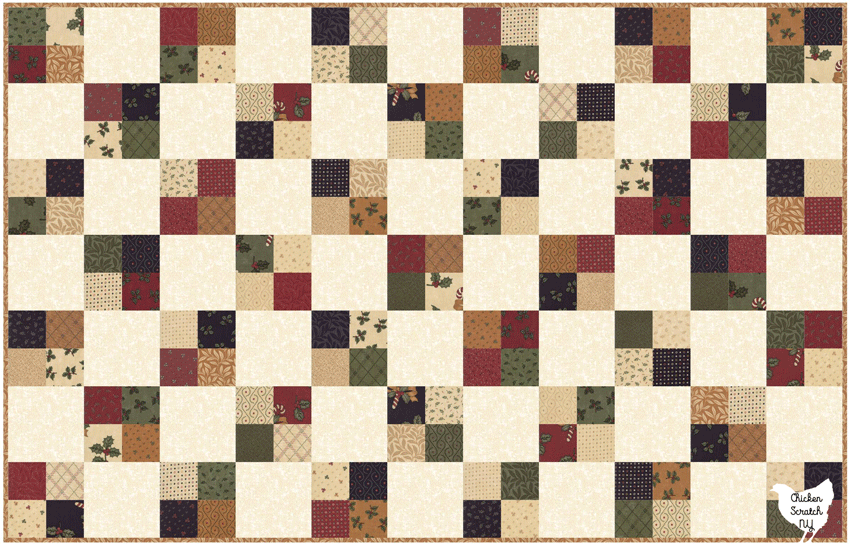
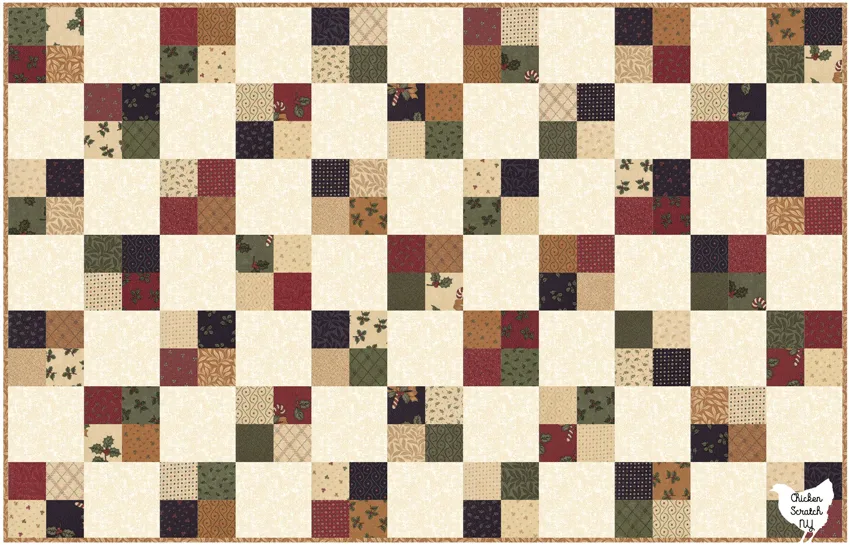
I wanted to go for a traditional look so I paired them up with alternating solid blocks. I drew up a pattern for a 2 charm-pack lap quilt, a smaller 1-charm-pack table topper or baby quilt, and a bigger throw made from 10″ squares.
The pattern includes fabric requirements & sewing instructions for all sizes.
It’s named for my best friend, Alfred, aka my soulmate and firstborn. If you’re new around here, Alfie is my golden retriever.
Get the Free Printable Alfred Quilt Pattern Here
That’s not to say you have to use my patterns at all, you could also sew your blocks together with contrasting sashing between or skip the sashing and go for all four patches.
I will warn you, the latter is much less forgiving and you’ll have a lot of seams to match up.
If 5″ or 10″ precut squares aren’t your thing you can swap them out for any size square. The four patch blocks will be 1/2 inch smaller than the original squares and finish at one inch smaller.
How to Sew the Magic 4 Patch Blocks
The first step to making the Magic 4 Patch blocks is pairing up your squares.
If you’re lucky your squares will all be squares but it’s pretty common to find a charm pack or a layer cake that’s more rectangular than square.
The tricky thing about charm packs or precut 5″ squares is they aren’t all made the same. Depending on the manufacturer, you might need to measure from the inside of the pinked edge, the outside, or somewhere in the middle.
This pattern is very forgiving and as long as you are consistent in how you sew your blocks will turn out the same size (unless you’re mixing squares from different packs, then all bets are off).
I do recommend waiting to cut your solid squares until after you’ve finished your four patch blocks so if your 4-patches are a bit smaller or larger you can accommodate that.
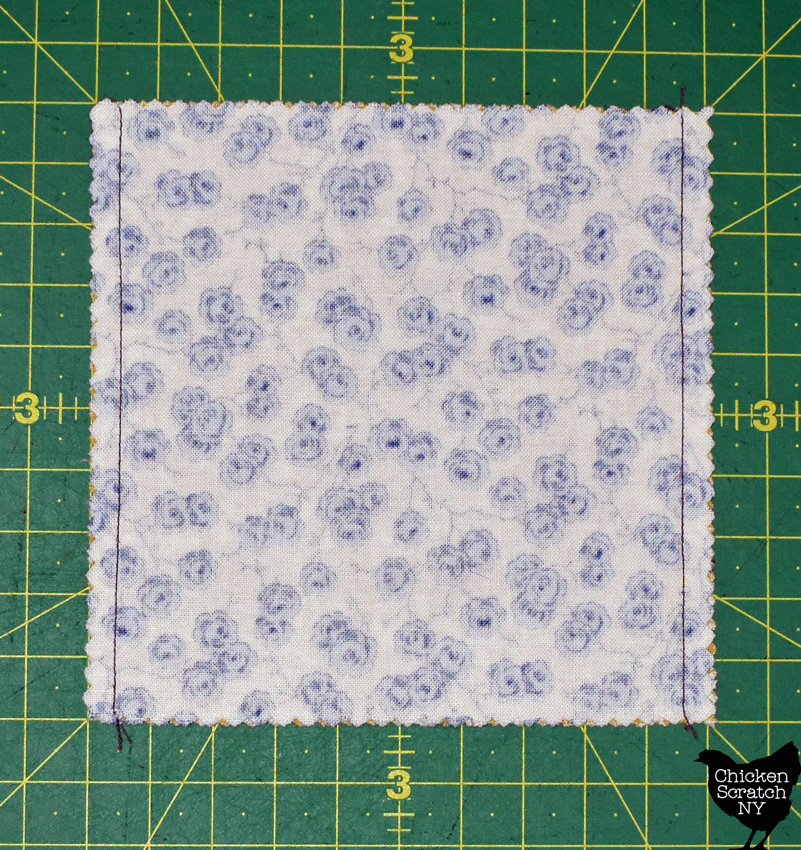
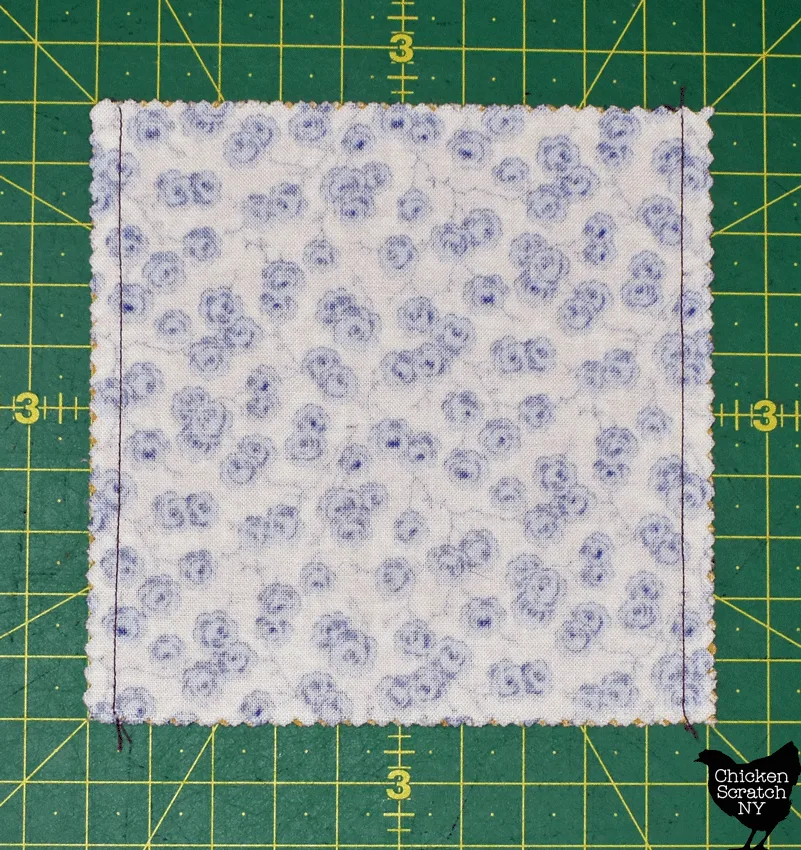
Once you’re happy with the pairs set them face to face and sew a line down opposite sides, 1/4 inch away from the edge.
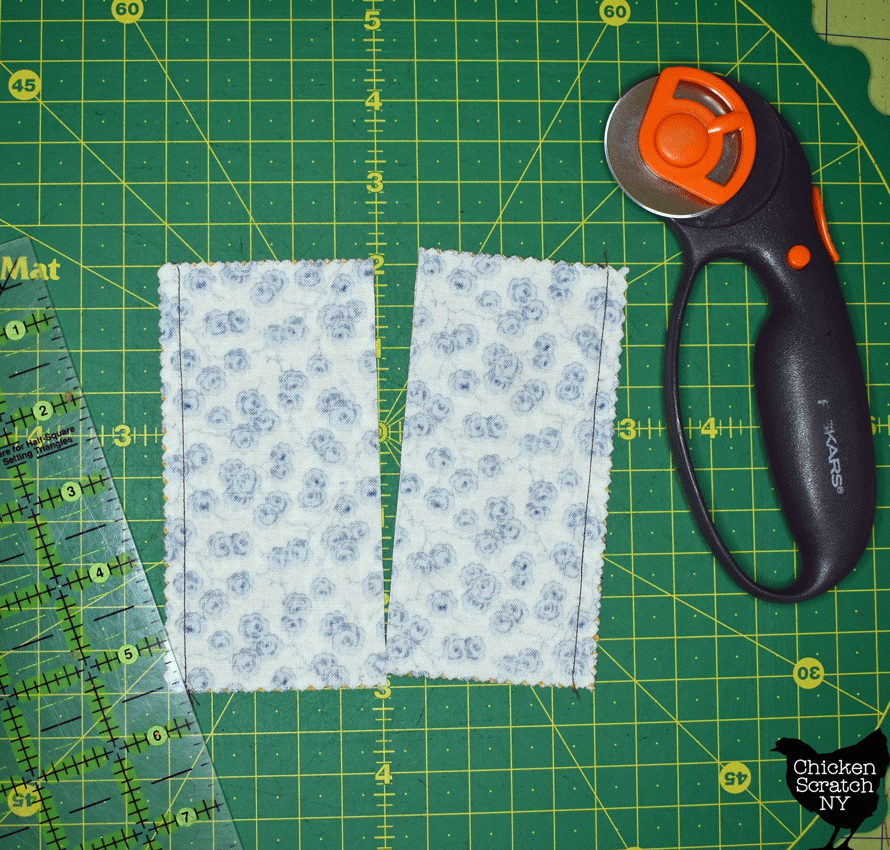

Once you’ve got your seams going down both sides cut the squares down the middle, if you started with a 5″ square that will be 2.5″ from the edge.
I like to use the lines on my mat to center the blocks and use that to find the center (going back to that annoying pinked edge issue).
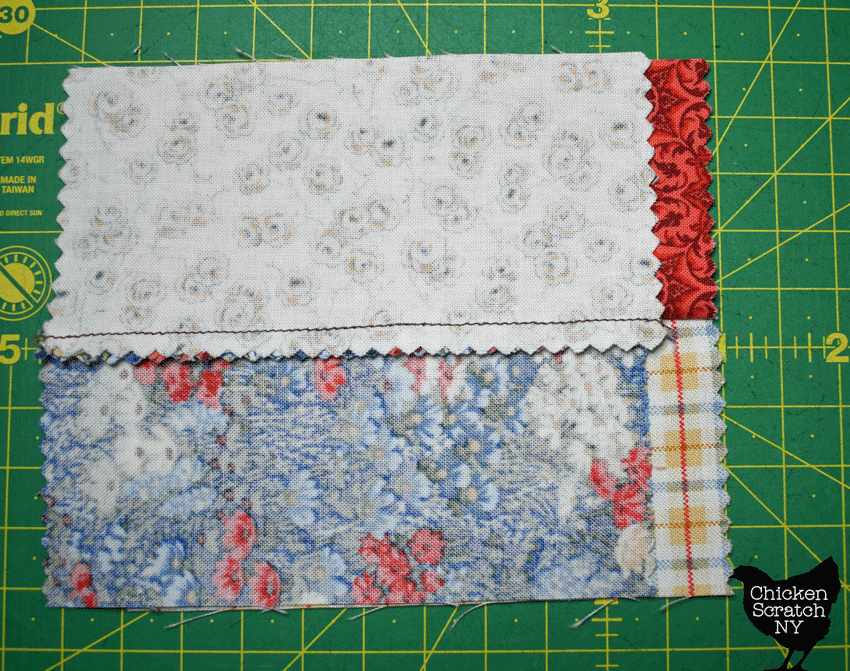

Press open with the seam going to one side. It doesn’t matter which way you press but the next step will be easier if you can nest your seams.
Match up two blocks, face to face with the center seam nested together. Sew down the sides of the block 1/4 inch away from the edge, making sure you’re going across the center seam.

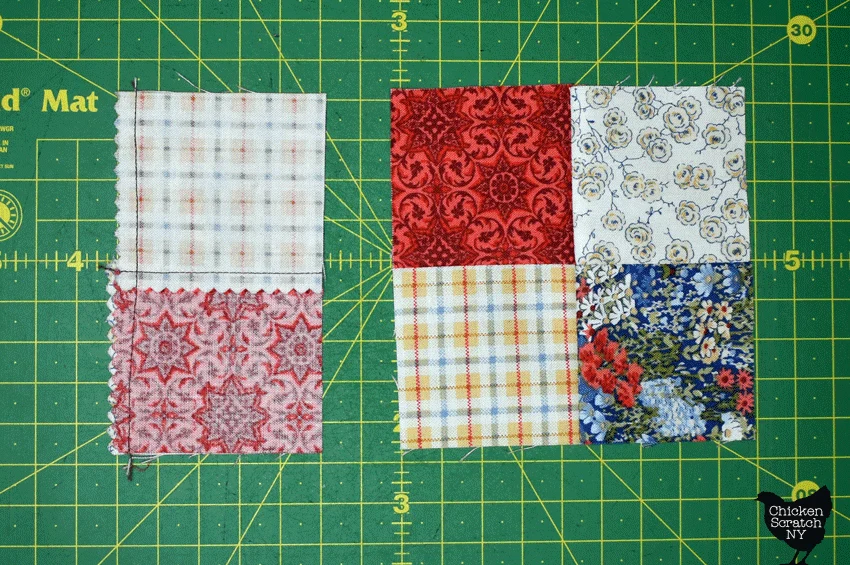
Cut the blocks apart across the center, press them open and you’ll have two identical four-patch blocks to use however you’d like.
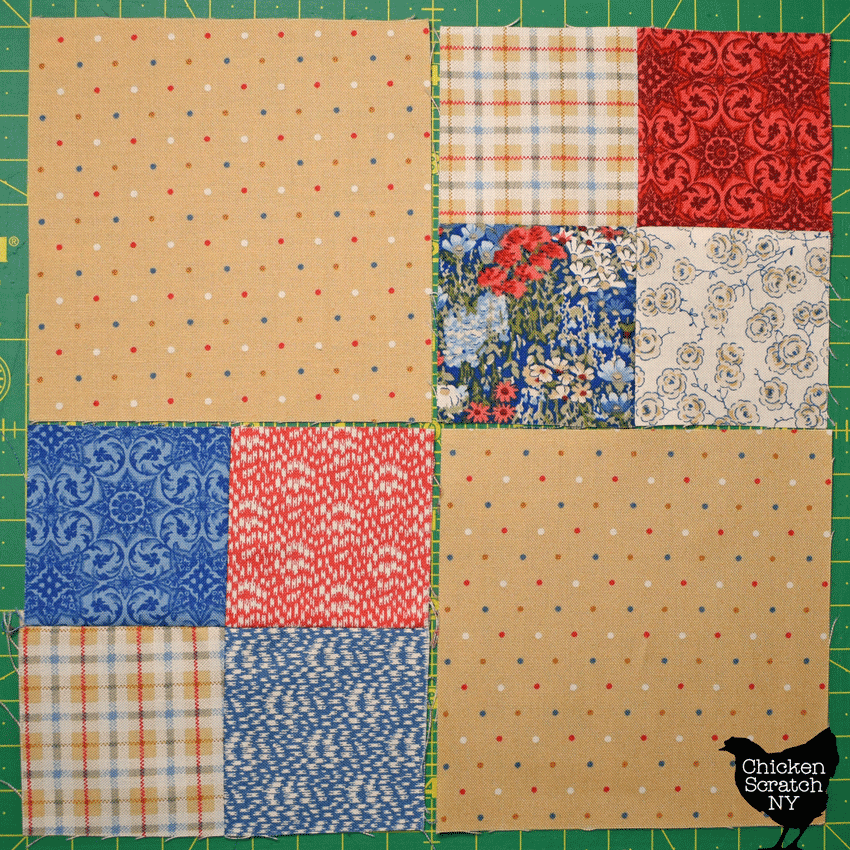
If you plan on turning these blocks into a quilt like the ones I made, I highly recommend waiting to cut your solid squares until you’ve made all of your four patch blocks.
That way if things get a little wonky and you have to trim down your 4 patch blocks you can cut your solid squares the correct size.
When it’s time to assemble them lay the blocks out according to the diagram (or however you need to lay them out to get them to fit your wall, table, or couch) and then sew them together in rows.
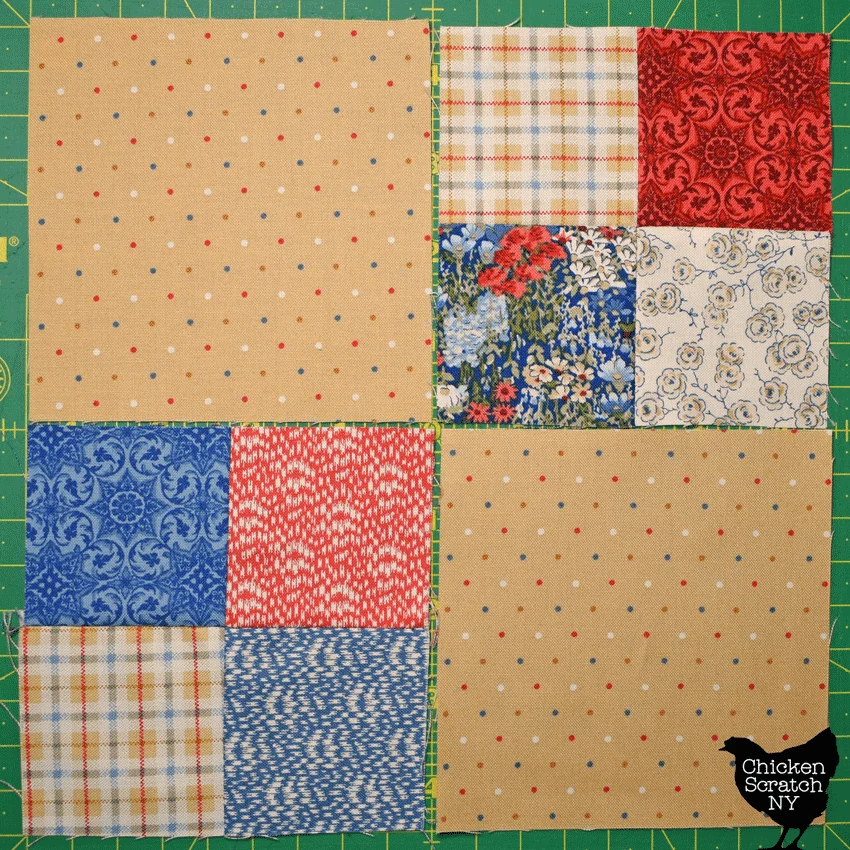
Press all of the seams toward the solid squares. That way when you go to sew the rows together the corners will nest and everything will match up easily peasy lemon squeezy.
This is an excellent pattern for tying or quilting with a simple walking foot X Pattern. If you’re tying the large version check the spacing between stitches on the batting (it should be on the package), you might need to add a tie in the center of the large blocks.
Check out my Quilting page for more info or start here:
Kathy Henderson
Tuesday 28th of October 2025
Where do I find it? I ordered it and it went through I think but I can't find it. Was it emailed or what?
Alecia
Monday 10th of November 2025
You will be able to download them from your account, you can follow this tutorial: https://store.chickenscratchny.com/how-to-access-designs/