DIY Screen Printed Window Valance

I can't quite make it out to the garden yet so I decided to DIY myself a new curtain with some screen printed carrots. I wrote about making the curtain itself yesterday so check that post for instructions on 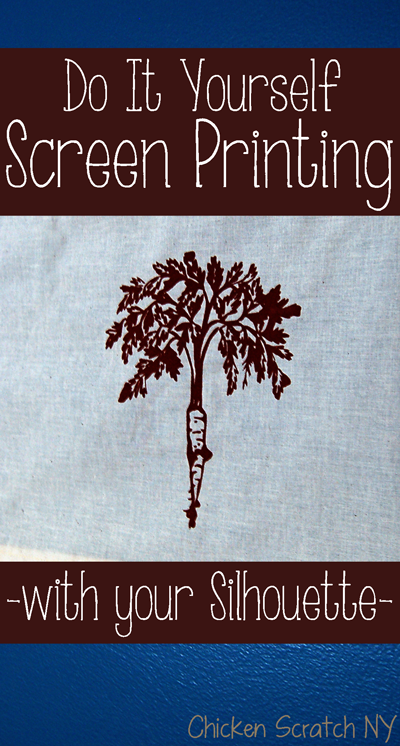
This all started with YouTube. One day I was randomly clicking my way around and I stumbled across a video on screen printing. Immediately my wheels started turning. I have a hoard stash of fabric and more than enough paint. What did I have to lose?
Screen Print Supplies:
- Vinyl
- Vinyl Cutter
- Cut File
- Transfer Paper
- Organza Fabric
- Embroidery Hoop
- Painters Tape
- Thick paint or screen print ink (I used house paint and I'll cover the pro's & con's at the end)
- Old Gift Card
- Newspaper to protect your table
Instructions:
- Set up your image in Silhouette Studio. I found this carrot image through Google and traced it in SS. Draw a large circle around the image, just smaller than the embroidery hoop. *TIP* Hold down shift while using the circle tool to make a perfect circle.
- Cut out your stencil on vinyl and weed.

- Hoop your organza tight with no wrinkles. Apply the stencil using the transfer paper. I had trouble with the small pieces sticking to the transfer paper so I would avoid a design with a ton of small pieces. Press it flat and make sure you don't have any bubbles or wrinkles. You can see where my carrot bled on the carrot part, I did a test run and rinsed the stencil and the vinyl warped a little. If you have the time, place something flat and heavy over the stencil over night to help it set. I'm sure heat pressing to the fabric would help but I only had regular vinyl.
- Mark where you want your stencil. If you're doing more than one it's important to move quickly so the paint doesn't dry in the screen. I used pins to mark my curtain, I ended up with 7 carrots and my stencil was starting to fall apart by the end.
- Using the painters tape seal off the edges of the hoop so you don't get any leaks.
- Tape your newspaper to the table to protect it from any leaking paint.
- Pour a little paint into the hoop NOT on top of your design. Using your gift card lightly scrape the paint over the stencil. Try to get it done in as few passes as possible.
- Carefully lift the hoop straight up with out smearing the paint. It will look bubbly but don't worry, it will dry flat
- Repeat until you're happy.
- Let the fabric dry and you're good to go.


What I learned:
- Latex house paint works if you don't have screen printing ink, it will run if you go over the screen too many times and it will make the fabric very stiff. I haven't tried washing yet but that might soften it up a little. It's cheap and readily available in any color you can imagine. If you plan on printing on clothing seek out screen print ink.
- Next time I'll leave more blank space in my hoop. Once the paint was scraped the to top there was very little room to work.
- I don't see how these stencils could be used after washing, the vinyl on mine started to warp and peel away after washing. I have seen on the internet where people used a heat gun or iron to 'set' the stencil but I haven't tried that yet so proceed with caution.
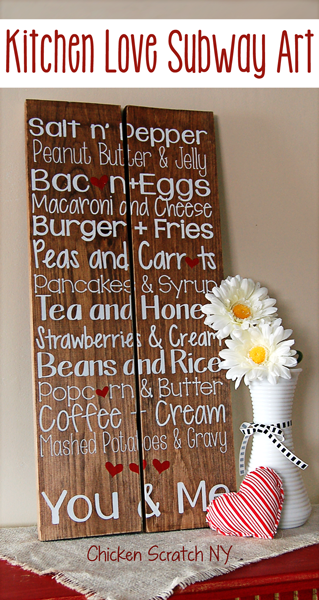
Other Vinyl Projects to try:


WOW.. who would've thought!! Screen printing with a Silhouette!!! I'm so glad you made this tutorial, I never would have thought to try this, let alone were to begin!! Nice job!
This is amazing. The valance turned out terrific. Is there anything this machine can't do? LOL
Wow, you are very talented, and probably very Pinterest popular! You can always tell the ones who will be popular on Pinterest (and it's not me).
Thank you so much for sharing your amazing talent, and for participating in the 100 day blog challenge!
I already wanted a Silhouette. Now you have me really, really wanting one. Your stencil turned out so good. If you decide to change your room colors, all you have to do is add more stencil color to match. Clever. Thanks for sharing. And thank you for participating in the boost challenge.
Julie
Wow! You are talented! Love the photos on your posts! I'm visiting from the Blog Challenge!
How cute are those curtains. I really need to bring out the craftier side of me and start making things. There are so many things out there I just don't know where to begin, I love it all! Visiting from BYB
I love your design. It reminds me of spring which I wish would hurry and arrive.
Such a cute design for your curtains. Love your honest review of this technique so I know what to expect when I try it.
OMG! My wheels are spinning. We are getting ready to move into a new rental house. I'm sure I can find something to decorate with this idea!
Coming over from 100 days to a better blog
Erica
We Three Crabs
I've always wanted to try to make my own prints! Thanks for sharing, I'm going to pin this for future reference 🙂
I love your valance! It's perfect for a kitchen area or pantry! The carrot is a really fun design, too.
-Cristyl @ http://www.MyCHillThoughts.com
This is brilliant- why have I not thought of it before! You have a new follower 🙂
Wow! This is really lovely. What a wonderful idea. Not that I would ever have time for anything like this right now, but I will have to Pin this, who knows, maybe sometime in the future...