The Silhouette Cameo 4 is a powerful and versatile tool that can even be used to cut fabric. But before you toss your rotary blade and rulers in favor of this crafting magician it’s important to know the best ways to use your cameo when working with fabric.

I’m in a lot of quilting groups and at least once a week someone pops in and asks if they can use a Silhouette Cameo or a Cricut machine to cut their fabric for quilting. The simplest (and most unhelpful) answer is: technically yes but you probably don’t want to.
The Silhouette Cameo is capable of cutting fabric and it does a good job making accurate and specific cuts. But, since you’ll need to stabilize your fabric and put it on a mat for cutting, it will take a lot longer and a lot more effort than just cutting it with a ruler and rotary blade.
The real area where the Silhouette comes in handy is cutting out fabric shapes for appliques and crafting. If you’re looking to get into fusible applique and you don’t want to cut things, this is the tool for you!
A quick side note before we get into the actual cutting, I had so many issues with Silhouette Studio crashing when I was selecting my material type. That would be more related to my ancient laptop but I haven’t had that issue with the software before.
How to Cut Fabric with a Silhouette Cameo
You’ll need a few things to cut fabric other than your machine and cut file.
If you want to cut felt get your hands on a mat with a heavier tack, it’s stickier and it just does a better job holding things in place.
For cotton that’s backed with fusible interfacing you can just use your regular mats, I actually recommend against using the heavy tack mats, you’ll just end up with a disaster when you try to remove the paper backing from the mat.
I tried using the tackier mat and when I removed the paper, it left about 1/2 of it behind. After scraping away the remnants of paper I tried cutting another set of letters, with the fusible stabilized fabric straight on the mat. Another mistake, 1/4 of the adhesive stuck to the mat, and the letters were basically mangled when I tried to pull them off the mat.
The moral of that story, I don’t know when to walk away and you should use a regular mat for cutting quilters cotton stabilized with fusible interfacing.

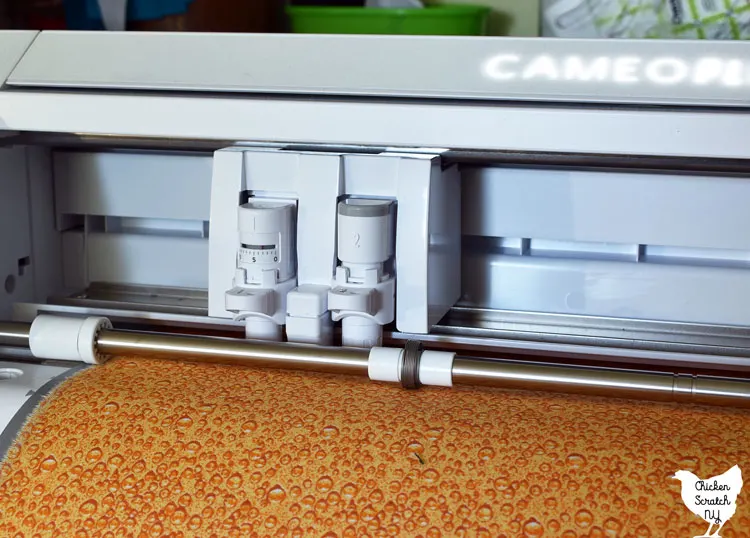
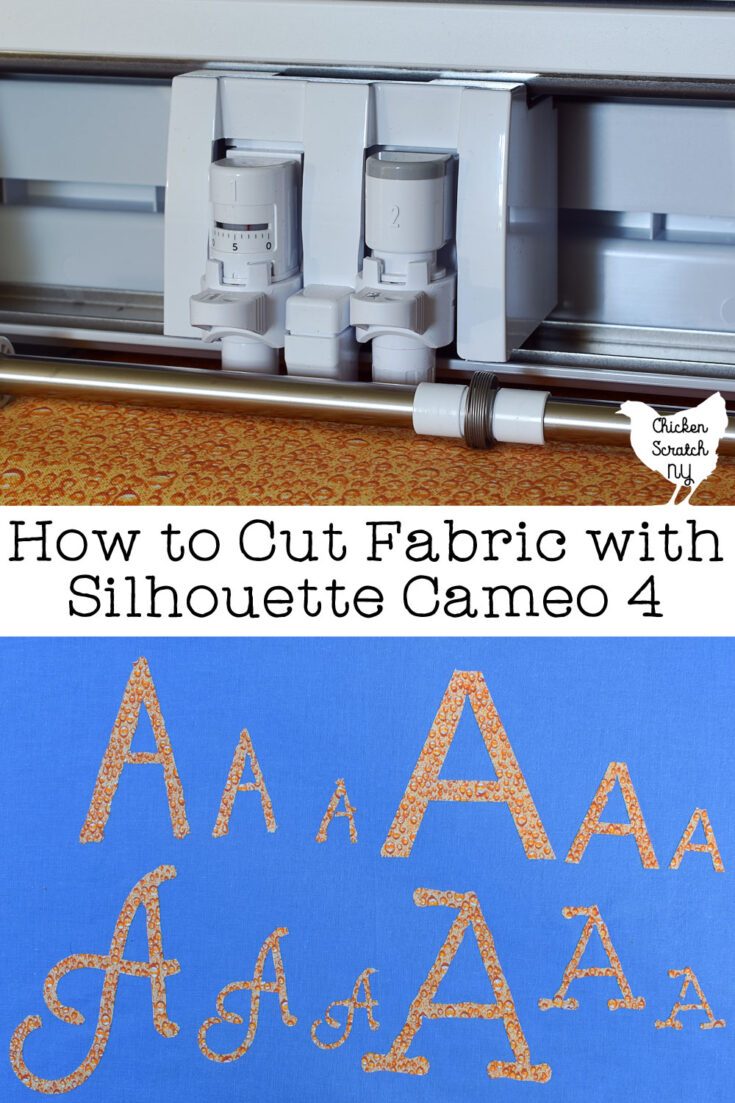
The second thing you’ll need is the rotary blade for the Cameo. The Cameo 4 has two slots for blades, the regular craft blade goes in the 1st holder on the left and the rotary blade goes in the 2nd holder on the right.
It’s not recommended but you can cut fabric with the regular silhouette cameo blade as long as it’s fairly new and sharp. If you want to try that out you’ll have to lie to the software.
If you tell it you’re cutting fabric and you don’t have the fabric blade in, it won’t do anything. I told the machine I was cutting heavy cardstock and it worked out ok, I did have more shedding around the letters than I got with the rotary blade.
The last thing you’ll need to do is stabilize the fabric. There are sprays and starches you can use and Silhouette America makes their own fabric stabilizer but I’ve only ever used Heat and Bond Fusible Interfacing.
It comes in two styles, the Purple package is “Lite” and it’s a thinner adhesive that is supposed to be stitched over. If you don’t want to sew down your appliques look for the Red package.
Heat and Bond is basically a sheet of glue on a paper backing that you iron to the wrong side (the back or the ugly side) of your fabric using a hot iron with no steam (check your package for specific directions).
When your shapes are all cut out you can remove the paper and the fabric shapes will have a shiny almost plastic layer on the back, that’s the adhesive.

Place them wherever you want them, glue side down, and press with a hot iron according to the instructions on the package.
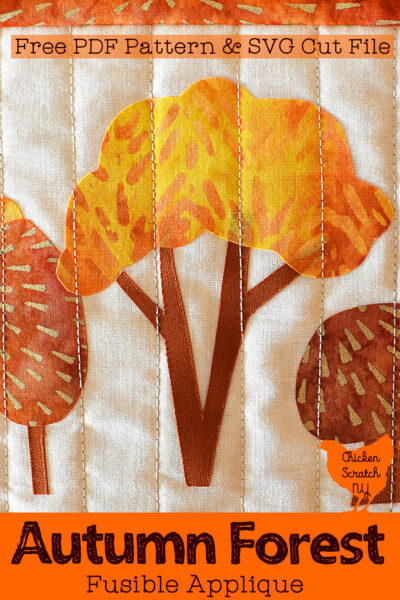
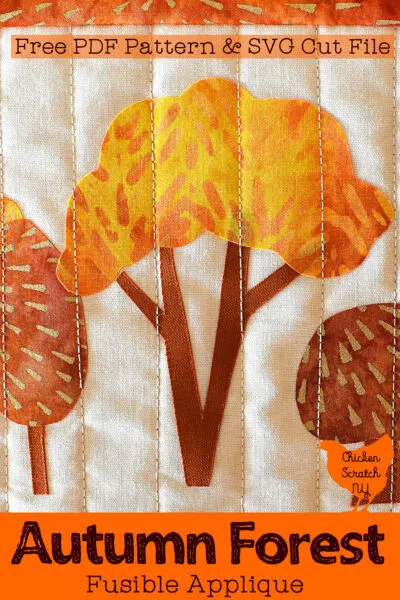
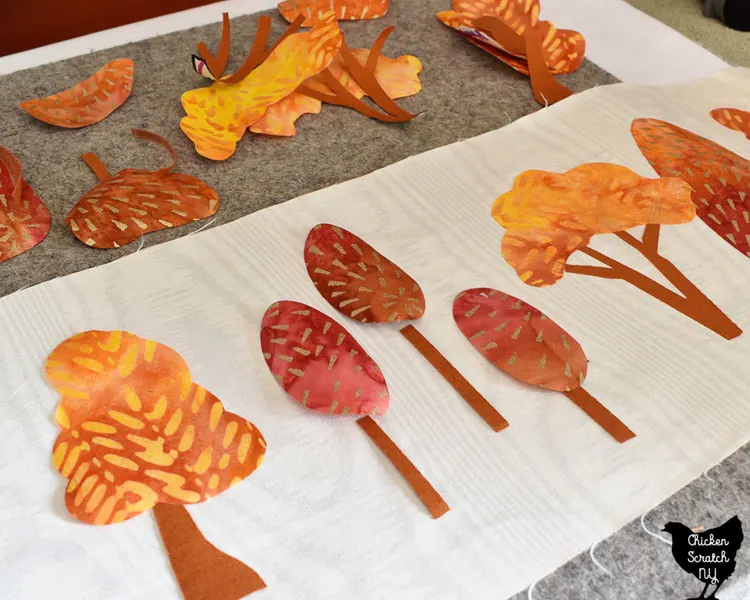
Try your hand at fusible applique with this sweet Autumn Forest Applique project. Get the free cut files (PDF or SVG) and step by step instructions for hand or machine cut appliques
You can use the fusible interfacing for cutting felt if you want your shapes to be fusible but I found that the machine cut really nicely with the felt stuck straight to the strong mat.
I did a test with a different kind of fusible interfacing, a thin type sold by the yard at Joann’s with pretty dismal results. The fabric puckered and without a flat surface to cut on it was a disaster and a waste of time and fabric.
Silhouette Studio Settings for Cameo 4
I consider myself someone that’s fairly good with computers and software but this threw me for a bit of a loop. I recently updated my well-loved Cameo (the OG, didn’t even have a number Cameo) for the Cameo 4 and along with the new capabilities came a second holder for specialty blades.
The machine is able to read the blades and it will let you know what you have in, I think that’s actually pretty nice if you’re working at your computer and you don’t want to get up to check what’s in the machine.
The standard blade goes in the left slot, or space one, and the rotary blade goes in the 2nd holder. When you switch from Design Mode to Send Mode, you have to select what you want each blade to do.
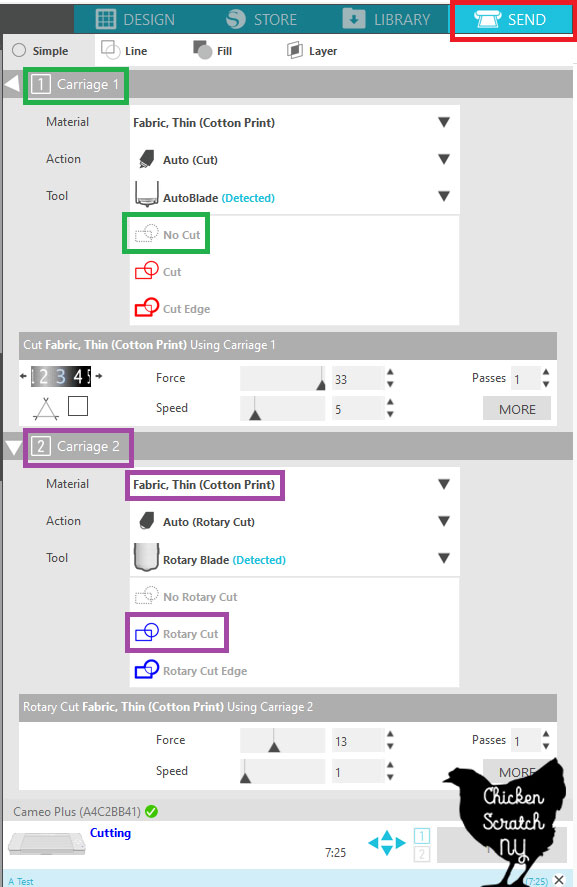

To cut fabric you need to switch Carriage 1 to [No Cut] ” and Carraige 2 to [Rotary Cut]. Make sure you select what type of fabric you’re working with, for all of my tests I used Fabric, Thin (Cotton Print) or Felt, Acrylic.
Tips for Cutting Appliques with a Silhouette Cameo
Cutting applique shapes with a Cameo is going to open up a lot of doors, it will seem like the sky is the limit and you have no more boundaries. And that’s almost true.
I don’t have any specific numbers for you but in general, the smaller your shapes are, the simpler they need to be. When I tried to cut small letters (about 1-1.5″ tall) the fancier fonts ended up pretty mangled even though the larger-sized letters looked great.

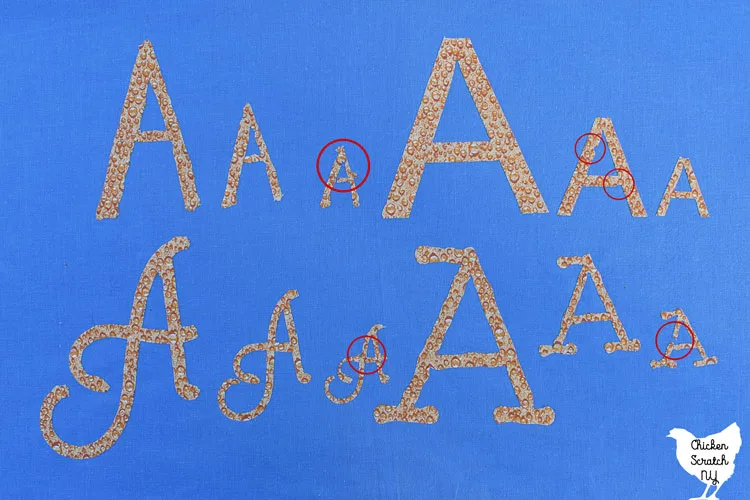
I cut four different styles of A’s in 3 different sizes just to show how the accuracy and quality improve with the size. I circled the biggest issues just in case you thought they looked ok.
Every single size had a few areas in the corners where I had to go in and snip with sharp scissors. The more curved or detailed your shape is, the more you’ll have to snip.
It’s also really important to give your shapes some space. The rotary blade cuts straight lines and it needs some extra wiggle room that you can ignore with the regular blades.
If you look closely at the letter I cut there are areas where the fabric blade cut into the letters, again, the larger and simpler your shapes are, the less this is going to be an issue.
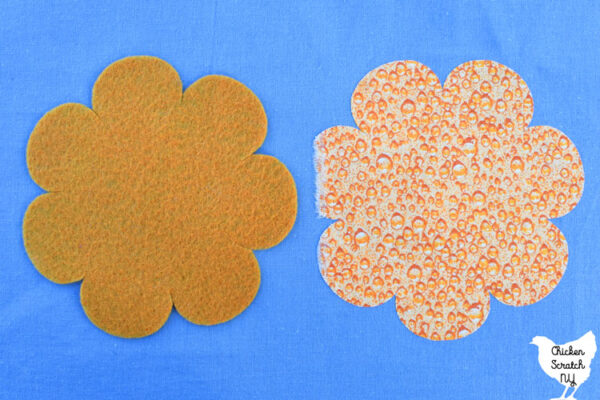
After my letter experiments, I branched out to experiment with a simple shape straight from the Silhouette Studio software.
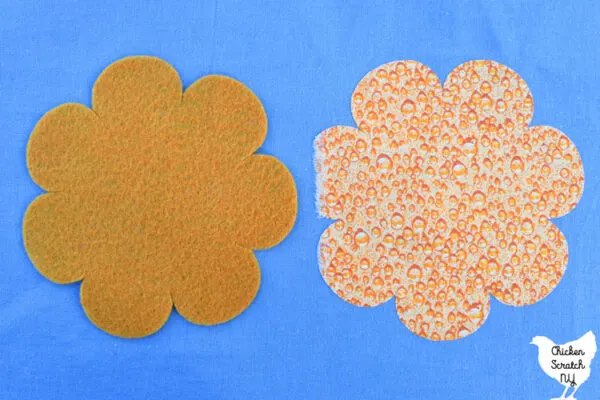
The felt cut beautifully with no mat, I didn’t even have to clip away any of the corners. The flower did perfectly as well, the weird-looking side is my fault, I was trying to use a piece of fabric that was too small.

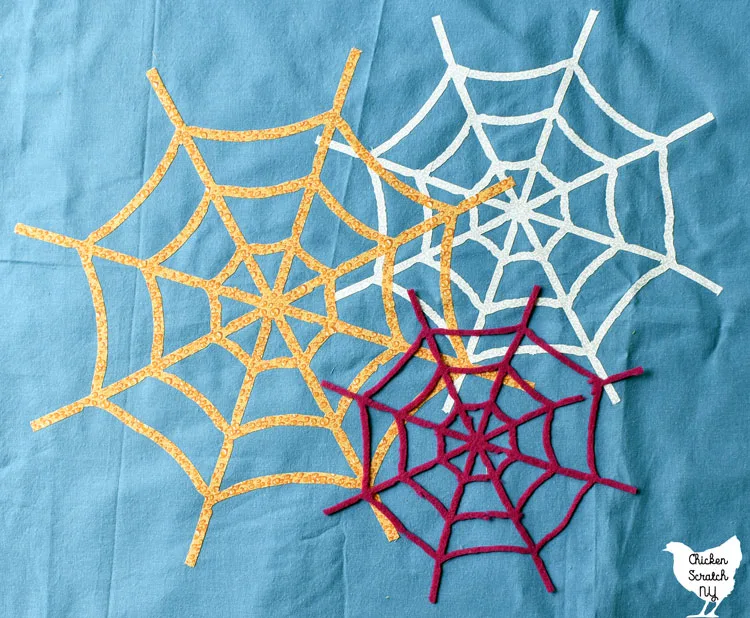
The Silhouette Studio shapes turned out so well I was feeling ambitious and tried to cut out a spiderweb traced in Studio from some free clip art. I cut the spiderweb from felt at about 9″ tall and from white cotton as big as I could get it on a 12×12 mat.
I timed the large spiderweb cutout and it took 24 minutes from start to finish. It was ok but even at the larger size I had areas get cut that shouldn’t have been.
When I was looking at the design I realized the lines were all really jagged in the clip art. I did some Silhouette Studio magic and simplified the shape by selecting it, going to [Object] in the top menu and then clicking on simplify.
It did a great job removing all of the jaggedness and I had to test it one more time, this time I went all in and made it as big as I could on my 15-inch mat. It’s still a bit wobbly in areas but it came out much nicer and I highly recommend simplifying any shapes you plan to cut from fabric.
Overall, I think it’s going to be pretty handy for cutting simple shapes but I wouldn’t bother with small or detailed cuts. If you’re looking for small lettering, like for a quilt label, you’d be better off using heat transfer vinyl and adhering that to the fabric.
Check out more Silhouette Cameo Projects or start here: