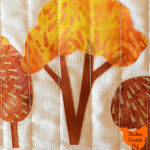
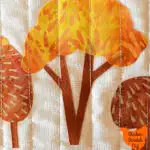
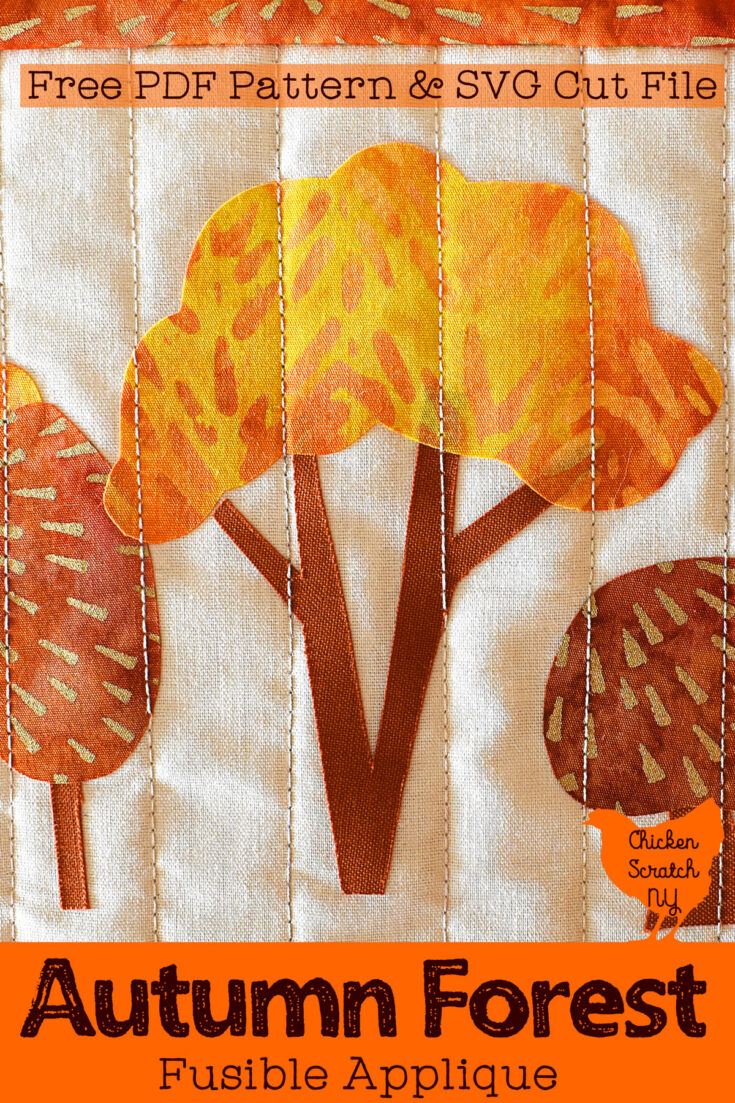
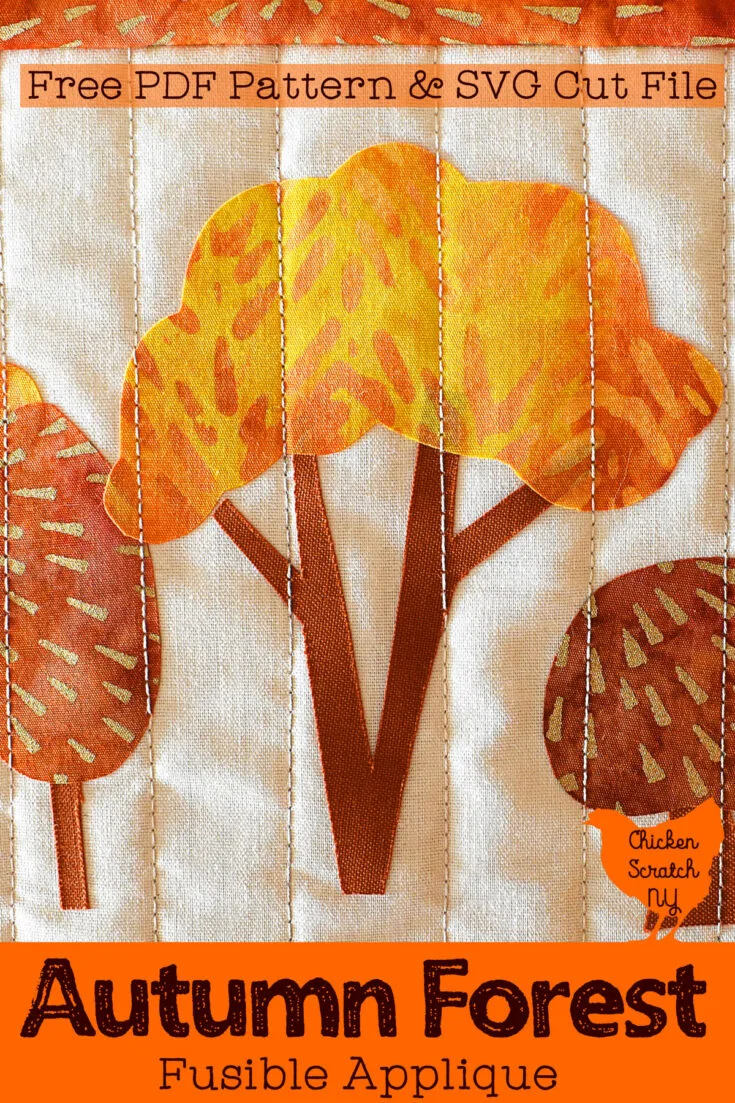
Get ready for fall with a simple DIY Autumn Trees Fusible Applique project. Decorate a table runner, pillowcase, or just about anything cotton with a forest of cute trees cut from quilters cotton.
When it comes to autumn crafting and fall colors I really struggle to rein it in. In an effort to make this project as accessible as possible, I’ll be giving you lots of options.
If long rambling blog posts about crafting make you want to bang your head against the wall feel free to use the handy table of contents to get straight to the info you want!
Fusible Applique Basics
Before we get into the project let’s start at the beginning. Fusible applique is a way to add fabric shapes to a background fabric without sewing.
Instead, you use a double-sided fusible interfacing to adhere the cut-out shapes to the background. I’m a big fan of Ultra Bond, it comes in a sheet or on a roll with a paper backing.

There are two types, UltraBond Lite comes in a purple package and you can easily sew over it (it’s recommended that you do sew over it to keep the appliques in place), and UltraBond in a red package that has a stronger adhesive.
You apply UltraBond to the wrong side (the back or the ugly side) of your fabric using a hot iron without steam to melt the adhesive to the fabric. When it’s cool you can either cut the shapes by hand or with a cutter like a Silhouette Cameo.
Then you remove the paper backing and place your shapes, glue side down, on your background fabric and use the iron to glue them in place.

At this point, you can be done (if you used the regular UltraBond) or you can sew around the edges either by hand or with a machine.
Fusible Autumn Tree Appliques
There is one big difference in the process of making fusible applies with a craft cutter vs doing it by hand. It doesn’t matter that much for this project but if you’re trying this method with letters or anything where directions matter it’s critical.
Hand Cut Fusible Appliques
Whether you don’t have a cutter or you just don’t feel like fighting with your laptop’s Bluetooth connection, making this project by hand is pretty easy. First things first, you’ll need the printable PDF of the tree shapes.
Download the Autumn Tree Applique PDF
The next step is to grab your fusible interfacing and a pen. Lay the fusible down over your printout, with the adhesive side down and the paper side up.
Trace around the shapes with a pen, leaving at least 1/4 inch between shapes so you can roughly cut them out. Then you can cut apart your shapes (not on the lines!).
If you want to add some letters or numbers make sure the shapes you’re tracing are mirrored. You’ll be cutting your shapes from the backside of the fabric and if you don’t reverse them you’ll have backward letters.


Place the shapes on the back of your decorative fabric and fuse them in place with your hot iron. One huge benefit of the hand-cut method is you can specifically place your shapes on the fabric.
Not only does it cut back on wasted materials but you can also get that cute little squirrel or bird placed directly in the center of the tree.
When the fabric has cooled off, use sharp scissors (not your good fabric scissors!) to cut out the appliques on the lines you drew on the back. Remove the paper and you’re ready to go with your project.
Silhouette Cameo Cut Fusible Appliques
First off, I created this project with my Silhouette in mind but I honestly think it’s easier to do by hand. You have to cut each fabric individually and the rotary blade does weird things sometimes.
Here’s the big difference between doing this by hand vs with a machine: when you’re using a Silhouette or a Cricut to cut fabric appliques you’re cutting from the front and you don’t need to reverse your letters. That means if you are cutting out words or numbers they’ll look normal and not reversed.
It doesn’t really matter for this project and you can mirror a few of the asymmetrical shapes if you’re looking for more variety in your shapes. You can also easily stretch and resize them for larger projects, just make sure you’re resizing the tree canopy and the trunk or things might get odd when you go to put them together.
You can go as big as your machine can handle but I recommend against going smaller. I did a lot of experimenting with cutting fabric on my Silhouette Cameo 4 and things get wonky if you go small.
Learn more about Cutting Fabric with a Silhouette Cameo
Unless you plan on making all of your trees and trunks from the same fabric you’ll need to jump into Silhouette studio and do so some shifting around.
Download the Autumn Trees SVG
First things first, download the free SVG and open it up in Silhouette Studio. You’ll be cutting the shapes one fabric at a time so it’s going to take a while if you’re using a variety of prints.
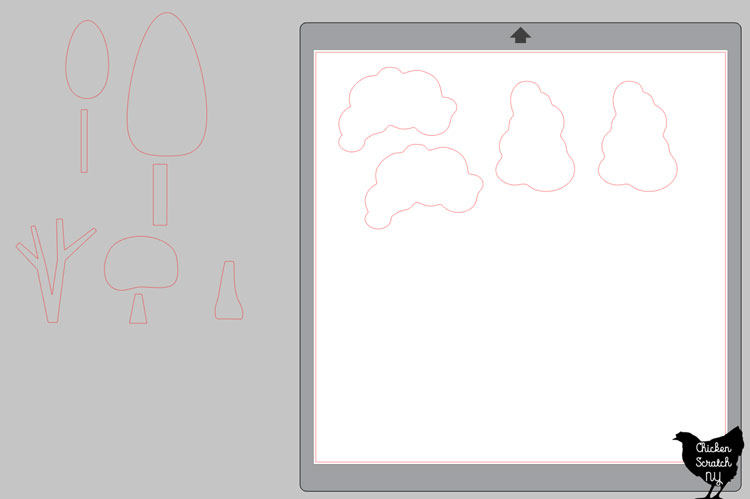
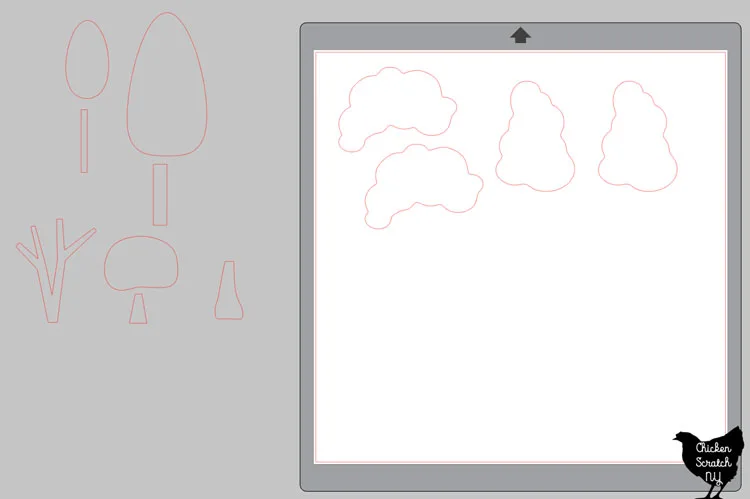
Select the shapes you aren’t cutting yet and drag them off the mat. Organize the remaining shapes making sure to leave about 1/2 an inch between them. Make a note of how much fabric you’ll need, it’s going to depend on how many shapes you’re cutting and what sizes they are.
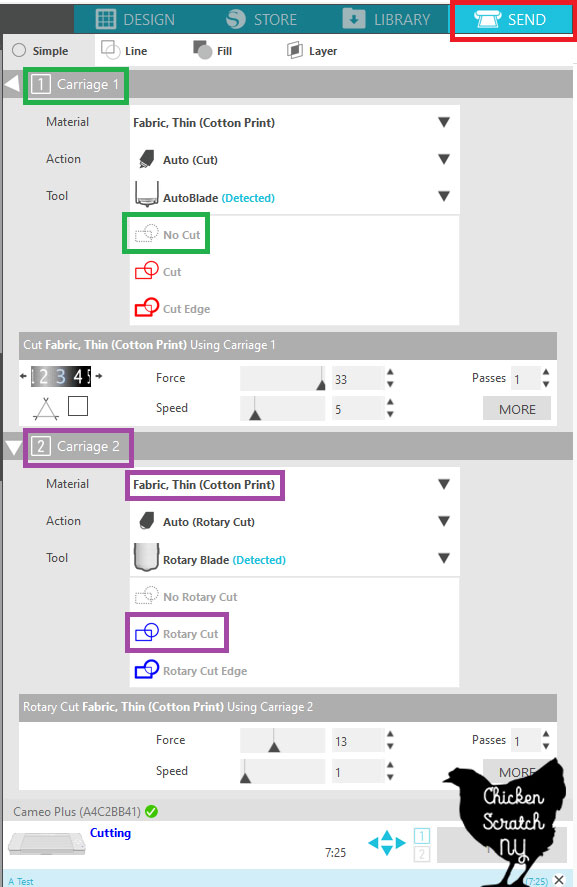

Switch to the [Send] screen and change your settings to use the rotary blade
Now we need to prepare the fabric for cutting. Take that measurement you just made (I always estimate larger) and cut it from your paper-backed fusible interfacing. Iron the interfacing to the back of your cotton fabric.
When your fabric has cooled down place it, paper side down, on your cutting mat. Load the mat and click [SEND]
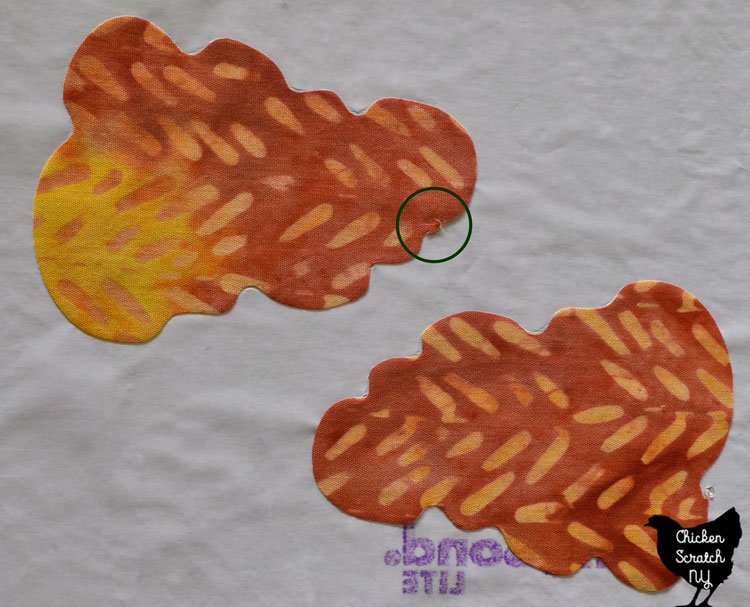
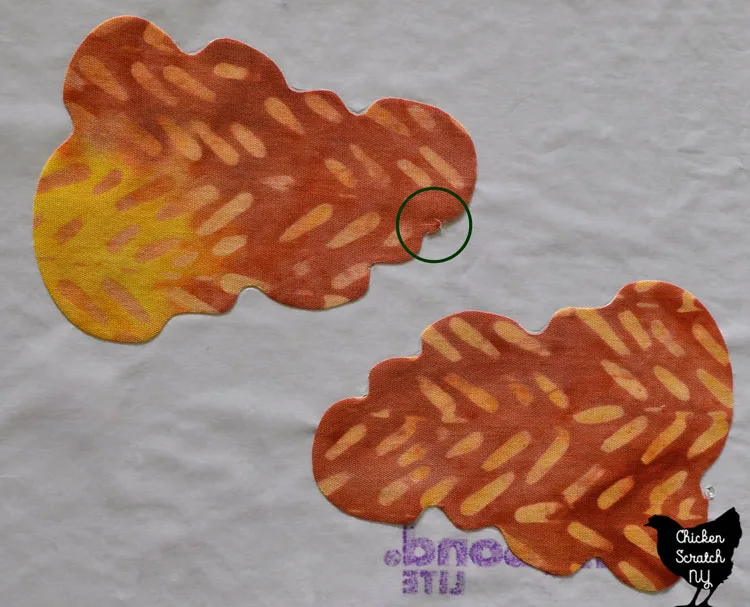
Repeat that process for all of your applique fabrics and shapes. You’ll likely need to clip a few spaces, I noticed it a lot more on the tree trunks than on the tree canopies but that might have been a difference in the fabrics I was using.
There were also a few random spots where I went in with my scissors to even out lines or rescue a weird divot like the one above.
Spots like this are my biggest issue with cutting fabric with my Silhouette Cameo, they just appear randomly with no rhyme or reason. I can cut the same exact shape twice and one will have a random cut and one will be perfect.
Using the Fusible Applique Shapes
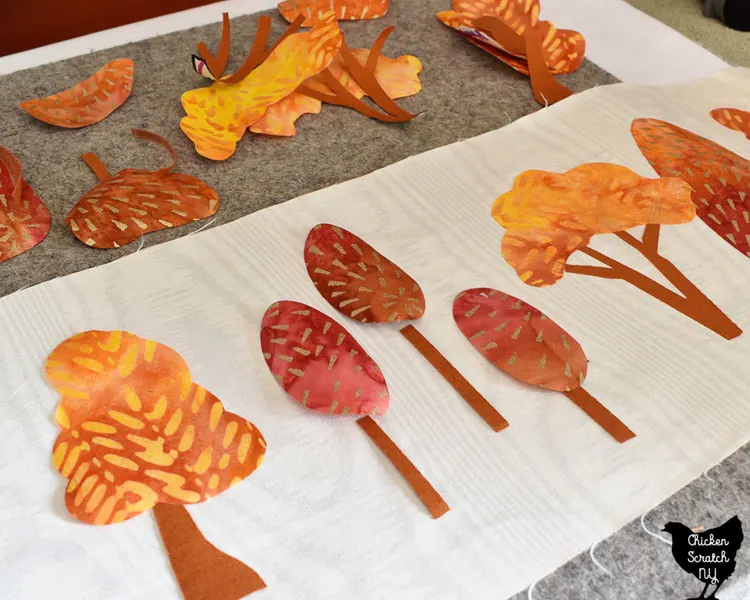
Now that we’ve got our shapes all cut out it’s time to grab the iron again and finish up the project. One fun thing about this technique is you can attach them to just about anything cotton that you can get under your iron.
That includes pillowcases, tablecloths, tote bags, quilt blocks, and even t-shirts. I decided to turn the shapes cut out today into a mini table runner for my wine shelf.
If you’re working with fabric start by pressing it flat and cutting it to size. Layout your shapes, play around, and get a rough idea of what you want.
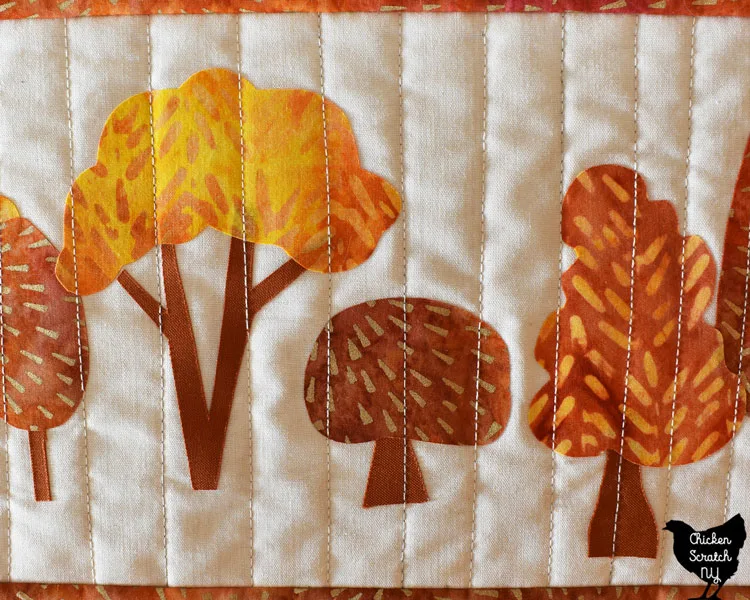
Make sure all of the paper backing is removed and start fusing the shapes down, working from the background layer to the front. For this project that means start by ironing down the tree trunks, then add the treetops and iron those down.
If you used the red Heat and Bond you’re all set, go out and enjoy your newly decorated tote bag or tablecloth. If you used the purple Heat and Bond (or Lite) you need to add some stitching to make sure your appliques stay where they’re supposed to.

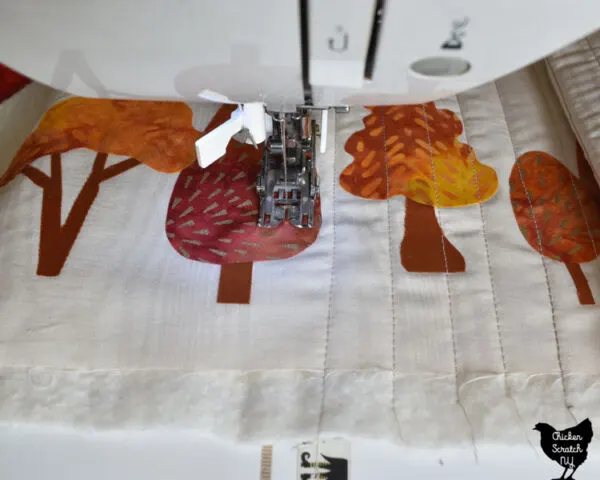
I finished up my narrow table runner by making a quilt sandwich with batting and another piece of the background fabric I used on the front. It’s quilted in simple straight lines with my walking foot in a variegated thread.
My stitching missed quite a few of the tree trunks and I should have used the stronger Heat and Bond but I used what I had and this runner won’t get a lot of wear and tear so I’m optimistic that it will be fine.

I finished it up with binding cut from one of my applique fabrics. It fits perfectly on my little wine rack and I can’t stop looking at it when I’m in the kitchen.
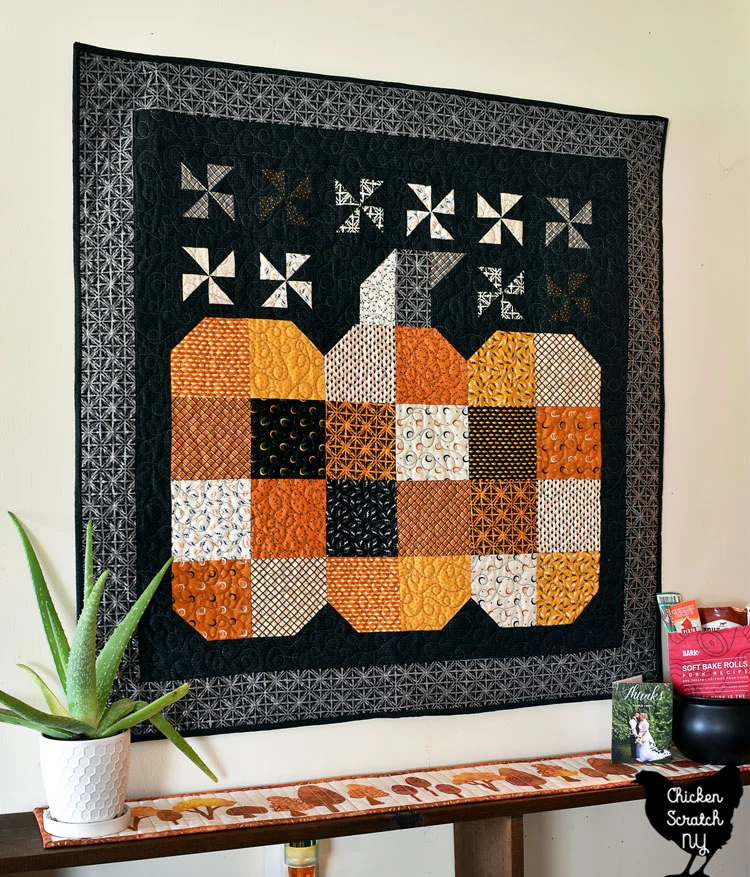
If that pumpkin on the wall has grabbed your attention, you are in luck! The pattern for The Great Pumpkin Wall Hanging Pattern is available for sale in my shop (there’s even a giant throw if pumpkins are really your thing!)
I would love to see any projects you try with this pattern, share them on Instagram and tag me @CSNYSewing
Check out my Sewing Page for more projects and ideas or start here: