
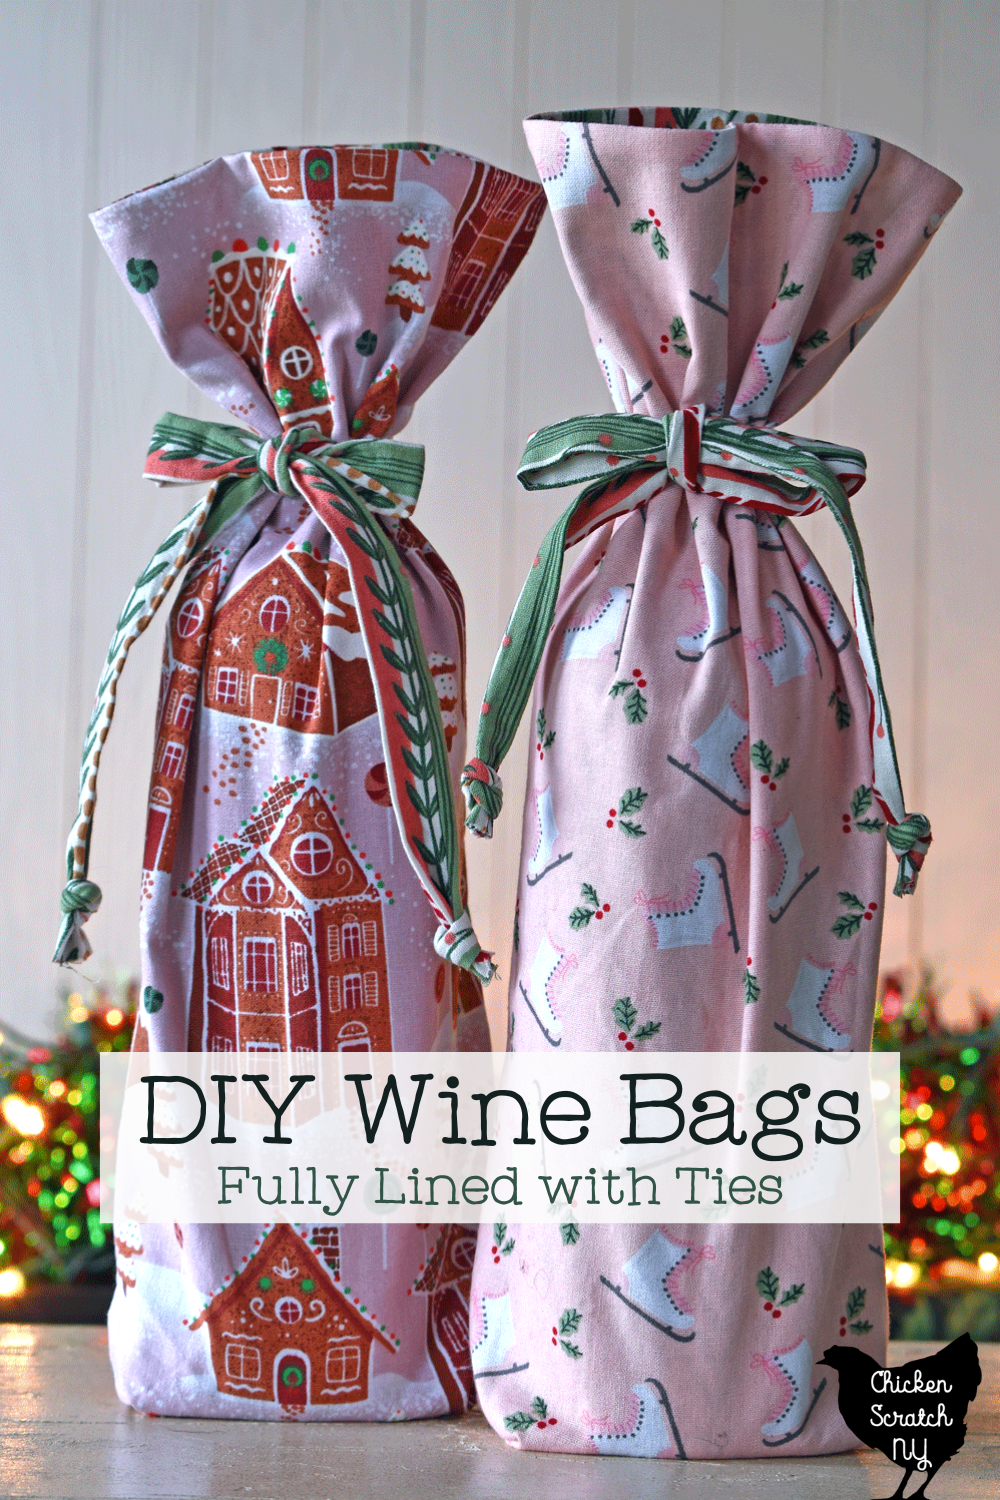
Wine makes a great gift but why not take it up a notch with a handmade gift bag? Sew your own with this simple wine bag pattern for a fully lined fabric bag with a flat bottom and ribbon ties!

At first glance, this may seem like a complicated tutorial but I promise it’s only tricky until you know the secret! The entire thing is sewn with straight lines from rectangles making it perfect for beginners.
I was able to fit all of the wine bottles on my (albeit small) wine rack into these bags but if you’re giving larger bottles you might need to size up your fabric pieces.
This is the same method I use to make my Christmas stockings and every time I have to readjust my brain a little bit. If you go step by step I promise you’ll get there in the end!
Wine Bag Supplies
You’ll need three pieces of fabric for each bag, one for the outside, one for the lining, and one for the ties. If you don’t want to make your own ties you can swap them out for ribbon.
I used quilters cotton for all three pieces, you can use heavier home decor fabric like canvas or denim but I would recommend pairing it with something thin for the lining or your bags will be very stiff.
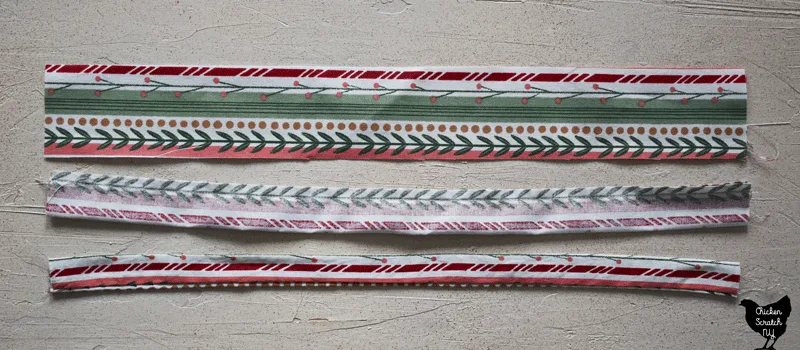
Picking your fabric is going to be the hardest part of this project! I started with a fat quarter bundle from Joann Fabrics.
It’s a great way to make a coordinated batch of wine bags without agonizing over color matching in the crowded aisles!
I also picked up some yardage of my favorite fabric from the fat quarter bundle (the amazing stripe) for the lining & ties and a coordinating solid for my embroidered bags.
You will also need:
- sewing machine & coordinating thread (I sew just about everything with a neutral tan color)
- iron
- ruler & rotary cutter+mat
- bodkin or safety pin
- pencil or Frixion pen
Lined Fabric Wine Bag Pattern
I wasn’t lying when I said this was easy! The main piece of the wine bag is a rectangle and you’ll need two, one for the outside and one for the lining.
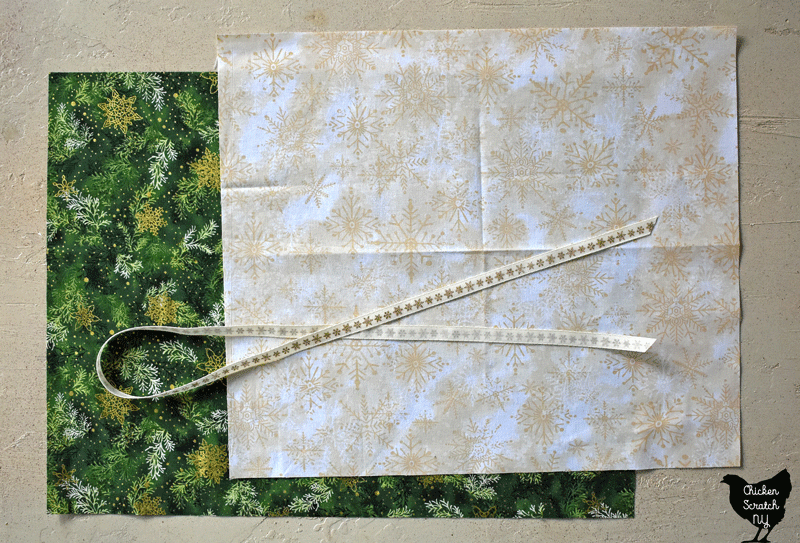
Cut two rectangles, 15″ tall by 12″ wide. If you are using a directional print make sure you’ve got your rectangles oriented the correct way!
These numbers are easy to adjust if you’re looking to make a bag for something taller like a champagne bottle or something short and squat for liquor.
You’ll also need to cut two 2″ x 14″ strips to make your ties. I think this is a good length for tieing a bow around the neck of the bottle but you can adjust it to fit whatever you like.
Once your fabric is ready it’s time to get sewing. The first bag you make is going to feel really strange and it’s not going to make sense until the end, just trust the process!
As for sewing, I used a 1/4 inch seam allowance because I’m in quilting mode 24/7 but if you want to use 1/2 inch go for it. Your bags will end up 1/2 inch shorter than mine, but they should still be taller than the wine unless you have a very tall bottle.
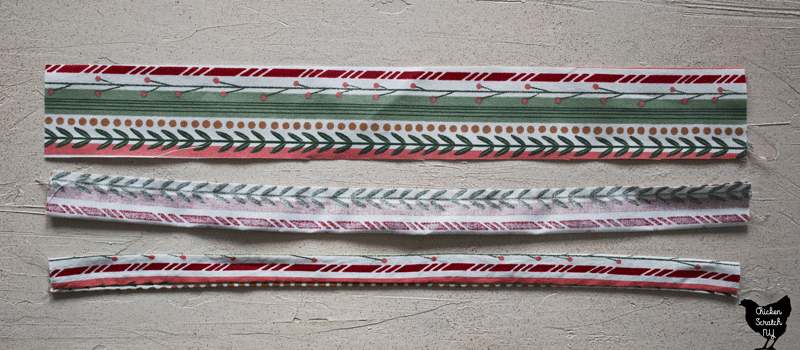
To make the ties fold the 2″ x 14″ pieces in half, right sides (pretty sides) together and sew 1/4 inch away from the open edge.
Use the bodkin or safety pin to flip the tubes right side out. It will take a bit of fiddling to flatten them out but do your best and then hit them with the iron.
Either fold one end in and stitch across or tie a knot at the end.
For the bag itself, start by sewing the two rectangles together across the top. Press the seam open to make the next step easier.
Fold in half so the center seam matches up, for a perfect bag stick a pin here to keep the pieces lined up. Measure 4″ down from the seam on the outside of the bag, and pin the ties with the raw edges sticking out (the long pieces will be inside).
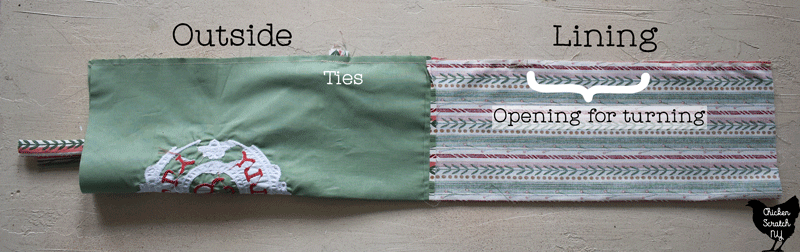
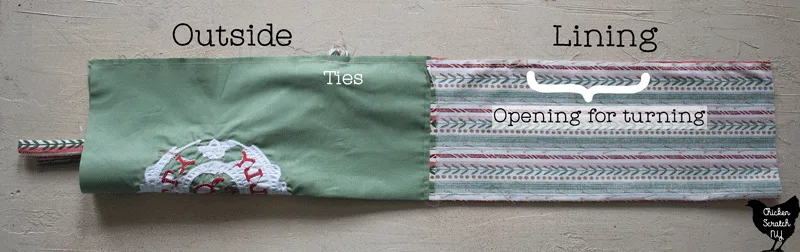
Sew along this seam, leaving a 4″ opening on the lining side. Backstitch or lock stitch at both sides of the opening so your bag doesn’t fall apart when we go to flip it.

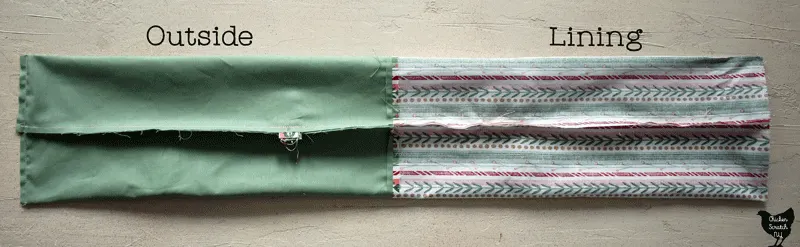
Take your tube and flatten it out, aim to get the seam in the center but it doesn’t have to be perfect. Sew across the bottom on both sides taking care not to catch the ties in the seams.
We have one more weird step before it all comes together.
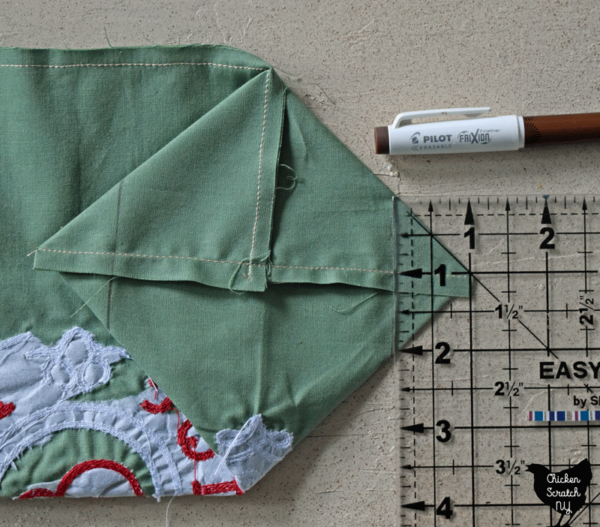

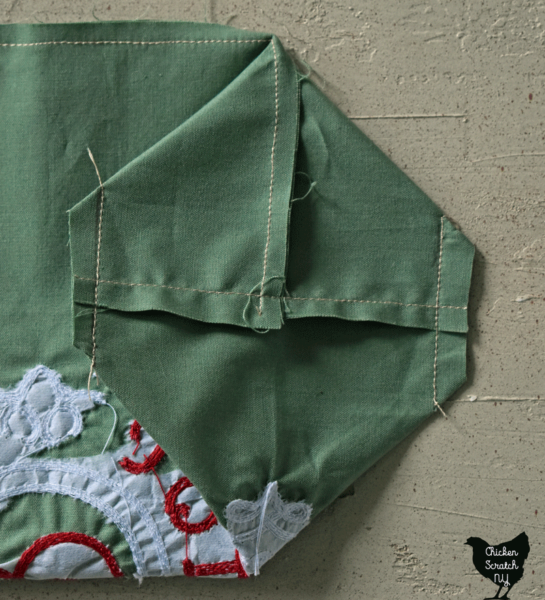
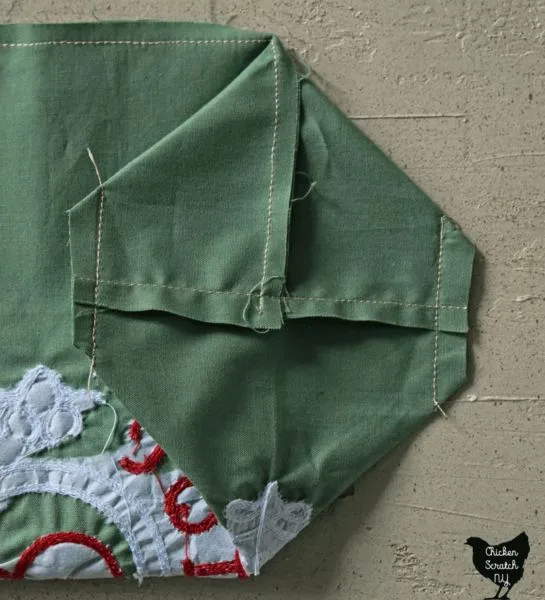
Flatten out the bottom of the bag, it will make a semi-squarish shape. Use the ruler and a marking tool to draw a line 1″ away from the point.
Draw the same lines on both sides of the outside & lining. Sew along those lines & cut off the extra fabric.
Remember that hole you left in the lining? Now it’s time to go into that gap and turn the whole thing right side out.

You’ll end up with a long tube with squared-off ends and some ties. Sew the hole in the lining shut, you could do this by hand to make it invisible but no one is going to see it so I just use my machine.
The final step is to shove the lining inside the bag. Once you get it started it’s really helpful to just stick a bottle of wine in and wiggle it around to get everything in place.
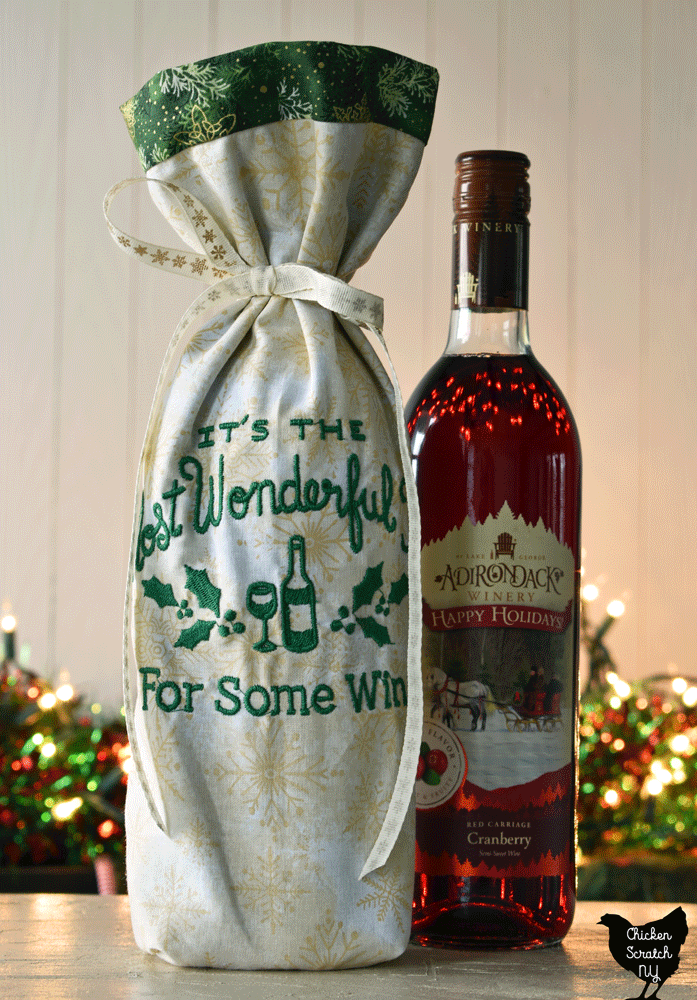
And there you go, a fully lined wine bottle bag with ties!
Wine Bottle Bag Variations
Once you’ve got the method down you might as well experiment with it.
The easiest way to fancier up your wine bags is to substitute ribbon or lace for the ties. Not only does this eliminate the most tedious part of the process, but it also opens up a lot of doors for pretty bows!
You can also show off the lining. This is actually a lot easier than it seems.
Instead of cutting the rectangles the same size, cut the lining 1/2 to 1.5″ longer than the outside of the bag. When you stick the lining in the bag a little bit will peak out the top.
You can also do the reverse to make the lining more hidden. That’s how I make my Christmas stockings, on the outside they’re a pretty red plaid but if you look inside I have beetles, my daughters have Pikachu & Scooby Doo and my fiance is repping the Washington State Cougars.
It’s a fun way to make your bags a little more personalized without taking away from the holiday aesthetic.
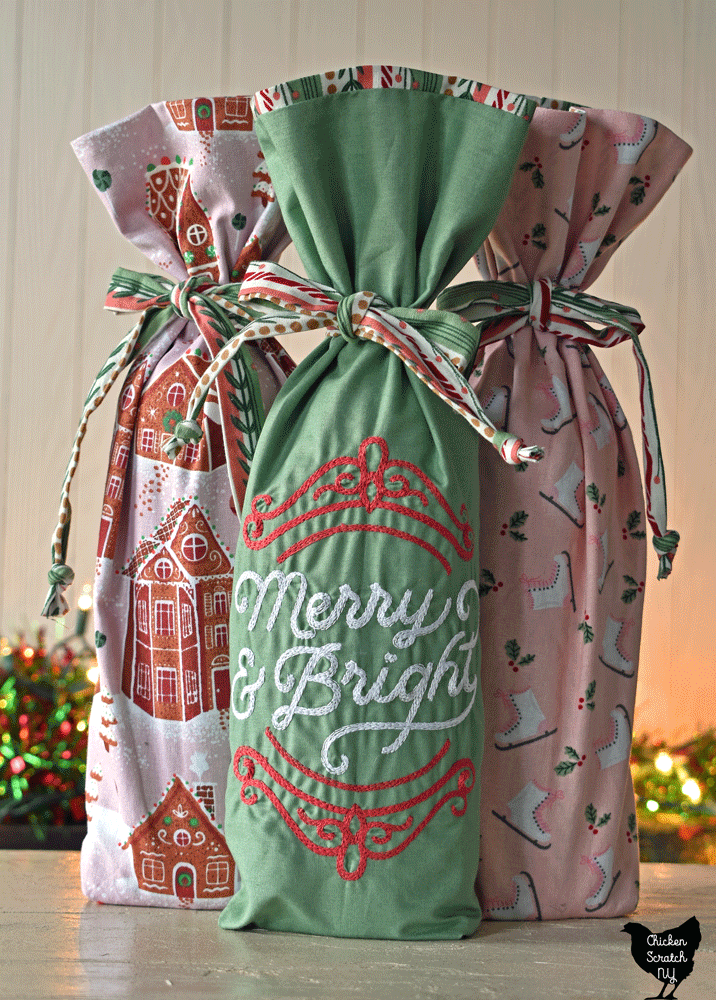

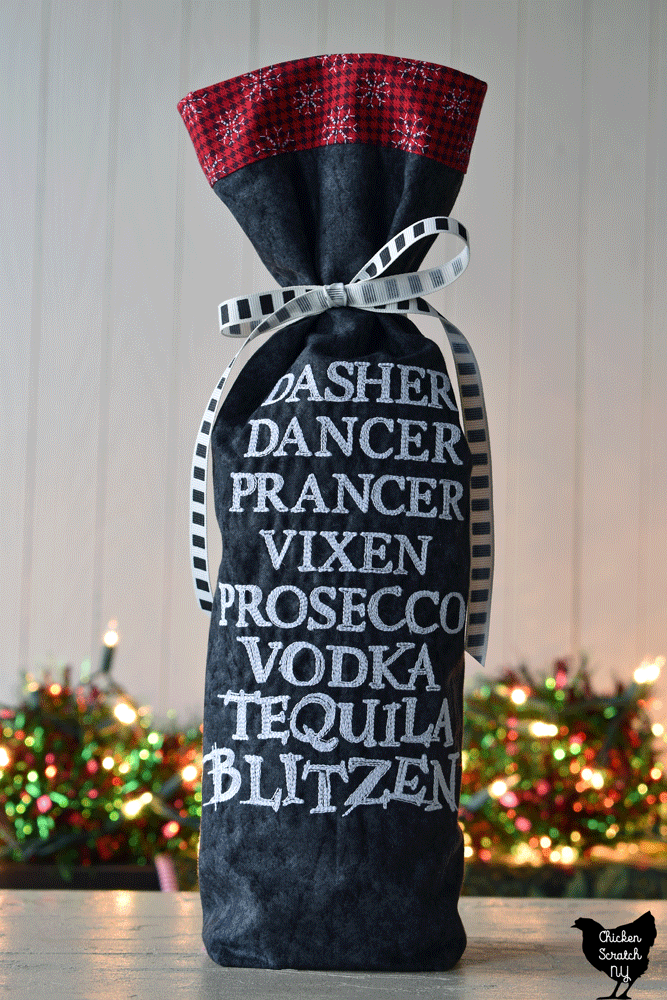
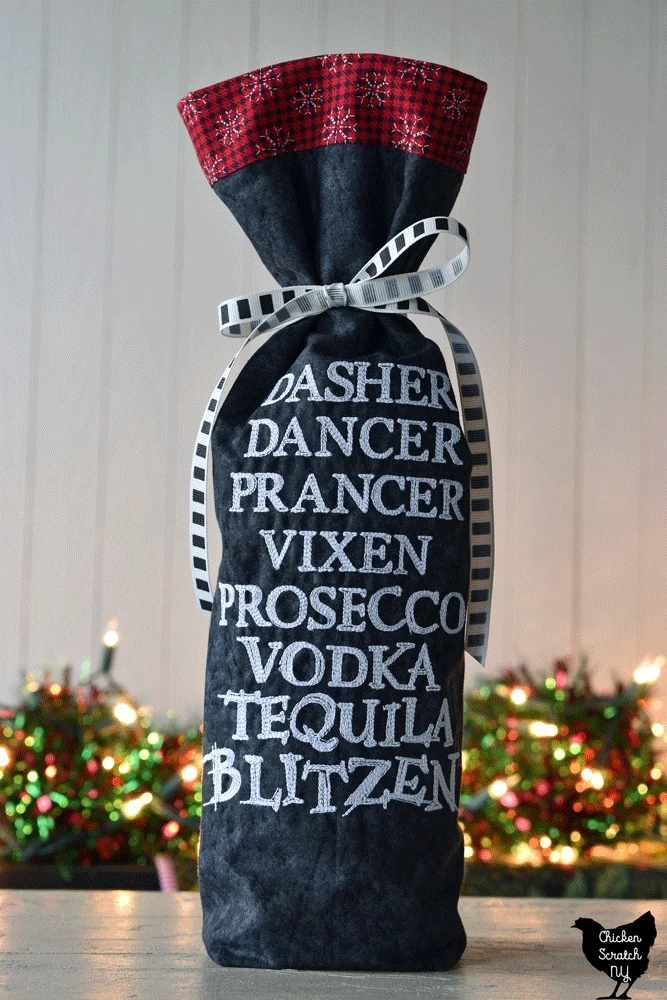
One more option for making your wine bags extra special is to add embroidery! You’ll need to do this in the beginning before you sew anything.
I used the designs Modern Merry & Bright, Modern Holly Jolly, It’s the Most Wonderful Time for Some Wine, and Tispy Reindeer Games.
For modern Merry & Bright and Holly Jolly designs, I centered the embroidery 5.5″ up from the raw edge of the fabric.
I used the wrong stabilizer for those and the designs ended up pretty squished. I corrected the problem for the other bags and I think they looked a lot better.
“The Most Wonderful” design on the snowflake bag is too big but that was the size I had so I went with it. I’ll give it to my mom and she’ll love it no matter what.
If you ever feel bad about your homemade items, go to a store and look at the questionable quality people are eager to hand over their money for.
The best placement will depend on the design you choose so I recommend making one bag and then using printouts of the design to figure out your placement.
Check out my Christmas Page for more ideas or start here:

Debbie
Thursday 4th of December 2025
I’ve made several of these for gifts. Directions are so easy and the recipients love them. I use ribbon instead of fabric ties.
Kristin
Saturday 19th of July 2025
This is a wonderful tutorial - thank you for sharing!
Thursday 7th of November 2024
Thank you for the pattern!