

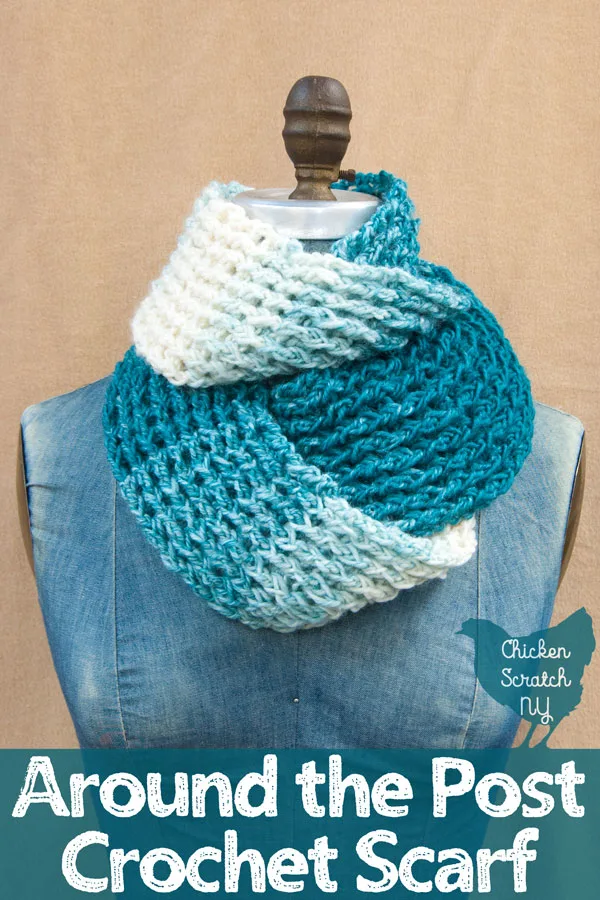
If you’re looking to take your scarf game to the next level look no further. With one simple change to the double crochet stitch you can take basic to fantastic and whip up an Around the Post Double Crochet scarf in no time at all.


Scarves make perfect gifts, they’re easy to personalize and you can finish one in a day. Thanks to crowded yarn aisles you can find something in a color and texture for everyone.
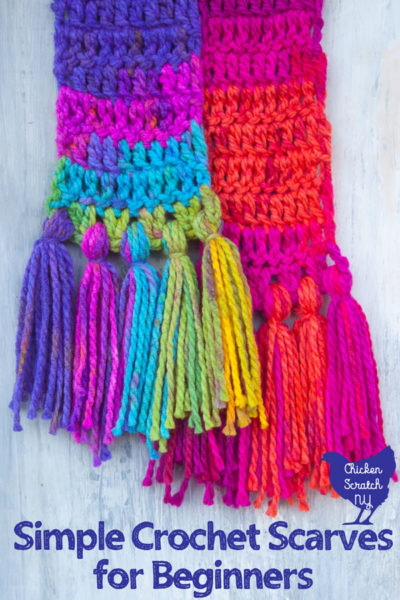
My go-to Christmas gift for years has been a simple crocheted scarf with fancy tassels that I can whip up in a few hours. Very important when you procrastinate and have a huge family. Those scarves rely on colorful chunky yarn to make then seem much fancier than they are.
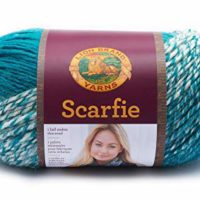
Then I went and fell in love with a new yarn, a thinner yarn. Scarfie yarn in Cream/Teal was a total impulse buy. Scarfie is an acrylic/wool blend available in 20 different ombre shades.
The label classifies it as bulky, but I don’t believe them. It runs $10 for a ball, add a 60% off any item and you’ve got yourself a fancy $4 scarf.
There is a variation in the thickness of the yarn as it changes colors. It has a very smooth transition from cream to teal and back. I tried to work it up in my basic scarf pattern but it wasn’t what I wanted. This yarn deserved more.
After flipping through my trusty crochet book, a little experimenting and a lot of frogging I settled on a double crochet variation with crocheting around the post.
It’s not any harder than a regular double crochet but it looks a lot different. You end up with pronounced vertical ridges that look more like knitting than crochet. Which is great for ahem those of us who can’t knit but still like that look.
Instead of going through the loops at the top of the stitches you go around the double crochets in the previous rows, aka the posts. By alternating between the front and the back you make scarf that looks the same on both sides.
How to Crochet Around the Post
You’re going to be making a mesh of sorts, there with be vertical columns on the front and back with the horizontal rows running in between them. If you pull the scarf apart you’ll see exactly what I mean.
Start with a basic chain and a row of double crochet. At the end of the row chain 3. This creates the foundation for the pattern.

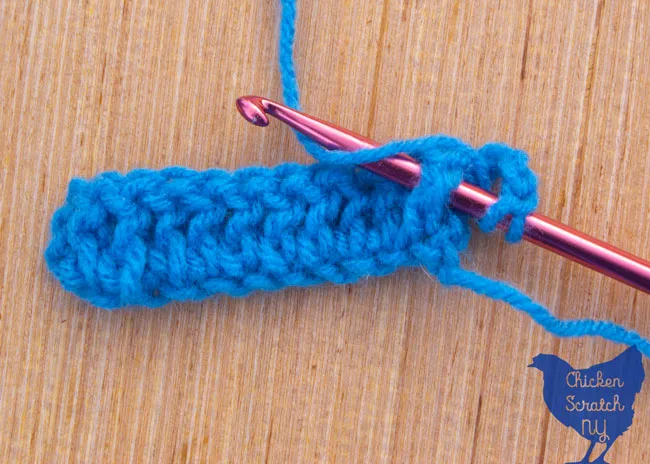
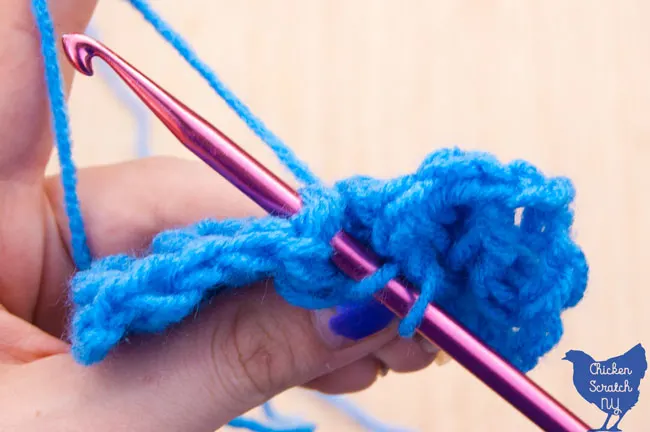
Yarn over and pass the hook under the 2nd dch from the hook from the front, yarn over and pull the loop back behind the dch. You should have 3 loops on the hook. Finish the stitch.

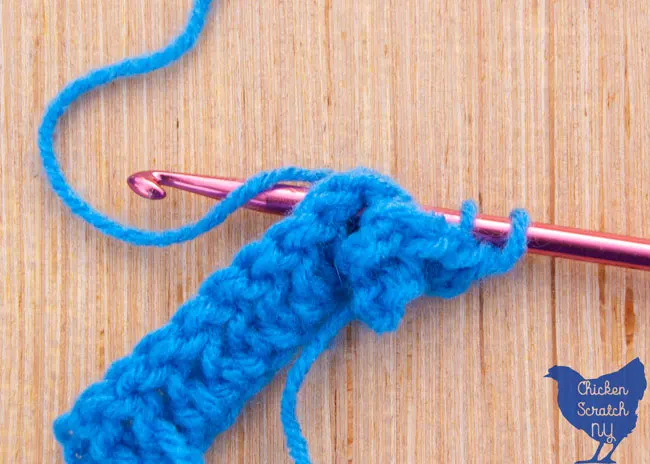
Yarn over and pass the hook under the 2rd dch from the hook from the back. Yarn over and pull the loop in front of the dch. You should have 3 loops on the hook. Finish the stitch.
Working around the stitched pulls them forward (and backward) to make the vertical cables. It’s pretty and it also makes this an easy pattern to pick up and put down. You don’t need to count or keep track of where you are.
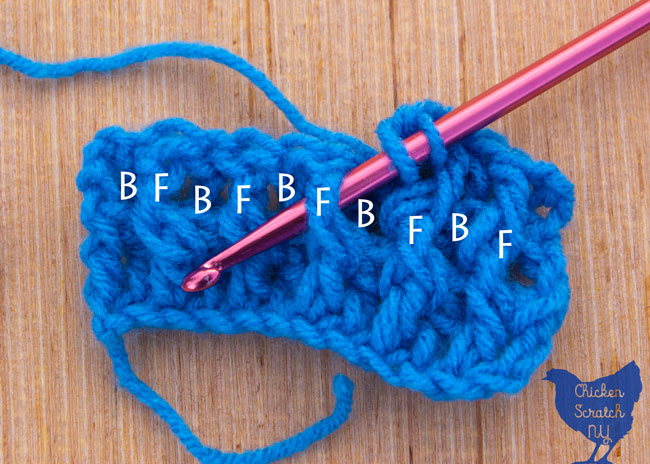

If the dch is pushed forward, work from the front, if it’s pushed back work from the back.
If you’re new to crocheting practice this stitch with Simple Saver or another basic cheap yarn. Working the dch from the back is tricky, it’s easy to drop the loop when you pull it through. Even after 3 full scarves I’m still dropping a stitch or two every few rounds.

I find it easier to bend the whole thing forward when you’re working around the back posts.
Once you’ve mastered crocheting around the post it’s time to make a fancy scarf.
Picking a Yarn to Crochet Around the Post

You can obviously use any yarn here but I’ve played around with this stitch in a few different yarns and I’m going to tell you what I’ve discovered. I think you get the best look from this pattern with a textured yarn and a loose stitch.
We’re going for that cabled look and due to the nature of crocheting you’ll get obvious gaps on either side of the double crochet columns. A textured yarn hides the gaps between the stitches, especially if the yarn is a little fuzzy.
The best thing about going around the post is that it’s so much easier than trying to find the correct loops with a fuzzy textured yarn. For example I have a love/hate relationship with Homespun yarn from Lion Brand.
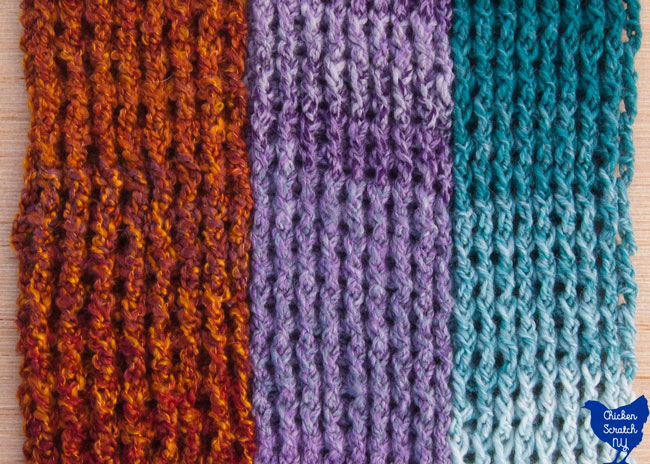
It’s soft and fluffy and warm but it has a funky loopy texture that makes it impossible to find the right place to put the hook for the next stitch. I made a scarf with Homespun in the color Wildfire. This scarf is super squishy and warm.
The second scarf in the line up was made with Barcelona yarn by Loops & Threads in the color Quartz. I picked the purple shade with my mom in mind, it’s her favorite color and the scarf I made her was a few years ago (the pearl white Homespun scarf hanging on the fence in my double crochet scarf post).
I love the yarn and I think the texture is perfect for this crochet pattern. But… I really don’t like the pattern. The ball of yarn itself is gorgeous it’s a range of gray, lavender and purple tones with a hint of blue.
When you work it up it has very abrupt color changes, it makes very distinct blocks of color. But they’re very random and bother my brain.
I prefer colors that blend into each other like on the cream and teal scarf. Keep that in mind if you’re checking out the Barcelona yarn at Michael’s. It was only $5 though, so not bad for a gift!
The last scarf in the trio was crocheted with the Selfie yarn I mentioned in the beginning. You get a soft lacy look without being too delicate. It’s a pretty sturdy stitch so it’s fine for every day wear. The one downside is that Scarfie is a wool blend, if wool bothers you you’ll need to pass on it.
How to Crochet a Scarf Around the Post
Around the Post Double Crochet Scarf
Take your beginner crochet skills to the next level by learning to crochet around the post. Turn any ball of yarn into a stunning cozy scarf in a few hours while you practice!
Materials
- Chunky Weight Yarn - try Scarfie by Lion Brand or Barcelona by Loops & Threads
Tools
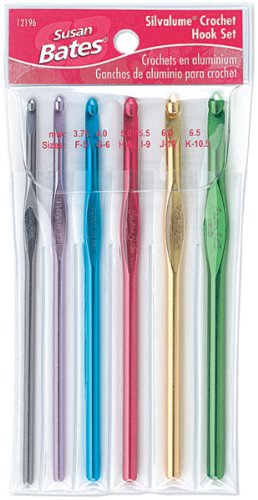
- Crochet Hook, size based on yarn
Instructions
- Chain 20
- Double crochet in the 4th chain from the hook, dch across the row (16 dch + chain), chain 3 for your turning chain
- Yarn over, working from the front slide the hook behind the first dch, yarn over and pull the loop behind the post (aka dch) finish the dch
- Yarn over, -working from the back slide the hook in front of the next dch yarn over and pull the loop in front of the post and finish the dch
- Keep working around the posts zig zaging from front to back. The first row is the hardest, after that the row you just finished will show you what to do
- Chain three at the beginning of each row before you make your first around the post stitch
- The scarf is done when you run out of yarn, if it's not long enough add another ball and keep going until you like the length. It's really up to you and your personal preferences
Notes
You can change the width of your scarf by changing the length of your original chain.
Recommended Products
As an Amazon Associate and member of other affiliate programs, I earn from qualifying purchases.

Check out my Yarn page for more ideas or start here:

Maritza Fernandez
Sunday 21st of February 2021
If I wanted to make my scarf wider, how do I add to the width? Does the base chain have to be an even number or a multiple of 4? Help! Thanks
Alecia
Monday 22nd of February 2021
You can use any length of chain, if you use an even number you'll start in the front post and end in the back post. If you use an odd number you'll start and end in the front post (or back post). Hope that makes sense!
Irma
Sunday 2nd of February 2020
I love the dc and dc in back easy and different. Thank you.
Sarah Kleineider
Monday 6th of January 2020
I have been trying to figure out what I was doing. I knew it had to have a name. Thank you so much for posting this.
Joan
Monday 11th of November 2019
Thanks for this pattern! I, too, have a love/hate for Homespun yarn, it is impossible to crochet! But your pattern is inspiring, & now I have something to try with the Homespun I have!
Veronica Gonzales
Tuesday 24th of September 2019
Hi! I JUST NOW JOINED YOU AND YOUR BEAUTIFUL WRITING SKILLS AS I FELT LIKE WE WERE HAVING COFFEE OR TEA AND CHATTING ABOUT OUR HOBBY AND ACHES BEGINNING IN OUR HANDS BUT KEEP ON CROCHETING!! LOL I LOOK FORWARD TO LEARN MORE STITCHES AND YARNS FROM YOU SO THANK YOU!