
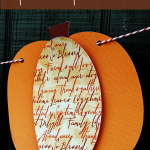

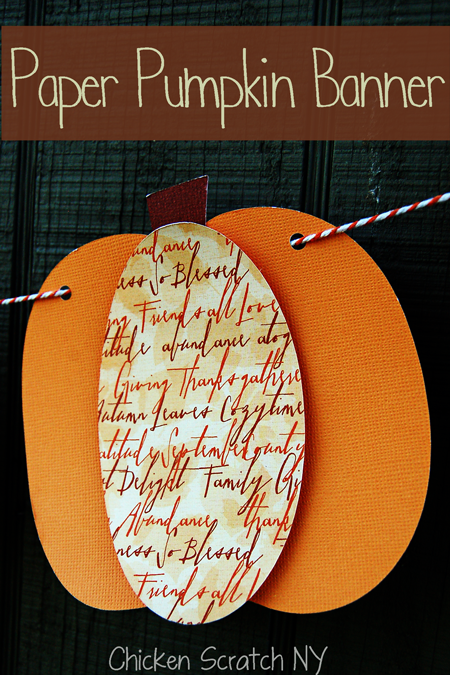
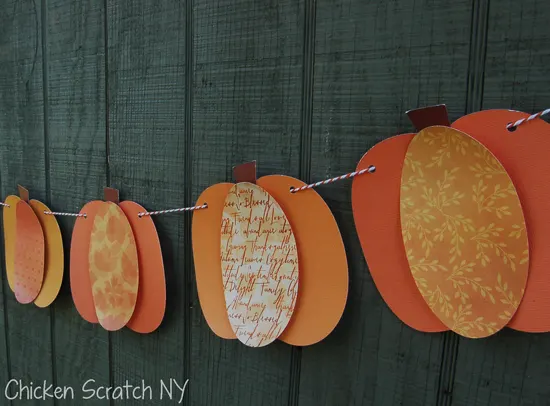
Turn a pack of autumn cardstock into a sweet autumn garland with this tutorial for a Paper Pumpkin Banner and free SVG cut file!
Decorating for all the holidays can be overwhelming and expensive. As much as I love fall I tend to skip straight from Halloween to Christmas.
This project is a great option for a simple decoration perfect for the autumn months. You will need a Silhouette Cameo or similar cutter to pull it off but if you’re set in that department this is a really cheap and simple project to throw together!
To make your own paper pumpkin banner you will need:
- Silhouette Cameo
& Mat
- Pumpkin Banner cut file
- Assorted 12×12 Cardstock
- Adhesive Foam Squares
(Check the Dollar Tree craft aisle!)
- Twine for hanging

Download the Paper Pumpkin Banner SVG File
Once you’ve got your file downloaded open it up in Silhouette Studio. You can probably do this with a Cricut but I’ve never used one and you’re on your own there!
How to Duplicate Shapes in Silhouette Studio
I’m going to go out on a limb and say you want to make more than one pumpkin and you might as well cut all the pieces at once.
There are multiple ways to duplicate items in Silhouette Studio and I’m going to go over 3 of them today.
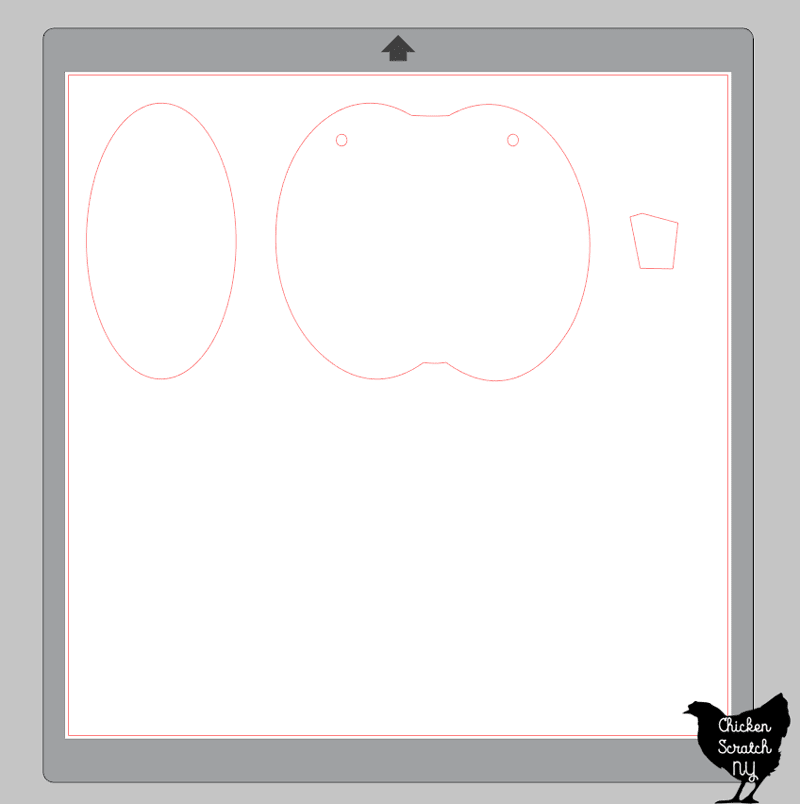
We’re going to start with the large back pumpkin piece. Start by selecting and dragging the pumpkin center and stem pieces to the side off of the workspace.
Silhouette Studio Tip: Hold down [SHIFT] to select multiple items at one time
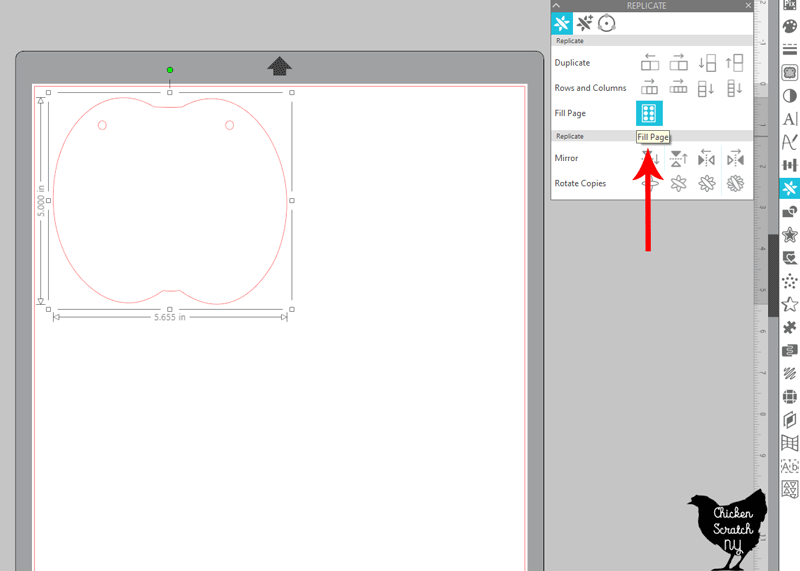

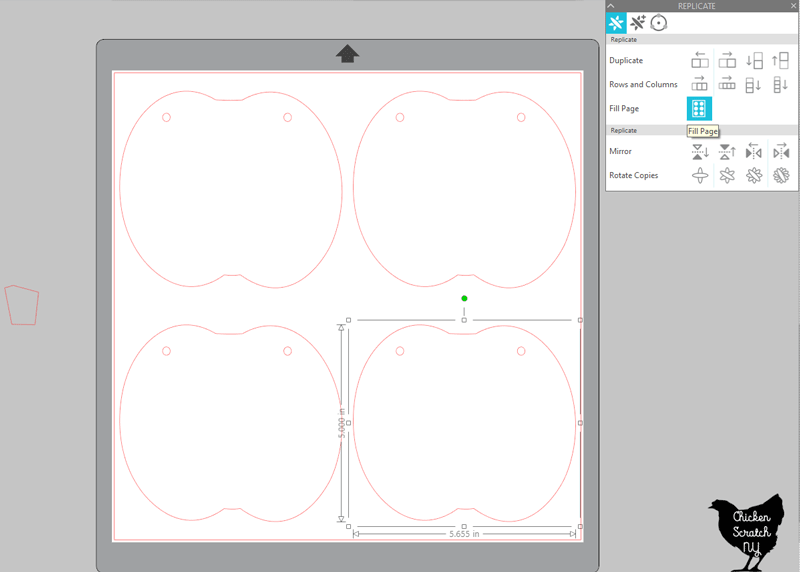
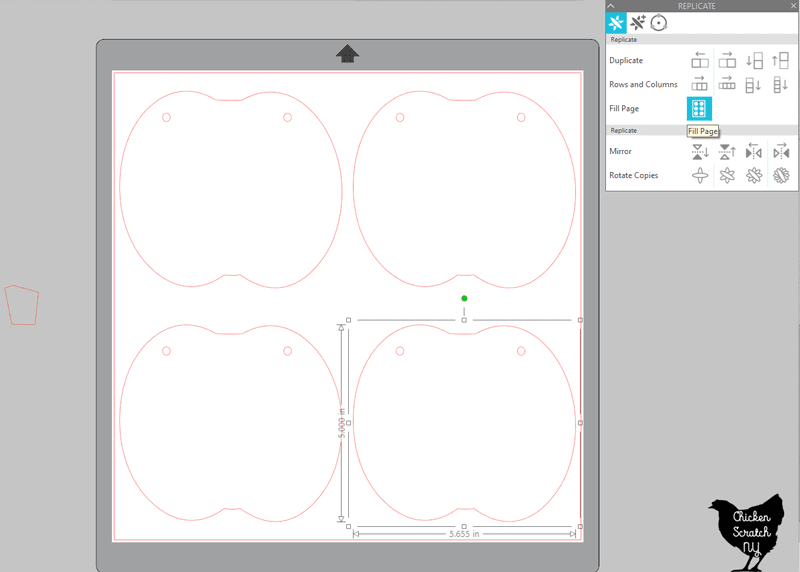
With the large pumpkin back selected open the Replicate Panel on the right side (looks like a 6 petal flower). Click the icon next to the text “Fill Page” which looks like a box with 6 dots in it.
This will automatically give you the maximum number of shapes you can fit on the page. For this shape we can cut 4 from a 12×12 sheet of paper.
Now is the time to cut all of your back pieces by sending the design to your machine and running it as many times as you want.
The next piece we’ll cut is the pumpkin center. I wanted the same pairs of paper for all of my pumpkins so I needed to cut 4 centers to match up with the four backs.

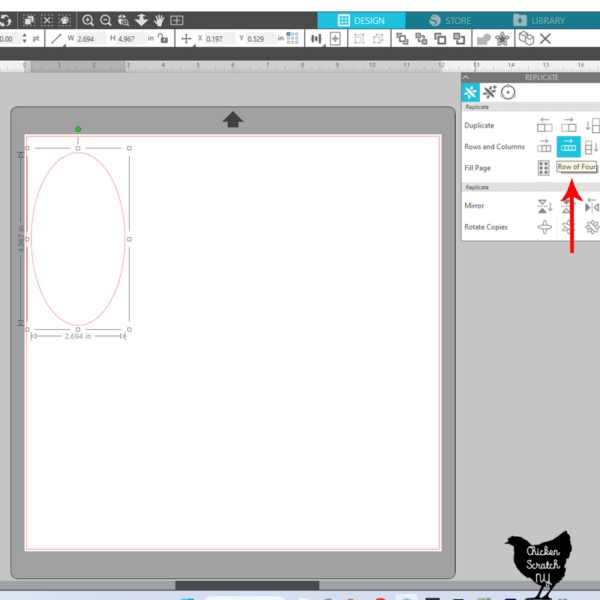


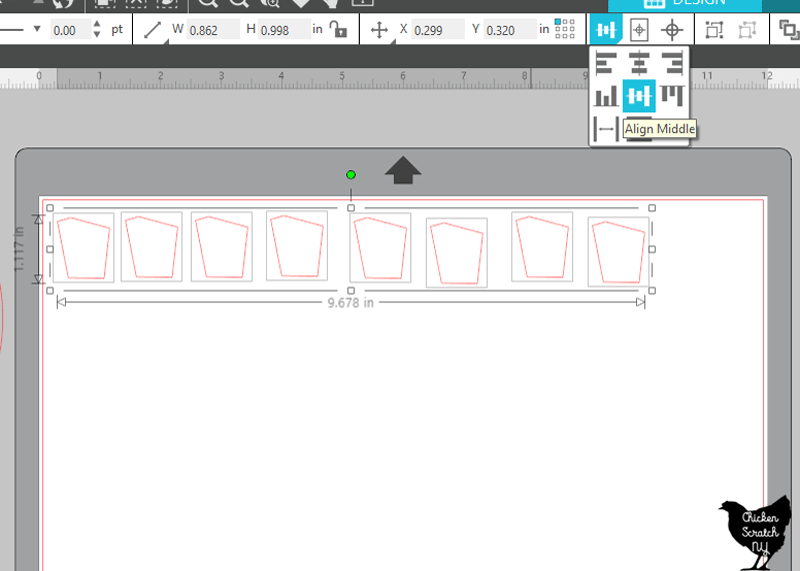
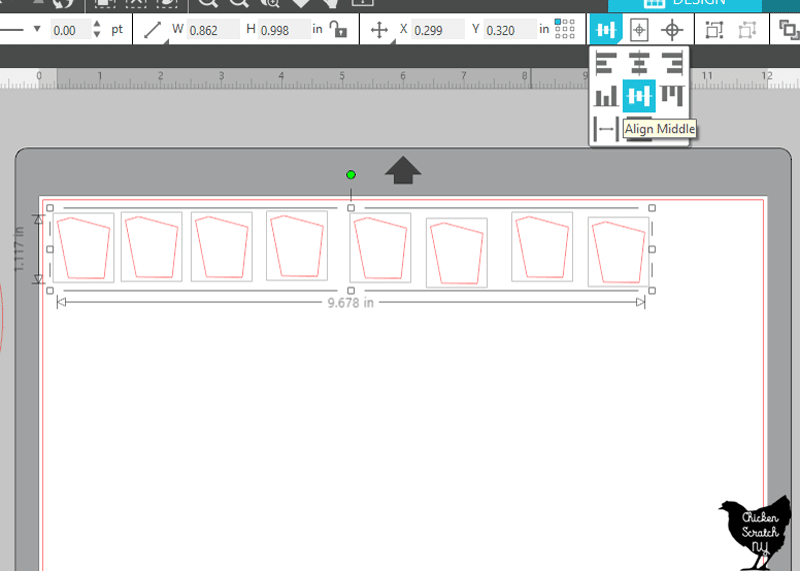
We’re going to use the same replicate panel but this time (with the center piece selected) click the second icon in on the Rows and Columns Row. If you hover over it without clicking it will say “Row of Four”.
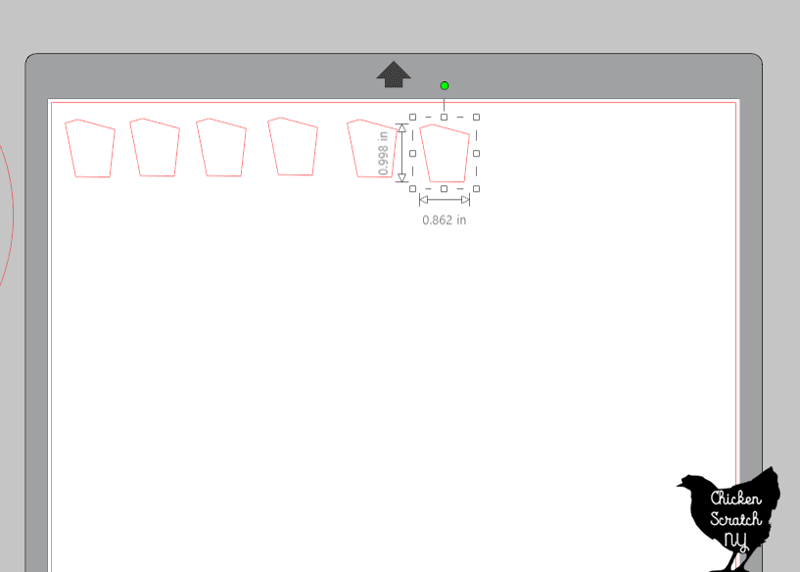
All of the shapes will be touching on the sides, you can cut them this way but I prefer to add a little space. To do this easily select the shape farthest to the right and drag it over close to the edge of the paper.
Select all 4 shapes, go up to the top menu, and hover over the alignment icon. A small box with a collection of icons will open up.


Select the bottom left option, it looks like two vertical lines with a double-sided arrow between them. If you hover over this icon it will say “Space Horizontal”.
Clicking this icon will immediately evenly space out the shapes.

The final option is to manually duplicate your shapes. The fastest way is to hold down on the [ALT] key while you click and drag the shape.
All of these methods will make an exact copy. Then you can draw a bow to select all of your shapes, go back up into that upper menu, and select “Align Center”
Paper Pumpkin Banner

Turn autumn cardstock into a festive paper banner with this simple DIY project perfect for fall & Thanksgiving!
Materials
- Autumn Paper
- Adhesive Foam Squares
- Twine
Tools
- Silhouette Cameo & Mat
- Free SVG File
Instructions
- Download and open the Paper Pumpkin Banner SVG in Silhouette Studio
- Cut as many duplicates as you need for your banner (you will need one of each piece for each pumpkin)
- Use the adhesive foam squares to attach the pieces together, layering the stem behind the center pumpkin piece
Notes
Make sure to adjust the cut settings to match your paper
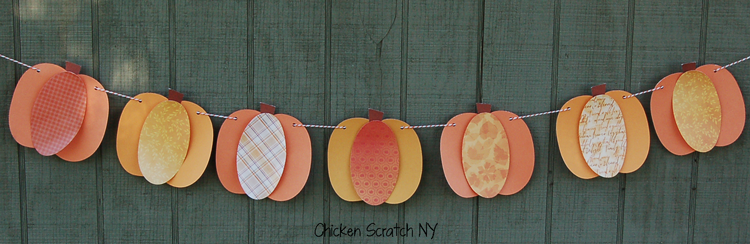
I used paper for the original Paper Pumpkin Banner and due to a combination of a new mat and thin paper I ended up with pretty curly pumpkins.
For the remake, I used thick cardstock and an older mat (literally just sticky enough to hold the paper while I loaded the machine) and had none of the curling issues.
To hang your banner run twine through the holes in the pumpkins. Tie loops on either side and hang with tacks or my favorite, command hooks.
Even if you use heavy foiled cardstock this banner is fairly light and should stay up without needing to put holes in the wall.
Check out my Autumn page for more craft and decorating ideas or start here:


Randi Sowders
Wednesday 18th of September 2013
Love this!! What is the group you joined? I need in! lol
Alecia
Friday 20th of September 2013
It's a Facebook group and you can join it by emailing Laura, the group owner. Here are all the details: http://www.thinkingcloset.com/2013/01/06/the-silhouette-challenge-a-new-series/
Mariely
Wednesday 18th of September 2013
Such a cute banner! Every time I see a Silhouette project, I remember how bad I want one :) Thanks for linking up to the Less Laundry, More Linking party.
Megan @ Our PInteresting Family
Friday 13th of September 2013
This is just too cute. I love learning how to do new things on the Silhouette machine. Thanks for sharing your tutorial. Found you through the Link Party Palooza, and I'm definitely pinning this idea.
Alisha Landreth
Friday 13th of September 2013
I can't get over how cute this is! I love LOVE all things fall and winter. You are my kinda gal getting ready for the season!
Lauren @ The Thinking Closet
Wednesday 11th of September 2013
This looks like such a fun and festive banner for fall! I love your use of the baker's twine - - and your variety of papers is just lovely. So glad that you joined our group, Alecia, and that you participated in this month's Silhouette Challenge Group Post! Whoo hoo!
Warmly, Lauren The Thinking Closet