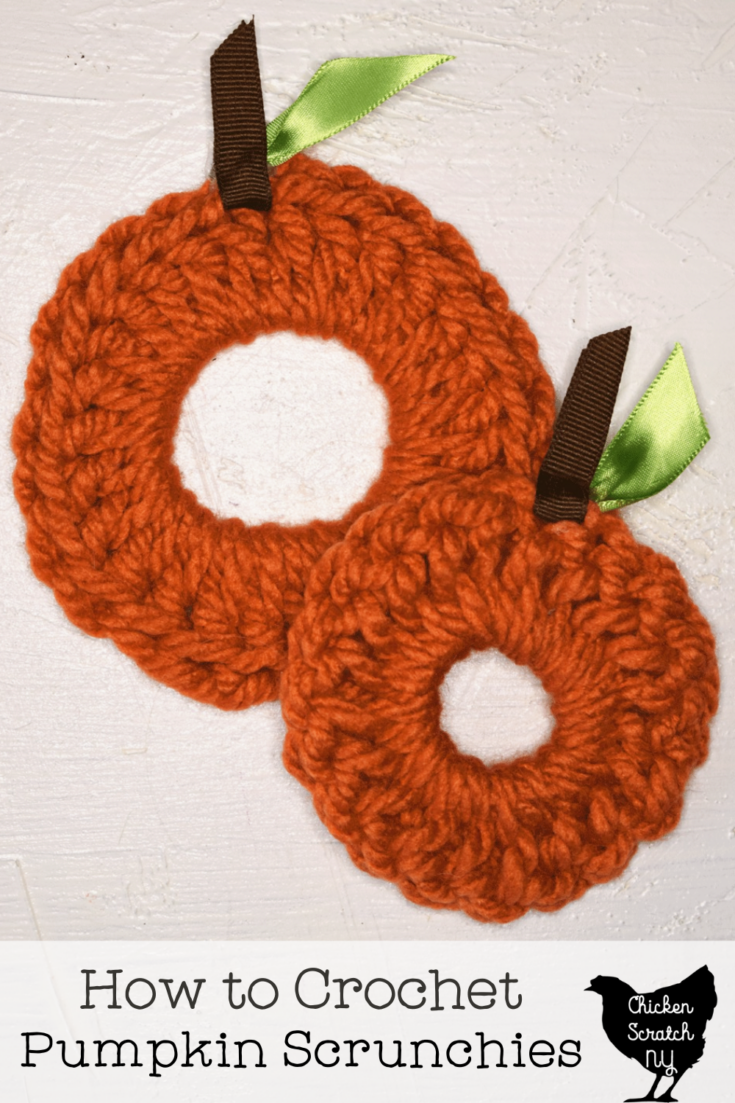
Add some fall fun to your hair with this simple crochet pumpkin scrunchie! With a little bit of yarn & ribbon, you’ll be ready for hayrides and pumpkin carving in no time.

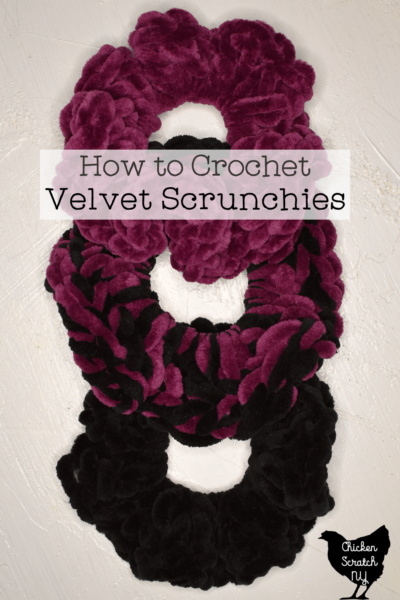
Crochet scrunchies are a new love of mine, not only are they fun, cheap, and easy to make but the options are apparently endless. When I was working on an article about Crocheting Velvet Scrunchies I got this idea in my head and it absolutely would not let go.
And I’m so happy it didn’t because these pumpkin scrunchies are adorable and absolutely perfect for the fall and Halloween season!
Learn How to Make Velvet Crochet Scrunchies
Pumpkin Scrunchie Supplies
You’ll need the basic crochet scrunchie supplies for this (yarn, hooks, scissors & yarn needle) along with a few extras. You’ll need brown ribbon for the stem and green ribbon for the leaf along with a hot glue gun to hold it all together.
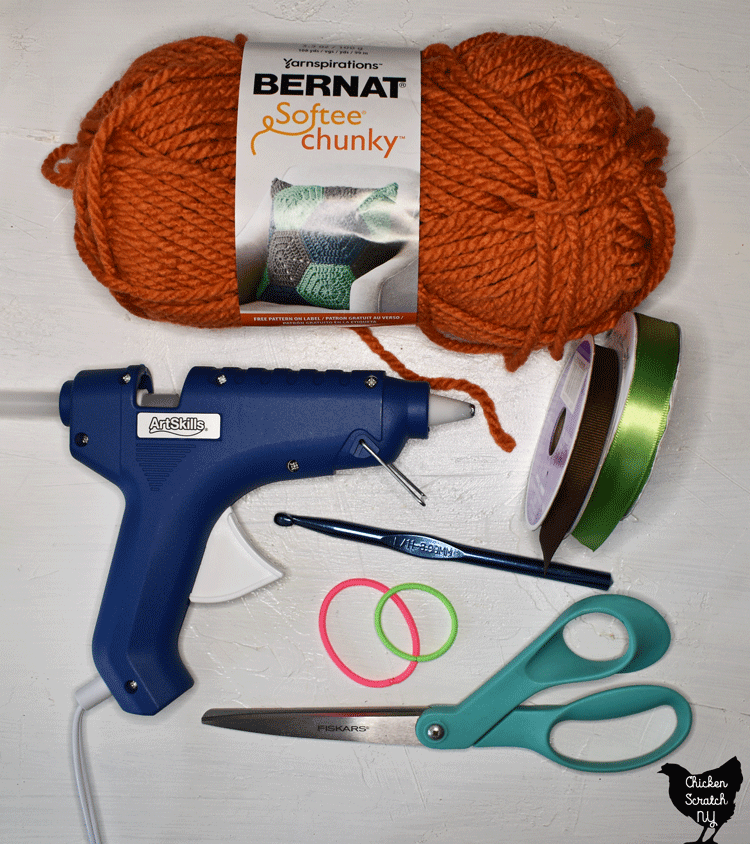

I used a 1/4 inch brown grosgrain ribbon for the stem, I liked the way the ribbed texture reminded me of a rough pumpkin stem. For the leaf, I picked out a wider 5/8 inch green satin ribbon, the shiny green contrasted nicely with the wool yarn and textured brown ribbon.
For the yarn, I used Bernat Softee Chunky in Pumpkin. It was the best pumpkin orange I could find in a Super Bulky weight.
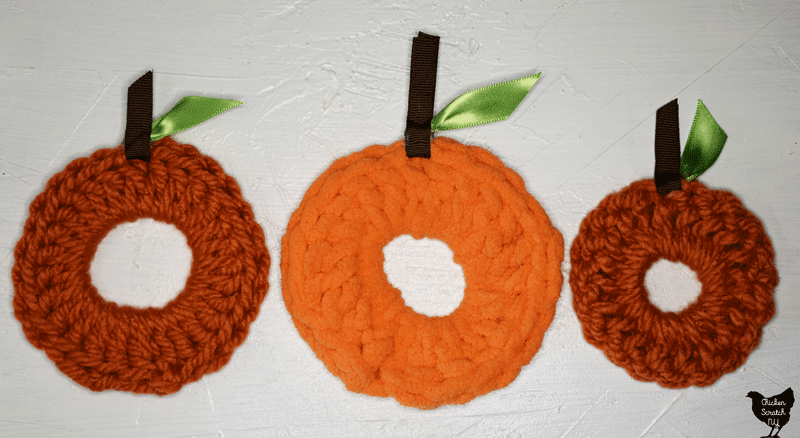
I also made a few with Bernat Blanket Brights in Carrot Orange. The scrunchies were cute but I thought they looked more like oranges than pumpkins so I decided to stick to the Softee.
How to Make a Crochet Pumpkin Scrunchie
Start your scrunchie by tieing a piece of yarn around the hair tie. Leave a tail about 6″ long so you can weave it into the outer edge when you’re done.
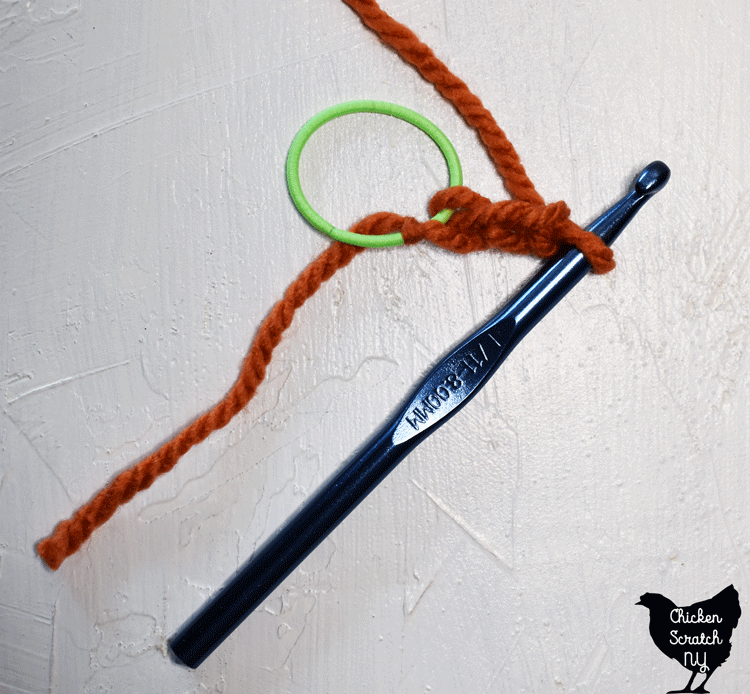

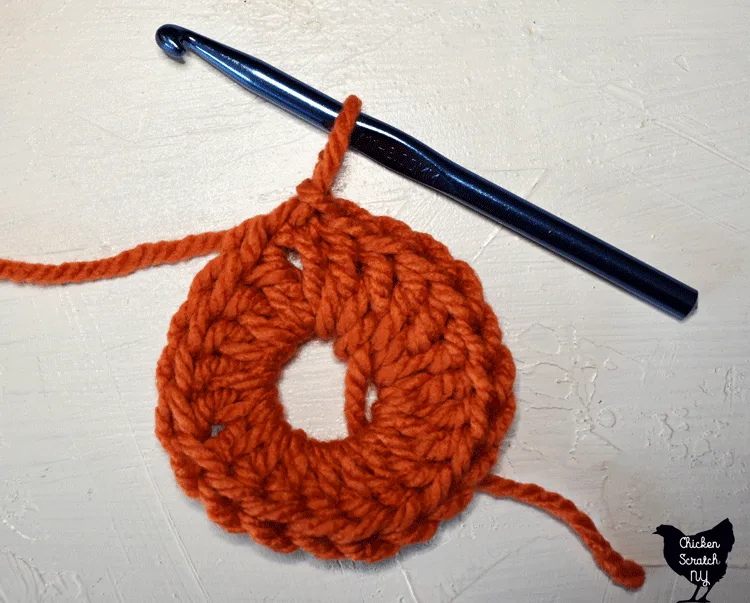
Put your hook through the hair tie and pull up one loop, then make three chains.
Start double crocheting around the hair tie. Make as many stitches as it takes to complete a circle without any ruffling (you shouldn’t be able to see the hair tie when it’s unstretched).
For a large hair tie, with a size L hook, I needed 27 double crochets. For the small hair tie, I only made 20 double crochet stitches.

When you have a nice flat circle make a slip stitch to bring the first and last stitches together.
Cut off the yarn leaving a tail and pull it through the loop on your hoop. Use a yarn needle to weave in the end.
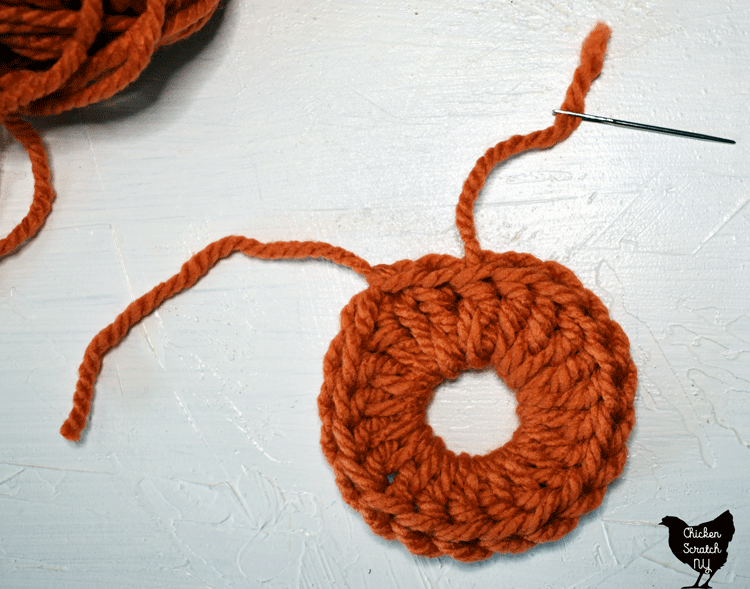

Use the same needle to bring the tail from the beginning up through the stitches and weave it in around the outside of the scrunchie. Most of the stretching will happen on the inside around the hair tie and if you weave your end in here it’s more likely to come out.
At this point you have an orange scrunchie, all that we need to do is add the stem and it’s a pumpkin!
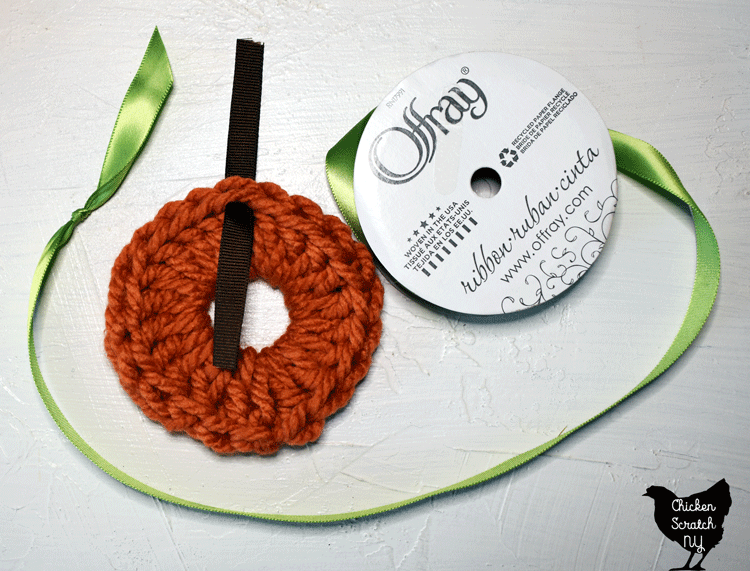

Tie a small knot in the green yarn and cut about 1/8 inch away from the knot. Cut a piece of brown grosgrain ribbon about 6 inches long.
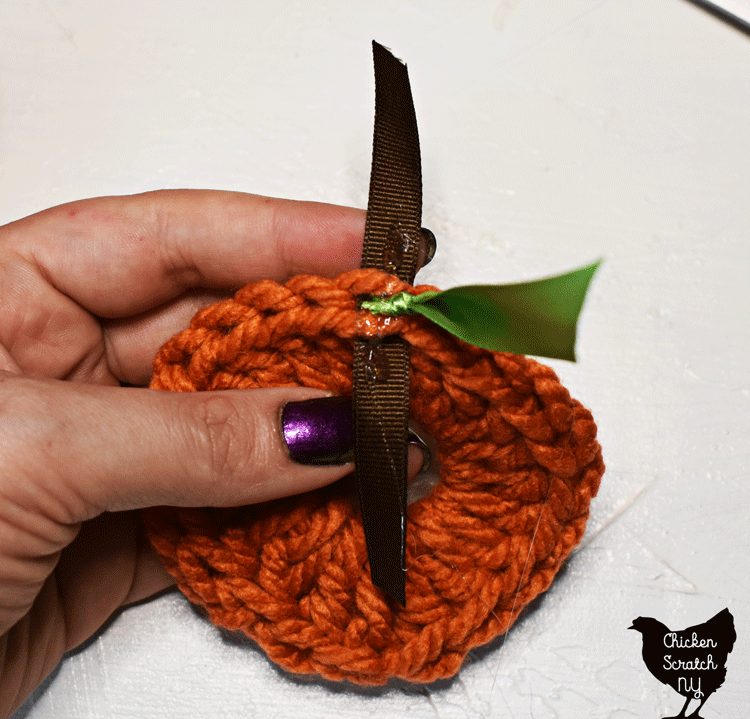

Pull the brown ribbon through both loops of one stitch. Run a line of hot glue across the brown ribbon & yarn loops.
Press the knot in the green ribbon into the glue and then press the brown pieces together.
After the glue hardens you can trim up the ribbons and remove any excess hot glue.
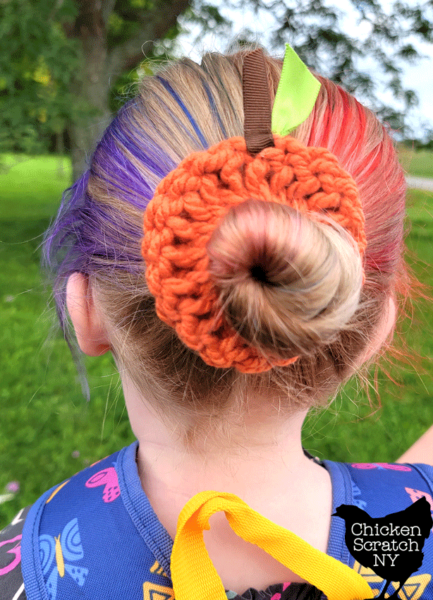

They look super cute around a bun!
Check out my Crochet page for more projects or start here: