• Skip to primary navigation
  • Skip to main content
  • Skip to primary sidebar
  • About Me
  • Blogging Resources
  • Disclosures & Sponsors
  • Privacy Policy
  • Contact Me

Chicken Scratch NY

  • Punch Needle
    • Chicken Scratch NY Pattern Shop
  • Farm
    • Chickens
  • Garden
    • DIY Garden Projects
  • Food
    • Preserving Food
    • Desserts
  • DIY
    • Fabric & Sewing
    • Paint
    • Paper
    • Vinyl
    • Wreaths
    • Wood
    • Yarn
  • Holiday
    • Birthday Parties
    • Valentine’s Day
    • St. Patrick’s Day
    • Spring & Easter
    • 4th of July
    • Halloween
    • Autumn & Thanksgiving
    • Christmas
  • Family Life
    • Crafting with Kids
    • Word Search & Crossword Puzzles & Mazes
  • Newsletter
You are here: Home / DIY / Vintage Lace Pennant Banner

Vintage Lace Pennant Banner

Last Updated May 4, 2018 By Alecia

My wedding reception is being held in an old barn in late September. We’re going very simple and rustic with the decorations. I decided to make several styles of pennant banners to decorate the space. The main entrance to the barn is lined with fences that will be hung with the vintage lace banners.

 I cut piles of triangular pennants from the scrap bin at work (bonus of working for a sewing company!). I used browns, reds, yellows, oranges and off whites; but you could use any colors that contrast with your lace. White on white would also be pretty. I had a bag of lace from Mikes late Grandmother, I thought it would be a nice way to involve her in the wedding.

You can make a nice banner with only 5 pennants, I generally find that odd numbers look the best but you can use what ever number you like.

Start by folding over tops of the pennants and ironing the flaps down. Then stitch across the top with a straight stitch. You will have a channel to run your twine through.

Next start adding the lace. Switch the machine to a zig-zag and change the thread color if desired.I wanted the lace to start in the same place on all of the pennants so I lined up the top of the pennant with the edge of the metal plate. That also helps keep your line straight.

Stitch a line across the pennant along the top of the lace. Trim the lace following the lines of the pennant.

Keep going until you run out of lace, pennants or patience.

When you’re all done sewing string the pennants on twine and hang the banner.

5 down, 200 to go!

Update: Here the banners are hanging at the wedding:

Country Farm Wedding Ceremony Site
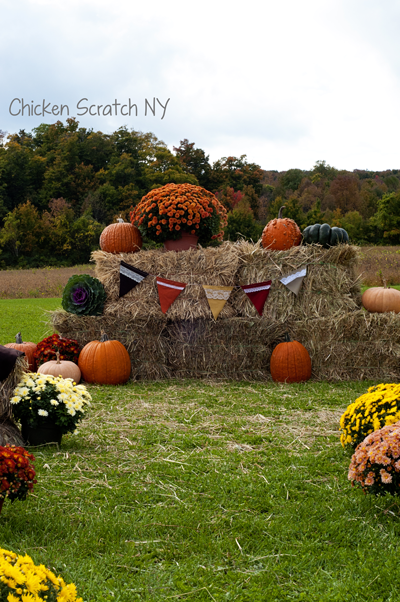
We had the ceremony on the lawn of the farm where we had the reception


Linked up at: Tuesday Treasures

Filed Under: DIY Tagged With: machine sewing

Reader Interactions

Comments

  1. Veronica and Daniel says

    August 28, 2012 at 12:03 am

    So pretty! What a special touch for your special day! I love antique lace!

  2. Chiwei @ One Dog Woof says

    August 28, 2012 at 12:58 am

    I love how it has family meaning, using the lace – elevates the simple craft to something really special 🙂 Hope you’re well!

  3. Karen Mary Butterfly says

    August 28, 2012 at 4:12 am

    I love, love, love that banner! It’s going to be a beautiful vintage accent at your wedding! New follower through, “Kate with an E.” I am happy I found you!

    http://shabbybrocante.blogspot.com/

  4. Jeanette says

    August 29, 2012 at 3:04 am

    Fall colors and vintage lace! And so special with the family connection. Lovely!

  5. Christina at I Gotta Create! says

    August 30, 2012 at 2:53 am

    Darling!! Oh wow–I just totally love this idea for a wedding. The lace on top of those colors is perfect. I cannot wait to see what all you come up with. September is just around the orner. Congratulations!

    Pinning. Thanks so much for linking up at I Gotta Create! <3 Christina

  6. Earning-My-Cape says

    August 30, 2012 at 4:56 am

    Very pretty!
    Of course you know, we all expect to see pictures of your wedding and your decor! 😉

    Thanks for sharing with my Super Link Party! 🙂

  7. Kathe says

    August 30, 2012 at 7:59 pm

    How sweet to include Mike’s grandmother in such a pretty way Alecia! Love this touch to your wedding! Thanks for sharing this at the party this week!

  8. Ruby Jean says

    August 31, 2012 at 12:16 am

    I Love the colors. Just pinned it from the Pinning Party.. 🙂
    Angelina

  9. Tutus & Tea Parties says

    August 31, 2012 at 12:45 am

    This is gorgeous! Love the colors. So pretty with the lace too!

  10. Meegan Fast says

    August 31, 2012 at 4:20 am

    You are so talented!! Thanks for sharing this!! I am excited to pin it!!
    Have a great week Alecia!!
    Meegan

  11. Shannon says

    August 31, 2012 at 4:52 am

    Super cute! Your wedding is going to be beautiful! Great tutorial–thank you.

  12. Lynn @ UpCountry Olio says

    August 31, 2012 at 6:29 am

    What a fun touch to add to your wedding!

  13. Christina at I Gotta Create! says

    August 31, 2012 at 4:31 pm

    You’re a STAR today with your own feature at I Gotta Create! Thanks so much for linking up. Live this!

    <3 Christina

  14. Nancy says

    September 1, 2012 at 3:31 am

    These turned out wonderful! I’m your newest follower, here from a link-party. I’d love it if you’d stop by my blog and check out my diy ideas!

    Nancy
    http://dosmallthingswithlove.blogspot.com

  15. Sweet Boutique says

    September 2, 2012 at 5:24 pm

    This is really adorable! I love the lace, great idea. I would really like if you would share this on Super Sweet Sunday @ swtboutique.blogspot.com
    Stephanie

  16. The Girls from Whimsically Homemade says

    September 3, 2012 at 6:30 pm

    Wow, there are really pretty. I’m sure this is going to be beautiful at your wedding reception.Thanks for sharing. Love from your newest Facebook follower, Whimsically Homemade!

  17. Sara - My Merry Messy Life says

    September 18, 2012 at 7:31 pm

    This is just beautiful, and a great decoration for a wedding, especially since you’re making it yourself! We made all our own decorations for my wedding, and it was hard work, but so worth it. Thanks for sharing at Hookin On Hump Day!

  18. Kelley says

    September 19, 2012 at 4:47 am

    Thank you so much for linking up to Financial Friday! Im sharing this on a fall decor roundup post tomorrow!

    • Alecia @ Chicken Scratch NY says

      September 19, 2012 at 4:43 pm

      Awesome! Can’t wait to see what else you’ve got!

  19. Nancy says

    June 20, 2013 at 4:54 pm

    Excited to be sharing this project in a round up today! Thanks for sharing it!

Trackbacks

  1. How to make a vintage lace pennant banner · Recycled Crafts | CraftGossip.com says:
    September 5, 2012 at 4:33 pm

    […] Are you on the banner bandwagon like me? Do you have a stash of lace scraps? Well why not combine the two using the great tutorial Alecia shared at her blog Chicken Scratch on how to make a vintage lace pennant banner. […]

  2. Fall Decor Ideas says:
    November 26, 2012 at 11:09 pm

    […] Chicken Scratch – Vintage Lace Pennant Banner […]

Primary Sidebar

Copyright © 2021 · Daily Dish Pro On Genesis Framework · WordPress · Log in