• Skip to primary navigation
  • Skip to main content
  • Skip to primary sidebar
  • About Me
  • Blogging Resources
  • Disclosures & Sponsors
  • Privacy Policy
  • Contact Me

Chicken Scratch NY

  • Punch Needle
    • Chicken Scratch NY Pattern Shop
  • Farm
  • Garden
    • Gardening
    • DIY Garden Projects
  • Food
    • Preserving Food
    • Desserts
  • DIY
    • Crafting with Kids
    • Fabric & Sewing
    • Paint
    • Paper
    • Vinyl
    • Wreaths
    • Wood
    • Yarn
  • Holiday
    • Birthday Parties
    • Valentine’s Day
    • St. Patrick’s Day
    • Spring & Easter
    • 4th of July
    • Halloween
    • Autumn & Thanksgiving
    • Christmas
  • Family Life
    • Word Search & Crossword Puzzles & Mazes
  • Newsletter
You are here: Home / DIY / DIY Chicken Wire Gallery Wall Frames

DIY Chicken Wire Gallery Wall Frames

Last Updated August 16, 2013 By Alecia

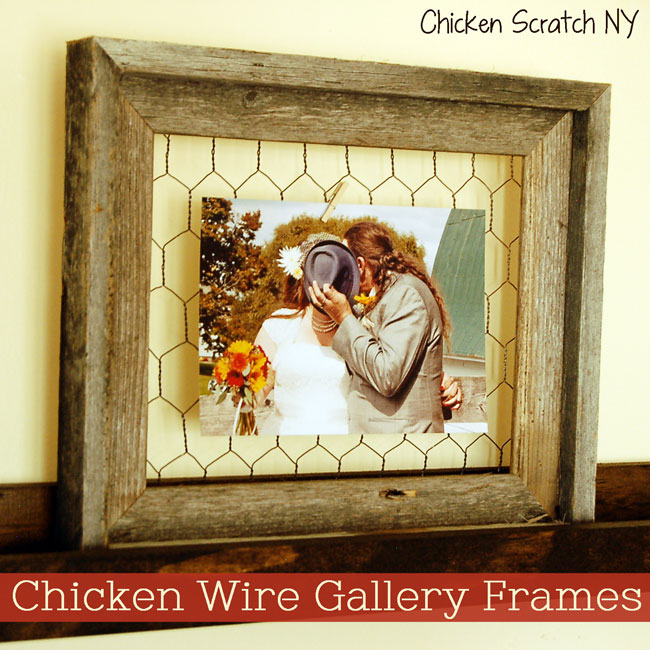
This project is indeed one born from necessity. One, I’m sick of my fridge being covered in photos. Two, picture frames are crazy expensive! We recently added four Ana White $10 ledges to our living room and I wanted a way to display all of my photos. It needed to be low-cost and I needed to be able to switch out my photos easily.

Chicken Wire Gallery Frames

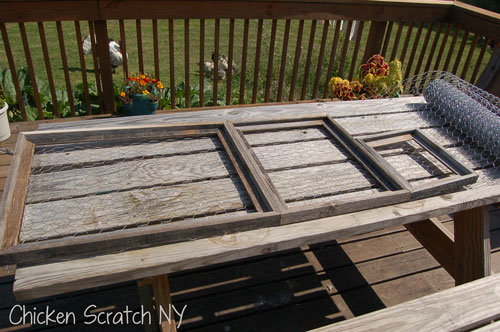
I started with 3 barn wood frames from Hobby Lobby (purchased during a 50% off sale). I also picked up a roll of 1 inch chicken wire at Lowe’s. I bought a whole roll so I can use the rest to keep the chickens from digging up the garden beds and unearthing my Mulberry trees to dust bathe. The wire is super shiny silver so dug out a few cans of spray paint.

If you want to make your own frames you will need:

  • Wooden frames
  • Chicken Wire
  • Spray paint (optional, I used Brown, Black and Hammered Copper)
  • Wire Cutters
  • Heavy duty stapler (your swingline isn’t gonna cut it!)

Start out by rolling out your chicken wire. Lay out your frames so you know how much wire you need to paint and cut off the end piece.

Chicken Wire Frames Tutorial

Spray painting chicken wire isn’t as easy as it might seem; I recommend using lots of paint, time and not worrying about a little silver peaking through. I used a piece of extra wire to hook the chicken wire rectangle to my clothes line and a piece of wood to weigh down the bottom so it was hanging. Chicken wire is apparently invisible in the mid day sun so instead of showing you a photo of my lawn I’ll show you my spray paint:

spray-paint

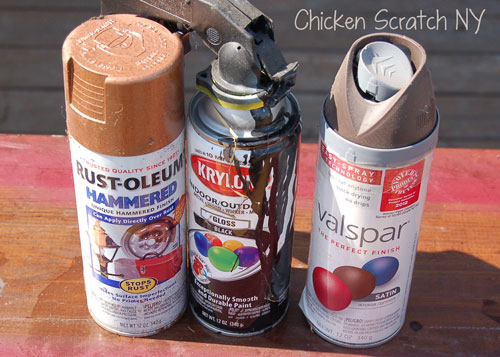
I have no idea what happend to the black paint, I do know my husband was involved. Several slow passes with the brown paint covered most of the wire, I randomly lightly misted with the black and copper spray paints to add some age and then added a few patches of more solid black and copper. It was really sunny out and I couldn’t really see what I was doing so I just went with it and hoped for the best.

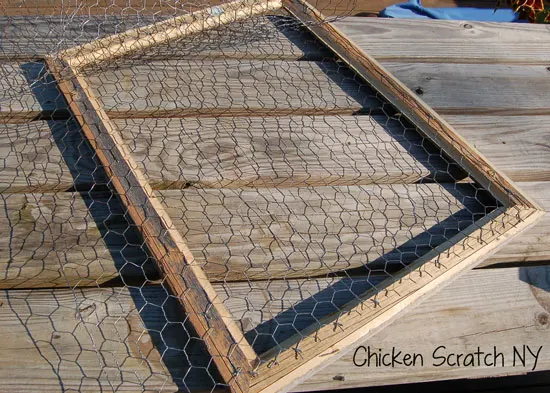
Lay your first frame face down, start by stapling in a corner and work your way around. It’s pretty easy to warp the chicken wire so gently pull it taught and continue to staple. It can be tricky and there is a bit of a learning curve to stapling hex wire (we learned that when fixing up our “witness protection program”.

clipped-and-stapled

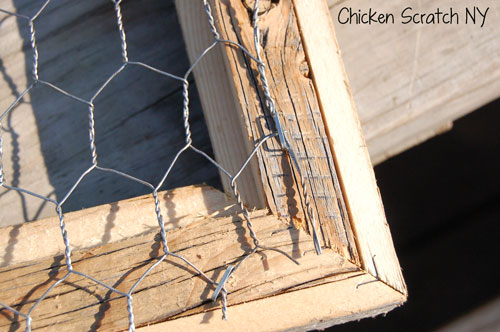
After stapling use your wire cutters to clip the wire around the entire frame. Good cutters are worth their weight in gold. Our came from Lowe’s, they didn’t cost a lot more than a regular pair (under $20) but they make cutting so much easier. I stapled, then cut because the wire has a tendency to shift and once you cut it too small you have to start over.

stapled

Repeat with the other frames. The small frame holds one or two pictures, the larger ones can each hold over a dozen depending on size. I used miniature clothes pins to hold my pictures up, I’m not 100% in love with the mini clips yet, I might give a few a quick stain to darken up the color similar to the shelves.

Filed Under: DIY

Reader Interactions

Comments

  1. Jeannie says

    August 16, 2013 at 10:26 pm

    The chicken wire frame is cool. 🙂

  2. [email protected] Cooking with Curls says

    August 16, 2013 at 11:33 pm

    I love it…those are so cute! What would we do without spray paint? 🙂

    • Alecia says

      August 17, 2013 at 7:56 am

      the world would be a much sadder place 🙂 Thanks for stopping by!

  3. Home Coming says

    August 19, 2013 at 2:41 pm

    Great idea! I’d love for you to link up to The DIY’ers.

  4. Merissa @ Little House Living says

    August 22, 2013 at 10:53 am

    Those are so cute! I will have to make them in my next house!

  5. Sue says

    August 22, 2013 at 1:21 pm

    Hi. This is so clever, I pinned it too. I had thoughts how this could be used outside in the garden and/or hanging on the house too to display ornaments.

  6. Stacie says

    August 22, 2013 at 4:01 pm

    So cute! I love this!

  7. Claire @ A Little Claireification says

    August 23, 2013 at 6:47 pm

    Thanks again for sharing this at our “Best Of The Weekend” party! I love it!! I am featuring it tonight when the party goes live at 8PM EST so be sure to pop over and grab a “featured” button from my side bar when you get a chance and we hope to see you back at another party again soon. 🙂
    Have a great weekend!
    xoxo

  8. Karla Campos says

    January 6, 2014 at 12:39 pm

    What a creative idea, I think this would make a cool board for hanging notes and memos as well. Looks like you had a lot of fun making these frames.

  9. brett says

    January 6, 2014 at 3:32 pm

    those are very cute. my 4 year old is looking with me and wants to put thse frames in our chicken coop (that we don’t have yet)

  10. Elizabeth Towns says

    January 6, 2014 at 4:43 pm

    This is the kind of project my dad would have done when he was alive. From the time I was young he would bring projects like this for us to do on weekends and they always resulted in great additions to our home decor! I love this

  11. Pam says

    January 6, 2014 at 5:27 pm

    That is so cool! You have the neatest crafts. I want to make these too!

  12. Jennifer B says

    January 6, 2014 at 6:07 pm

    This is such a cute idea! This would be great to hang all of my kids projects on too!

  13. Helene Cohen Bludman says

    January 6, 2014 at 6:19 pm

    So cute! I wish I had a creative streak, but I’m hopeless.

  14. Liz @ A Nut in a Nutshell says

    January 6, 2014 at 7:17 pm

    What an incredibly unique decor idea. I so love this!!!!

  15. Amy Desrosiers says

    January 6, 2014 at 8:26 pm

    I love this idea because it totally matches my home! We share the love for rustic, and primitive decor!

  16. Tina Ashburn says

    January 6, 2014 at 8:28 pm

    What a great idea this is! I no longer have lots of “things” on my ‘fridge, but I sure wish I had thought of this 25 years ago!

  17. Debi says

    January 6, 2014 at 9:18 pm

    This is a great idea. A great craft

  18. trisha says

    January 6, 2014 at 9:21 pm

    This is super unique! Great great tutorial! I have never seen a frame like this.

  19. Mama to 5 BLessings says

    January 6, 2014 at 9:40 pm

    that’s cute and rustic!

  20. Wendy @ ABCs and Garden Peas says

    January 6, 2014 at 9:47 pm

    Very creative idea. I love how it would break up the wall and vary the textures and colors.

  21. Cynthia L says

    January 6, 2014 at 10:32 pm

    I love the photo and I love the frame. What a great use of chicken wire. Too cute!

  22. Lisa says

    January 6, 2014 at 10:41 pm

    My sister-in-law would love this.

  23. Stefani says

    January 7, 2014 at 12:41 am

    I LOVE this frame. This would make a perfect gift too!

  24. Rhonda - A Born Unique Mom says

    January 7, 2014 at 12:54 am

    I wish that I were more crafty, your frame turned out great. Love the antique quality of it! Thanks for sharing.

  25. Lexie Lane says

    January 7, 2014 at 1:42 am

    Now that’s what I call creativity! I never would have thought to use chicken wire for anything! Hope it’s clean of chicken “stuff.” 🙂 (I’m a total germaphobe)

  26. Amanda Love says

    January 7, 2014 at 8:22 am

    What an ingenious way to use chicken wire. Don’t think I’ll have the patience to do this though. I’d rather just run out and buy a cheap 99 cent frame at the dollar store.

  27. Shannah @ Just Us Four says

    January 7, 2014 at 9:22 am

    That looks awesome! I have never thought to make my own chicken wire frame.

  28. Janeane Davis says

    January 7, 2014 at 10:22 am

    This is such a nice and creative craft idea. I immediately thought of several things I could do with this great idea.

  29. Trice says

    January 7, 2014 at 12:26 pm

    Love this ideal… I love DIY projects; makes things so personable.

  30. Debbie Denny says

    January 8, 2014 at 4:56 pm

    Very creative and crafty! So beautiful!

  31. Kristyn says

    January 9, 2014 at 10:32 am

    love this idea! so creative and cute!

  32. sarahbarah1 says

    April 20, 2014 at 8:32 pm

    I am seeing a lot more now with a natural finish which to me makes it more rustic looking. These came out nice…especially the smaller one as an actual “picture frame”
    Well done!

    I put together my first one for a friends bridal shower:
    http://sweetlittleamelie.com/2014/04/20/chicken-wire-picture-frame/

    I am wanting to try slightly different variations for my daughters room to hang her hair accessories on

Primary Sidebar

Copyright © 2021 · Daily Dish Pro On Genesis Framework · WordPress · Log in