
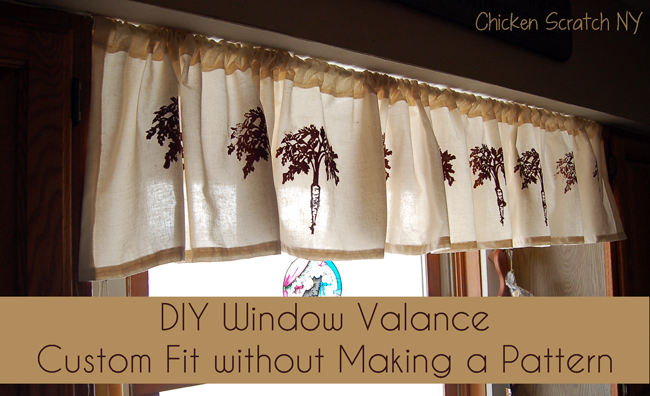
Tomorrow I’ll be sharing how I decorated this little number but tonight I’ll be sharing how I put it together. When we first moved in I whipped up a simple valance but since then we’ve painted the dining room dark rust and found new dark brown curtains for the sliding glass doors.
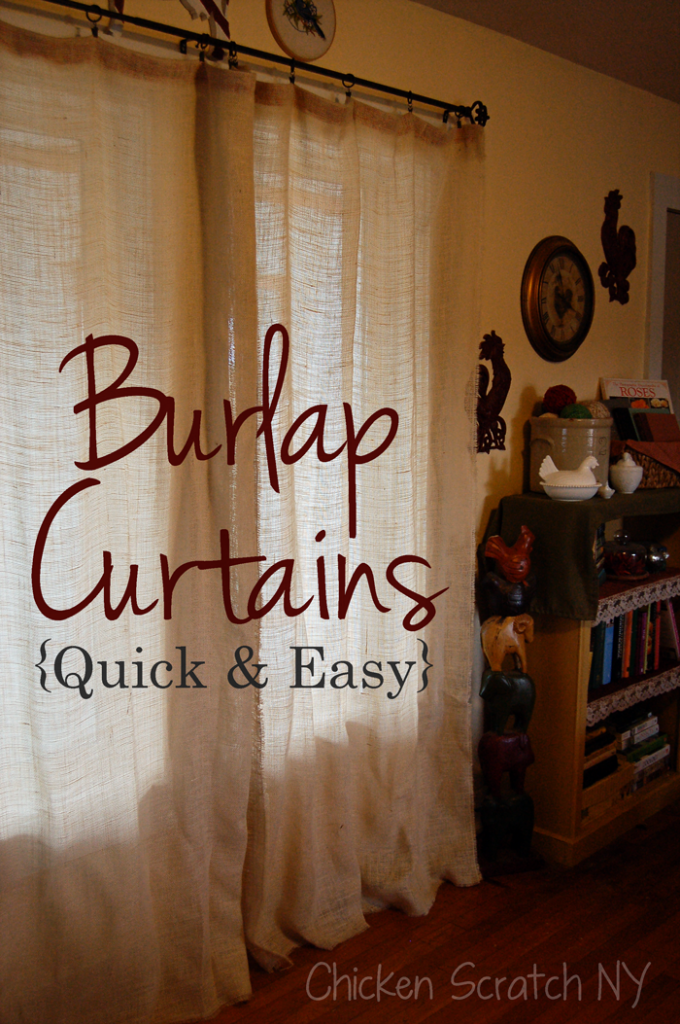
I wasn’t feeling the peachy fabric anymore. This project requires more sewing than my burlap curtains (which are still holding up despite the best efforts of 3 cats and a rabbit) but can still be completed in a few hours or less.
DIY Window Valance Supplies:
- Cotton Fabric (if you don’t use cotton be careful with your iron)
- Iron
- Pins
- Sewing Machine & Thread
Instructions:
1. You might have noticed I didn’t tell you how much fabric you need. To figure that out you need to measure your window. First measure across your window, write down that number. We get to do some math in step 2! Now figure out how far down you want the curtain to hang.
I used the super scientific method of making my husband stand in front of the window and measuring from the curtain rod to the top of his head, so he can look out the window and see window not curtain. Write down this number too.
2. Take the first number and double it. The general guideline for making a nice full ruffle is the length times two or three if you want it even fuller. My kitchen window is 47 inches wide (nothing in my house is square or evenly measured) so I bought 3 yards of muslin.
I did it for a few reasons, I didn’t want a seam so I did it all in one piece, I didn’t know exactly how wide the window was and muslin is really cheap so buying a little bit more wasn’t a big deal.
3. Take the 2nd number and add 2.5 inches for the hem and curtain rod pocket. Cut (or rip) your fabric to size.
4. Iron the fabric to get all the wrinkles out, you should prewash it but I didn’t. Even if the curtains shrink they are over sized and it won’t matter much. BUT be warned that fabric sizing can smell absolutely terrible when you iron it.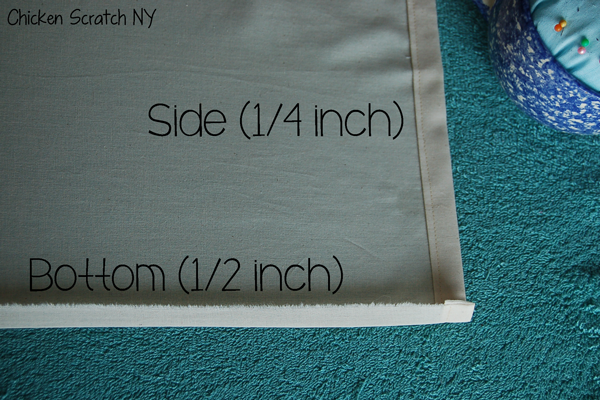
5. Iron the sides, fold the raw edge in 1/4 inch and iron. Your fabric should be face side down. Fold in another generous 1/4 inch and press again. Pin in place and sew a hem down the folded edge. Repeat on the other side.
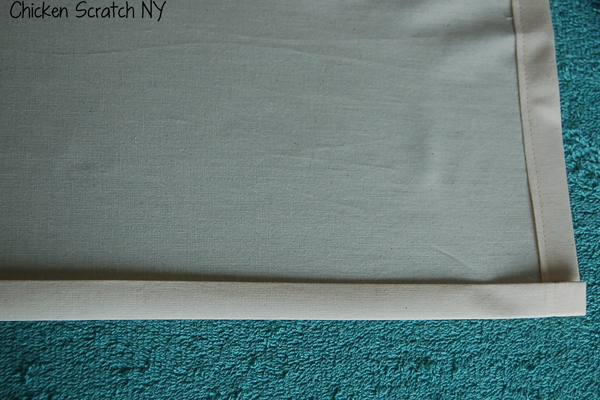
6. Do the same on the bottom edge using a 1/2 inch hem instead of a 1/4 inch. If you have a selvage edge save that for the pocket (top) to save a step.
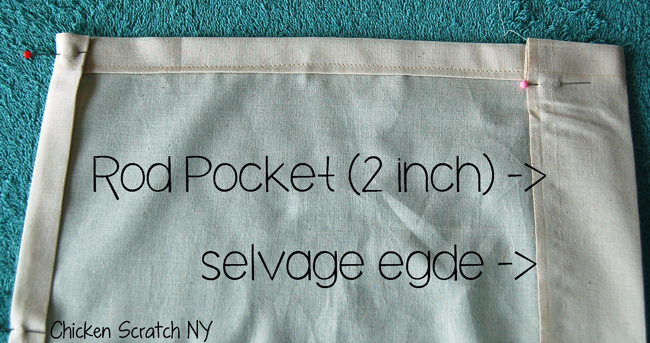
7. If you have a selvage edge fold the fabric down about 2 inches, press and stitch straight across creating a tunnel for the curtain rod. If you have a raw edge, fold a 1/4 inch down and press then fold down about 2 inches and press again so you don’t have a raw edge. Sew across to make your tunnel.
8. Congrats! You just made a rectangle! If you are happy with your curtain as is thread it on your curtain rod and you’re all set. If you want to add a little something more stop back tomorrow for my DIY screenprint tutorial.
Check out my Fabric & Sewing page for more ideas or start with these:


Tamara Wilson
Thursday 20th of February 2014
That is adorable. I need to get some new ones for our kitchen this looks like a great solution. Love the palm trees
Kimberly B
Tuesday 18th of February 2014
These are so cute! I'm going to check out your next post to see how you stamped the print on. I really suck at sewing so I use the iron on stitch witch stuff if it is something simple and straight forward like these.
Visiting from the BYB challenge.
Holly
Monday 17th of February 2014
Cute blog. Looks like we have a lot in common. Added to my RSS reader! #BYB100
Kayla
Monday 17th of February 2014
I've done something similar and was so surprised that I actually could do it!! Great tutorial!! Thank you ~ Visiting from BYB!
Honey Rowland
Monday 17th of February 2014
That carrot print is too cute!! I've got to head over and see how you made it! Normally I'm not a fan of curtains but a valance would be cute and still allow the sun to shine in nice and bright!!
~Honey #BB100