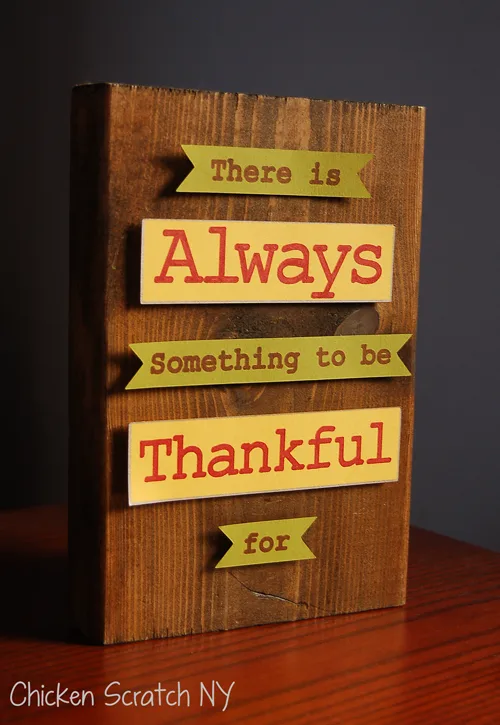
I like sappy signs, they make me happy and keep me focused when life sucks. The phrase “There is always something to be thankful for” has been a great reminder lately.
It only seemed natural to turn it into a small sign. When I was looking around for something to turn inspirational I found a pile of stained wooden blocks sitting just inside the craft room door. Aka, I’ve been tripping over them for about a year.
Speaking of neglected craft supplies, when my sketch pen holder for my Silhouette came in I decided to use it for the first time. There is a bit of a learning curve when it comes to using different pens but thanks to a few youtube videos and some trial and error I was able to figure out this project with only one marker fatality!
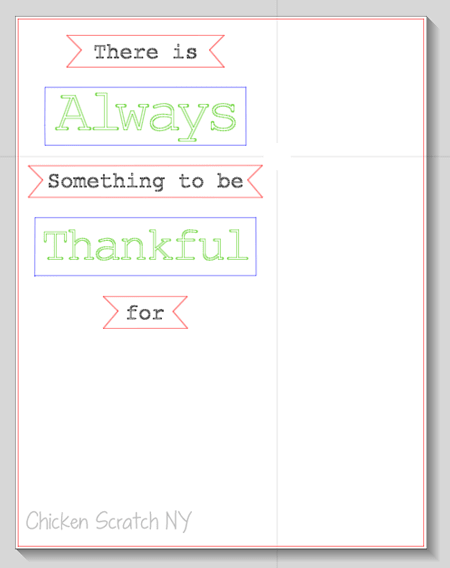
This design is set up to be drawn and cut on two colors of paper using 3 pen colors. It was a little confusing making sure the correct outlines were selected. But it’s only paper so if you mess up it’s not hard to try again
I used the font Courier New for the whole project; I believe it’s one of the basic ones that comes on all computers. The text was skinny enough on the green pieces to completely fill itself in but on the yellow pieces I had to go back and fill in a few spots with the marker.
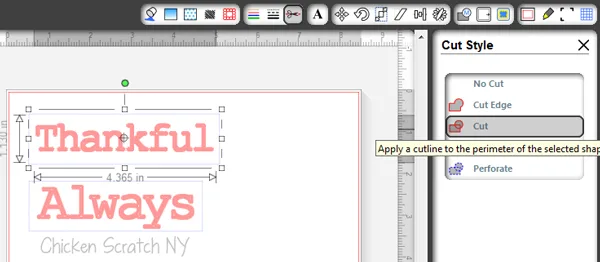
I do have the design file linked below if you want to make your own.
I used Bic Markit markers for the text and a metallic felt tip pen for the outline on the yellow boxes. During my testing process I managed to completely destroy the tip of one of the Bic markers, luckily I was smart enough to do my practicing with an ugly color so it wasn’t much of a loss.
It’s tricky to keep the tip of the marker from sticking out too much and getting flattened when you start to sketch. First I tried turning the thickness all the way down to one and putting the markers in so they were hardly sticking out. Don’t do that, all my lines were ending up all wonky and that’s not what I was looking for.
I found a you tube video that recommended putting the pen in all the way (so you know it’s centered) and then adjusting how far you put the pen holder in the machine. There is a little guess work involved but it’s pretty easy once you get the hang of it.
Back to the project! The metallic outline on the yellow boxes is ‘sketched’ on the same line as the cut line. The pen leaves a wide line and if you draw your outline and then cut on the same line it makes a nice outline for you. DO NOT unload your mat until the end when you are done sketching and cutting.
Thanksgiving Sign Supplies:
- 8 inch piece of 2×6 coated with Dark Stain
- Silhouette Cameo & Mat
- Silhouette Pen Holder
- Heavy Yellow and Green Card Stock
- Brown and Orange Markers
- Metallic Marker
- 3D Adhesive Foam Dots
Paper Sign Instructions:
1. Smooth the green paper on the mat and load into the machine.
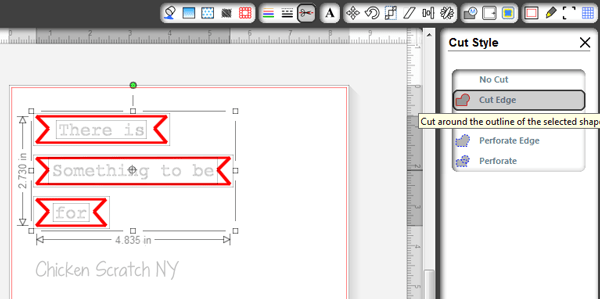
2. Place a brown marker in the pen holder and load it in place of the blade. Select the black text, select “cut” and sketch in brown. You can select more than one piece at a time by holding the SHIFT key. Send to the machine.
DO NOT UNLOAD THE MAT
3. Replace the marker with the blade. Select red shapes, select “cut edge”
4. Unload mat and remove the green paper. Place a sheet of yellow paper on the mat and load into the machine.
5. Place an orange marker in the pen holder and load it in place of the blade. Select green text, select “cut” and sketch in orange
DO NOT UNLOAD THE MAT
6. Place the metallic marker in the pen holder and load it into the machine. Select blue shapes, select “cut edge” sketch in metallic
7. Replace the marker with the blade and cut the same shapes again
8. Attached the pieces to the wood block with 3D foam squares (same one from the Pumpkin Garland).
You can download the .studio file or .svg file to make your own sign – please keep these for personal use only!
Don’t forget to PIN this to your Thanksgiving Board!
Check out my Autumn Page for more ideas or start here:

selina
Monday 14th of July 2014
Did you have any problems with your pens leaving lines all over the page? I am currently trying to find a reason/solution for this somewhere on the internet. When I use the actual sketch pens, it works fine, but now that I am using a pen holder, it is like the pen is in too far and it leaves slash marks where the pen is moving around on the page.
Alecia
Monday 14th of July 2014
I had to experiment a lot with them, on some pens I don't push the holder all the way in. Unfortunately it took a lot of trial and error. I killed the tip on the first maker I tried to use.
Brooke
Tuesday 12th of November 2013
Very cute! I love holiday decorations!
Trisha D.
Tuesday 12th of November 2013
Finally having a chance to go through all the Silhouette Challenge project inspiration-- I'm like a [big] kid on Christmas but earlier!!
Gah, I love how your project incorporates reclaimed wood! I love how you ventured outside the typical Fall/Thanksgiving colors, yet it seems perfectly festive!!
I'm so glad you worked with sketch pens this round. I've been considering a pen holder for quite some time. Do you like yours? Where'd you purchase yours? Does it pay to have multiples?
Keep rockin on!!
Tori
Tuesday 12th of November 2013
What a gorgeous sign!! I haven't tried sketching but you have inspired me to try it out!!
Marilyn
Monday 11th of November 2013
This turned out so beautifully! I'm still a newbie and just did a sketch pen project but it was WAY simpler than this one! Thanks for inspiring me to try using more than one color next time!