Barn Quilt Tutorial
Barn quilts are a traditional method of barn decoration dating back hundreds of years. They're a great way to add some color all year round to your outside spaces.
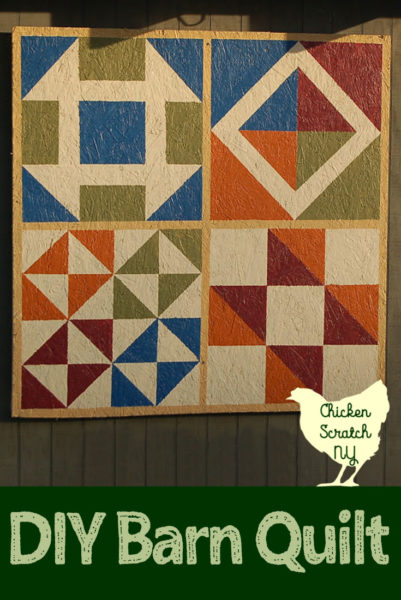
If you have an outbuilding, plywood, and some paint you can add your own barn quilt to the world. Depending on the size of your barn quilt this project can be completed in a few days to a week. Most of the time is spent waiting for the paint to dry which can take a while if it's humid.
Long before I started making my own quilts I was obsessed with them, the way simple shapes turn into something completely different has always fascinated me. But despite sewing, since I was literally a child, I didn't start quilting with fabric until 2020.
Learn more about Quilting & beginner-friendly quilt projects
Instead I kept my quilting urge satisfied by painting quilt blocks on plywood and sheet metal. Instead of a sewing machine, you'll need some painters tape and house paint.
The total cost for my barn quilt was around $20 for the paint, brushes and tape. The plywood was salvaged from the turkey pen at the old house (free!)
How to Paint a Barn Quilt
The hardest part of making a barn quilt is picking the pattern. Traditionally barn quilts are made with a single quilt block blown up to cover 8 foot by 8 foot plywood.
My barn is only one story and an 8 foot quilt would have been way too big so I made my quilt 4 foot by 4 foot. It ended up being the perfect size for my space so feel like you need to make a giant quilt for it to count.
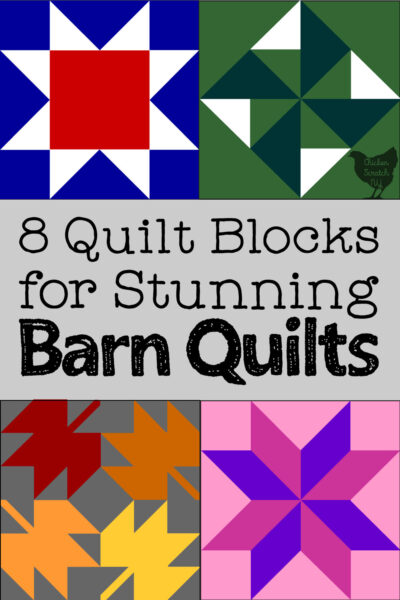
Check out 8 Classic Quilt Blocks Perfect for Barn Quilts
Print out a copy of the pattern and get busy with your colored pencils to figure out what colors you want and where and then keep the paper with you while you're working. After you've got your pattern picked out it's time to get your supplies together.
Barn Quilt Supplies:
Plywood - as of writing this, wood costs are on par with car payments. This is a great project for reusing scrap plywood, it's going to be completely covered with paint so don't let a few dings or odd paint splotches hold you back.
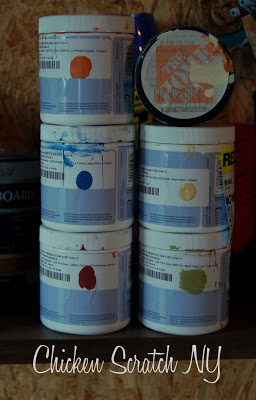
Paint - Outdoor house paint works really well for barn quilts. It's meant to be outdoors and should hold up to the sun, rain, wind and snow.
It's also thick enough to fill in any gaps in the plywood. I had small sample jars made in my colors and I had about half a jar of each left at the end.
If you are only using two colors you'll need more paint. Definitely check the oops rack, you might get lucky, or you might dive headfirst into another craft hoarding situation.
Painters Tape - The secret to straight lines is painter's tape. In my experience, you don't want the cheapest on the market (it shreds when you try to unroll it) but you don't need the really expensive stuff either.
Measuring tape or Ruler & Pencil - Quilting is very math/geometry-based and the more precise you are in the beginning the better your results will be. Pencil lines are easy to cover with paint and even if you miss them they won't show up unless you're right up against the quilt.
My barn quilt was 4x4 so I measured out and marked 2 ft sections. and taped them off before I moved on to marking out my smaller blocks. Most quilt blocks are based on 2x2 block (4 patch) or 3x3 block (9 patch) settings.
Barn Quilt Painting Instructions:
The first step to making a barn quilt is to give your plywood a good base coat of paint. Use a brush or a roller but don't be stingy with the paint.
Plywood (at least the cheap stuff) has lots of holes and nooks and crannies and the paint will get sucked right up. Go at it from all directions and you might still need a second coat.
Let the base coat dry really well, overnight is great, or aim a fan at it. If the base paint isn't completely dry it will peel off with the tape.
My quilt took three days, one for the base coat, one for marking/taping/painting, and then I hung it up the next day after everything had time to dry.
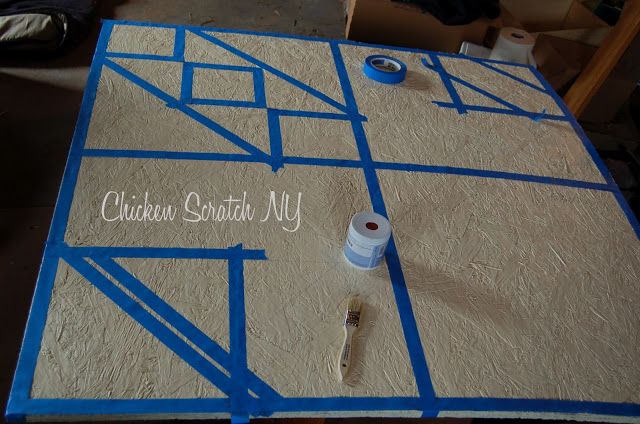
When the paint is dry grab a ruler and start marking out your pattern. I had 4 equal sections and I added a one-inch border around the whole thing. Those paint lines stayed on the whole time so they had to go down first.
Then I was able to start marking off sections for the individual paint colors. How complicated this step is will depend entirely on your pattern. I tried to get all of one color done at the same time.
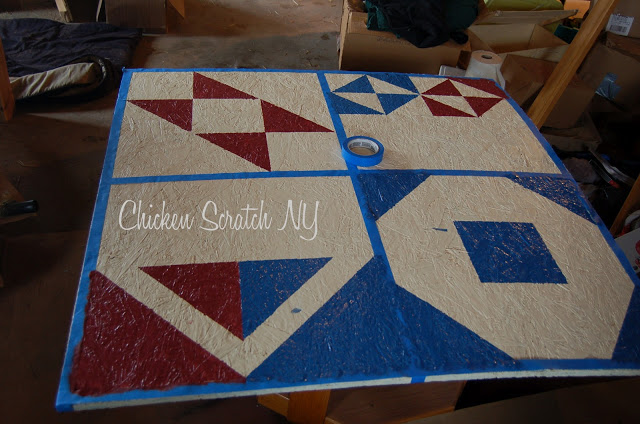
If you make a mess while you're painting it's not a big deal. Let the unintended paint splatters dry and then go over them with another coat of your base color.
I hung my barn quilt by marking the center of the barn and then screwing scrap pieces of 2x4 to the barn along the top and bottom.
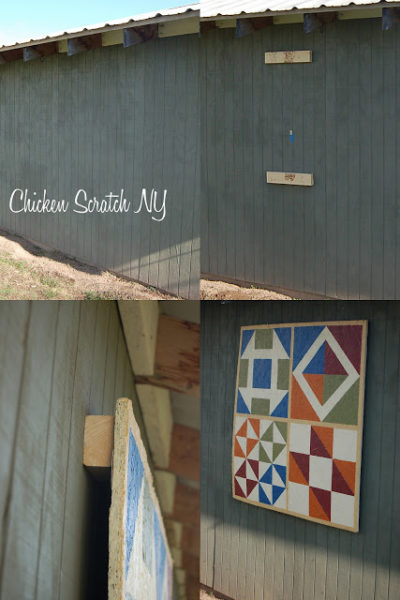
Then I screwed the quilt to the 2x4s. I didn't want the quilt right against the barn. Leaving the gap keeps things drier.
I bought poly-sealer but I never ended up using it. It's been up all year round since 2012 and it looks like it did the day I hung it up.
It's protected a little by the overhang from the barn roof and it's not on the side of the barn that gets the brunt of the rain and snow so that also helps.

Barn Quilt Painting Tips:
- Don't be stingy with the paint. This board was so rough (and sucked up paint like crazy) that I found it best to slap on massive amounts of paint
- If you use rough plywood - buy some cheap chip brushes. You'll mangle them trying to get the paint in all the cracks
- Step back - you'll drive yourself nuts trying to make the lines perfect. Step back 3 feet, if it looks straight leave it alone!
- Keep it simple! Large blocks of color work best at long distances
- Don't worry about spills. They are easy to cover up with a few dabs of paint
- Don't be afraid to fudge a bit if your lines don't meet up
A Barn Quilt is much more forgiving than an actual quilt and takes much less patience and effort.
2018 Update:
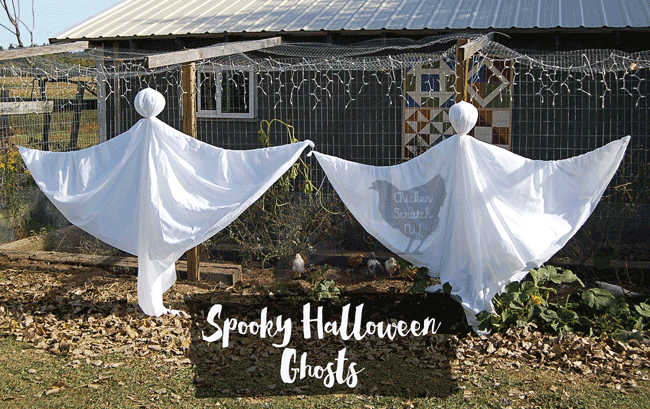
I never sealed it. But it still looks brand new! It's well protected under the roof overhang. I added a chicken run to the front of the barn during the hawk & fox population explosion of 2014.
You can see the run and the barn quilt in the background of the Halloween Ghosts post.
Check out my DIY Garden Projects page for more ideas or start here:
I love it.....you have inspired me:)
I love it! I've seen many hanging on the barns! Good job!
Wow, it's beautiful! Really nicely done.
Good for you Alicia. You painted a barn quilt. It looks wonderful. You should link it up to Barn Charm at Bluff Area Daily here http://bluffareadaily.blogspot.com/2012/03/barn-charm-78.html
Gorgeous! If I had a barn, I would so want one of these.
Welcome to Barn Charm! How awesome! This is the 1st barn quilt tutorial participation for Barn Charm & I'm sure everyone will love it!
Thanks so much for joining in & linking up to this week's Barn Charm... let us know when the temps warm up & the flowers start blooming, that's going to be beautiful, too! =)
I love all the colours. Very cleaver. - Margy
Love this!
The worst part of any project in my opinion is the prepping.
glad you linked up. thank you for sharing. such a fun creative way of sharing your art. love it!! i will be linking up next week. missed out due to being in disney world. take care. (:
I want to make a barn quilt so bad. We don't have a barn, we don't live in a rural area, but that doesn't change my desire at all. This was helpful. Thanks. Found you via Happy Go Lucky.
Love the barn quilt! Now I wish one would look good on our Victorian house! Great work! Going to start following along I look forward to seeing what ese you come up with!
Amy @ http://yellowhouseon3rd.blogspot.com
That is a great idea! Such a great pop of color to a boring gray wall.
Nice work!! We have lots of Barn Quilts here in Morgan County, Colorado. I want to make one, but don't have a barn...just a small barn shaped shed. Maybe I should make it a mini quilt. Thanks for sharing!♥♫
Beautiful!
This is so beautiful. I live in a small town in Nova Scotia but I am tempted to do something like this above my little shed..will pretend it's a barn. So lovely!
A super idea to play with the Farmer's Wife blocks! We have to be neighbors - fellow NYS'er.
Wow! What a cool idea! It looks great...and that's the kind of quilting I could do...lol. Love it! Thanks for sharing at Shine on Fridays!
Wow, That is VERY creative!!! You did a fantastic job! It looks so nice on your barn. I am your newest follower. Hope you can visit me sometime too!
What a great piece! Your barn is cute and the barn quilt is the perfect addition.
That is beautiful, love it you did a great job and looks so nice on the side of the barn. Enjoy your farm and hope you stay put for many years. Andi thewednesdaybaker.blogspot.com