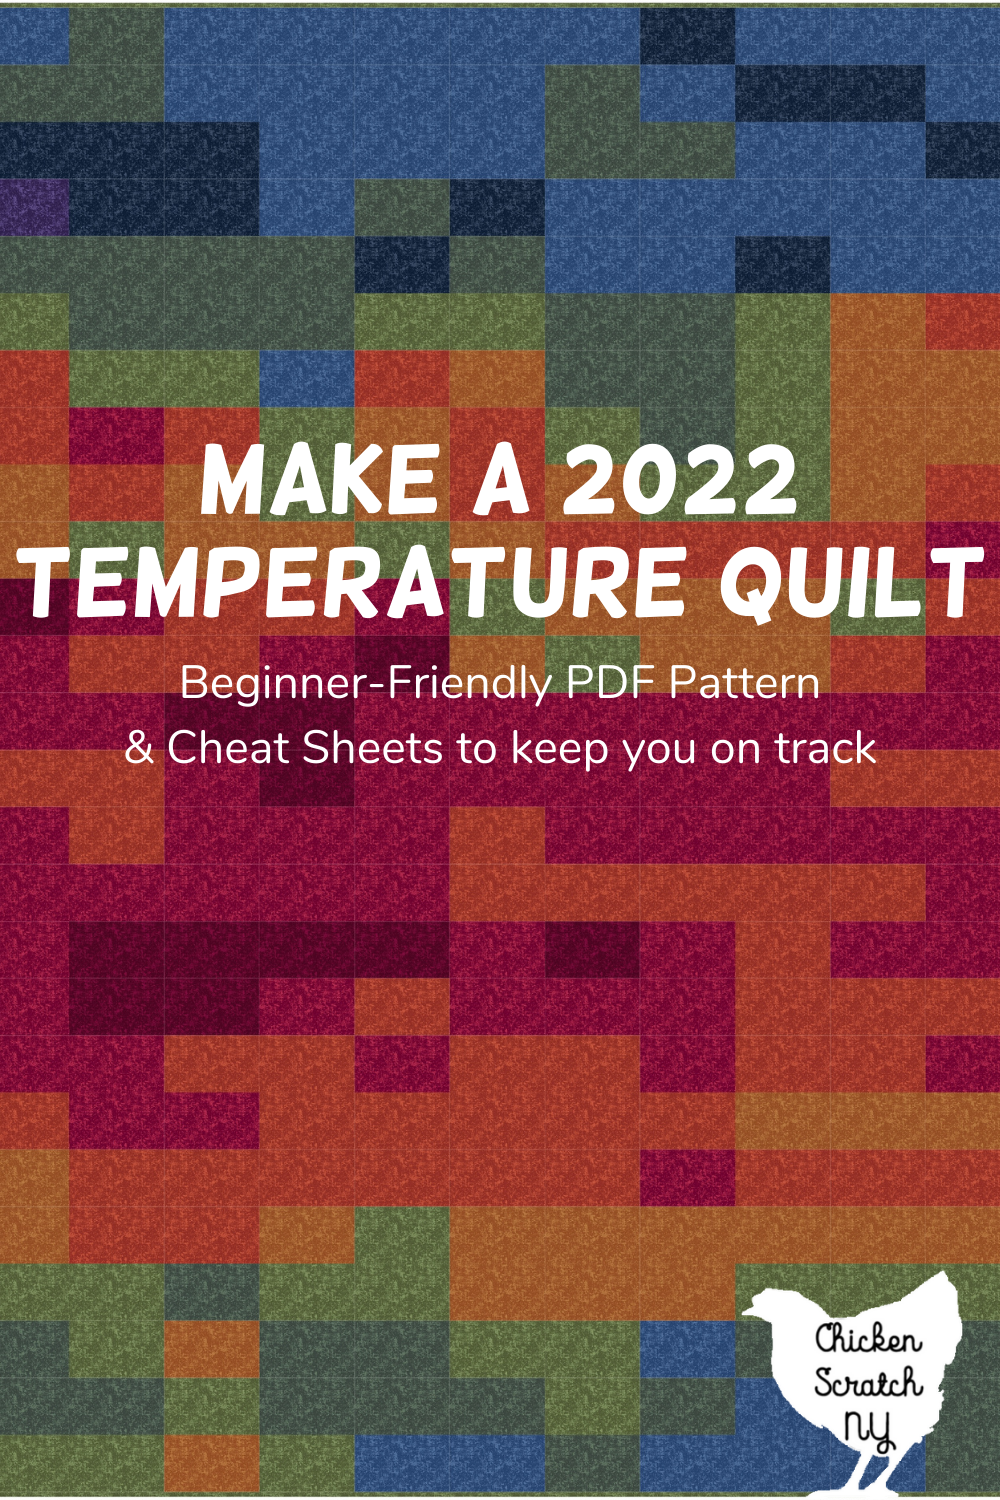
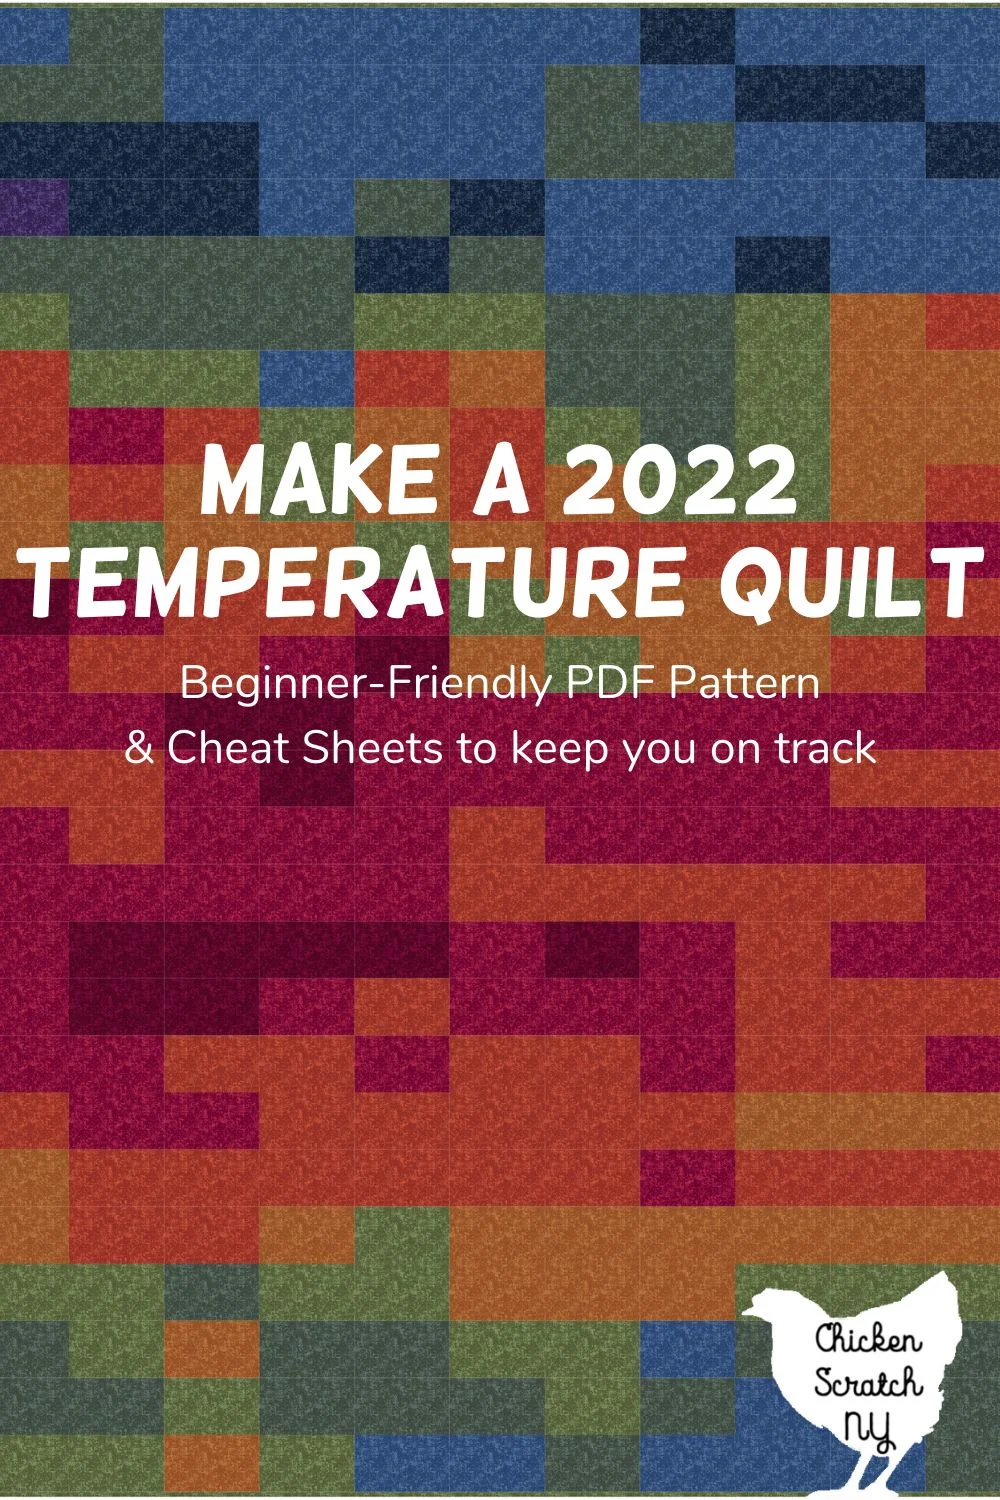
Temperature quilts are a fun and trendy way to sew all year long! Customize your quilt by selecting your own color palette and using temperature ranges suitable to where you live.
This is not my first attempt at a temperature blanket, in 2016 I started a crocheted temperature afghan and spoiler alert, I never finished it.
I made it about 1/2 way through the year before throwing in the towel. It turns out that I’m far too inconsistent in my tension to work on a really long-term crochet project. The good news is I learned a lot from the process, mostly what not to do, and I’m jumping into this project far more prepared!
What is a Temperature Quilt and Why should you make one?
Temperature quilts (and their knitted or crocheted counterparts) have been around for a while and there are so many options out there that it seems a bit silly to reinvent the wheel. But I’m going to do it anyway.
At its most basic, a temperature quilt is a year-long sewing project where you add a new block representing each day. The color of the block is determined by the daily high temperature.
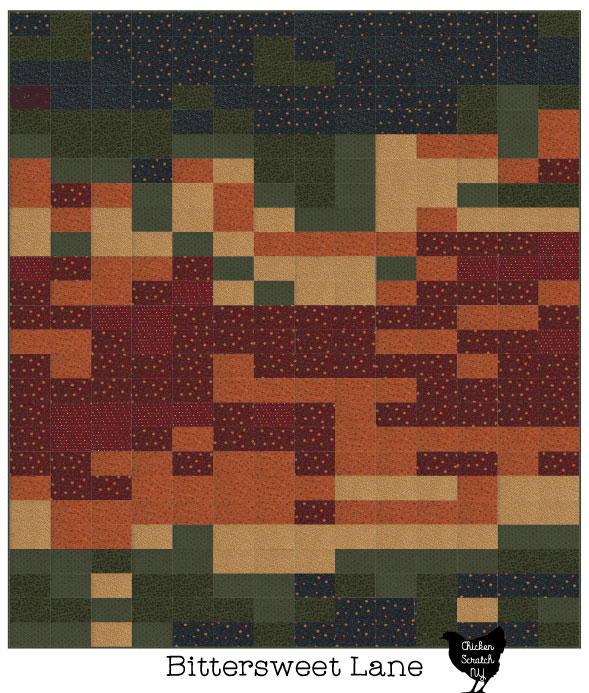

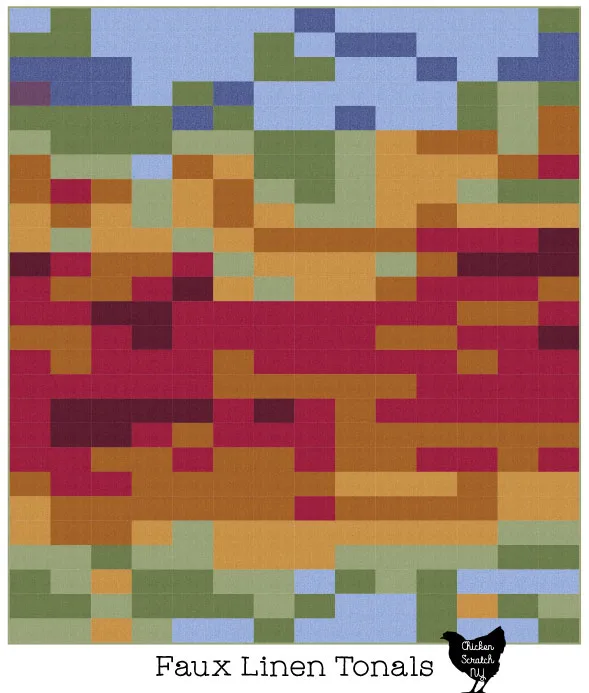
All of the example quilts in this post were mocked up in Electric Quilt 8 using the daily high temps in Central NY for 2021.
If the temperature isn’t your thing you can create a quilt to reflect your mood (mine would literally be 95% ‘tired’ and therefore a very boring quilt), the precipitation, wind speed, how many dogs you pet, hours spent outside, etc. There are unlimited options.
Maybe someday I’ll make a quilt based on how many eggs my chickens lay in a day.
My favorite thing about temperature blankets is that they are the perfect combo of concrete framework and absolute chaos. Going into the project you know the pattern, the final size, and a vague idea of what you’ll end up with, but there is no way to know the final outcome until December 31st.
Big projects can be intimidating, something about knowing I need three hundred and sixty four blocks is enough to send me into a tizzy. Breaking it down by week, weeks or even a month makes the whole process less daunting.
Create Your Temperature Scale
Before you jump into sewing you need to create a scale where you assign each temperature range to a specific color. This is where you get to be creative, you can go with a rainbow scale, a monochrome scale where you move from darkest to lightest, or randomly assign your favorite prints.
I live in Central New York where we’re lucky enough to have all four seasons, at least in theory, the past year has been mud or cold mud. I created a 9 color range that goes from “Below 15” to “Above 86” in 10-degree increments.

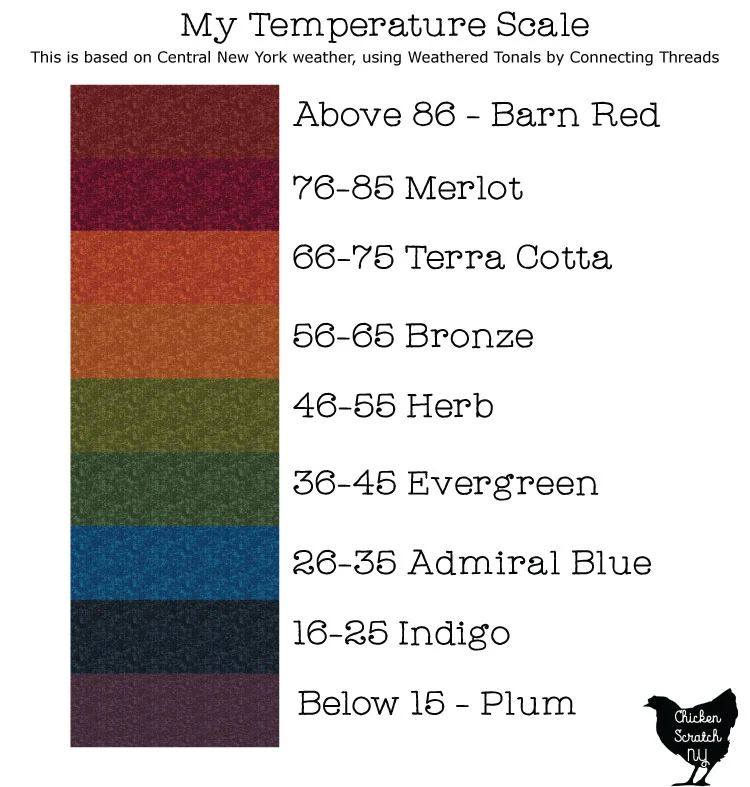
I recommend personalizing your scale based on where you live, if you live in the south or in an area where the temperatures stay fairly consistent my scale will give you a very boring quilt!
I looked up the high and low temp of the year for the past few years and created my scale around that. We don’t get very many days below 15 or above 86 (except for last year, 2021 was stupid hot) and I liked having the consistent intervals of 10 degrees.
If your local temps only swing from 45-75 you’ll probably want to pick a shorter interval. But before you go too crazy and give each degree its own color, keep in mind that you’ll need to have a stash of each color you plan to use.
Picking Fabric
The hardest part about making a temperature quilt is that there is no way to know how much fabric you’ll need for each color until you’re done. Unfortunately, fabric lines aren’t always available forever and there is no guarantee that what you buy in January will be available in November or December.
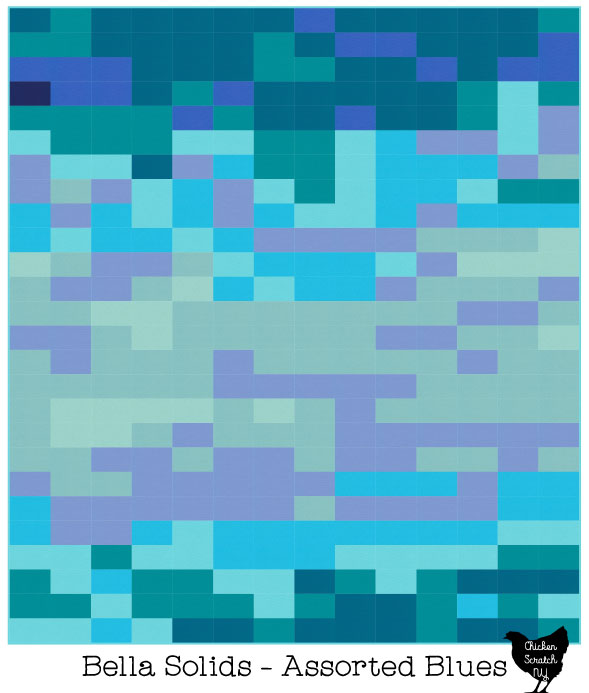
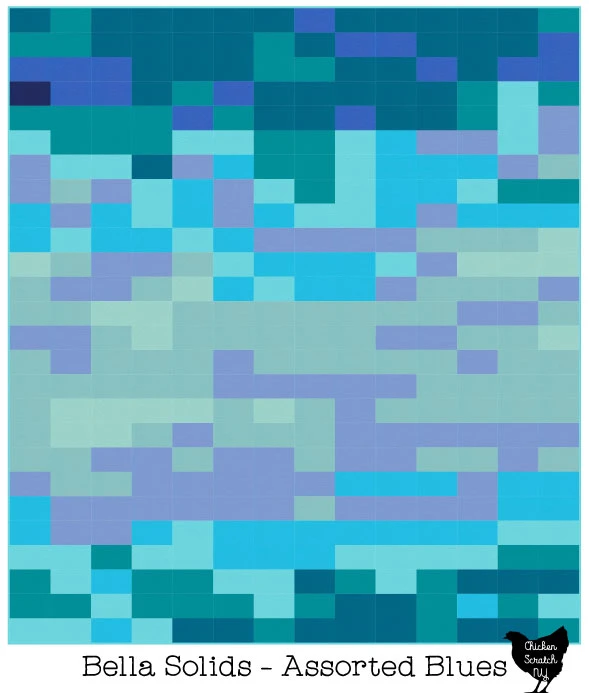
There are a few ways to deal with this issue, the easiest is to pick a basic line that’s always available like Bella Solids, Moda Grunge, Bee Basics or Weathered Tonals.
Dye lots might shift a bit over the course of a year but you should be able to buy more fabric as needed. This will cut down on your initial investment and you’ll end up with less fabric left over.
Another option is to buy a lot of fabric in the beginning. I mocked up the entire quilt in one color for every block and it took 5 3/8 yards of fabric.
For 9 colors that works out to be about 5/8 of a yard per color BUT chances are really good you aren’t going to have an even distribution. The colors used for the middle of the scale will likely be used a lot more than the colors at the extremes (if you look at my 2021 examples there was literally ONE square from the lowest temperature range).
If you’re using a 9 color scale I would get 1 1/4 – 1 1/2 yards of the colors you think you’ll be using a lot and 3/4 – 1 yard of the ones that won’t see as much action.
I only bought a 1/2 yard of the purple I’m using for the coldest days. That will also give you some wiggle room for cutting mistakes.
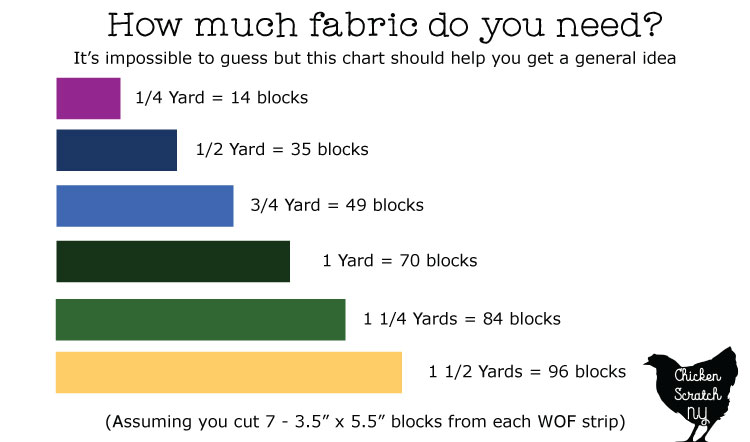
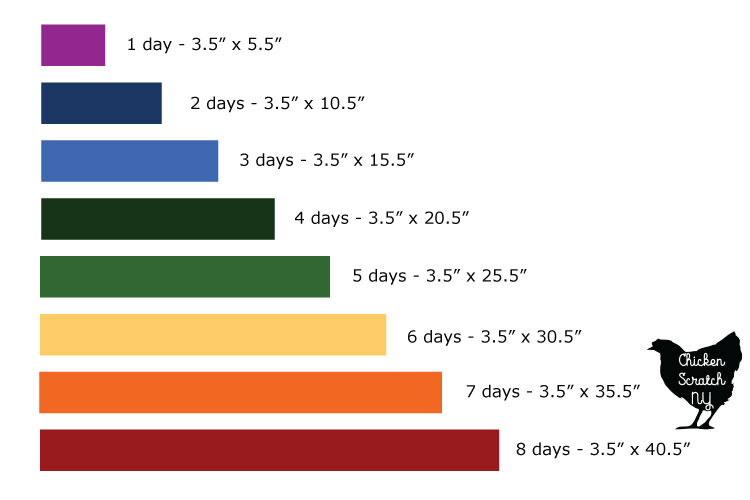
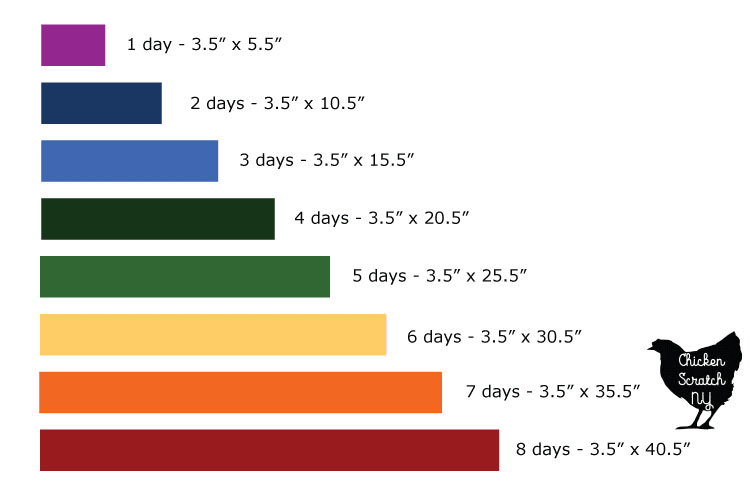
This chart should help give you a general idea of how many days you can get from yardage. It is based on cutting 3.5″ strips across the width of fabric (from selvage to selvage) and cutting the strips down to blocks.
For my 2021 mockup, I needed less than a yard for 6 colors, exactly one yard for another, and the two most popular colors required 1 1/8 yards.
My third and final option is to make it super scrappy. Instead of picking a specific fabric for each temperature range pick a color.
Then dig into your stash and go nuts. If you decide to go this route I would recommend cutting all your blocks to the same size instead of using the lazy strip method I’ll be describing below.
As far as what fabric patterns to use, the sky is the limit. I prefer smaller scale prints in a quilt like this but if you love giant Kaffe Fasset florals go for it.
I really wanted a jewel-toned quilt and I figured this was the perfect excuse to make one. However, I hate working with solids so I went for the Weathered Tonals collection from Connecting Threads.
Temperature Quilt Pattern
Here we are, the meat and potatoes of the project! This is a very basic pattern, the fun comes entirely from the fabric selection and random temperature-based placements.
Get the Free Temperature Quilt Pattern + Cheat Sheets from my Shop
The 70 inch x 80 inch quilt is made from 364 – 5.5″ x 3.5″ blocks in a 14 x 26 layout. That’s a lot of numbers but don’t let it scare you away!
Each row of the quilt represents 2 weeks (14 days x 26 = 364 days) and the last day of the year is represented by the binding on the quilt. If you are doing this on a leap year, use 2 colors for the binding or make the backing the color of the leap day.
Cheat Sheets
I love a good cheat sheet and this pattern would be really hard to pull off without one! When you download the pattern above the last 4 pages are your cheat sheets, even if you don’t print off the whole pattern you’ll find those 4 sheets to be your new best friend!
The cheat sheets are broken down into 4 sections, the pages are all the same but the dates change to help you keep your place.
The majority of the sheet is just lots of boxes. I recommend grabbing some colored pencils to fill in them as time passes.
At the bottom of each sheet is a place for your key, I left it completely blank so you can fill it in with your temperature scale and fabrics.
At the end of the day (or the end of the week) hit up your favorite weather app and check the days’ high temp, then fill in the corresponding box. At the end of two weeks, you’ll have a full row and that will be your personalized pattern!
Cutting
I don’t recommend cutting all of your blocks out in the beginning, A, because it’s impossible to know how much you’ll need of each color; B, the more you handle cut fabric the more potential you have for fraying; and C, I’m lazy and wanted to avoid sewing blocks that were the same color together.
Chances are very likely you’ll have multiple days in a row with the same daily high temp. While you could cut and sew a block for each day I’d rather cut them as one long piece.
Instead of cutting out my individual blocks, I found it easier to cut 3.5″ wide strips from each color. Then I could cut pieces from them as needed.
Sewing
This is where I’m really going against the grain. For most people, the idea of a temperature quilt is to work on it every day. That just doesn’t work for me.
I know myself well enough to know that if I’m supposed to do something every day, the first day I miss (be it January 5th or October 23rd) that’s it for me. The project instantly becomes too much for me to handle.
So instead of daily sewing, this version of a temperature quilt is designed to be sewn every 2 weeks or even once every 4 weeks. That way you’re working on a full row (or two) at a time.
It gives you the chance to cut those longer blocks for days in the same color and I think it will help with consistency.
It will also make it easier to do this as a group project, you can set up an in-person meeting or a zoom call for your closest quilting buddies every other week or monthly and everyone can work on their quilts.
I do recommend finding a large project box to keep everything together over the year while you work. It doesn’t have to be fancy, I’m using the box from my new Muck boots.
You can keep your yardage, copy of the pattern, the cheat sheets you aren’t using, cut strips and completed sections all safe and sound together.
Construction
The entire quilt is put together in rows of 14 blocks (or fewer if you’re using the cheater strips but it should all measure the same!) that are then sewn into rows.
The only secret to a neat assembly is to press the seams in alternating directions so your corners will nest together. There are arrows on the cheat sheets to help you keep track of your seam directions.
I also recommend marking the top left corner of all your strips to make sure you aren’t sewing your next block to the wrong side. Whenever I’m sewing together strips like this I put a pin in the top left corner so I always know where things go.

I recommend sewing them in rows of 4 and then combining rows instead of just adding the next row to the quilt as you make it. You can absolutely do it that way but by the end of the quilt you’ll l have a big and heavy top contend with and it’s more likely to get pulled out of shape due to the extra weight.
Really that’s all there is to it! By the end of the year (or realistically sometime next January) you’ll have a nice big throw quilt in a random pattern to help you remember the year.
Quilting your Temperature Quilt
Knowing myself I’ll throw this baby on my frame and go to town with a loopy meander. It’s my go-to for quick and simple quilting where I don’t want the stitching to overwhelm the design.
If you aren’t into free motion quilting you still have a few options. Simple, uniform quilts like this temperature quilt are great for straight line quilting.
I highly recommend a walking foot for straight line quilting. It has an extra, mobile foot on top that works with the feed dogs on the bottom to pull the top and bottom of the quilt evenly.
If you are looking to pick one up you need to know the maker and model of your sewing machine to make sure you get one that will work with your machine.
You can use the walking foot to sew straight lines in or near (my preference) “the ditch” aka your seams. Or you can sew diagonally making elongated X’s in the blocks.
Another option is to tie the quilt, you’ll need to check your batting for the optimal spacing but the uniform blocks will give you lots of opportunities for tying.
More Options for a Fancier Temperature Quilt
I wholeheartedly admit this is a basic quilt. I’m a basic quilter, I like making simple, pretty, utilitarian quilts and there is no shame in that.
That doesn’t stop me from daydreaming about making fancier or more elaborate quilts. I just know myself and I know that unless this project is bare-bones simple, I’ll never finish it.
If you are looking to take it up a level here are a few ideas I’m come up with:
Half Square Triangles
This isn’t a unique idea, I’ve seen it around the internet before but it does seem fun. Instead of a single “blank” block for each day, you make a half square triangle (HST) with half being the daily high and half being the daily low.

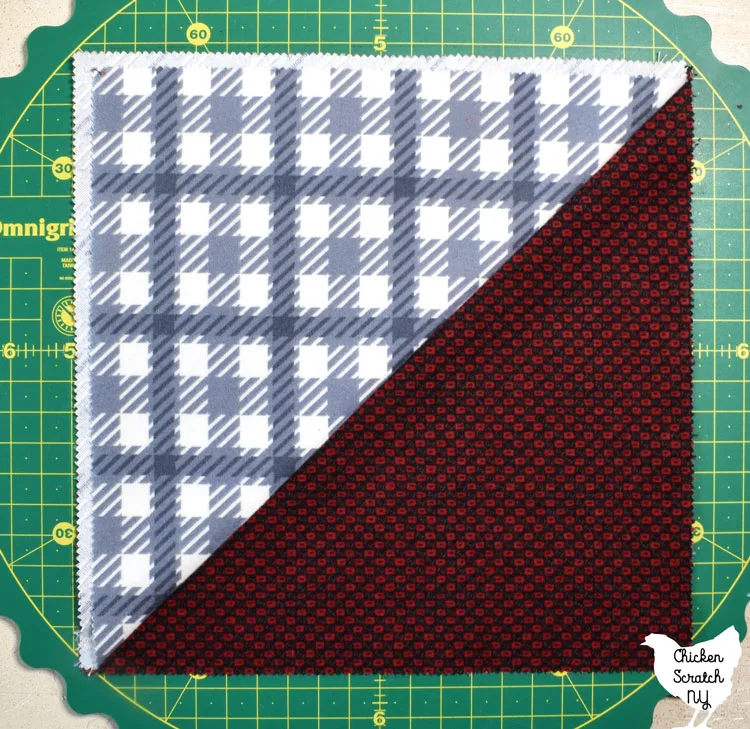
I really like this idea and I’ve considered it but in the end, I hate making single HST blocks, and trying to do my usual 4 or 8 at a time would inevitably leave me with piles of unneeded squares.
Yo-Yo Quilt
If you’re looking for a hand-sewn temperature quilt yo-yos might be up your alley. For this method you’d make a single yo-yo for each day, using the same temperature scale idea.
This would be a great scrappy option and you could make a whole stash of different colored yo-yos to keep on hand for daily assembly. Yo-yos are great if you’re on the go (or spend a lot of time sitting at sports practice!) and want a project you can carry around with you.

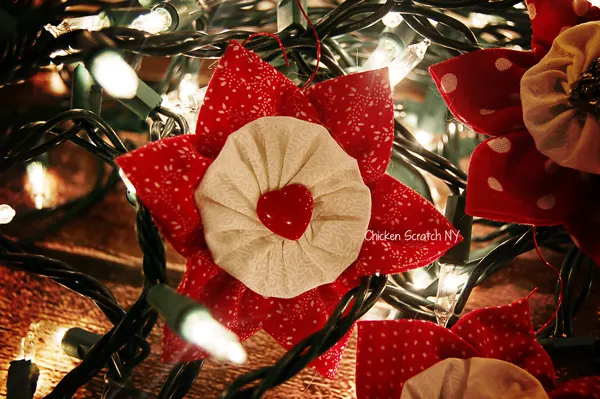
I’m a gadget gal and I use the plastic Yo-Yo makers from Clover whenever I feel the itch to sew up a bunch of little circles. I’ve never made a large quilt from them but they do play a very important role in my Prairie Point & Yo-Yo Christmas ornaments.
Quilt as You Go Hexagon
I’ve been working away at a stack of quilt as you go hexagons for a few months using the leftovers from one of my Pumpkin Lattice quilts. I wanted to use quite a few fabrics and I ordered them all online with a one-yard minimum so yeah, lots of leftovers!
I have been using the Quilt As You Go 2.5″ Hexagon Template from Missouri Star Quilt Company. It’s a two-piece template, one piece is used for the center front and the batting, and the other is used for the back.
After you’ve cut all your pieces you stack them with the back face side down and then center the batting and the top with the face-up. You fold the back to the front creating a clean edge and then sew around the border, either with a machine or by hand.
I think they would make a great temperature quilt if you used the daily low as the back/frame color and the daily high in the center. They go pretty quilt and if you want to do a little sewing every day this is perfect for you.
Cathedral Windows Quilt
As far as I can tell there are two ways to make a Cathedral Window quilt, the old school way and the simpler method of making a pile of fabric frisbees that get flipped right side out and sewn together. We’re going new school here.
This Simple Cathedral Windows tutorial from Quilting in the Rain explains exactly how to make a quilt with this method.
The construction is a bit more tedious than regular quilting but it’s a quilt as you go method and when you’re done, you’re done. You don’t construct a top and then need to quilt it at the end.
Just the hexagon method above, if I were to use this method for a temperature quilt I would use the daily high as the front fabric (center of the circle) and the daily low temperature on the back (the frame).
Decorating the Blocks
One final way to make your temperature quilt just a little bit more special is to mark the important days in your life. You can do this in a few ways, you could use a special fabric for that day, embroider a name or add special quilting to that square.
I plan to grab my heavy hand quilting thread and stitch 1/4 inch in around the block for the birthdays in my immediate family. It’s a subtle mark but I’ll know what it means.
Check out my Quilting page for more info or start here: