

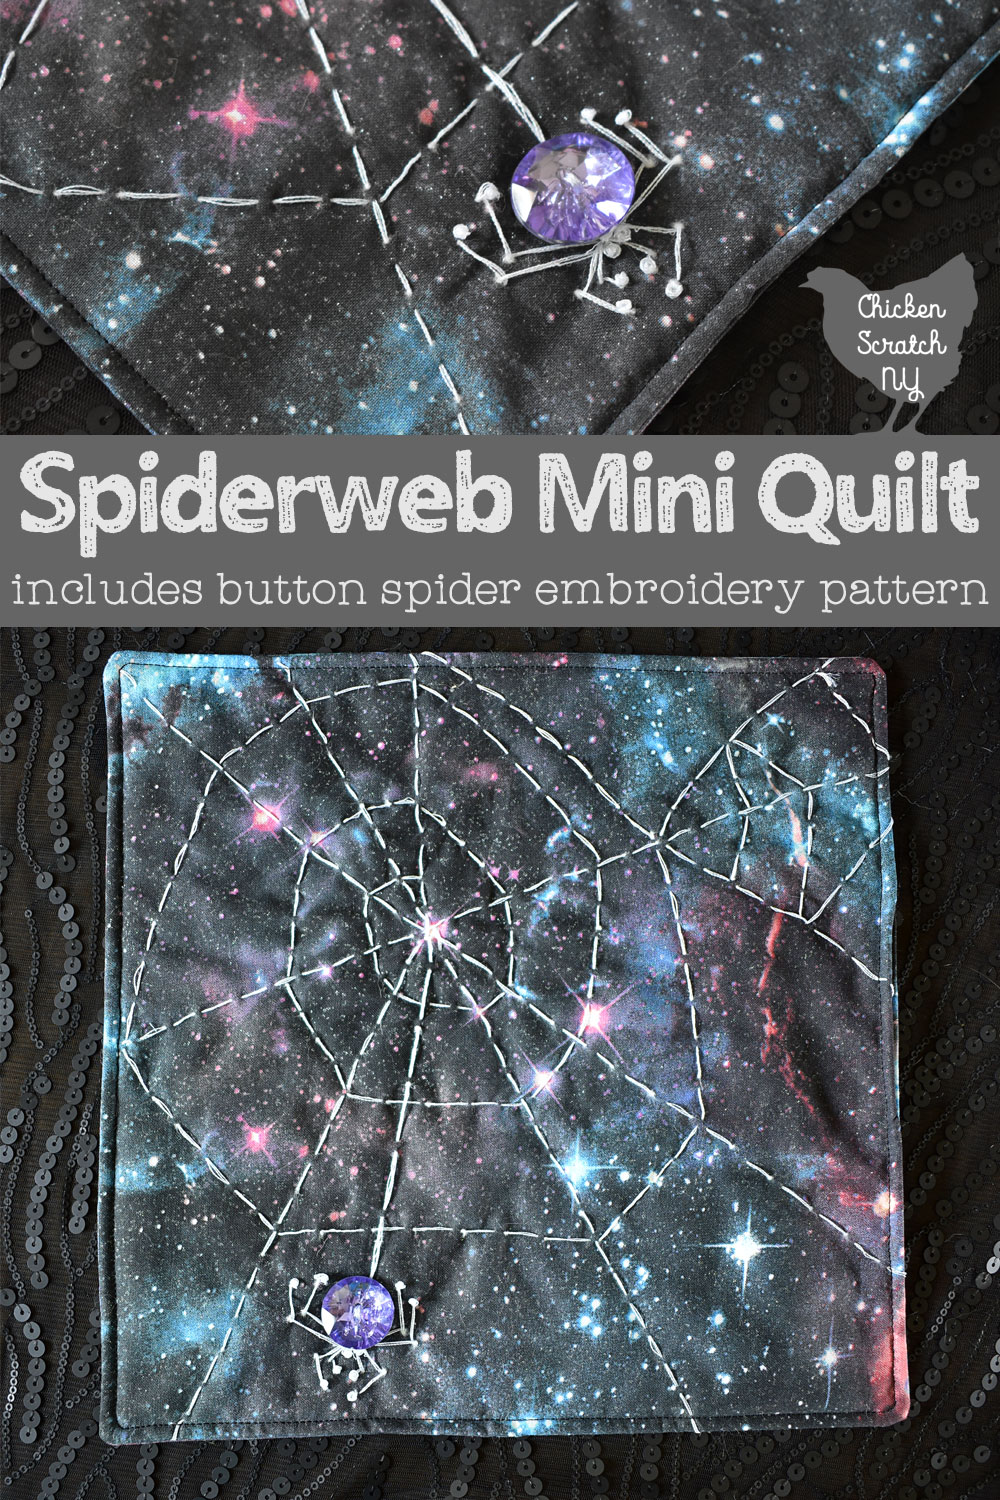
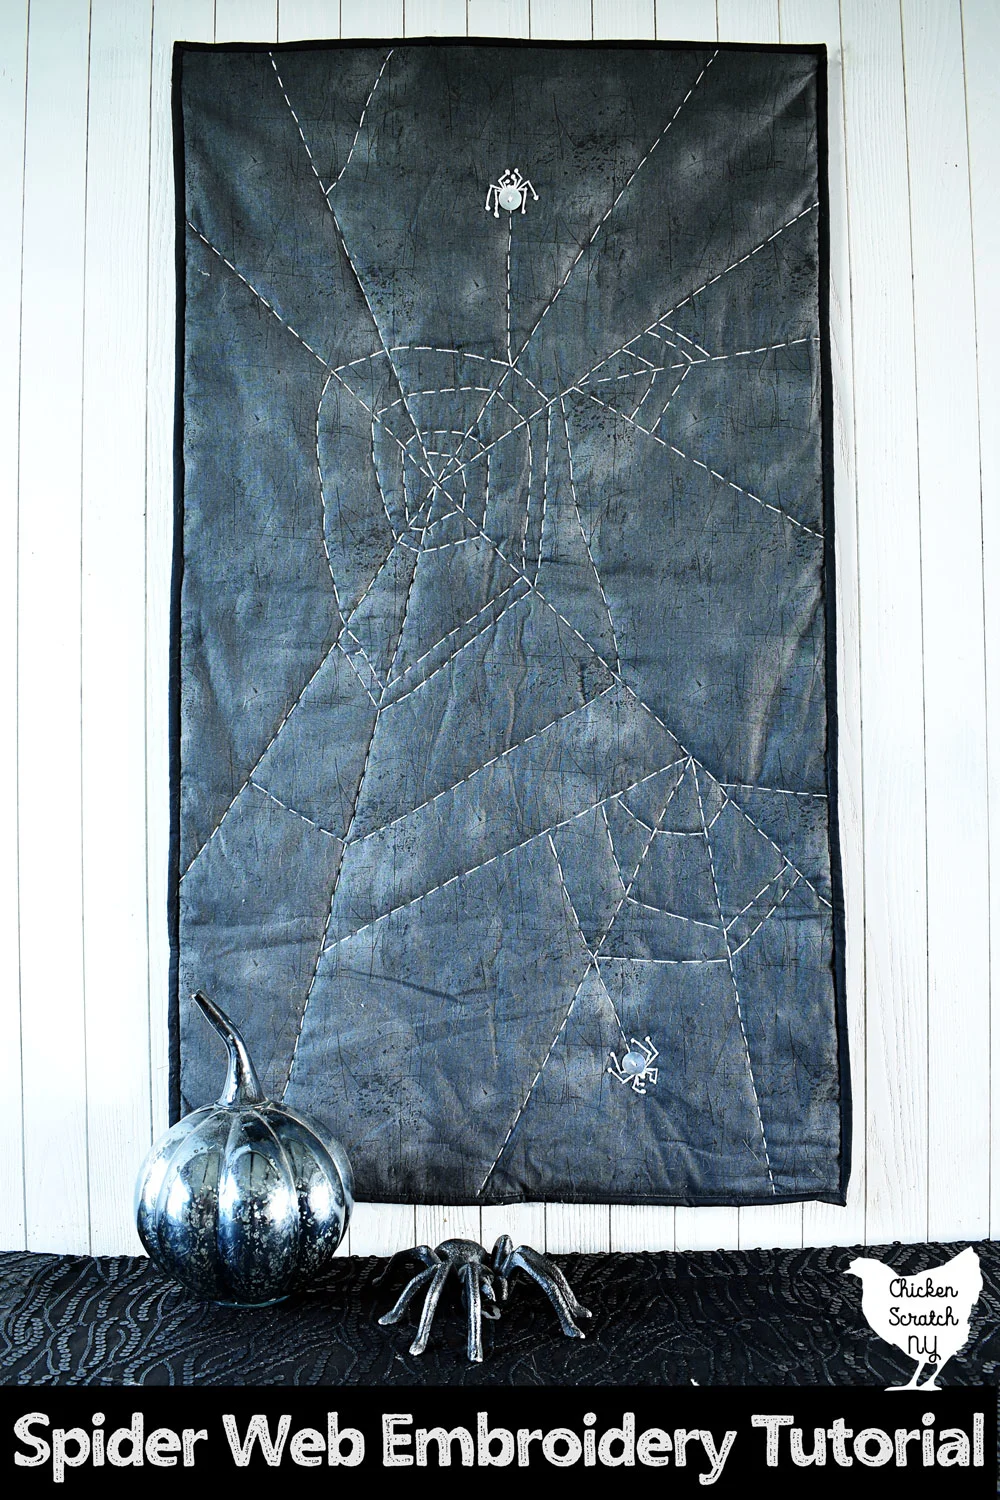
This Spiderweb Mini Quilt can be sewn up in a day. It combines simple hand embroidery and machine stitching for a creepy and cute Halloween decoration you can make at any time.
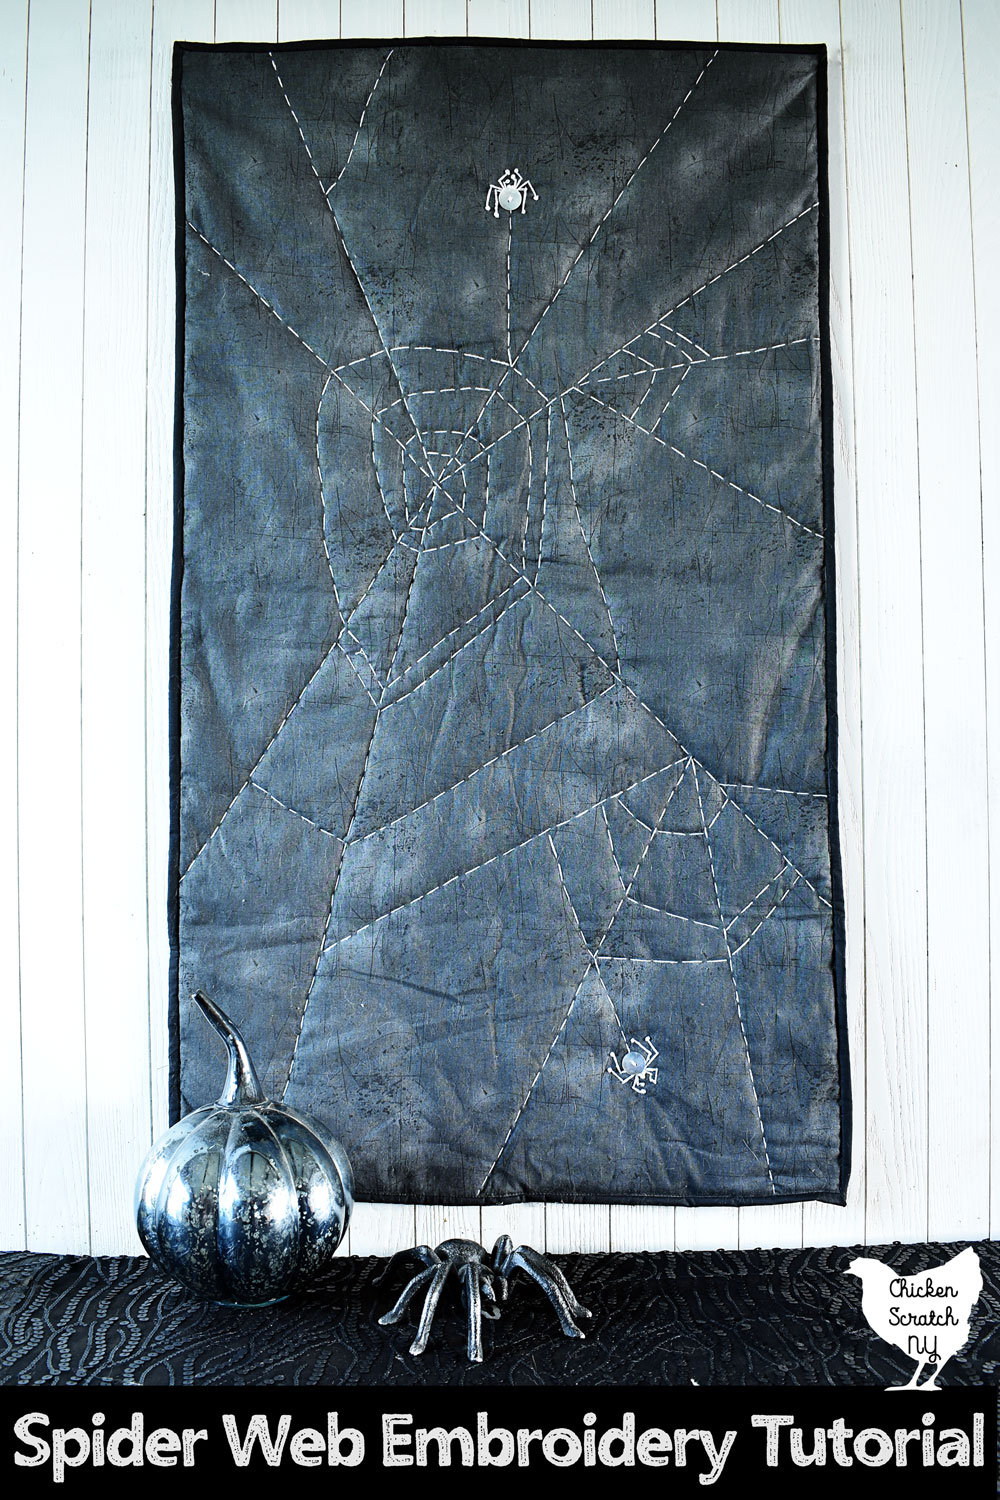
I’ve already shared a more traditional version that’s finished with binding. If that’s more your style check out my Spiderweb Table Runner.
The Galaxy Spider was clean finished and top-stitched. I think it’s easier than the quilt binding method but I don’t quite like the look as much, like I said before the binding adds a nice “frame” to your work.
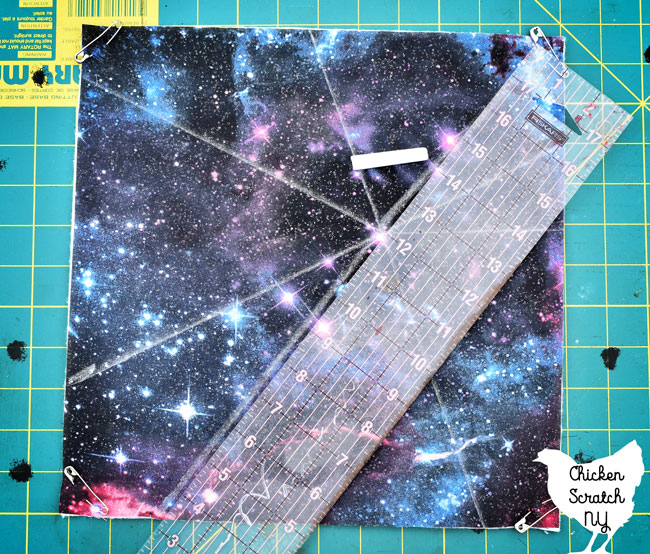
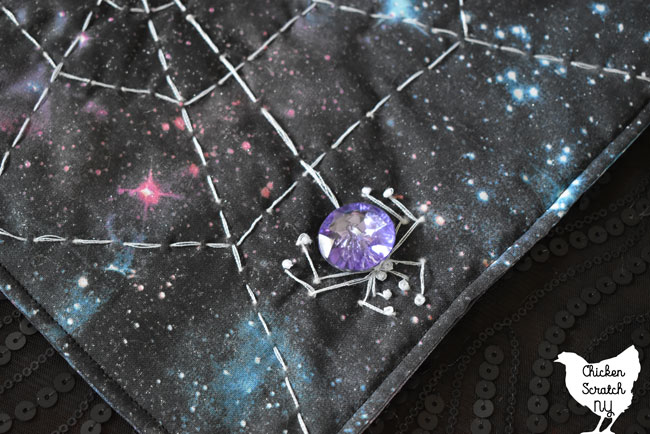
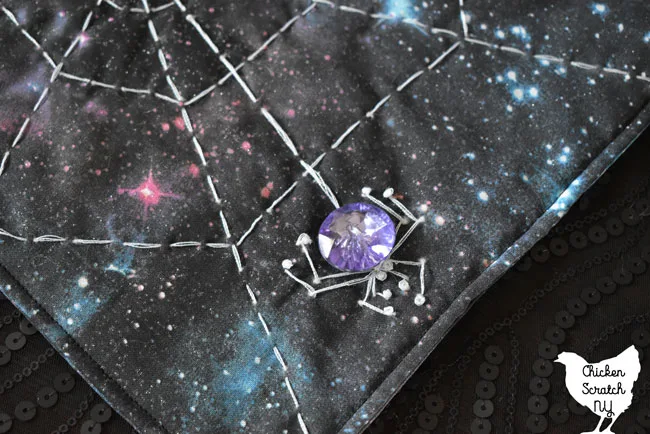
For this quilt I used a super busy galaxy print and cut two identical squares about 12.5 inches by 12.5 inches avoiding the lightest areas of the fabric. I picked up the fabric at Joann’s.

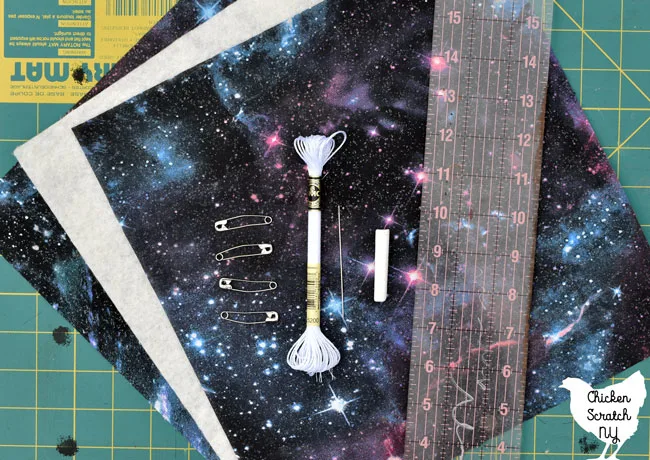
I used an iridescent thread from DMC from the Light Effects line (color E5200) for this web and spider. It’s stiffer than regular embroidery thread and feels like plastic. It looks plain white until the light hits it and you get a bit of the shimmer.
Most of the web was done with 3 strands, the stand with the spider attached was done with six strands. Sometimes it felt like it was going to snap but I never had that happen.
Side note, I’ve started getting really crazy about unnecessary use of plastic in my life so I bought a giant king-sized piece of 100% cotton batting for all my quilts (check my Instagram for real-life crafty updates and lots of chick pictures!) and I used that for this project.
I really struggled with the cotton batting on this one, it worked great for my machine quilting but hand quilting was an issue.
I don’t know if it was the batting on it’s own or the stiffness of the thread but I had little bits of batting pulling to the front of my work on almost every stitch. I didn’t notice the same thing with my other spiderweb quilt where I used polyester batting.
It’s not as noticeable because I used such a busy print but it certainly drove me a bit batty while I was working.
The Set Up
To set up your spiderweb mini quilt cut two pieces of fabric and a piece of batting to the the same size.
Set aside the backing piece for later, you won’t need it until you’re completely done. Smooth the front piece onto the backing and pin down securely with safety pins. I only used four pins, one in each corner for this small size.
Making the Spider Webs
Onto the real fun! Adding the web is where you really get to let your creativity go wild. I used a few special tools to make my webs just the way I wanted them.
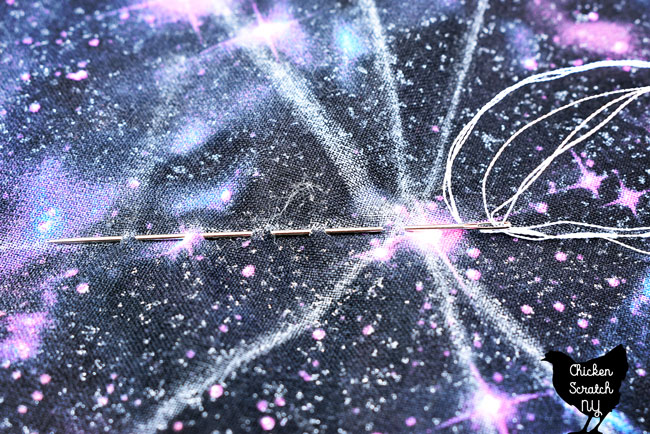
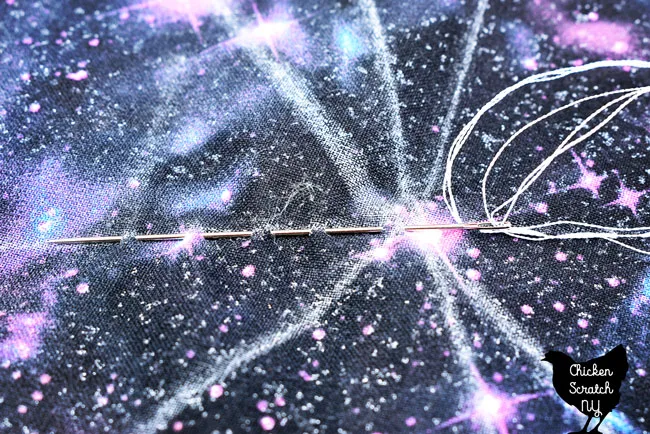
First up is a giant needle, I bought 3 inch long Doll Needles from Joann’s. Using a long needle means you can make more stitches at once and I think it’s easier to keep them straight and even.
Second is a ruler or straight edge and some chalk. You can use fancy tailors chalk or just grab a stick from your kids craft bin. It will rub off as you work but it helps you create a decent framework.
This example is based on my larger runner but I think you can get the same idea, you’re still making a large web (or two) just in a smaller area.
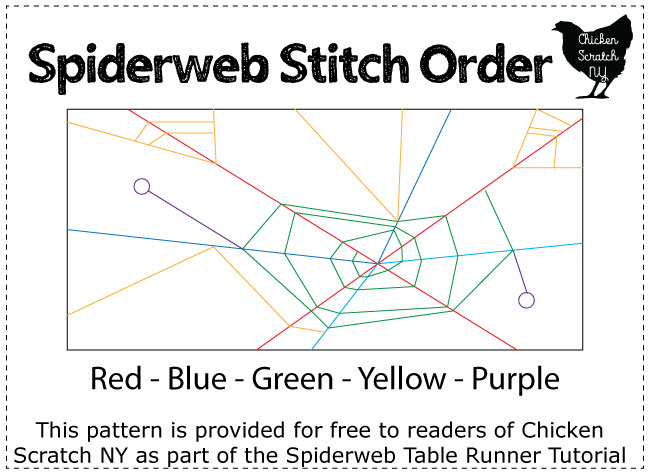

First up make a giant X (red) with two straight lines using the ruler and stitch them from edge to edge. I intentionally avoided the corners or making anything symmetrical.
For your straight stitches aim for about 3/8 to 1/2 inch of thread showing on top (big bite) and 1/8 (tiny bite) on the bottom. It gives the illusion of an unbroken line but up close you get that rustic homey feel I’m always going for.
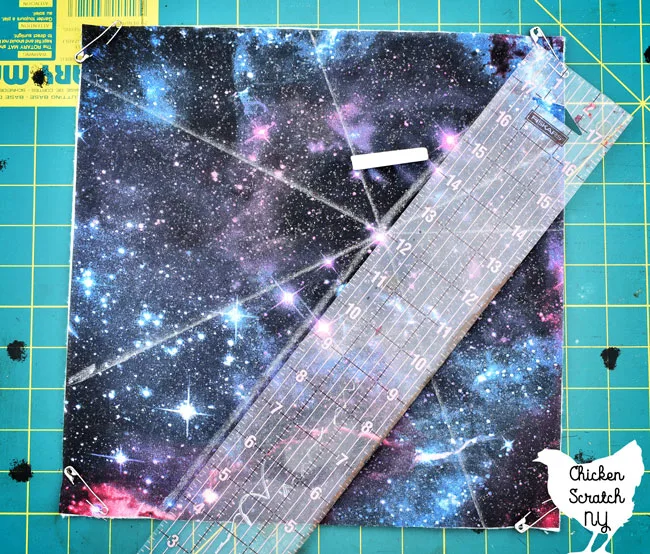
Then I added a few more lines from the edge to the center and then back to the edge at another angle (blue).
I like to keep my knots toward the edges where ever possible. Speaking of knots, all of your stitches with start with the knot at the back.
Learn the fastest way to Thread a Needle & Tie a Knot
Now it’s time to really get webby. Start near the center and spiral out using straight lines and turning when you intersect a web line (green). I like to use wonky angles and make some lines close together and leave larger spaces in other areas.
I like to add some smaller webs or just extra lines of stitching where I feel like there is too much open space (yellow). Just make sure you leave a spot for your spider and her butt rope (purple)!
Adding Button Spiders
You can out your spider (or spiders) wherever you want, just keep them at least a 3/4 of an inch away from the raw edge or you’ll catch the legs when you do the top stitching.
This spider was my first attempt at normal hand embroidery. I’ve done quite a bit of punch needle embroidery and so much machine embroidery that it’s actually weird that I’ve never tried the regular method.

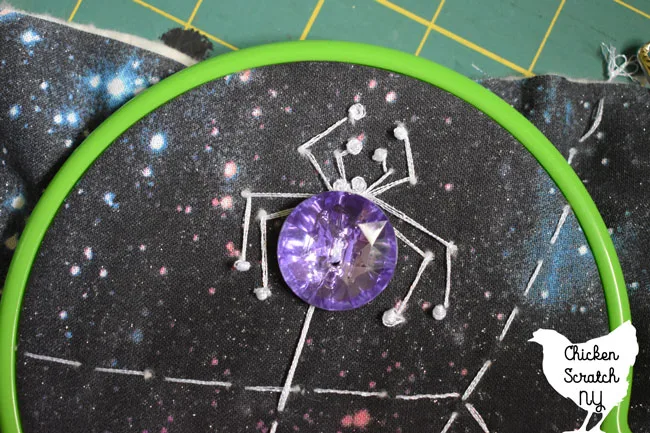
You only need to understand two stitches for this little spider, a straight or running stitch and a french knot. I switched to a shorter needle and found a small hoop pretty helpful.
Again you can really make this spider your own. I love the chunky french knot toes but you can skip them or add even more and give her fat ole knees too.
The number of times you wrap your thread for the french knots will depend on the thickness of your thread and how big you want the knots to be. I recommend you practice on some scraps before hand to figure out your sizing.
Coming from the land of machine embroidery digitizing I’m mentally programed to draw lines with the absolute minimum amount of stops (and knots) as possible.
You can sew each spider with a single length of thread by working from the middle out and back in. It’s easier than stopping and cutting and since the only real traveling you do is between the toes you don’t end up with any giant stitches on the back either.

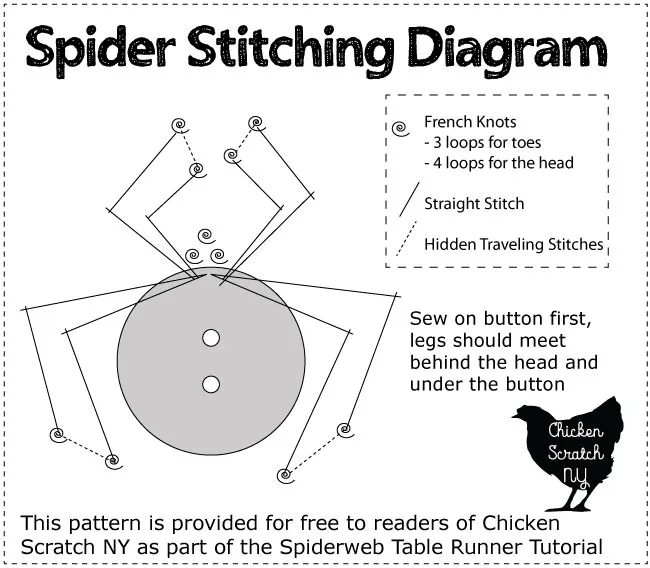
Start off by giving your spider a head with 3 large french knots. Then come up with the needle just under the edge of the button, make one long straight stitch angled back towards the button, bring the needle back up just outside the fist line you made, make a second long stitch angling even more towards the button.
Come back up a few threads over and make your french knot for the toe. Bring the the thread back up about 1/4 inch from your first knot and make another french knot, now stitch the second leg the same way you made the first but in reverse, ending up in the same spot under the button.
Repeat another three times to make 8 legs. I made my back legs longer but again, this is your chance to make the spider of your dreams!
Finishing the Mini Quilt
When you’re happy with your web and spiders smooth out the quilted fabric with your hands making sure everything is laying flat, the batting should be against the table with the pretty fabric looking at you.
Place the backing fabric, pretty side down over the embroideried piece. Match up the corners and pin the pieces together.
On a sewing machine sew a generous 1/4 inch from the edge leaving a space for turning.
Sewing Tip: You’ll get the best corners if you stop with your needle down, lift the presser foot and turn your piece at each corner.
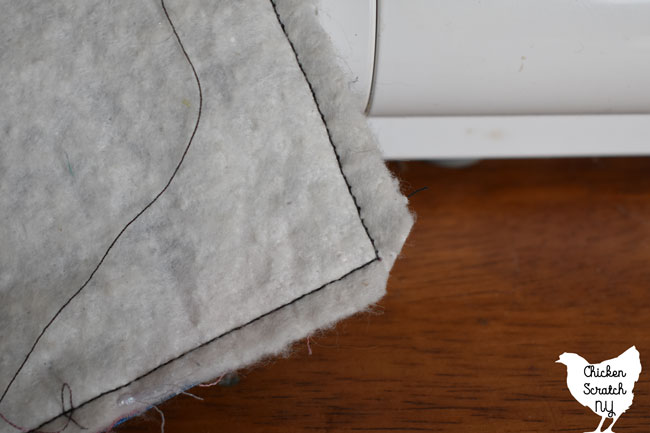

Clip across the corners about 1/8 inch from the seams and flip the piece right side out. Use a pin or awl to pull the corners out if needed.
Finger press or iron along the edges and whip stitch the opening closed. If you’re careful you can skip this step and close the gap with the top stitching.
Roll the seam between your fingers to flatten it out. Pin around the edges and add a line of top stitching 1/4 inch away from the edge all the way around to help keep things in place.
Spiderweb Mini Quilt

This Spiderweb Mini Quilt can be sewn up in a day. It combines simple hand embroidery and machine stitching for a creepy and cute Halloween decoration you can make at any time.
Materials
- 2 Identical pieces of quilting cotton
- Same size piece of quilt batting
- Embroidery Thread, try something fancy like DMC Light Effects
- Buttons for Spiders
Tools
- Scissors or Rotary Blade & Mat
- Safety Pins
- Ruler
- Chalk
- 3 inch Doll Needle
- Regular Sewing Needle
- Small Embroidery Hoop
- Sewing Machine with coordinating thread
Instructions
- Prepare your mini quilt by pinning the front to the batting
- Mark main lines for spider web using ruler and chalk
- Stitch webs using long straight stitches
- Add buttons and stitch spiders following the diagram above
- Square up uneven edges with rotary blade or scissors
- Sew piece of backing fabric to the embroidered piece face to face leaving a space for turning.
- Clip the corners off
- Turn right side out and whip stitch the gap closed.
- Press and top stitch around the edge
Check out my Halloween Page for more spooky fun or start here:

Scarlet
Friday 7th of August 2020
I love this beautiful spiderweb min quilt. Especially cool is that outer space galaxy fabric. It kind of makes an esoteric statement. That iridescent thread is another awesome touch.