


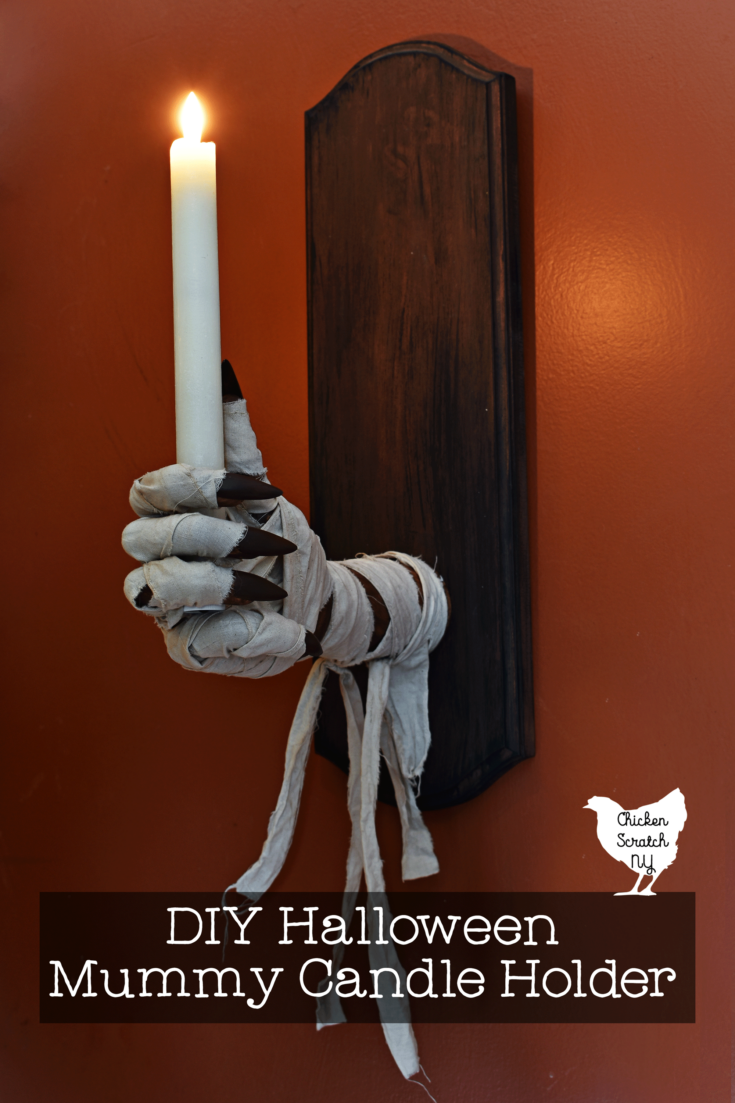
Halloween is best experienced by candlelight so why not DIY a spooky Mummy Hand Candle Holder? All you need is a trip to the craft store and a little Halloween magic to Illuminate your creepy decorations!
I’ve fallen down the rabbit hole of articulating hands so this is actually the first in a series of Halloween Hands! Coming up we’ll have a witch and with a little luck a werewolf.
Mummy Candle Holder Supplies
There are a few specialty items you’ll need for this project, most obviously the hand, but the rest can be found in most craft stashes or hit up the Dollar Tree. You should always feel free to adapt projects to what you have, what you like and what you want.
Wooden Hand
The most important part of this Halloween DIY is the hand. You can find articulating hands at Michael’s in the art/drawing section or buy them from Amazon.
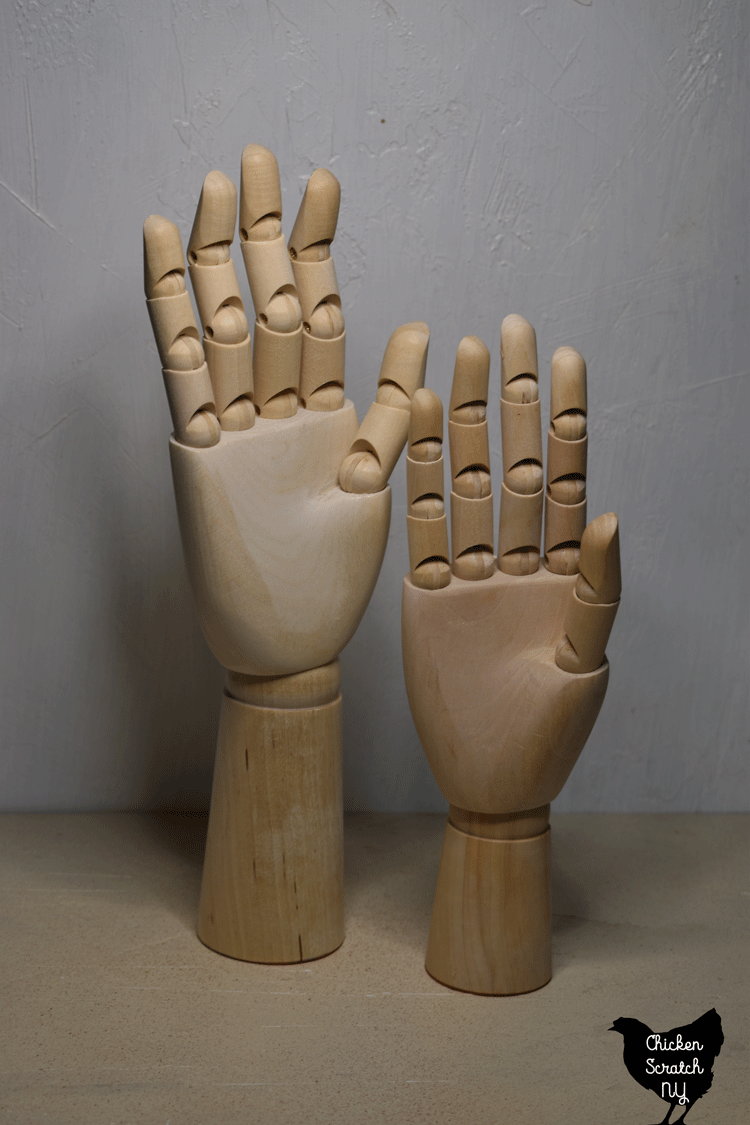

The hand from Michael’s is larger overall and it’s labeled a male hand (still smaller than my hand though!). The “wrist” is taller and the palm is a bit wider. It will run you $19.99 before you use your coupon (hold out for a 40% off and it’s not a bad deal).
The larger hand is more dramatic but it will stick off the wall a lot farther so keep that in mind if you’re decorating at tight space.
Amazon had a few hand options, but the one I bought was smaller and possibly a female hand. The fingers are a little narrower and the wrist is much shorter.
Unlike the hand from Michael’s, you can get a right hand, a left hand, or a set. For this project, you’ll only need one hand unless you want to make a pair of candle holders.
Brown and/or tan, black paint & paint brushes
Most of the hand will be covered with bandages but you’ll want to paint it anyways so if any bits peak out it looks like a withered hand and not a wooden drawing model.
You can go really sloppy with it, just try to get into all the joints, nooks & crannies so no matter what position the fingers are in you’re not seeing raw wood.
This is a great stash project, you can use any tones of dark brown that you have on hand. I would recommend sticking with a matte finish and saving the high gloss for something else.
For the wooden background plaque you can use the same brown, and then use a dry brush with a bit of black paint to age it and add some depth.
Fake Finger Nails (optional)
You don’t need to give your mummy claws but it’s Halloween and it’s an easy way to up the creep factor. I was pretty surprised to find out how cheap a giant box of fake nails was so I’m sure I’ll be sneaking them into quite a few projects.
I figured the creepiest nail shape was the stiletto (oddly enough not the coffin) and I bought a 500-piece Stiletto Nail set for $6.
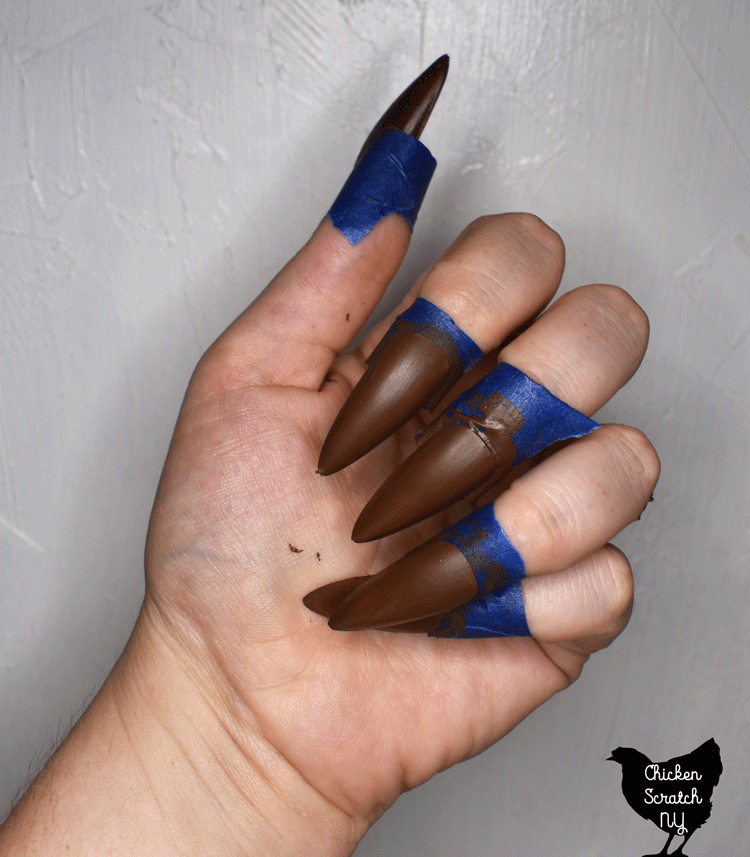
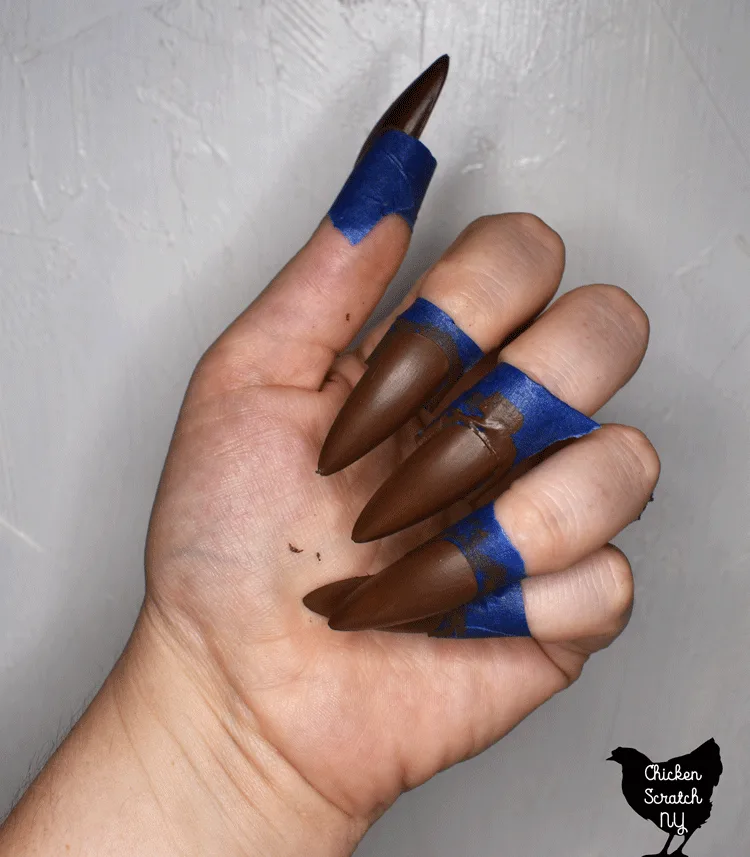
You can paint the nails with the same acrylic paint you’re using for the hand. The best way I found to paint the nails is to loop painter’s tape around your fingers sticky side out, press the nails on over your real nails and paint them.
Wooden Plaque
In order to make the hand holding the candle stand up, you’ll need to attach it to some kind of backing. There are a lot of options in craft stores but for this particular hand, I went with a 4″ x 16″ Wooden Rectangle Plaque from Joann’s.
I wanted this hand to hold a taper candle and I thought the longer shape would balance that better than the rounded plaque I used for the witch hand.
Drill, bit & two screws
You will need a drill, a bit to pre-drill holes, and two screws long enough to go through the plaque and into the wrist of the hand.
If you don’t have access to a drill or you just aren’t a fan of power tools you can try using a strong glue or epoxy. Just be careful with the weight of anything you put in the hand.
White or Off White Cotton Fabric & Black Tea
It wouldn’t be a mummy without bandages and for this particular mummy, I used plain cotton died with black tea. The fabric I used was unearthed from my stash and I’m not 100% sure what it was but it was either off-white quilters cotton or cheap muslin.
To get the old bandage look you’ll want to rip the fabric, start by making a small clip in the edge of the fabric and tear it with your hands. As long as you’re using a woven fabric it will rip across the fabric in a straight line.
Use this method to make 6-8 strips of fabric about 1-2 inches wide. Then it’s time to head to the kitchen.
Heat up a few cups of water to a boil and toss in a black tea bag or two. Give it a stir and add your fabric strips.
Let it sit at least until the water has completely cooled, I left mine overnight because I’m finally watching Stanger Things and I forgot I was crafting.
Hang the strips up to dry, they will be wrinkly and there will be strings all over, that just adds to the atmosphere!
Glue Dots
You’ll need some kind of adhesive to attach the fingernails and the fabric strips. I’m a fan of Glue Dots for this kind of project.
It’s a lot cleaner and faster than messing around with glue. You can also use pieces of double-sided tape.
Fake Candle
DO NOT use this hand to hold a real candle.
Depending on the orientation of the hand you can hold a taper or pillar candle. As long as your hand freely rotates on the wrist you’re free to mix it up whenever the mood hits.
I have a set of fake taper candles from Amazon, they come with a remote that lets you set them to run on a 2/4/6/8 hours on a schedule. If you set them to turn on for 2 hours at 8 pm, the candles will turn off at 10 pm and turn back on at 8 pm the next day.
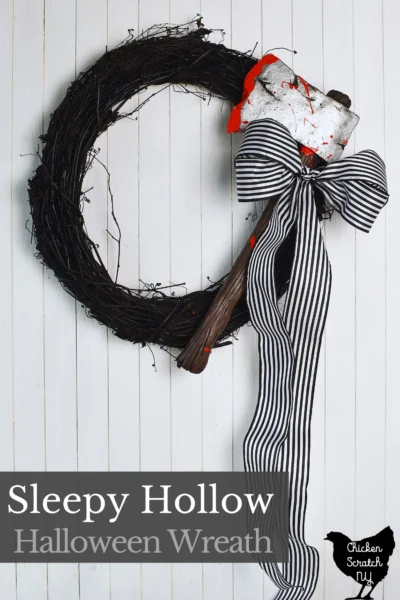
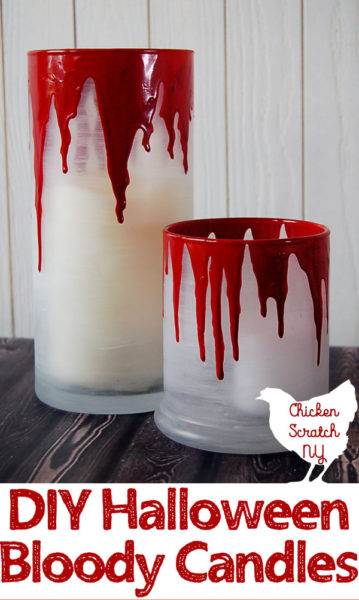
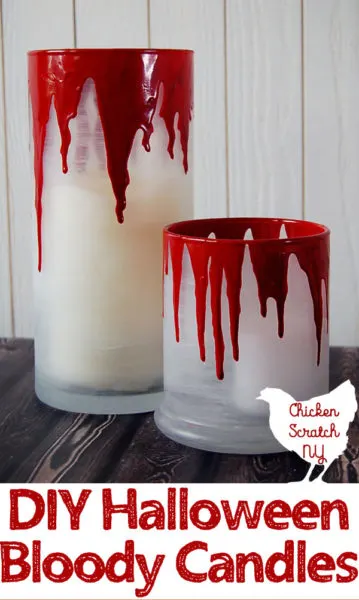
Looking for more spooky candle DIYs? Check out:
How to Make a Fake Hand into a Creepy Mummy Candle Holder
The first thing you need to do is peel the red sticker off the bottom of the hand so you can figure out where the metal pieces are and where you can safely drill a hole.
Then figure out where on the wooden plaque you want to attach the hand. Both of the hands that I’ve used are able to rotate, so it doesn’t matter if you want the hand palm up, palm down, or palm to the side. If your hand doesn’t have that ability you’ll need to decide what you want before you attach it.

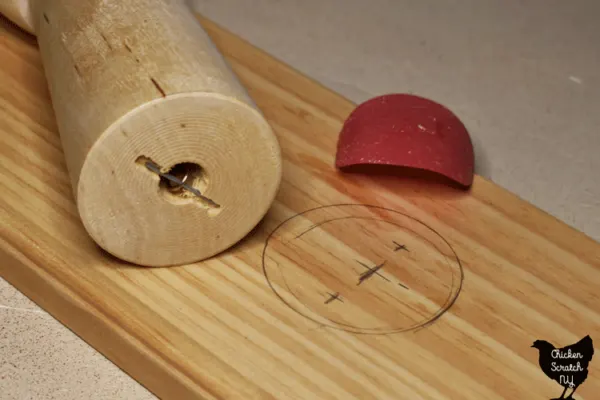
Use the drill and a bit to make pilot holes through the plaque and into the hand. If you skip this part you might split your hand or plaque and no one wants that!
After you’ve got your holes drilled paint the wooden plaque dark brown and let it dry. Then you can add some dimension by dry brushing the plaque with black and more brown.
There really isn’t a way to mess this up, it’s for Halloween after all, and looking messy is an aesthetic choice.
Now it’s time to have some real fun, decorating the hand and making it creepy!
The cool thing about these hands is you can adjust the fingers to hold different items, the less cool thing is how obviously fake the joints in the fingers look.
Painting the hands won’t do a whole lot to cover up the joints so we’re going to loosely cover them in strips of torn fabric. You can’t wrap the fabric super tight or you won’t be able to bend the fingers but you don’t want it so loose that they fall off.
Most of the hand itself will be covered by “dirty” bandages but first, you need to darken up the hand to make it look more like an ancient weathered hand than a chunk of wood.

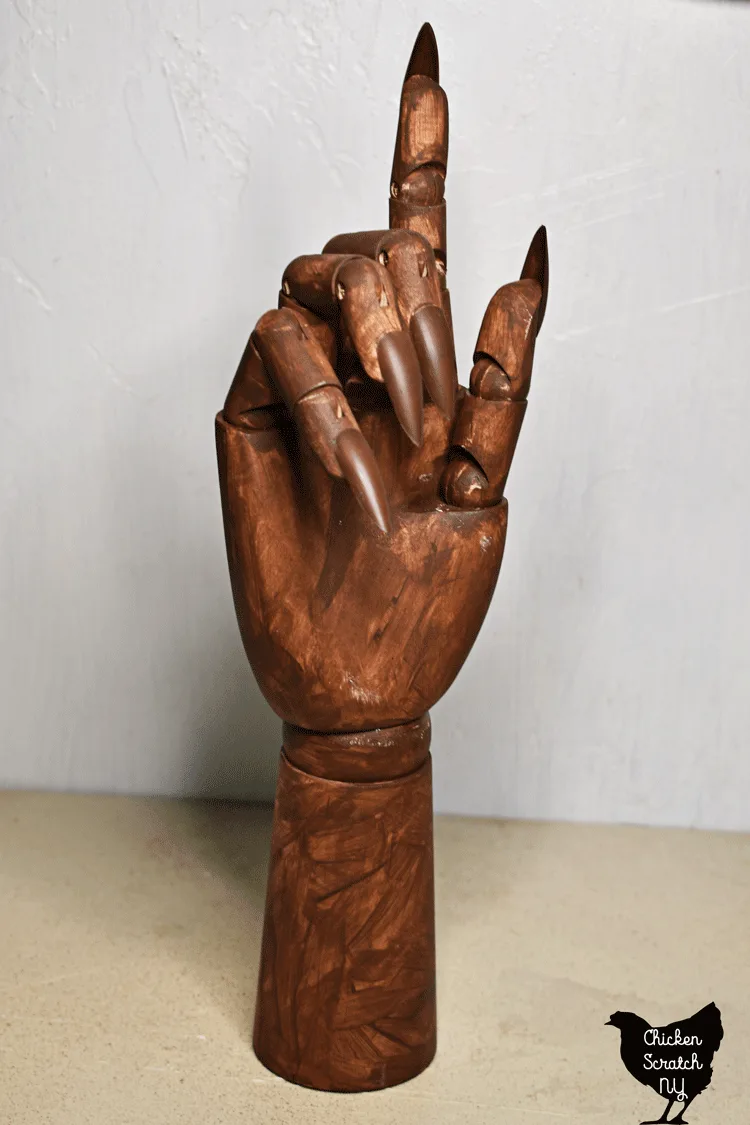
You can use any brown craft paint, it doesn’t have to be a particularly clean application, just slap it on there making sure to bend the fingers both ways to get into the joints.
If you’re going to be adding fake fingernails this is the time to paint and attach them. I used the same brown paints that I used for the hand itself and painted the front and back of the nails.
The easiest way to attach the fake nails to the wooden hand is with Glue Dots or some kind of double-sided tape but you can also try glue. The great thing about the Glue Dots is they fill in the spaces between the nail and the hand where the two don’t meet perfectly.
Once you’ve got the nails on it’s time to screw your hand to the base. It might be a little fiddly but the predrilled holes should make things easy for you.
The final step is to add the bandages. Start with one end of the fabric, use a glue dot to stick it to the fingertip, and then wrap each finger individually.
Make sure to test bend the fingers in and out, if you wrap the fabric too tight they’ll get stuck in one position.
Add fabric until the whole hand is covered, don’t forget the wrist and either use glue dots to secure the ends or tie them around the wrist and let the excess hang down.
Check out my Halloween Page for more spooky fun or start here:
Kathy
Wednesday 3rd of August 2022
This is very creative - I appreciate you sharing the links to where to find the items. I'll be checking out the rest of your blog. Thank you for sharing this fun idea!