Charcuterie boards have been the hot food trend of the last year or so. They’re stunning, tasty and with a little help incredibly easy and cheap to put together.

In my opinion the best thing about a charcuterie board is that you can customize it to fit your tastes. Everything I put on this fancy looking board came from Aldi.
I wish I could tell you how much I spent but these days grocery runs are a scramble and it was all thrown in with my regular groceries. But let’s be real, it was Aldi’s so it’s pretty budget-friendly!
If you shop at Aldi’s (this post isn’t sponsored by the way) you know the quality of their specialty, store brand food are amazing.
Especially the chocolate and honestly, the main take-away from this post is go buy the Dark Chocolate Caramels.

Traditionally charcuterie is all about cured meat and cheese but as it’s been trending it’s taken on a life of its own and people have started doing all sorts of crazy things with it from breakfast charcuterie to dessert charcuterie.
Today we’re keeping things closer to the traditional side but throwing in a few fun surprises to make it a meal instead of just an appetizer.
This tray would make a great at-home date night meal that looks super impressive while actually being pretty easy to put together.
The Set Up
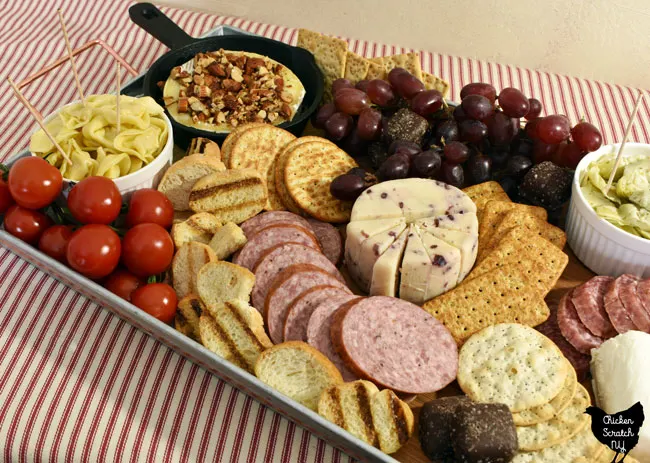
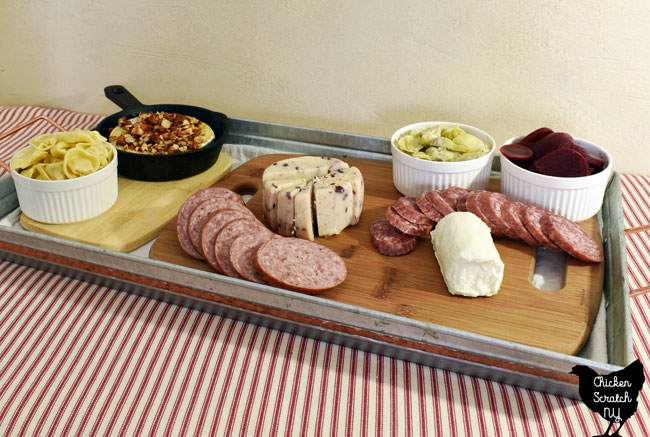
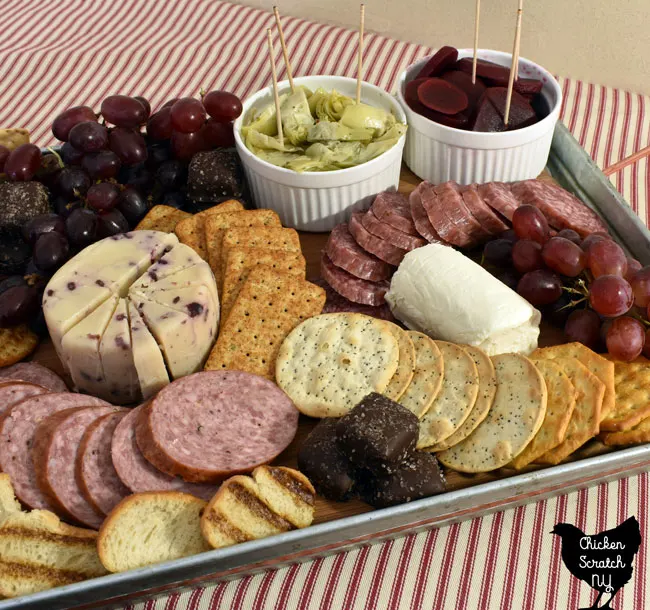
While the food is the real star of this show there are a few supporting actors that need to be acknowledged. I set up my charcuterie boards on wooden cutting boards nestled in a metal tray.
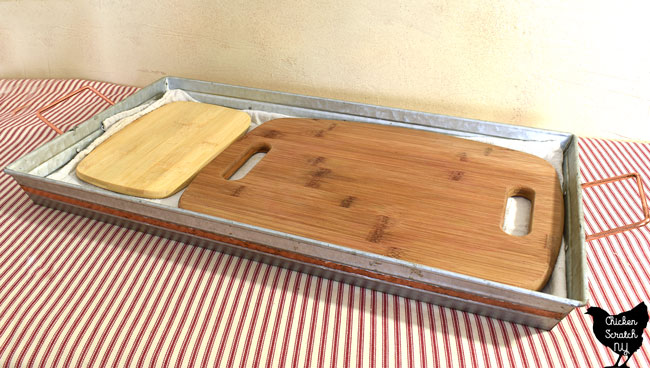

Trays are great because you can set everything up in the kitchen and then easily carry it all to the dining room, poolside or, let’s be honest to the living room to watch TV. The tray I use came from Aldi’s a few summers ago but they’re everywhere these days.
I have seen some really cool options at TJ Maxx and Home Goods made from either wood, metal, or stone. You can also use a large wooden cutting board if you can’t find a big tray with handles.
Before adding any of the food I like to line to the tray with a tea towel, it helps hold the cutting boards in place and it will soak up any spills. Then I add in the cutting boards to hold all the meat and cheese.
If you’re adding anything wet like olives, pickles, or artichoke hearts you’ll also want to grab a few small bowls or ramekins as well as a set of fancy picks to help pick up the food.
Cheese
The hardest part about making a charcuterie board is narrowing down the cheese options. You have so. many. options.
In the end, you should pick things that you like to eat that will work well with the other items on the charcuterie tray. Aim for a variety of flavors and textures.
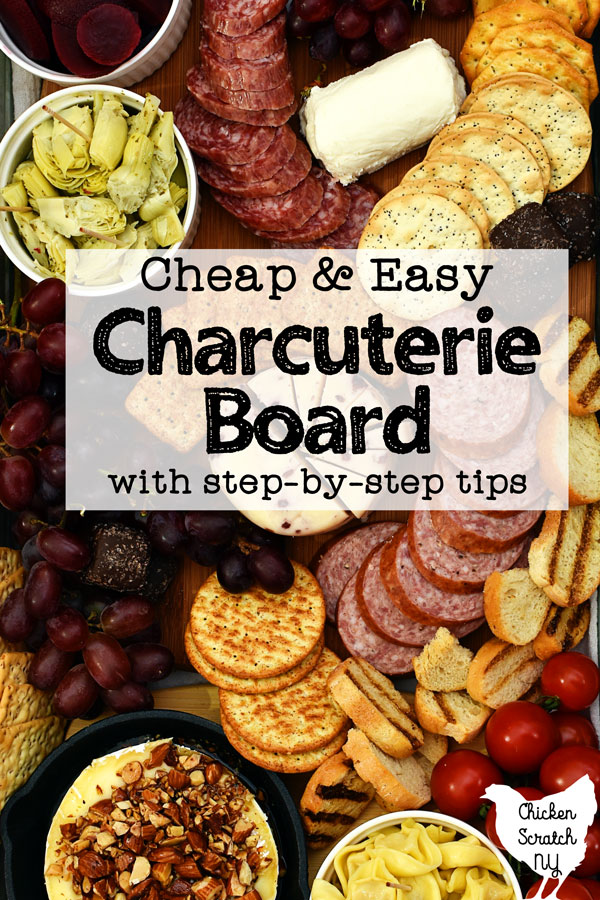
This time I went with a log of Honey Goat Cheese, Cranberry White Cheddar, and a small wheel of brie that I baked in a tiny cast-iron skillet with toasted almonds and maple syrup because I’m extra.
You can leave soft cheeses whole but you should slice up harder cheeses ahead of time or add a knife to your serving tray.
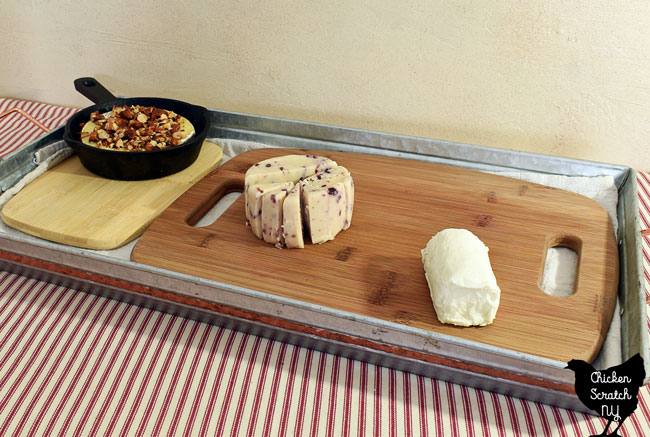
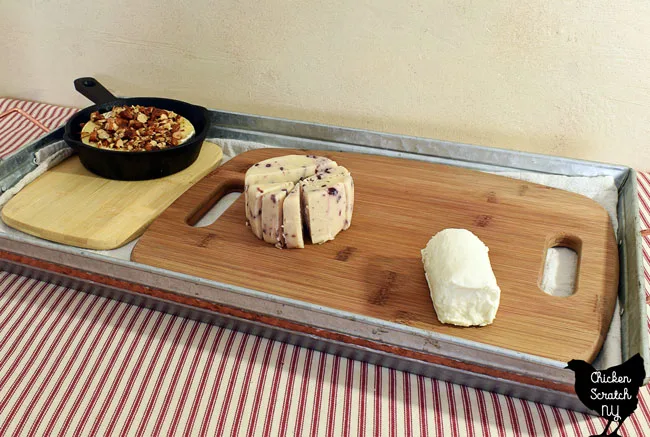
I like to set up my cheese and meat first, they’re the real stars of the show, and getting them spaced out gives you a good start for a dramatic and delicious charcuterie board.
If that Toasted Almond Maple Baked Brie caught your attention here is my recipe, it will be done by the time your water boils for the tortellini (getting to that in a second).
Maple Almond Brie

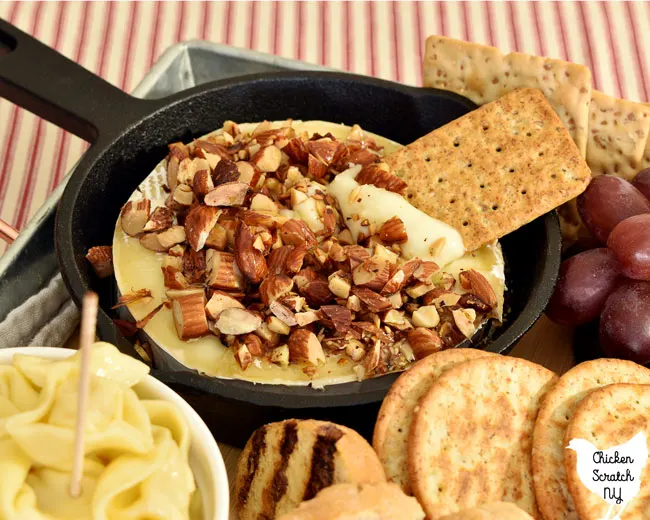
Baked brie is an easy way to make an impressive appetizer in minutes, by the time the oven has preheated it's ready to bake. This Maple Almond Baked Brie is delicious on it's own or served as part of a charcuterie board
Ingredients
- 1 small wheel of Brie
- 1/4 cup chopped almonds
- 2 T real Maple Syrup
Instructions
- Preheat oven to 350°
- Carefully slice off the very top of the brie, this is optional* and place in a small oven-safe dish or skillet
- Toast the chopped almonds in a dry skillet until fragrant, stirring constantly
- Dump toasted almonds on top of the cheese wheel and drizzle with maple syrup
- Bake for 5-7 minutes or until soft and scoopable
- Serve with crackers
Notes
The rind on brie is edible but I think it's easier to scoop up the melted cheese with a cracker when the top portion is removed
Recommended Products
As an Amazon Associate and member of other affiliate programs, I earn from qualifying purchases.


Bowls
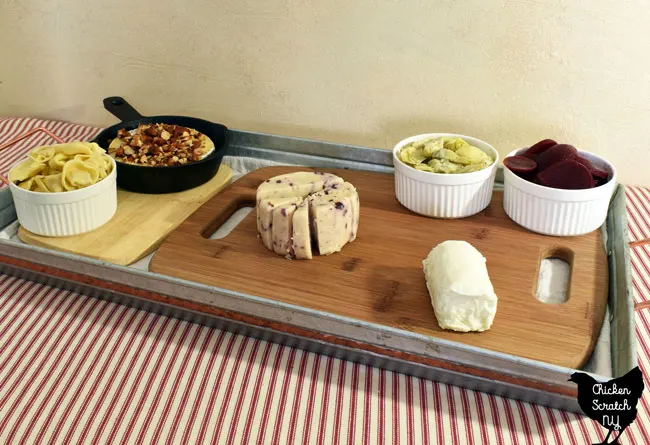
Before I add the meat I like to add in anything in a bowl. This time I used large ramekins filled with marinated artichoke hearts, pickled beets, and warm tortellini tossed in melted butter.
Traditionally you would have olives on a charcuterie board, but I don’t like olives so I swap them out for marinated artichoke hearts. It’s just one more flavor and texture to add variety to your meal.
I also like to throw in something pickled. This time I went for beets but pickled cucumbers are always a welcome hit of acidity to cut through the fatty meat and cheese.

Beets and goat cheese are a match made in heaven and I’d be happy with a whole tray full of that combo. Round baby beets are much more attractive than the slices but I’m not good at speed reading labels in the Grocery Store Hunger Games.
For our final bowl, how about some warm fresh, filled pasta tossed in melted salted butter? I picked up a pack of tortellini from the refrigerator section of Aldi.
You can use frozen pasta but the fresh stuff cooks up in barely anytime. There are always a few options of tortellini and ravioli, you never know until you get there but that’s part of the fun of shopping at Aldi’s.
Adding stuffed pasta is a great way to take this from an appetizer to a meal. And its portable nature makes it a perfect snacking dinner while watching a movie marathon.
Meat
Taking a step back to the classic charcuterie board, cured meats are the shining star standing hand in hand with the cheese. Just like with the cheese I like to have a few options.
This time I went with a softer summer sausage and a harder Genoa Dry Salami. I had planned on adding Prosciutto but I forgot to grab it.
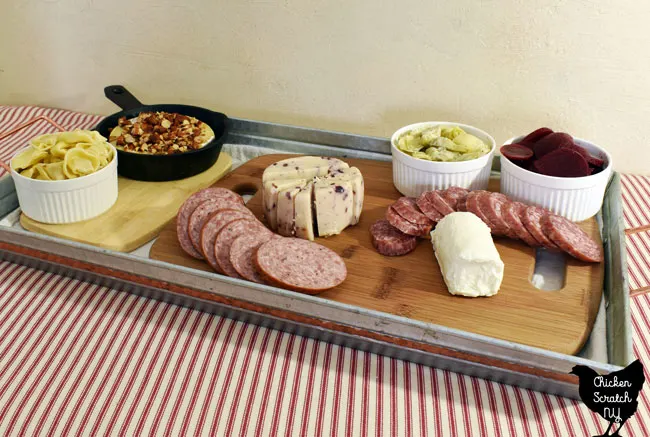
If you want to make your meat look extra nice slice it up on the diagonal. It takes it from ‘gas station pizza topping’ to ‘damn she’s fancy’ with no extra effort.
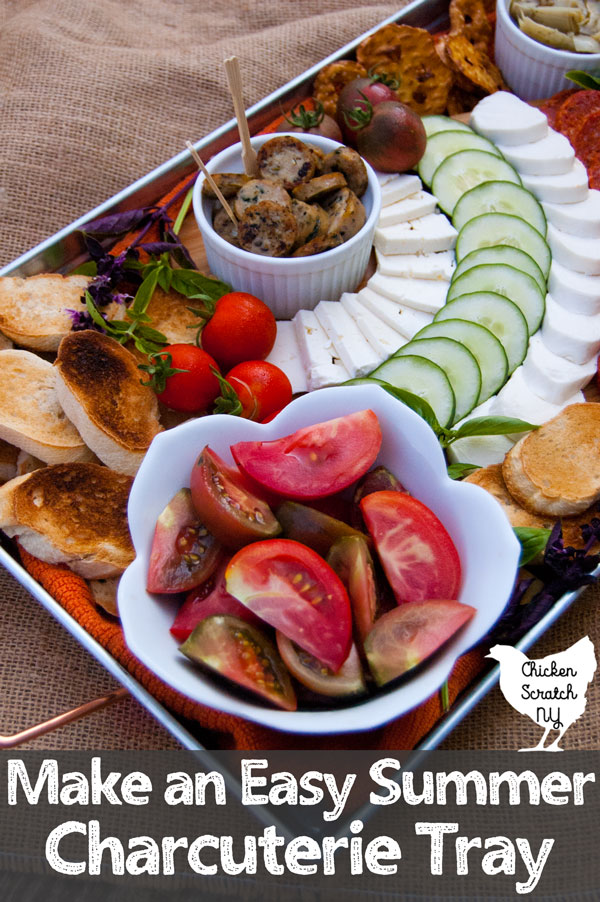
When I made my fresh summer charcuterie board I added a few sliced-up sausages and served them in a small ramekin.
Whatever you decide to use for meat make sure you space it out on the board. You want to keep the eyes moving and you can do that my keeping your star elements away from each other.
Even though we have over half the food on the board it’s still looking pretty empty and that’s perfectly fine. The next two steps are where it fills out and really comes together.
Fresh Food
This is where we start to get even farther away from the traditional charcuterie elements. I like to add some fresh foods to make things a little lighter (nothing like 15 pounds of cheese sitting in your stomach) and to add some variety.
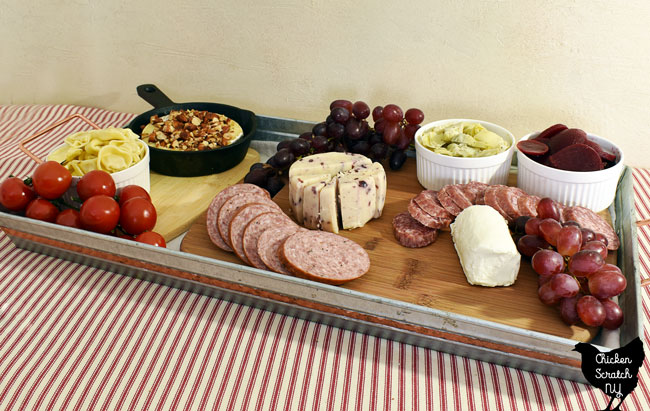

This time I went with red grapes and fresh cherry tomatoes. I’m a huge tomato snob, I refuse to buy slicing tomatoes from anywhere but local farmer’s markets but the on-the-vine cherry tomatoes from Aldi have my blessing.
Grapes and cherry tomatoes are perfect for charcuterie boards because they’re small and you can eat them whole, blueberries, cherries and raspberries will also add a bit of sweetness without making a mess of your board.
Small fruits and vegetable work really well on a charcuterie tray from a visual standpoint because they add color and they fill up a lot of space. Casually toss them on in a few of the larger empty spaces.
Bread & Crackers
Unless you’re completely feral you’ll want something to pile the meat and cheese on. Once again, variety is key here.
The best way to get that variety without purchasing a bunch of different boxes is with the 6 Cracker Assortment package. You get 6 different types of crackers, your tray will look fancy and it’s all in one box.
This time I also added in some mini-toasts, they were sort of like giant croutons. Another route is to buy a baguette, slice it up (on the diagonal of course), brush it with melted butter or olive oil, and pop it under the broiler for a minute or so until toasted.
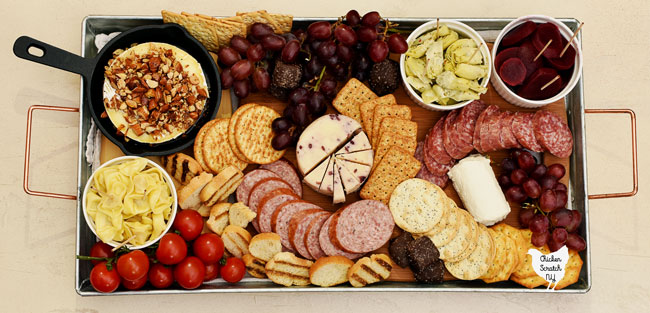

I like to add my bread and crackers at the end to fill in all the empty spaces. This is what gives a good charcuterie board that almost overwhelmingly full and decadent look.
You don’t want to see much if any of the tray and cutting boards. Try to avoid straight lines when you’re adding the crackers, and curve around the elements you’ve already added.
Finale
It’s not a meal without desserts and you can’t go wrong with the dark chocolate sea salt caramels from Aldi.

If you’re feeling lost here are the key take away points:
- Variety is key, have 2-3 types of meat & cheese & crackers
- Cut meat, vegetables, and bread on the diagonal to make them fancy
- Add the main elements first, spacing them out, then fill in with the fruit, vegetables, and crackers until you can’t see the base
- Avoid straight lines
Have you jumped onto the Charcuterie hype train yet? What would be on your dream charcuterie board? Let me know in the comments, I’m always looking for new ideas!
Check out my Recipes page for more ideas or start here: