Embrace Spooky Season with a DIY Bloody Halloween Apron. This easy project makes a perfect last-minute costume or a kitchen staple depending on your personal aesthetic.
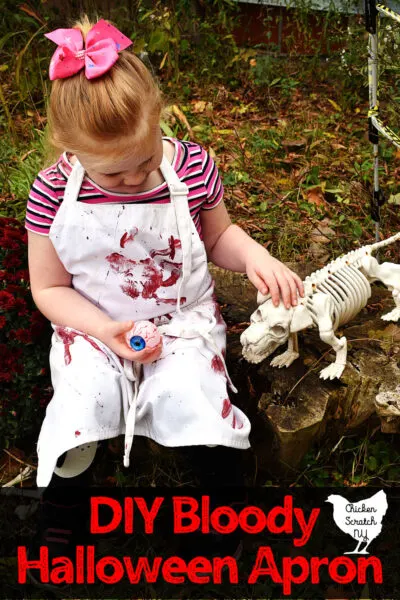
Whether you’re looking for something to throw on that casually says “I’m a serial killer”, you’re baking your haunted little heart out or you’re getting ready to dish up a spectacular buffet of Halloween party food this is the project for you!
Murder Apron Supplies
All you need to create your own bloody Halloween apron is a white apron and a few shades of red fabric paint.
Or just regular paint. I have a giant stash of craft paint and none of it is for fabric.
Craft paint will absolutely stick to fabric, I’ve inadvertently decorated enough shirts to prove that. I also used it for my daughters Miraculous Ladybug Costume.
Fabric paint won’t be as stiff as regular paint, I don’t think it matters for this project. Unless you’re in the market for a super soft Murder Apron use whatever have.
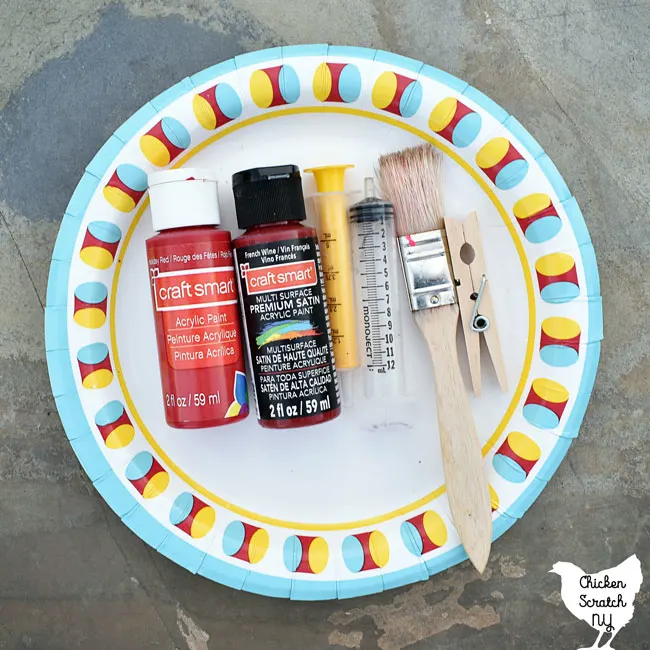
I mixed a bright red with something a little more on the burgundy side. The regular bottles of Craft Smart paint at Michael’s are less than a dollar so go crazy and get two, or three.
Enough about paint, the real star of this show is a white apron. You don’t need to use a white, any color will work but I think the contrast between the red and white really makes this Halloween apron special.
You will also need a stiff-bristled brush for splatters, a paper plate for bloody hand prints, a medicine syringe for big squirts.
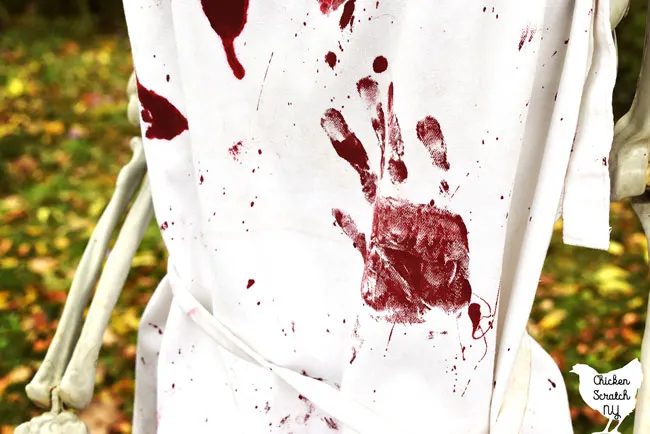
This is a super messy project and it’s best done outside. We did the handprints first with the aprons laying flat on the picnic table. You’ll need a firm surface to press your hands against.
I clipped our aprons up to the clothesline for the splattering with a few clothespins (that also ended up splattered).
Painting Tips:
I did a bit of experimenting for this one and as a result, I have not one, but three bloody aprons. it’s pretty standard around here but what started as a blog project quickly turned into mommy & me craft time.

If you have a tiny helper or two do yourself a favor and strip them down before you get the paint out. 90% of our family art projects are done with mostly naked kids and finish up with a bubble bath.
The girls were very eager to help with the aprons, the biggest draw (aside from just making a huge mess, that always goes over well) was getting to stick their whole hands in a plate of red paint.
You’ll get the best hand prints if you smush your hand down into the paint on a plate and then onto the apron. If you use a brush you’ll have brush strokes in your hand prints.
Even if you don’t have kids I recommend you borrow one because children’s bloody handprints are way creepier than adult bloody handprints.
You can add the hand prints when you’re wearing the apron or with the apron laying down on a flat surface. You’ll get for perfect prints with it laying flat and a more murder-y vibe if you’re wearing the apron.
We tried to do some “swipey” handprints but I think the ones where we just pressed our hands down looked best.
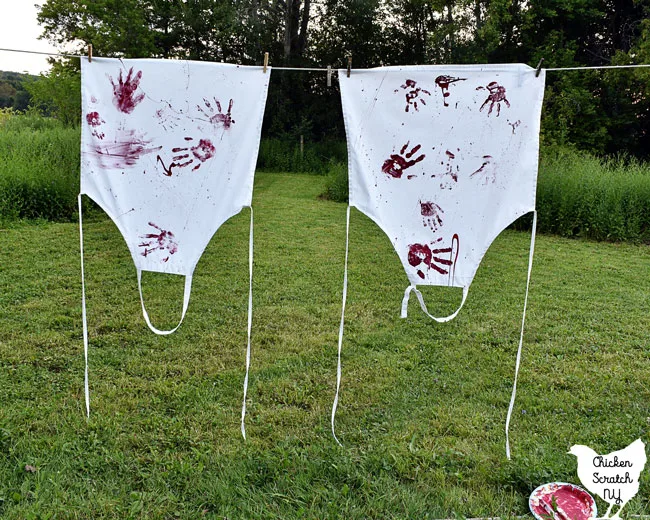
We got a little wild and tried to suck up the craft paint in a Tylenol syringe to squirt on the apron. It’s hard to control and I didn’t think the effect was worth the mess.
If you decide to try it yourself, pull the back off the syringe, drip the paint in and then add the back. OR stick the syringe into the bottle of paint and suck it up that way.
My favorite way to get the blood on the apron was with a paint brush. Get the bristles paint-y and flick the brush at the apron or run your fingers over it for a finer spatter.
Next time you have company put up your hair, throw on some pearls, red lipstick, and your blood-stained apron and make them question your sanity.
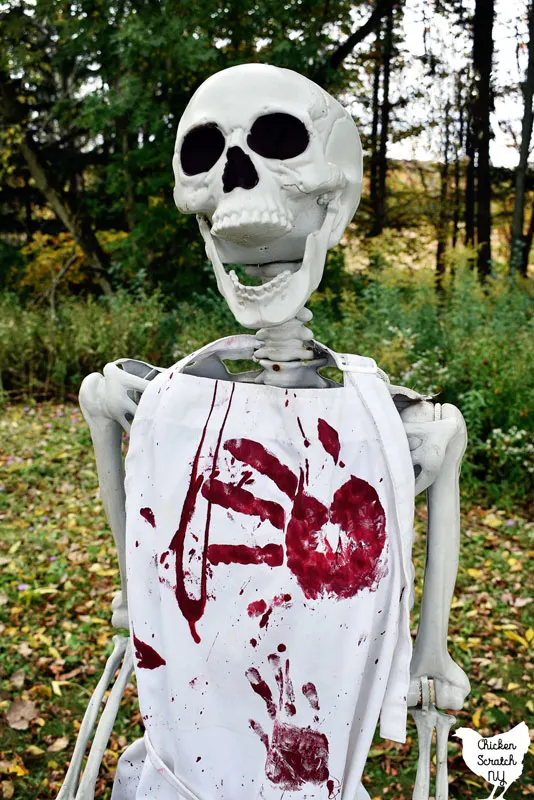
Or Host a Bloody Halloween Bash with blood themed decorations & food!
Bloody Halloween Apron

Embrace Spooky Season with a DIY Bloody Halloween Apron. This easy project makes a perfect last-minute costume or a kitchen staple depending on your personal aesthetic.
Materials
- White or light colored apron
- Red Paint (you can add blue, burgundy or black to change the tone of the red)
Tools
- Plate
- Chip Brush
- Tylenol syringe
- Baby Wipes for easy clean up
Instructions
- Prepare to get dirty, you might want to go outside for this part, pour red paint onto the plate and mix in a little blue and/or black to get a more complex color.
- Spread the paint out on the plate enough that you can dip your hand in it
- Dip your hand into the paint
- Press it against the fabric in different places and with different orientations. Use more paint on some and less on others
- You can add as much 'blood' as you want but I felt like less was more. You don't want your bloody apron to be tacky now, do you?
- Hang the apron up from the clothesline or lay it flat on the grass where a bit of overspray won't bother anyone
- Grab a paintbrush and get the bristles nice and coated with paint. Sharply flick the brush at the apron leaving a spray of tiny droplets
- If you want a thicker squirt use a medical syringe, like one ones that come in children's Tylenol. Remove the stopper part, hold your finger over the hole, and squirt in a bit of paint.
Carefully put the end up and squeeze the plunger aiming at the apron. - Let the paint dry and follow the directions on your fabric paint for washing
I’d love to see your own bloody creations, share them on my facebook page, tag me on instagram @AleciaCSNY or use the hashtag #ChickenScratchNY
Find more gory ideas on my Halloween page or start her:


