If pins and basting spray make you reach for the White Claw thread basting might be perfect for you. Instead of opening and closing dozens of pins or inhaling aerosol adhesive, you use large stitches to hold your quilt sandwich together.

I often say that borders are my least favorite part of quilting, but the truth is it’s basting my quilt top, batting, and backing together. I hate it so much that I finished exactly one quilt before I invested in a quilting frame.
Thanks to my quilting frame I’ve never again basted a full-sized quilt (by that I mean throw quilts because that’s just about all I make!).
However it’s a bit of a hassle to get everything set up, especially for small projects, and at this point, my table runners outnumber my tables by at least 3 to one.
You can’t really skip the basting (I’ve also tried that..), pins are annoying (all the opening, closing, stabbing, and getting in the way) and the spray gets everywhere. So what do we do?
Introducing thread basting. Basting or tacking is temporary stitching that holds the fabric in place until it’s permanently sewn.
It’s more common in garment sewing, basting stitches can be used to hold pleats or gathers in place, or sewn along bias edges to keep the fabric from stretching.
You can baste on a machine by setting your stitch length to the maximum length but for basting a quilt we’ll be doing it by hand.
I personally save this method for small projects like wall hangings or table runners, you could use it for a larger quilt but I would recommend adding knots to your thread ends instead of leaving them loose like I’m going to show you.
Thread Basting Supplies
You’ll need three things (along with your quilt sandwich) for this. A needle, thread, and a hard surface large enough to layout your project.
I’m not a needle snob, I just buy the green Dritz wheel and grab a needle as needed. However, as a person with giant hands, I do prefer a longer needle and for this purpose, I like the needle to have a bit of flex to it.

As far as the thread you can use whatever you have on hand but I do have a few recommendations.
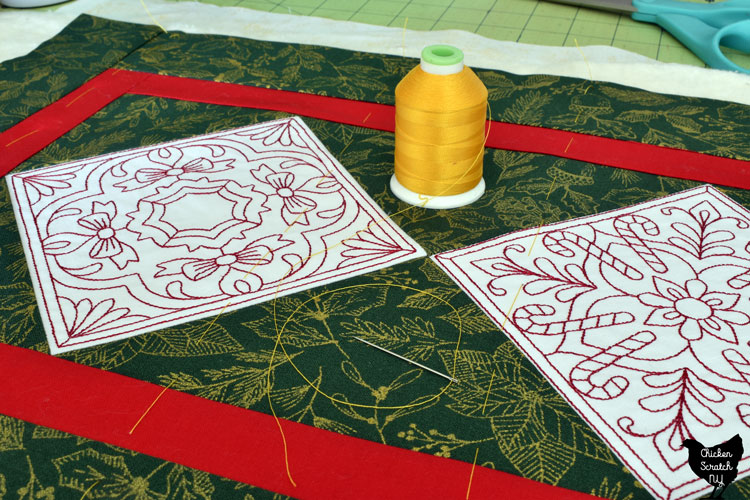
First up, use a bright color that isn’t the same as your quilting fabric or quilting thread. We’ll be pulling all of these stitches out and it’s a lot easier to do that when the thread stands out.
Second, I like to use a thin and slippery thread. I’ve been using a bright yellow spool of embroidery thread. You’ll be stitching over the basting and I find a thin and slippery thread is easier to pull out at the end.
The basting stitches are temporary so definitely don’t use your expensive thread for this!
The final thing you’ll need is a hard flat surface, I use my large cutting mat or if I’m desperate the floor. We’ll be working entirely from the top and you don’t want to accidentally baste your quilt to your bed or wool-pressing mat!
How to Thread Baste a Quilt Top
First things first, make sure your backing and quilt top are pressed flat. Then lay out your backing with the pretty side down.
Layer the batting over it. I almost exclusively use Warm and Natural cotton batting (I buy giant rolls from Joann’s with a coupon) which is a very sticky batting and I find that the batting really holds onto the fabric while I’m basting.
Smooth out any wrinkles and then add your quilt top. Take your time and smooth everything out so you don’t have any wrinkles.
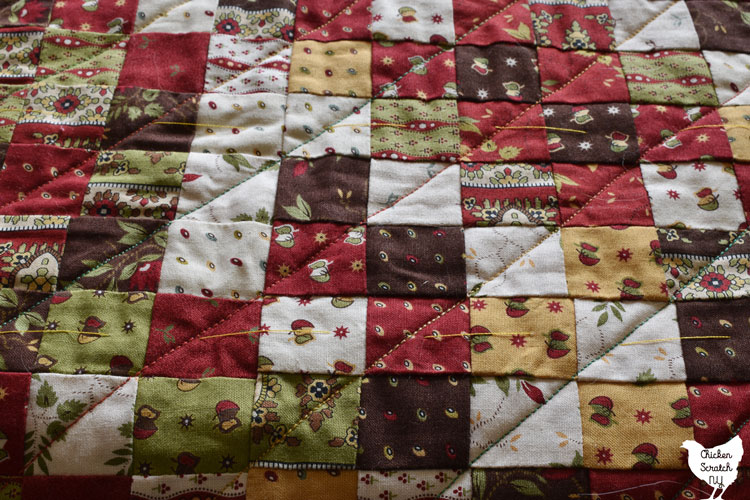

Working from one side to the other make rows of long stitches about 3-4 inches apart. I’m usually trying to get my stitches about an inch long but you can adjust that to fit your preferences.
I don’t knot the ends of my stitches, I haven’t found it necessary but you absolutely can if you’re finding your stitches are getting pulled out.
Instead, I just leave longish tails that I can tug if I need to tighten things up at all. For larger projects I’ll throw a backstitch in at the end of a row, it does a good job keeping the thread from pulling out while still being easy to remove.
If you need to roll up your project make sure you’ve already basted at least 6 inches (preferably more) past where you need to roll. If not you’ll find the backing and the quilt top won’t lay flat together and you’ll get bunching and pleating on the back.

After your entire project is basted you’ll be able to roll it up without any issues to get it under the needle. Occasionally I’ll have my stitches get tugged on by the presser foot but it’s easy to stop stitching and just direct the thread under the foot.
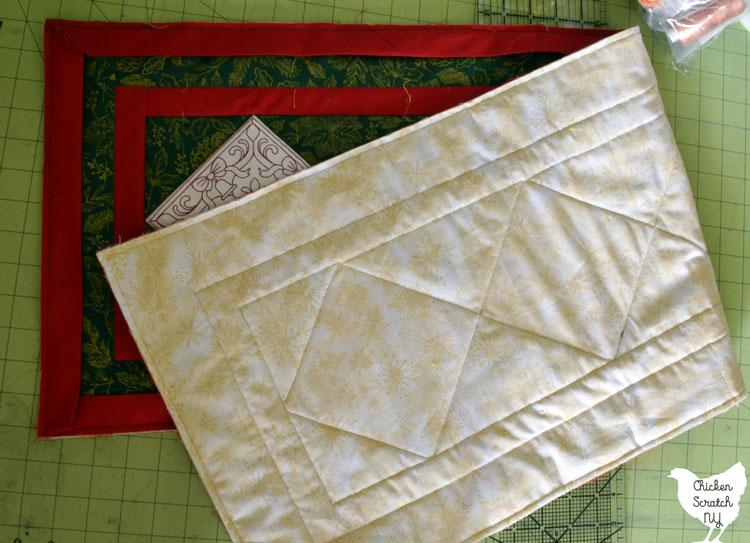
I leave my basting stitches in until the very end, unlike pins, you don’t have to remove the thread as you go. Most of the time I’ll even add my binding before I pull them out.
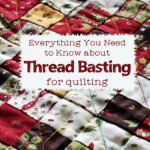
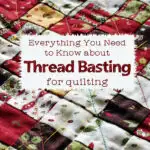
If you look at the back of this runner you can see how flat it turned out even though I have to mangle my projects to sew them with my machine with a 6″ throat.
You can also see that I did indeed sew on the binding before I pulled out the stitches!
I hope you’ve found this crash course into thread basting helpful. Quilting is super personal and what works for me might not work for you but I think the more things you try the better you’re quilting experience will be!
Check out my Quilting page for more info or start here: