


Some of my projects are in the works for a long time. Others, like this Easy Washi Tape & Fabric Halloween Banner are thrown together on a whim after a chance encounter in the craft store.
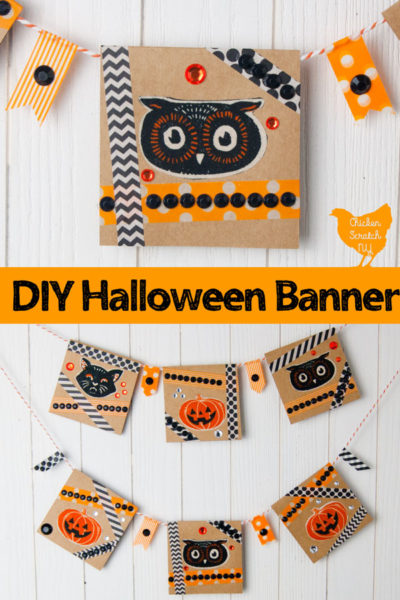

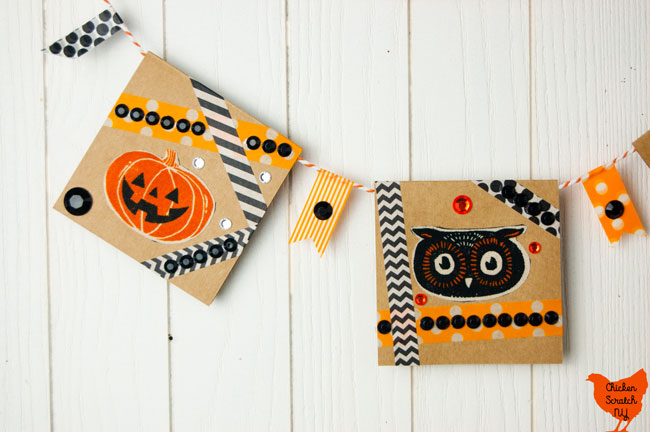
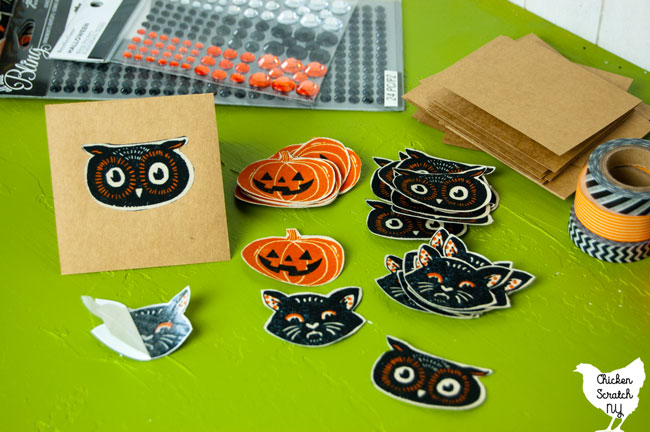
The catalyst for this project was a bolt of fabric I stumbled upon looking for material to make the girls Halloween pillowcase dresses. It has adorable vintage looking Halloween shape, a black cat, a black owl and and orange pumpkin.
You can use any fabric you like for this Halloween banner, this particular fabric came from Joann’s. When you’re picking your material look for distinct separate motifs.
We’re going to be cutting them out so you want to avoid anything overlapping. This pattern has a cream border around the shapes that made it even easier to cut out evenly.

The real star of this project is double sided fusible interfacing. I love this stuff, it’s how I made the Miraculous Ladybug Masks and my Autumn Apple Tree Pillowcase. Make sure you buy the kind that comes with a paper backing!
You’ll also need an iron to unleash the fusible magic. I used my mini clover iron to put the appliques on but any home iron will work.
The note cards, black rhinestone strips, fabric and fusible interfacing all came from Joann’s. I really wanted to get everything for this in one stop but the washi tape selection there was pretty dismal, they didn’t even have a Halloween section for paper crafting.
So I headed to Michael’s. Honestly I was going there anyway, Halloween crafting is my favorite so I’m at the crafts store pretty regularly this time of year. The washi tape I used to this project came from the regular paper crafting section. The individual orange, black and clear rhinestones are from the Halloween section.
It’s from the store brand and I used a 40% off coupon (always use a coupon!). Despite being an accomplished crafter this is my first time working with washi tape.
Halloween Banner Supplies:
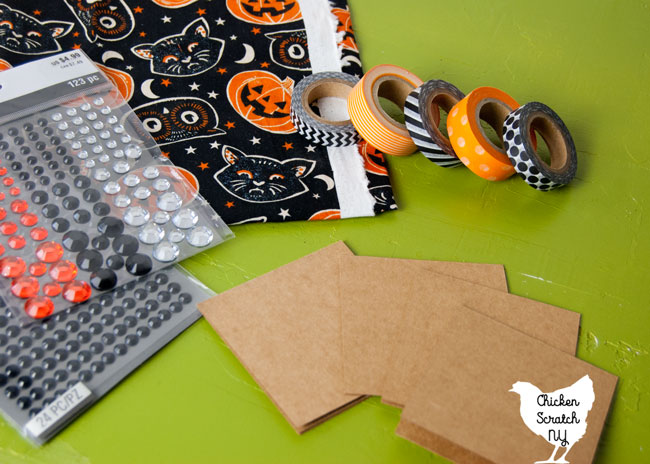
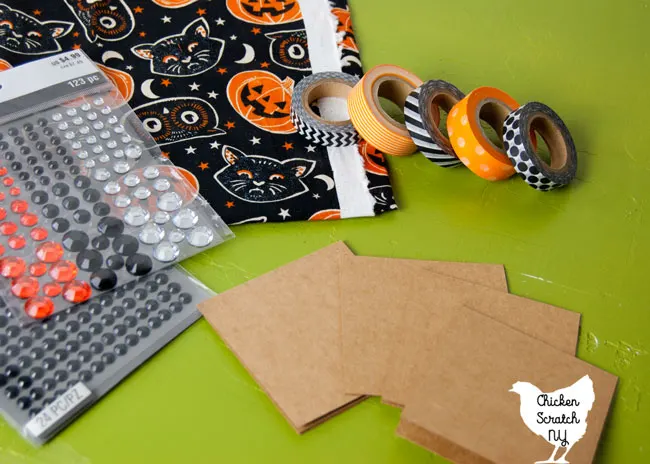
? Kraft Paper Note Cards
? Halloween Fabric
? Paper Backed Double Sided Fusible Interfacing
? Iron
? Scissors
? Glue Dots or Double Sided Tape
Instructions:

1. Following the package instructions iron a piece of fusible interfacing to the wrong side of the fabric. Allow to cool & cut out around the shapes
2. Remove the paper backing from the paper and iron the fabric shapes to the note cards
3. Decorate with washi tape and adhesive rhinestones. Either tear the washi tape at the edge or fold it over so it’s inside the card
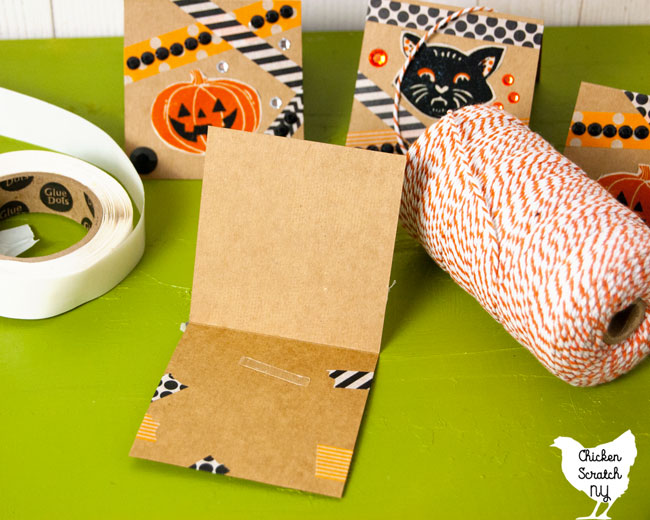

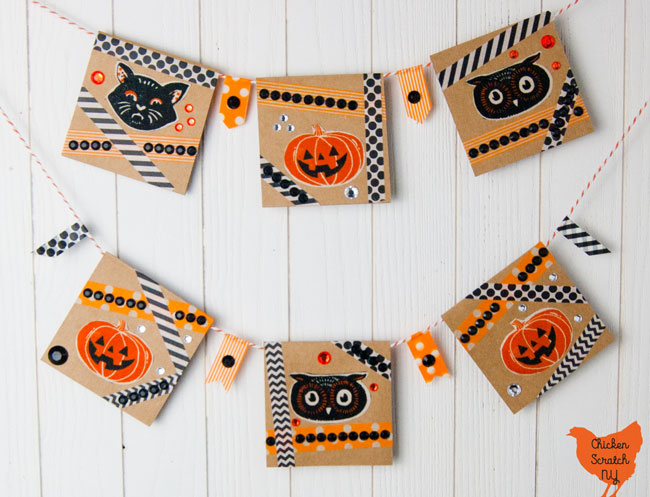
4. Fold the cards over a length of twine and secure closed with a glue dot
5. Add washi tape and rhinestones to the twine for more Halloween pizzaz
6. Hang up and enjoy!
I hope you enjoy this technique. It’s a great way to make your own decorations without a ton of effort or time.

You could even make this reversible, with Halloween on one side and Fall on the other. I was going to do that but none of the Autumn fabric spoke to me.
If a banner isn’t your thing you could totally give these as a cute little Halloween card
Don’t forget to PIN this to your Halloween Board!
Check out my Halloween Page for more ideas or start here:


Donny
Wednesday 18th of September 2019
I think you have noted some very interesting details, thank you for the post.