

Making your own Melt and Pour Soaps couldn’t be easier. This family friendly DIY tutorial is just what you need to keep your family washing their hands and having fun while they do it.

Melt and pour is the easiest way to make your own soap, you have complete control over the colors, fragrance and shapes with none of the math (or lye!) involved in cold process soap making.
All you need is the melt and pour soap base, a microwave, a microwave safe container and a mold. If you want to make your soap a little fancier you can add soap dye, biodegradable glitter and fragrance or essential oils.
I used to run a small wax melt business and I found myself working with the same companies over and over. There is a lot of overlap in the world of DIY bath and body and home fragrance so when I decided to try my hand at soap making I turned to the same supplies.
I am not sponsored by any of the companies I’m sharing in this post.
Melt and Pour Basics
Melt and Pour soap (or M&P) is a pre-made glycerin soap that you reheat to a liquid consistency and pour it into a mold. I have seen blocks of melt and pour at Joann’s and Michael’s.
In general, I prefer to order my soap supplies online. You have a wider variety of options and the prices and quality are usually better than you’ll get in the craft store.
Tools
Let’s go over the good news first, you probably have all the tools you’ll need in your house!
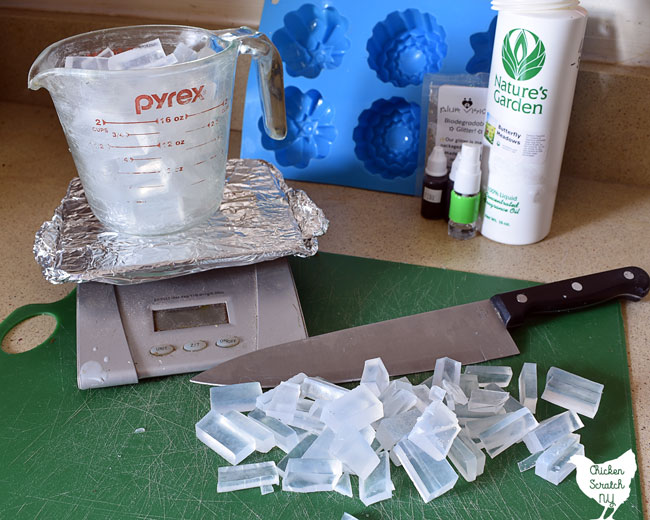

I use a regular knife to cut my soap base and heat it in a glass measuring cup that’s lost it’s volume marks over the years. After the soap is melted I stir in my fragrance and colorants with a regular spoon.
I have a measuring cup and spoon that I use specifically for soap making because they come in contact with the fragrance and colorants.
You can use a mason jar to heat the soap but I find having a pour spout makes for more controlled soap making.
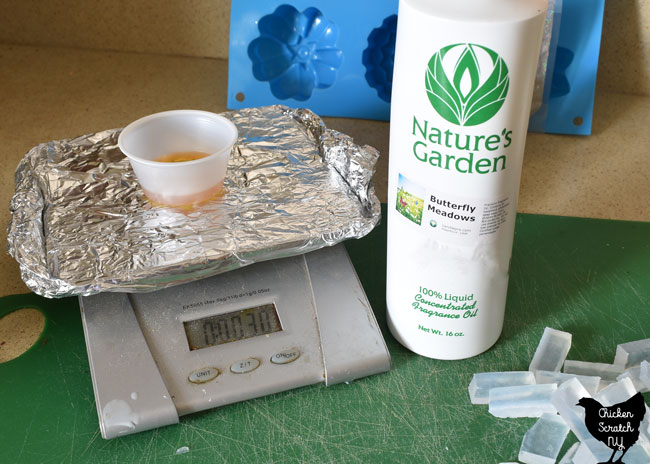
If you’re working with fragrance oils you’ll also need a kitchen scale. I cover the flat part of the scale with aluminum foil whenever I’m measuring soap, fragrance or wax.
The final tool you’ll need is a spray bottle filled with 99% isopropyl alcohol. You’ll use this to spritz the molds before filling, after pouring to eliminate surface bubbles and in between layers if making a multi-layer soap.
Melt and Pour Soap Base
The first thing you’ll need is a block of melt and pour base. It comes in a big block, quite often you’ll find it marked with indented lines.
Plain melt and pour is available in clear or opaque white. You can also get melt and pour soap bases made with goat’s milk, olive oil, honey or special butters like mango and shea.
Although you can technically add some extra oils or melted butter to your soap you’re better off getting a soap base that already contains those things. If not you’re risking soaps that don’t set or remain too soft to unmold and use.
Essential Oils & Fragrance Oils
Who doesn’t want a nice smelling soap? You can add fragrance to your soap with essential oils or fragrance oils. No matter what you choose make sure the oils are skin safe.

Essential oils are distilled from plants while fragrance oils are made in a lab. Some fragrance oils include essential oils.
Fragrance oils are cheaper than essential oils and you have a lot more options for scents. You can’t get a “Autumn Leaves” essential oil, but you can find that in a fragrance oil.
Most companies that offer fragrance oils that can be used for candles or home scenting and bath and body. Before you purchase them make absolutely certain that they are skin safe!
Two of my favorite sources for oils are Candle Science and Nature’s Garden.
Melt and Pour Soap Colorants
We don’t just want a nice smelling soap, we also want it to be pretty or fun right? The first part of making nice looking soap is picking your coloring.
There are two categories of soap colorant, liquid and mica powder. I use both depending on what look I’m going for.
When it comes to coloring soap a little goes a long way. I bought a set of liquid colorants and a set of mica powders from Amazon and they’ll probably outlast me.
Liquid Soap Colorant
Liquid soap colors come in squeeze bottles similar to food coloring. It’s easy to add a consistent amount of colorants to multiple batches and it’s easy to mix colors.
I like to use liquid soap dye when I want my soap to remain transparent. Of course it’ll only be transparent if you start out with a clear soap base!
If you’re helping little kids with melt and pour soap of you’re maybe a but clumsy… liquid soap dye is the way to go, it’s easier to control and no where near as messy as the powder options.
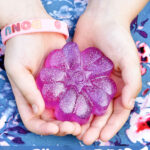
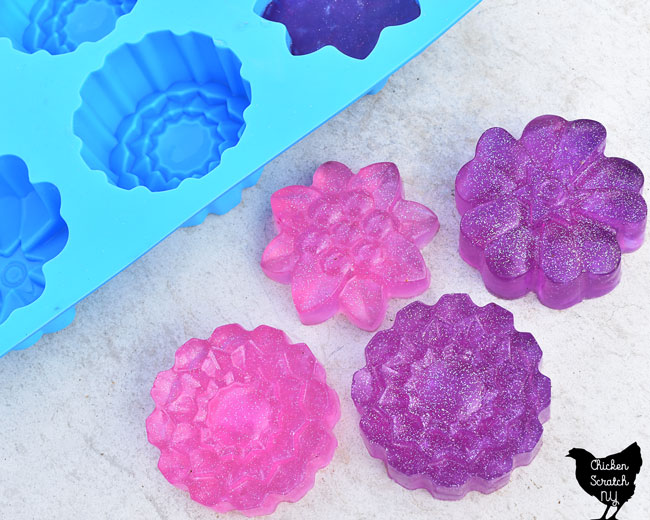
I decided to make two colors from one batch this time. I started with the lighter color (pink) and after I’d poured half the soap I added a bit of the darker dye (purple). This method works fine as long as you stick to the same color family and work from lighter to darker.
Mica Soap Colorant
The other option for soap coloring is mica powder. You lose the translucency you get with the liquid coloring but instead you get an amazing multidimensional shimmer.
The set I purchased came in little zip lock baggies and it came with a small metal scoop. The powder is very light and it can be messy if you aren’t careful when you open the container.
Definitely make sure you turn off the fan before you get out the mica!
It’s not as easy to measure out as the liquid colors, when you’re working with small amounts it’s not even worth measuring so I just eyeball it.
Soap Additives
The great thing about melt and pour soap is that it’s good to go straight from the box. If you want almond oil or goat’s milk in your soap just buy a soap base made with those ingredients.
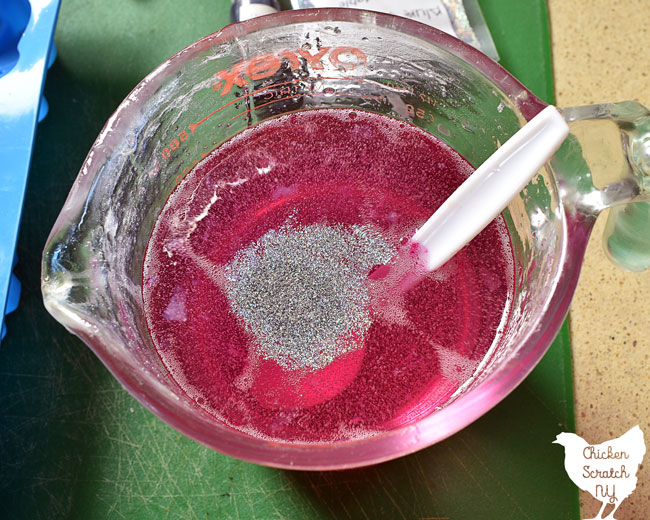

But there are things you can add for fun or practical purposes. My kids love adding biodegradable glitter to their soaps.
You can also add oatmeal, poppy seeds or pieces of natural sponge for mild exfoliation. One of the most popular melt and pour soap recipes involves pouring melted soap over rings of dried luffa gourds.
Soap Making Molds
You can buy mold intended for soap, or you can do what I do and buy silicone candy or baking molds. I usually pick mine up on sale around the holidays at Joann’s or Michael’s.

Small molds are good for making embeds or small pieces of soap that are added to a larger piece of soap. That’s how I make my Halloween & Autumn Melt and Pour Soaps.
Silicone molds are perfect for soap making because you can get lots of detail and the soap pops out of the mold without sticking. And unlike hard plastic mold you don’t have to worry about being too rough and cracking the mold removing the soap.
Larger silicone molds can be used on their own or filled with embeds or additives like the luffa I mentioned earlier. I like buying my molds in person because it’s easier to see how big the finished soaps are going to be.
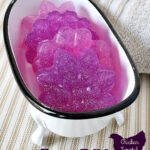
I bought this floral mold set from amazon and they were giant when they arrived. We still use the molds but only fill them about 3/4 of the way full.
Basic Melt and Pour Soap Bars


Melt and Pour Soap bars are a fun and easy way to dip your toes into the world of soap making. This is the simplest soap recipe but you can make it your own by changing up the colors, fragrance and shapes.
Materials
- 16 oz Melt and Pour Soap Base
- .2-.3 oz Fragrance Oil (see notes)
- Liquid Soap Coloring
- Biodegradable Holographic Glitter (optional)
Tools
- Knife
- Microwave Safe Measuring Cup
- Kitchen Scale
- Microwave
- Spoon
- Soap Mold
Instructions
- Cut the soap base into 1/2 inch chunks
- Heat in the measuring cup in short burst according to the package instructions. Do not overheat the soap! Stop heating when you still have a few unmelted soap lumps, stir until they melt
- Stir in 4 drops of pink coloring, fragrance and glitter
- Pour half of the liquid soap into the 3 of the mold sections
- Add 4 drops of purple coloring to the remaining soap and pour into the last 3 sections of the mold
- Remove when completely set to the touch
Notes
I used .3oz of Nature's Garden Butterfly Meadow fragrance oil
You can add up to .44 oz of fragrance oil to 16 oz of melt and pour soap, I personally prefer to stick with a smaller amount. Some fragrances are much more powerful than others so you may have a bit of trial and error
Don’t forget to pin this to your DIY board!
Check out my DIY page for more ideas or start here: