
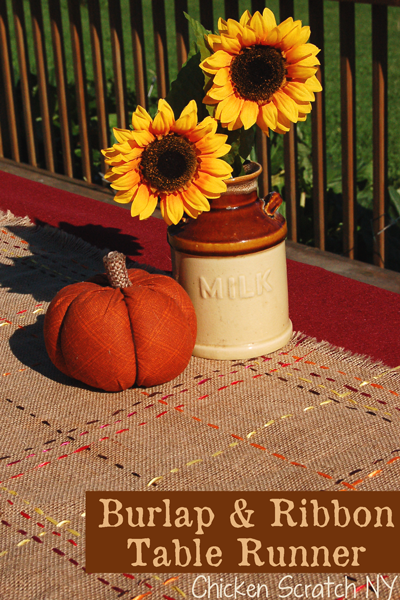
I’m beginning to think I have a serious problem with burlap. BUT IT’S SO FUN! Since I still have piles of the stuff I decided to make an autumn hued table runner. I love the natural burlap with the fall colors, it reminds me of a scarecrow in person (a friendly one, not an evil one).
I’m not sure if this is technically no-sew but I’m gonna say it is. Yes, you use a needle, but you aren’t actually putting anything together. You can adapt it to any holiday by changing up the ribbon and burlap colors. You could even glam it up with metallic cord or ribbon.
You need:

- Burlap cut to your desired final size (a looser weave is easier)
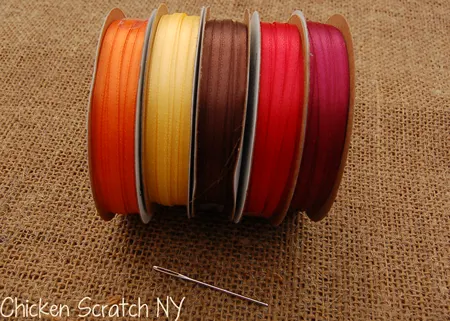
- Blunt needle (this is the time to dig out the super blunt, giant eye one you never use)
- Spools of thin ribbon (mine are the 50 cent 1/8 inch sating ribbons from Joanns)
Once you get your burlap cut to where you want start unrolling ribbon. Figure out how long you need it to be to go completely across add a few inches and snip it. Thread one ribbon through the needle.
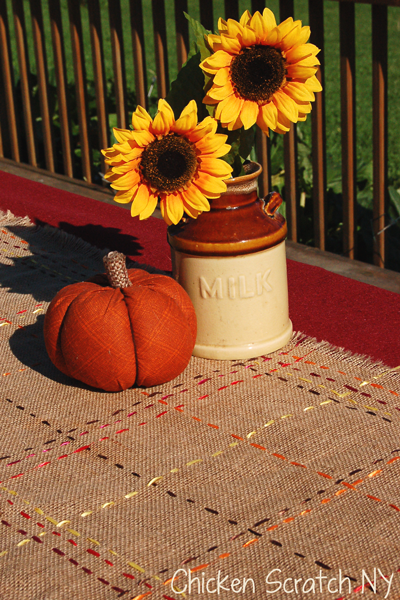
Weave the needle randomly (or following a pattern if you like to count) across the burlap in a straight line. When you reach the end, unthread the needle, make sure the burlap is flat (if it is puckered and you trim it then flatten it our the ribbon will be too short) and trim the ribbon even with the edge of the burlap.

Repeat. Repeat. Repeat. Go across both ways using all your colors. You can secure the ends by weaving over-under every string for the first and last inch.
Pull off the edge strings to fray the burlap if desired, I made a 1 inch fringe. One tip, unless you have lots of time and patience, don’t make a huge runner. I could have made a dozen place mats in the time it took me to make one table runner. So make those instead, or just a smaller runner.
Mariely
Monday 9th of September 2013
Beautiful!! I have always wanted to make something cute with a burlap. I can't wait to try this! Thanks for sharing it at the Less Laundry, More Linking party.
Lisa Ludlow
Sunday 8th of September 2013
The simplest ideas are sometimes the best. I love this. It would also make quick and cute pillow covers but alas it would go into the "sew" category. Unless you did an envelope and used the ribbon for the side "stitching" and had a fringe. Hmmmm. Thanks for the inspiration. I sure did pin you on "Falling for Autumn"
Alecia
Sunday 8th of September 2013
If they were to be decorative, fancy and not so useable you could make a square piece add the ribbons and either safety pin from the back or do a quick hand stitch around the edge to attach the purlap to an already made pillow. We're pretty rough on our pillows here so I'm not sure they would hold up. Thanks for stopping by :-)
Brenna @ Life After Laundry
Saturday 7th of September 2013
This is beautiful. I love to change things up and have little project to sew by hand.
Deb @ kneaded creations
Saturday 7th of September 2013
What a cute idea. Thanks for posting this on the OBC Friday Pin Party. Deb@ Kneaded Creations
Stephanie
Thursday 5th of September 2013
Great idea! I love burlap too so I love the idea of dressing it up. I use a square of it on my Thanksgiving table to cover where 2 table clothes meet and I will definitely be doing this.