

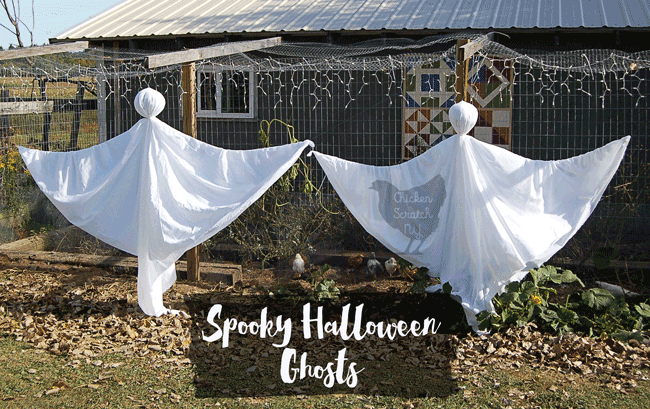
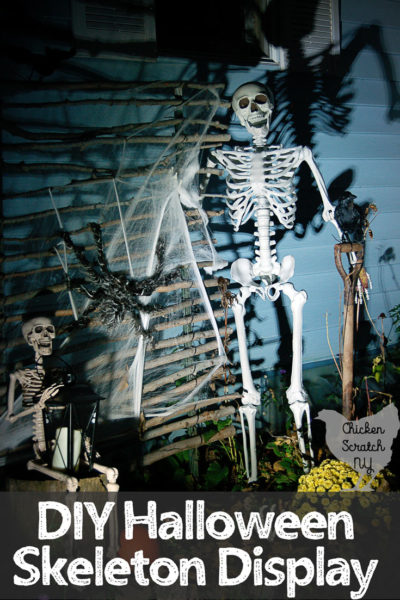
If I told you I didn’t have Halloween decorations in mind when I designed and built the chicken run I’d be lying. It was barely done before I strung it up with with icicle lights.
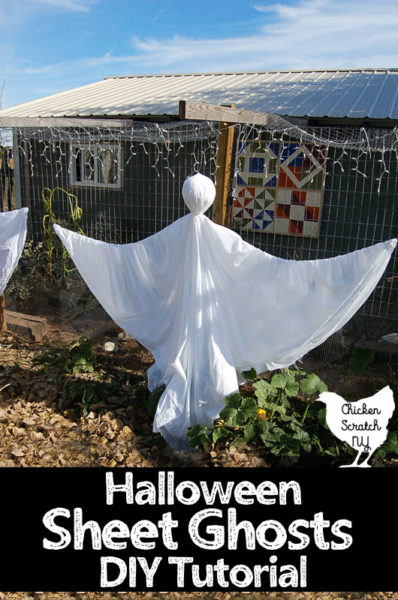
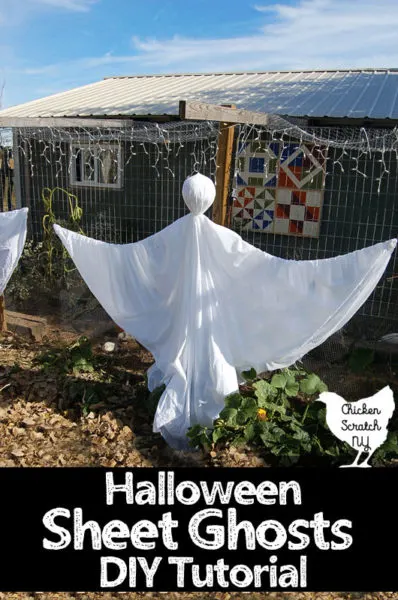
I considered putting my giant spider webs down there but considering how often the geese go barreling though where they are in front I didn’t think they’d last long that close to the barn (the geese are no longer cute and tiny). I needed a new idea and it just so happens that a few years ago I saw a few pictures of ring-around-the-rosy style ghosts and fell in love.
I wanted to do something like that but I wasn’t sure where or how. After we finished the run the where became pretty apparent but the how was still eluding me.
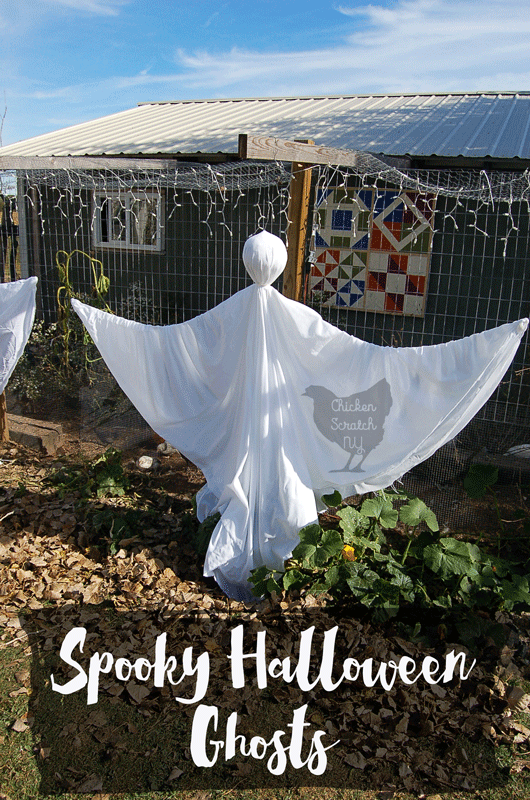
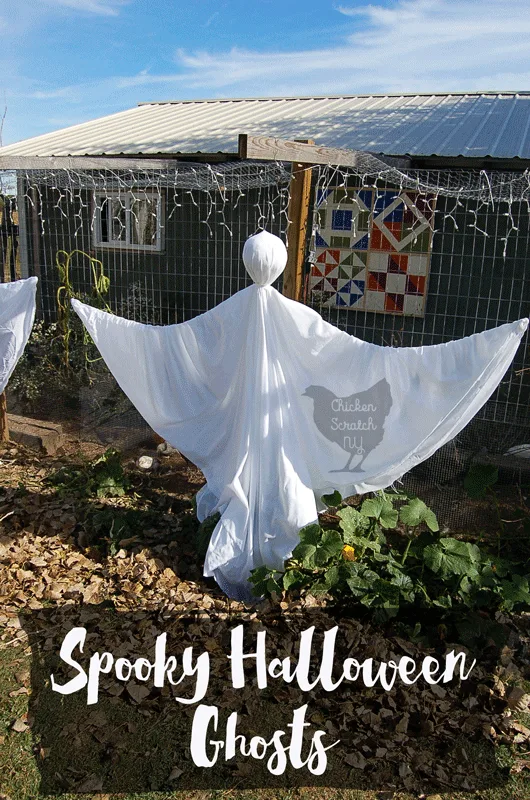
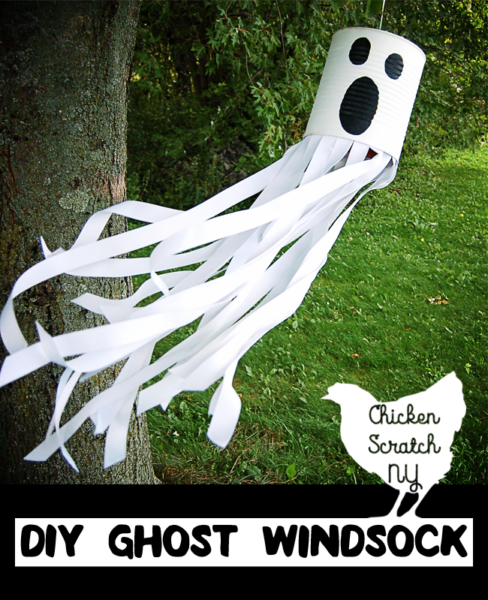
The hardest part for me to figure out was the head, I know I wanted something that would last more than a year outdoors, was cheap or free and was going to give me a nice round shape (milk jugs weren’t going to cut it!).
Eventually I settled on something that you probably have hanging around your house! Plastic bags, stuffed with more plastic bags became the base for the head and a few other basic supplies created the perfect spooky ghosts.
Supplies:
? Plastic bags, lots of plastic bags
? Wire & Wire Cutters
? White Fabric (I got lucky at the clearance counter and found some extra wide white cotton for $1 a yard, stick to woven fabric, knits will stretch and look odd)
? Long Ziptie (one per ghost)
? Scissors
Instructions:
1 – Find a few good bags and set them up like you’re going to triple bag your groceries. Then stuff them full of more bags until it’s firm, you don’t need it to be hard as a rock but it has to hold it’d shape.
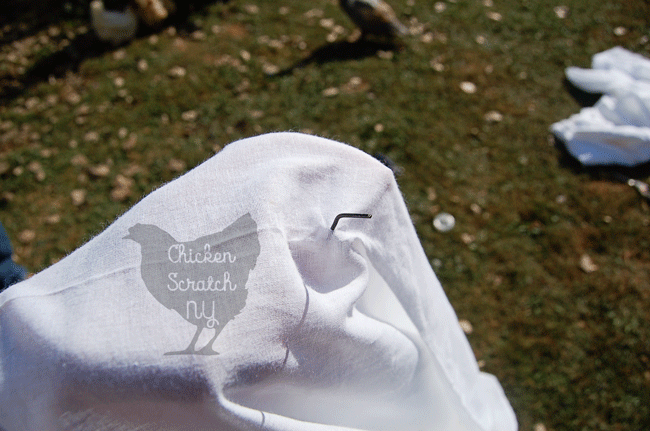
Tie the bottom off in a nice big knot Learn from my mistakes, don’t use a bag with printing on the outside, if you look closely at my ghosts heads you can see the type on the bags! I’ll probably throw another layer of fabric over the top next year to try and cover it up

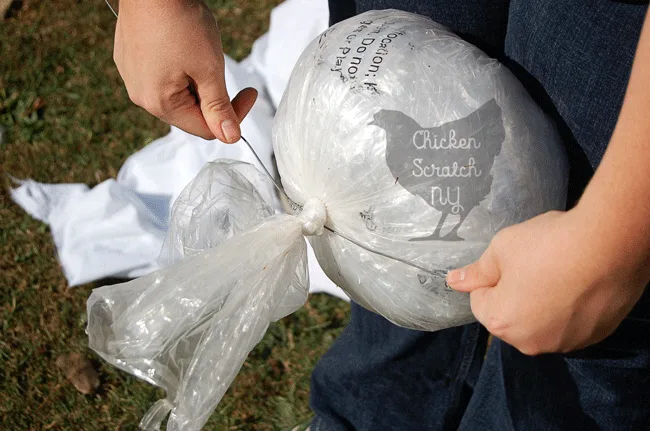
2 – I used left over electric fence wire to hang my ghosts but any thick wire that’s easily bendable will work. Start at the top of the bag run the wire down, make a loop around the knot and pull it snug.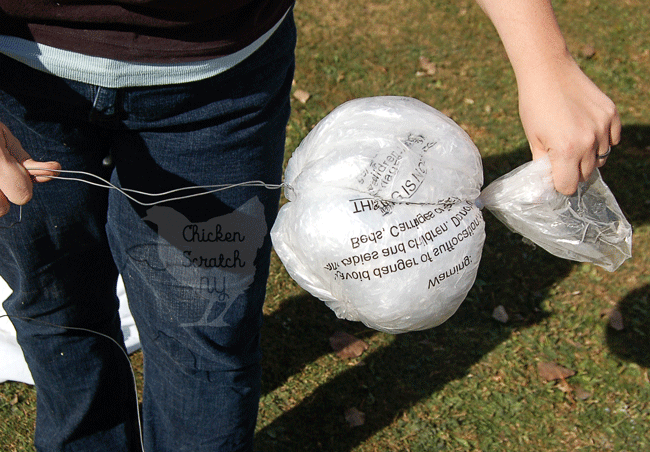
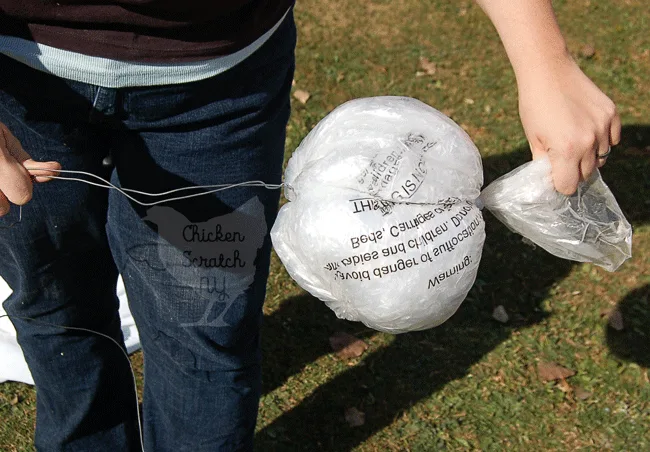
3 – Run the wire back up the other side and twist together at the top. If you stuffed the head enough it shouldn’t collapse too much but should stay.
See the knot above where my hand is gripping the bag? That’s where you’re going to tie the fishing line in a few steps. You could do it now but it’s likely to get all tangled

4 – Since my fabric was sooo wide I decided to make my ghosts out of squares. I cut my fabric into giant squares by folding it so the cut edge was right along the fabric selvedge making a giant triangle. Then I cut a small slash through the selvedge and ripped all the way across.
Refold so all the corners are together so you can find the center, and poke the wire through. DO NOT CUT A HOLE!! That will weaken the fabric and your ghost might loose his sheet (how embarrassing!).
5 – At this point I like to hang the ghost so I can set up the fishing line. We have 5 horizontal support beams from setting up the run (at the moment they don’t do much, they mostly held the poles in place while the concrete set) and that’s what I used to hold up my spooky Halloween ghosts.
6 – Attach the wire where ever you want. It might help to have another pair of hands for this part. Hold the sheet out of the way and pull off a length of fishing line. Tie one end to where ever you want the ‘arm’ positioned, then tie a loop around the knot under the head and finish off by typing the other ‘arm’ off.

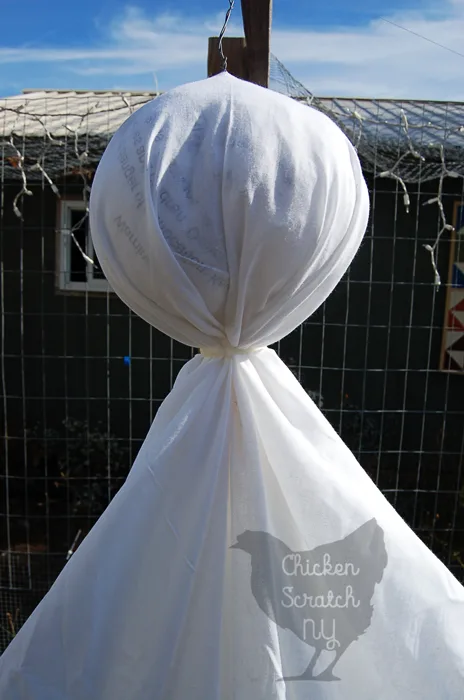
7 – Pull the sheet down and loop the zip tie around making a neck. Adjust the length of the fishing line to get the arms where you want it.
8 – Make a slip knot in the fishing line where you wants the arms to end (hands? Do ghosts have hands?) pull the corner of the fabric through the loop and let it tighten up. Using the opposite corner (remember, I used squares of fabric) make the other ‘hand’ in the same way.
Don’t forget to PIN this to your Halloween Board and check my Halloween Page for more ideas!


Patty
Tuesday 13th of October 2015
These are so cute! I could see hanging these along my front fence line - maybe with a few solar lights strategically placed underneath to give them a glow. I think those cheap plastic trick or treat pumpkins might work for the heads - I have a few collected from garage sales. They probably need a coat of white primer to keep the orange/purple color from shining through though. Thanks again, and Happy Halloween!
Kristin
Wednesday 7th of October 2015
Ohhhh that turned out soooo spooky! Love it! What a great way to jazz up your outdoor space for Halloween.
Victoria
Wednesday 7th of October 2015
This turned out super cute. Next year I am making it a goal to make Halloween decor instead of purchasing it.
Kendra
Tuesday 6th of October 2015
This is so cute. My kids would think I was the coolest mom if we made these!
chastity
Tuesday 6th of October 2015
These are so fun and festive. I especially like that they aren't creepy or scary looking...I get too freaked out with all the scary decorations.