
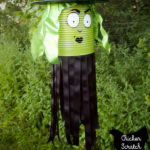
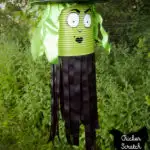
My favorite movie ever is Hocus Pocus, it has been since I was a kid. Witches have always been a favorite of mine (and let’s be honest, I’d trade my car payment for a broom in a heartbeat!) and I wanted to add one to my Halloween line up in the form of a Wicked Witch Windsock.

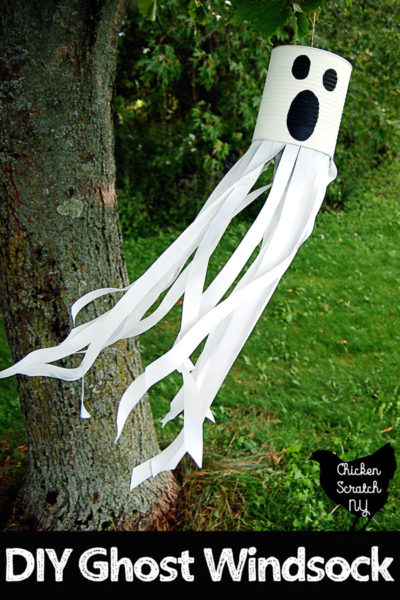
She’s a little more involved than the Ghost Windsock because you need to track down some extra supplies. I found the funnel in a set of three at Dollar General and I grabbed the plastic plate from Dollar Tree.
The face can be as simple or elaborate as you want, I think simple is better. You’re going to be fighting the ridges in the can so you might as well make it easy on yourself.
The green ribbon was left over from my Witchy Halloween Wreath for many years ago, it was actually Christmas ribbon. I’ve been trying to whittle down the craft room and using up left over supplies is the best way to do that.
I think I might like her more than the Ghost, she looks particularly nuts when the wind is really blowing! There is at least one more member of the Halloween windsock family so stay in touch for that (signing up for my newsletter is a great way to do that!)
Witch Windsock Supplies:
? #10 Can – clean with label removed
? Plastic Funnel
? Plastic Plate
? Green Ribbon for hair
? Black Ribbon for streamers
? Paper Clip
? Clear Top Coat Spray (optional)

Instructions:
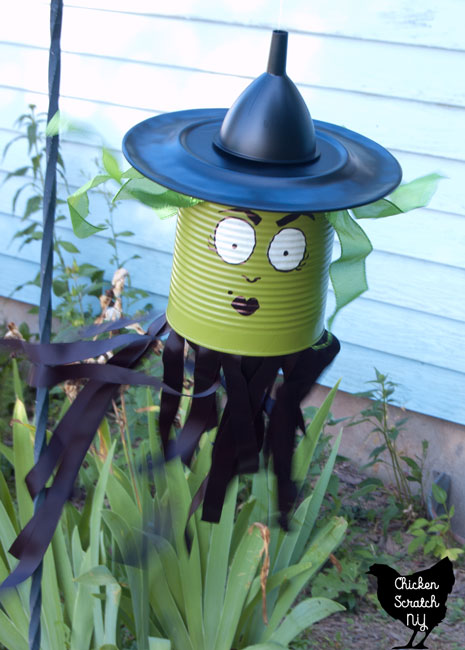
1. Paint the can solid green, you may need a few coats, let dry
2. Slowly drill a small hole in the center of the plate. I moved the sticker from the bottom of the plate over the center and it helped keep the drill bit from slipping
3. Spray paint the plate (both sides) and the funnel (outside only) black and let dry
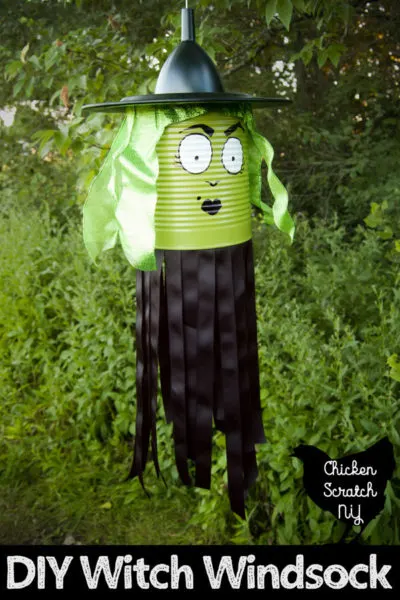
4. Add the face to the can, you can trace on features or just go for it. I lightly traced the eyes but the rest was winged.
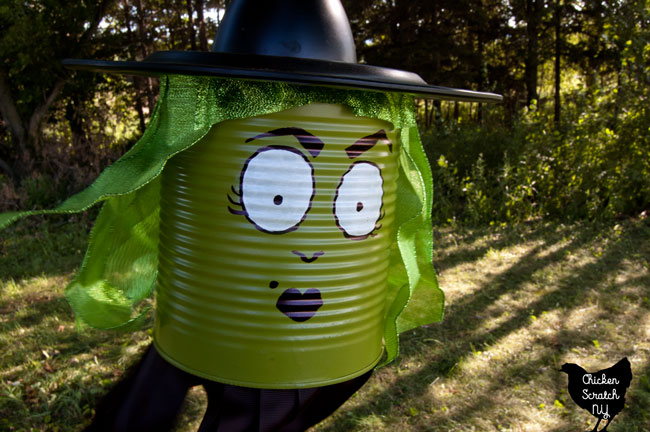

For the eyes: Paint two large white circles. They don’t need to be even in size, shape or orientation. I wanted my witch to look a little off kilter and I think I nailed it 😉
After the white dries outline the eyes with the sharpie and add eyelashes and pupils. Next give her some brows, my witch has very strong brows. They certainly aren’t sisters, maybe distant cousins?
5. Give her a nose and then a mouth. Originally I did the mouth then the nose but it ended up very off center. I had to repaint over the mouth with another coat of green.
6. Give her a mouth, I made a squatty heart then added a bit to the sides. You’re not drawing on a flat surface so it’s going to be a little odd no matter what you do. I think the brush tip marker is more forgiving but any sharpie will work
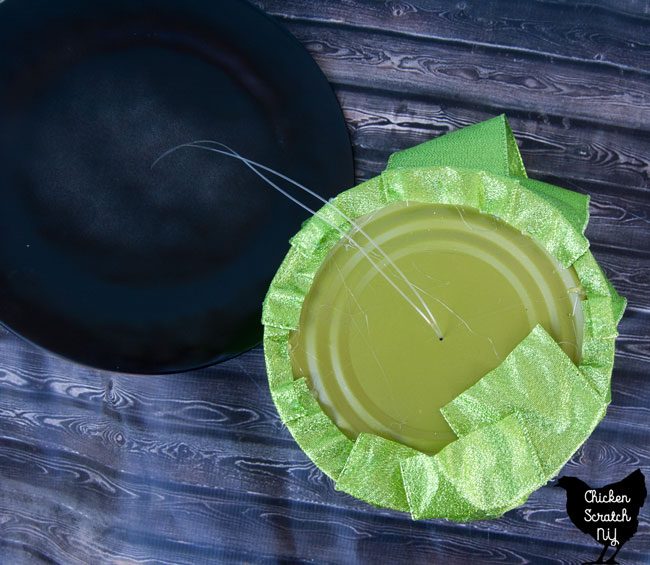

7. Cut the green ribbon into lengths about 2 inches longer than the can with an angle on one end. This is going to be her hair. Glue it around the top of the can.
I gave her very short bangs because I made her eyebrows so high. You are following a tutorial and not making it up as you go so you can plan for that 😉
The green ribbon is wired so I used my fingers to give her some nice 80’s crimping waves. I decided to take a picture of the top after I’d added the twine and hat but you should do the hair first.
8. Cut the black ribbon 2-3x the length of the can, again at an angle. Glue to the bottom inside the can. Start in the back and work around to the front so if you need to overlap it’s not as noticeable.
9. Drill or pop a hole in the top center of the can for the fishing line.

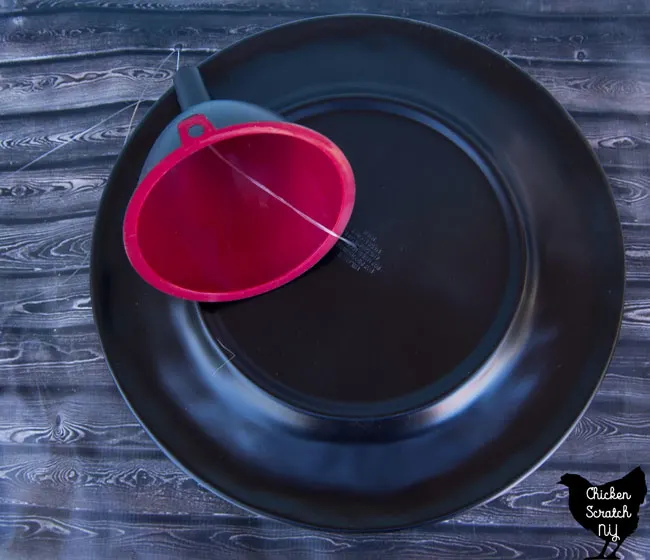
10. Slip the cut ends of the fishing line through the funnel, through the hole in the plate and finally through the tin can. Tie a knot and side the paper clip into the loop to keep the knot from pulling through.
11. Hot glue the plate down to the top of the can and then glue the funnel down to the plate.
Hang up your witchy woman and enjoy all season long! The extra accessories mean she probably won’t last as long as the ghost but I think she’s a great addition to the Halloween family.
Don’t forget to PIN this to your Halloween Board. Check out my Halloween page for more ideas or start here:


Kandy
Sunday 26th of September 2021
Great ideas