Whether you’re new to punch needle embroidery or just want a quick project, look no further! Make adorable Santa Hat Punch Needle Ornaments with this free pattern utilizing 2 loop lengths for texture.
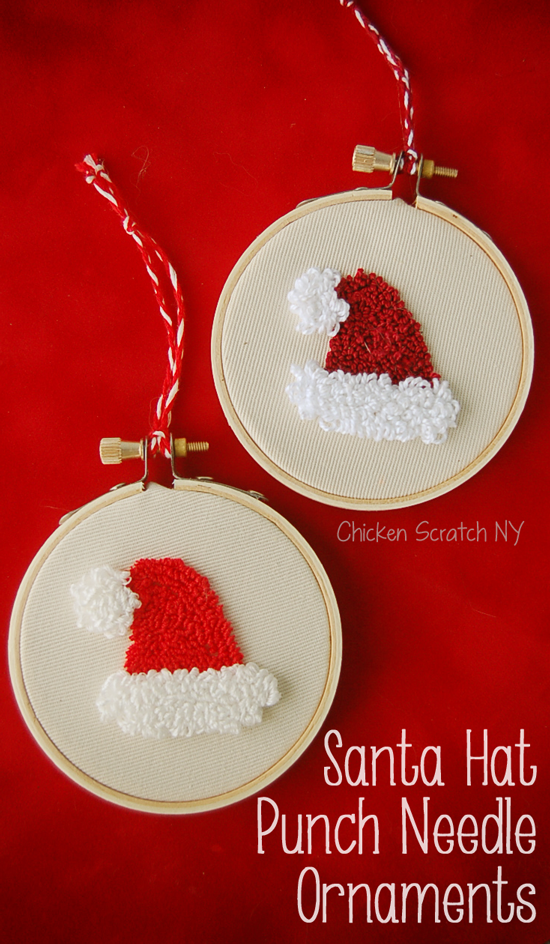
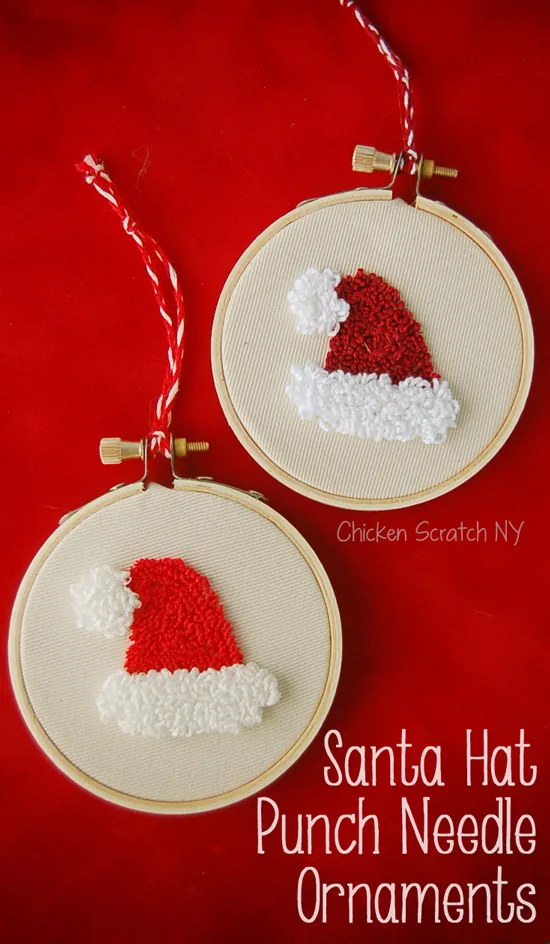
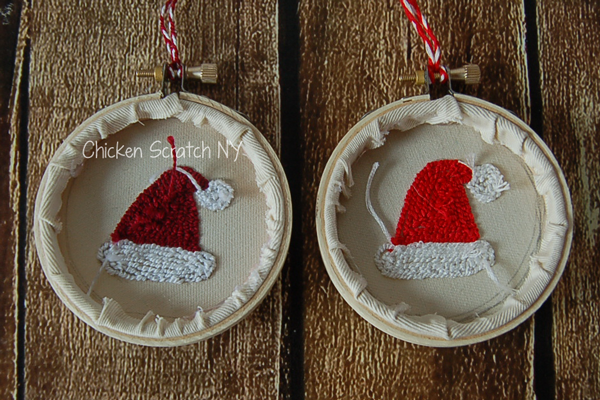
One of my favorite things to do with punch needle is take simple shapes and make them more interesting by changing up the loop size. This little project is a great way to test out the technique.
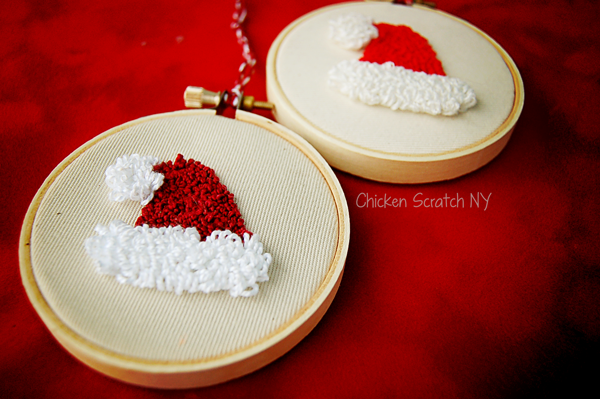
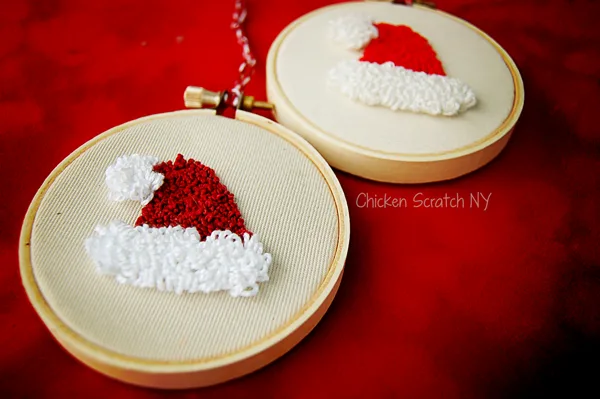
Longer loops give a fluffy look to the hat band and ball while short loops make up the rest of the hat. It’s a quick enough project that you can do a whole pile of samples playing with different loop sizes.
The darker hat was punched in size 5 pearl cotton and the bright red hat was punched with 6 strands of regular embroidery floss. Both are from DMC and available at Joann’s and Michael’s.
If you’re a little bit rusty check out my punch needle basics tutorial for clear instructions on threading, copying the pattern and how to punch. Also check out the three ways I rewind my floss before I start punching to eliminate knots.
Punch Needle Ornament Supplies:
- Ultra Punch Needle Set
+ threader
- Locking plastic embroidery hoop
- Cotton twill fabric
- Santa Hat Pattern
- Pencil
- Red & white embroidery floss
- 3 inch wooden embroidery hoop
- Scissors
- Hot glue gun
Punch Needle Ornament Instructions:
1. Download and print this Santa Hat Pattern. The circle around the hat should be 3 inches wide
2. Hold the pattern against a window and place your fabric over the top, lightly trace the hat with a pencil. Make sure you leave enough room to hoop the design
3. Tightly hoop the fabric in the plastic hoop

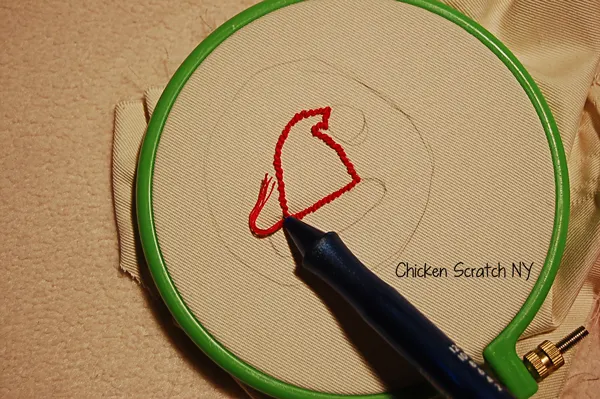
4. Begin with the red thread, set the needle to a length of 3 or 4 and punch the body of the hat starting with the outline and working inwards
5. Switch to the white thread and change the needle length to a 7 or 8. Punch the brim and ball on the hat
6. When you’re done flip it over and check for any empty spaces, fill them in if you find some
7. Unhoop and clip any extra long loops that stick out
8. Place the bottom of the wooden hoop on the table, lay the fabric over it with the right side up
9. Sandwich it together by sliding on the top hoop, make sure to keep the thumb screw at the top so you have a way to hang the ornament when it’s done. Tighten the hoop
10. Cut off the excess fabric leaving about 1/2 inch
11. Flip over the hoop and hot glue around the hoop, folding the excess fabric into the glue
12. Braid three strands of floss together and tie off the ends, fold it in half and pull the loop through the hole under the thumb screw for the embroidery floss. Pull the ends of the braid through the loop and pull tight.


Check out my Christmas page for more holiday ideas, my Punch Needle page for more free patterns or start here: