

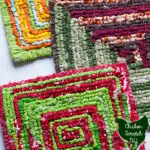
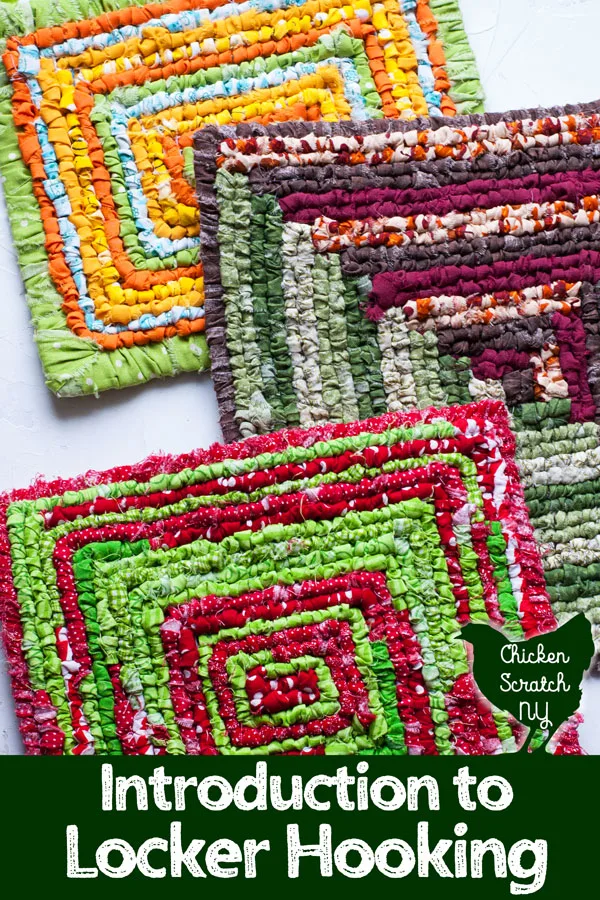
Locker hooking is a thrifty old school craft well worth reviving. You can make useable rugs and hot pads or go for fancy decorative table runners and wall hangings made from left over fabric and yarn.

I love learning old school, mostly forgotten craft techniques. That’s how I ended up falling in love with punch needle and selling my own punch needle patterns.
I brought my punch needle supplies to work to show my boss and she introduced me to locker hook. It’s completely different than punching but I think it’s just as fun.
What Is Locker Hook?

Locker hook is a hand craft that turns scraps of fabric and twine in to coasters, rugs, bracelets, bags or art pieces. It’s an easy skill to pick up and you can finish a small piece in an evening.
The sky is the limit when it comes to your design, you can follow an ornate pattern, do a simple geometric pattern or just randomly use up scraps.
Locker Hook Supplies
One of the best things about locker hook is that you can use up a ton of scraps and remnants. You will need a locker hook tool and a piece of backing fabric but the fabric you use to create the design can come from your stash.
Locker Hook
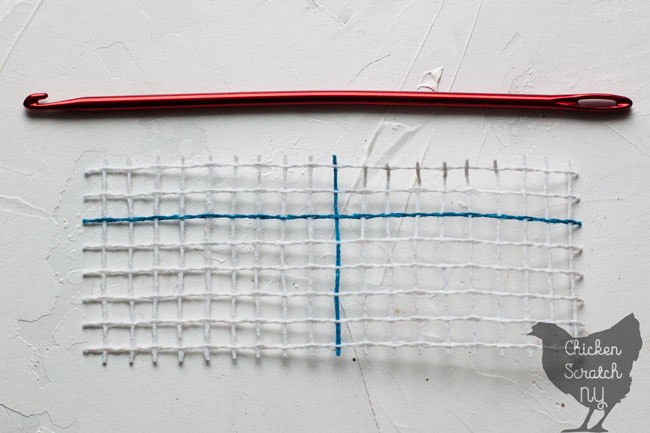
A locker hook looks like a short metal crochet hook with a large eye on the end. I found mine very randomly at Joann’s, it wasn’t even on a shelf, there was a pile of them on a stack of crochet books.
It was in Joann brand packaging. I have a feeling it’s a new thing that doesn’t quite have a home yet. But you can easily get a locker hook on Amazon.
Just like crochet hooks and knitting needles you keep using the hook over and over for as many projects as you want.
Backing Fabric
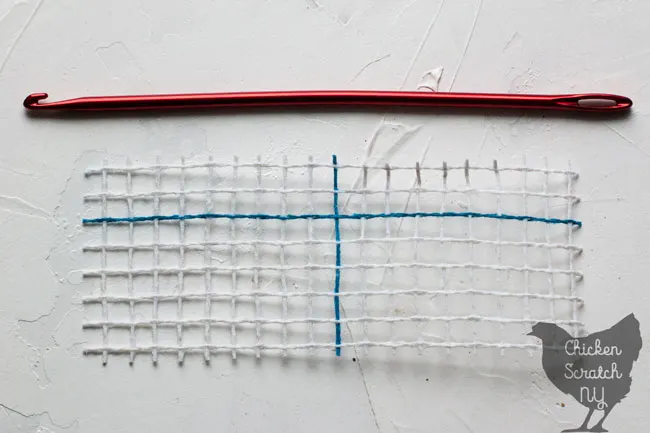
You need a special fabric for locker hooking, it’s the same material you would use for latch hook and will probably be labeled latch hook canvas.
It’s a heavy duty canvas mesh with large holes, about a 1/4 inch square. I bought a pack at Joann’s, it was about $10 for a 36×60 piece and I was able to use a 50% off coupon. It doesn’t unravel so you can cut it up to make a lot of smaller projects.
The fabric I bought is an off-white mesh and it has a blue grid running through it. I found the grid to be very helpful when I was working on my Log Cabin block, especially before I started drawing the pattern on.
Fabric Strips
The pretty part of the design is made with fabric strips, ribbon, or thick yarn. I am currently cleaning out my craft room (4 years running) and this is a great way to use up all the random assortments of quilters cotton I have laying around.
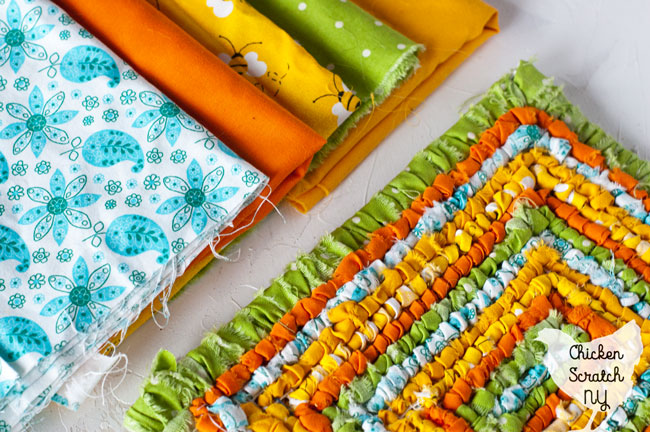

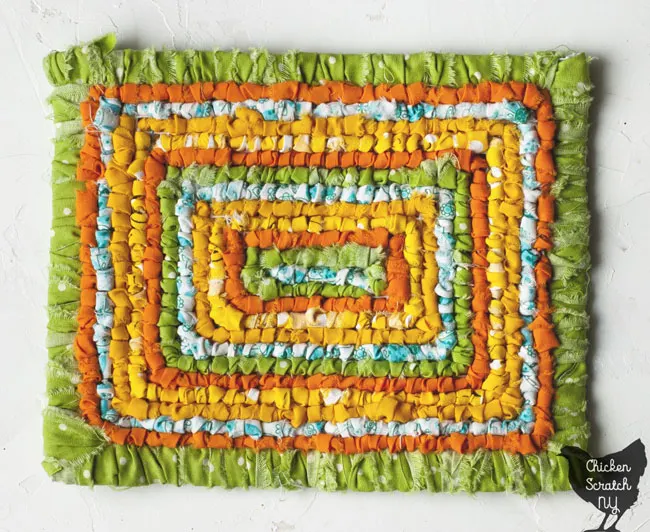
Once you get the fabric torn and stitched up you don’t see large patterns at all, which makes it especially great for ugly patterns. You can see what the fabric I used for the Spring colors piece looked like before and after.
Large patterns like the bees get obscured but the high contrast like the white paisley stands out.
I use a mix of solids and patterns but it’s really up to you and what you have on hand. It’s easier to use solids or batiks that are the same on both sides. you have to pay more attention when working with printed patterns that are dull on the backside.
Yarn or Twine
You will also need yarn or twine to pull through your stitches. Don’t get worried! I’ll explain that part in a minute.
It needs to fit through the eye of the needle and it should be smooth enough to pull through the loops, you don’t want anything brittle enough to snap when you pull or with slubs that will get caught on the loops.
The yarn won’t be that visible but it’s better if it blends in with the colors you’re using. I used baker’s twine for the Spring colors mat and burgundy Super Saver yarn for the log cabin block.
You don’t really notice the yarn in the dark half of the block but it does stand out on the green side more than I would like.
The scrappy Christmas mat was also done with Red Heart Super Saver. I think it’s a great option if you need to buy yarn, it’s really cheap, easy to find and it fits perfectly in the eye of the needle on the locker hook.
It also has enough grip to easily tie into a knot, which is great when you need to add another piece of yarn in the middle of a piece.
Just Yarn Worsted from the Dollar Tree is a great option for Locker Hooking, if you wanted to put together a little kit you could grab a skein of black, grey, and white to cover all your bases.
Read all about Dollar Tree Yarns
Optional Tools
Tapestry Needle – Technically this is optional, I didn’t use a tapestry needle (or yarn needle) for the Spring colors mat, I used the hook to pull the fabric around and around and around. It took so much longer! If you have one or if you’re at the store anyway pick one up.
Sharpie – Is it really a craft if you don’t use a sharpie? If you want to follow a specific pattern it’s really easy to draw it on with a sharpie. You don’t see the mesh when you’re done so it all gets covered up.
I used a black sharpie to help me keep track of my log cabin locker hook block and it made it 100x easier to know when to stop and switch colors.
Preparing Fabric for Locker Hook
You can get your fabric ready before you start or tear pieces as you go. I usually end up somewhere in the middle preparing a few pieces and then hooking then prepping again.
Tearing
If you want to tear your fabric you need to make sure you’re using woven fabric. Quilters cotton is perfect for locker hook, definitely check the remnant racks for fabrics. As long as you like the colors you’ll like the way it looks after being locker hooked.
For the longest pieces use the full width of the fabric, the way you would buy it off the bolt at the fabric store, not a fat quarter or pre-cut package.
Use your scissors to cut a small notch across the selvage and then use your hands to rip the fabric. I don’t mind the sound but it scares the crap out of my cat Whiskers.
Use your hands to pull off any loose strings, there will be a lot of them. If you find the fabric keeps unraveling as you pull off the strings you can cut the selvage end off completely.
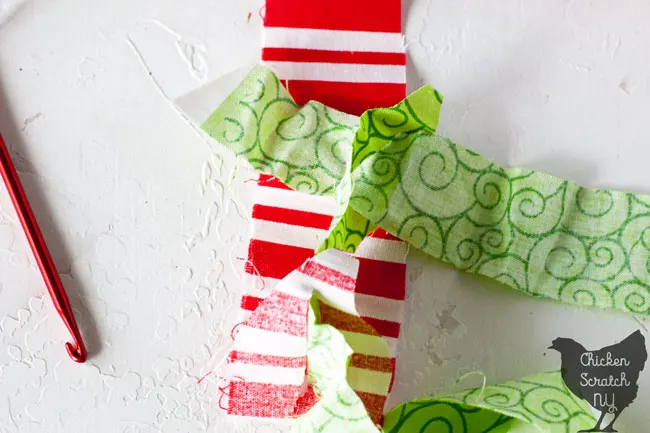
Once I’ve got a bunch of strips ready I wind the fabric into loops around my hand and keep them stored together in a small craft box or in whatever tote bag I’m carrying around at the time.
I like to use 1/2-inch wide pieces of fabric for the edge and 1.5-inch pieces for the actual locker hooking. To be honest I don’t actually measure anything, I eyeball it and I have a pretty accurate mental ruler after working in a sewing company for 9 years.
Tying Ends

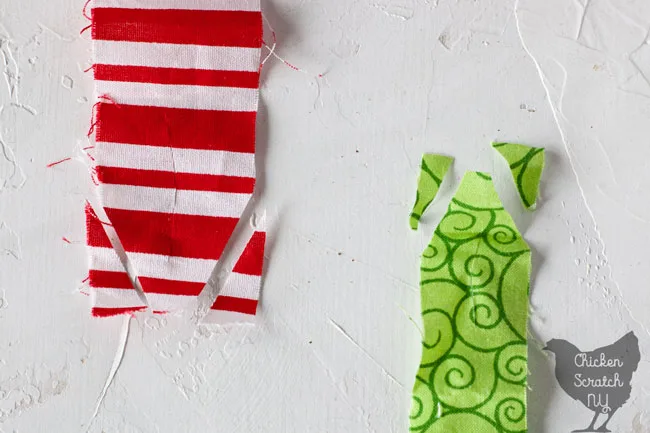
Clip off the edges of the strips, it’s not mandatory but it does make the knots smaller and easier to pull through the squares when you get to them. Cut a vertical slit about 1/2 inch away from the edge.
Slide one end though the slit in the other. Make sure the face side of both fabrics is facing up.

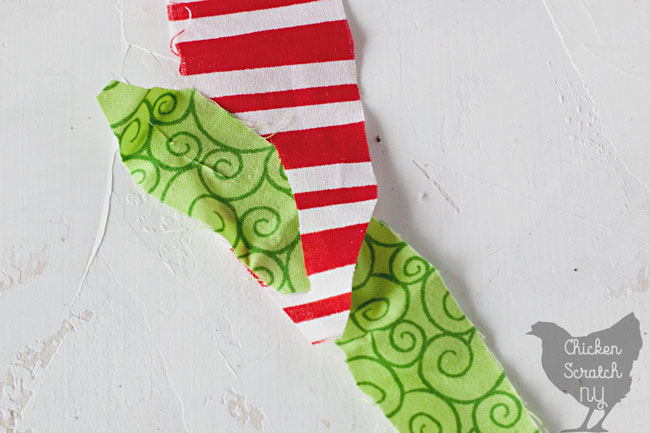
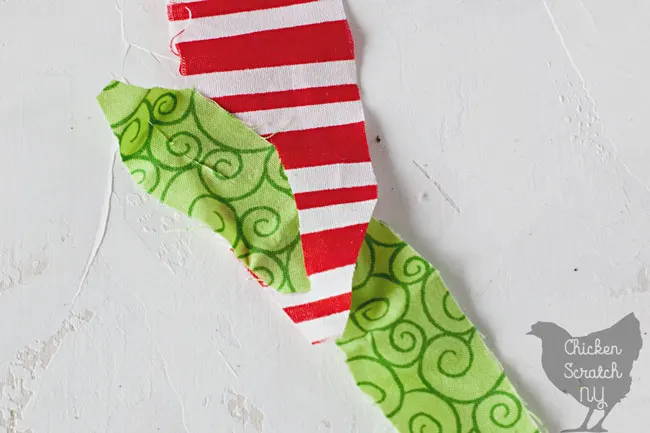
Take the loose end of the fabric you pushed though the first piece and push it through the slit in itself. In this example I put the green through the red, then the green through the green.

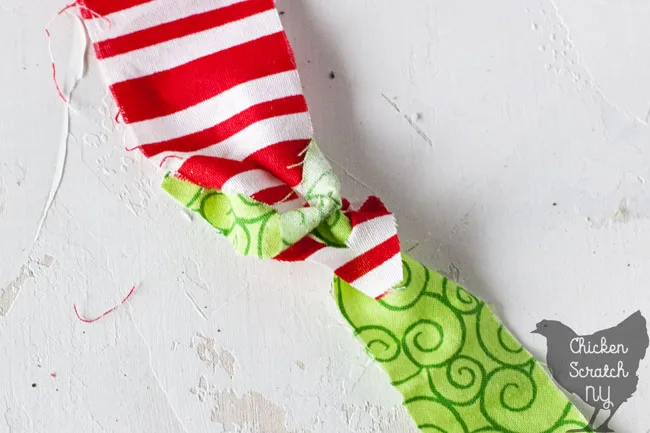


Pull the two pieces of fabric apart and they will form a small knot. I like to hold the fabric folded in half (right side out) when I tighten up the knots because I think it makes it easier to work with.
Wrapping the Edge

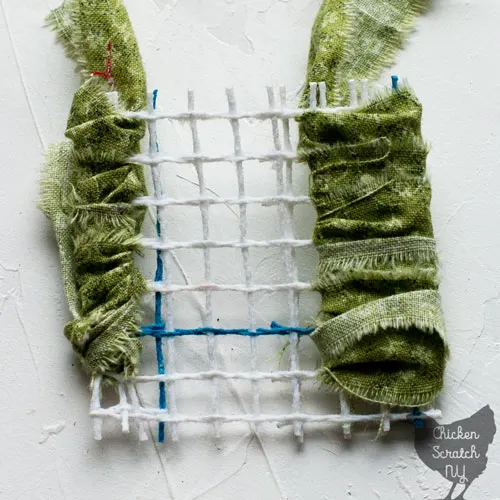
This is where that optional tapestry needle comes in. You can skip the needle and use the locker hook but it will take longer.
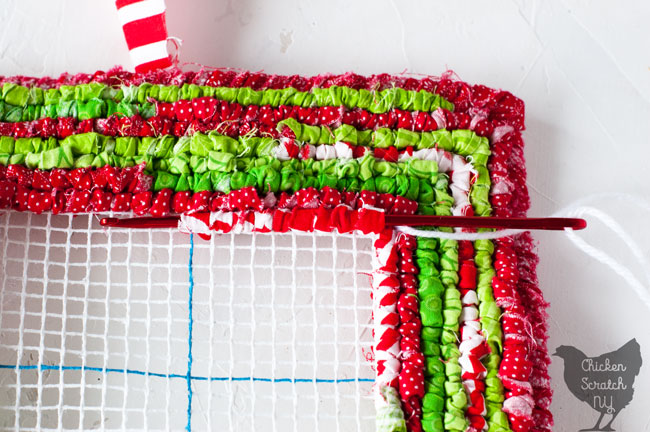
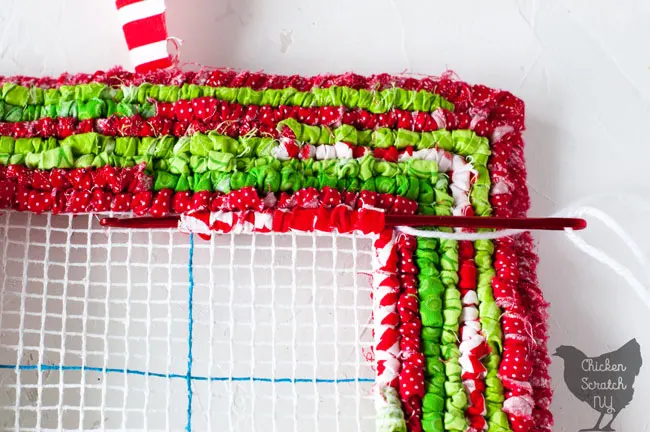
Start by deciding how big you want your finished piece to be, then add 2 (or three) rows to each side. Fold over that extra space and finger-press it to stay in place. I like to clip off the extra material in the corner so you don’t have as many blocks to line up.
Thread the locker hook or tapestry needle with a fabric strip and whip stitch around working in the second space from the edge. If you’re working with a printed fabric try to keep the right side of the fabric showing.
If you want a thicker border you can go into the 3rd space from the edge instead of the second. The spring colors mat had a 3-space border and the other two have a 2-space border.
Locker Hook Stitch
Locker hook is worked from the front or face. The fabric strips are held under the mesh and pulled to the front with the hook. Thread the needle end with a long piece of yarn or twine.
Step 1

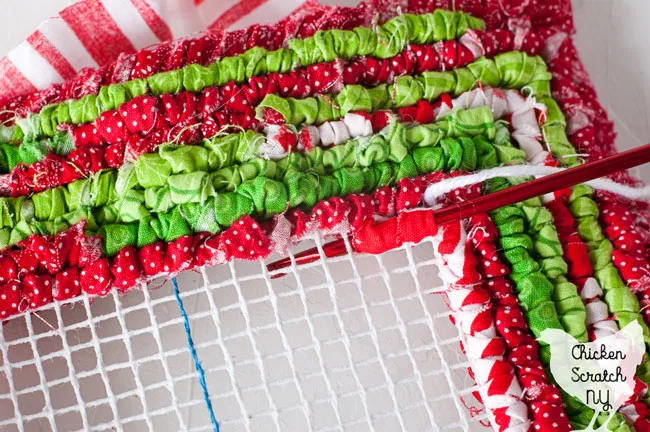
Push the hook into the first square of the backing fabric and wrap the fabric strip around the hook and pull up a loop of fabric. Then slide the hook through.
In the picture below I have the backing fabric turned so you can see the bottom, where the fabric stays. You can also see how I have it folded in half and I’ve got the fabric wedged between my fingers to help it hold the fold.

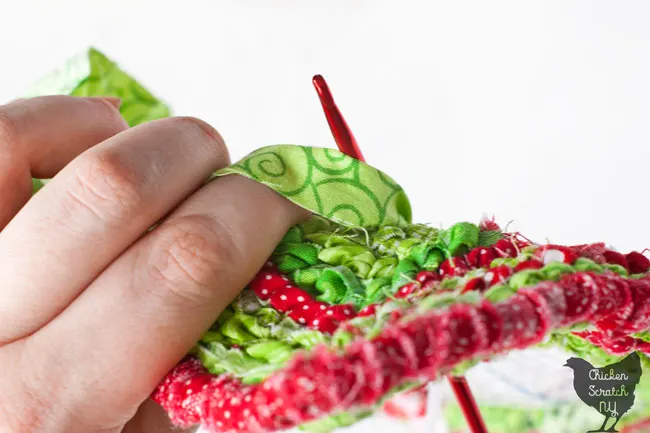
Move to the next square and pull up another loop. The fabric loops will stay on the hook.
Step 2
When you start to run out of hook to hold on to pull the hook through the fabric leaving a tail of yarn. Keep pulling up more loops and then pull the hook though.
If you need to remove any stitches pull out the yarn and you can then pull the fabric strip out from the bottom.
Patterns
You don’t need a pattern to get started, one of the easiest ways is to tear all of your strips, ties the ends, and wind them into a ball. Work from the outside in changing colors as they come up.

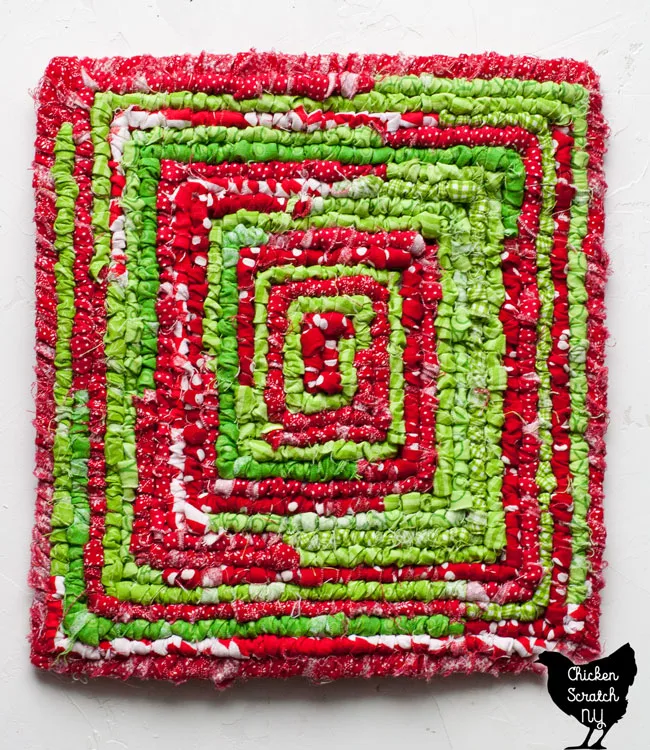
This is how I made the Christmas mat, I found a box of strips that I had cut so many years ago for a Christmas quilt. I alternated red and green in all the different patterns. Some of the strips were longer, some wider but in the end it I think it turned out very festive.
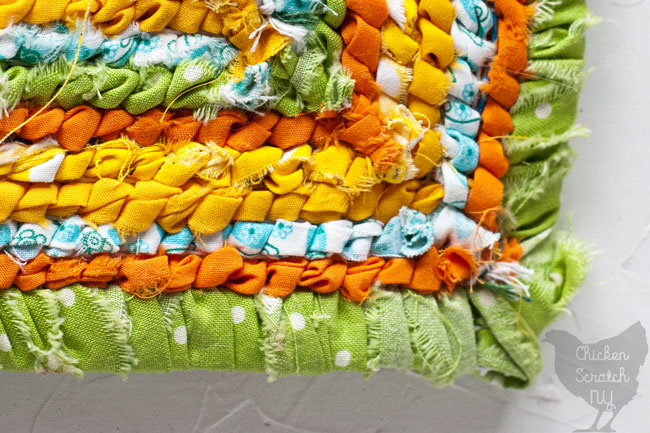

The Spring color mat was done by changing colors with each row. You need to pay a bit more attention, I actually messed up the pattern I was going for but it’s ok.
You’ll end up tying off a lot of ends, you can see they all run along one diagonal. This pattern was also worked from the outside in.
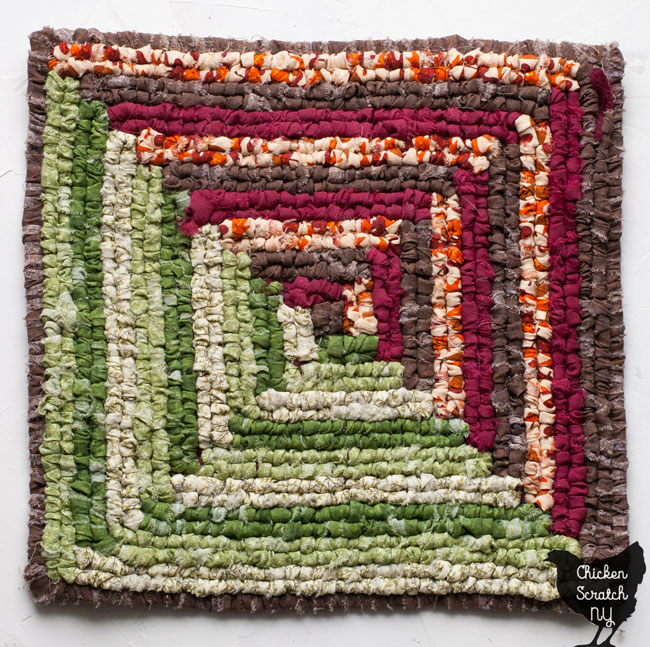

You can also split your fabric into sets of squares, stripes or rectangles. That’s how I ended up with my log cabin block. This one started from the center and it’s based on the traditional quilt block of the same name.
I hope that’s enough info to get you started! The sky and your craft stash are the only limits on this one.
If you decide to try out locker hooking I’d love to see your projects. You can email them to me at [email protected] or tag me on Instagram @AleciaCSNY
Check out my Crafting & DIY page for more ideas or start here:


Mary
Thursday 26th of May 2022
What do you do with the yarn and fabric tails at the beginning? How do they stay secure?
Do you usually but a backing on rug projects so it doesn't scuff the floor?
Alecia
Thursday 16th of June 2022
I use the hook or a large blunt needle to pull the ends under my loops so they get locked in as I work. I do the same at the end.
I haven't ever finished a rug but I would imagine you'd need some type of non-skid pad under it or you'd be turning your living room into a slip and slide! Most of the rough base material is covered by fabric so I don't think it would damage the floor but better safe that sorry
Tina G.
Tuesday 1st of March 2022
I have been half heartedly searching for flat type pot holder. They HAVE to be black(used for catering events). But, I think, I want to make a pair with tiny spec gold dots. And see if my co-staff think they are jazzy enough to be used at weddings to carry hot foods to the steamers. Now seeing this pin, I believe I will make some. If they don't think they're appropriate I'll just keep them myself. Thank you for posting. The art is beautiful.
Sandy Howard
Tuesday 11th of January 2022
I like be locker hooking have been doing for long time! Made Christmas stocking, place mats, and various others!
Vicki
Wednesday 27th of January 2021
I did a small rug 15 yrs ago. Would love to do it again. I had to medical retire. Retirement sucks to be honest when you can not go or do what you thought you might at this time. My question is , do they make a frame to put the canvas on? Years ago I did it in my lap. But my legs bounce due to a muscle disorder. Thank you for your time. Vicki Runninger
Heather Teffeteller
Friday 13th of March 2020
Ok.. just locked hooked my first piece of fabric.This has potential to be addictive.I desperately need some tips on how to hold this hook though I'm struggling getting loops through mesh and only using about one inch pieces of fabric.S.O.S