
I spent most of my 4th of July vacation on the couch surfing pinterest. It wasn’t that I intended to be super lazy, but it was really hot and whenever I tried to work in the garden I got dizzy and had to lay down. Eventually I gave in and enjoyed some quality time with my new couches, the cat and my laptop. I also watched Ax Men and cried when the Swamp Man swam with alligators at night to get money to take his dog to the vet and then CARRIED him 5 miles in the Louisiana summertime to the vet and back. But that has nothing to do with this post.
The inspiration came from Ella Claire, I fell in love with her Autumn Display and when I saw her Autumn Luminary I knew I wanted to make one of my own. Also, if you follow me on Facebook you know I purchased a brad nailer and I’m currently looking for any excuse to fire that up. So while my construction is very different, the end product looks fairly similar.
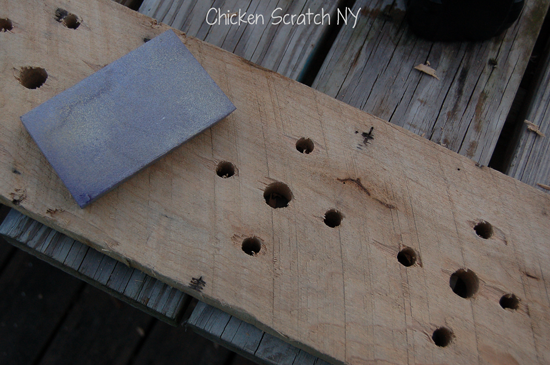
I used a scrap 1*6 that I pried of the old workbench in the garage, it’s too rough for signs but I knew it would work well for this project. It has one smoother side and one with rough-cut saw marks. I marked (2) 10 inch pieces for the front and back and (2) 5 inch pieces for the sides. I marked out my holes by drawing a grid and making X’s and O’s where I wanted the holes with a pencil. One the side panels I marked 5 holes, a large one in the center and 4 small ones around the outside.

I drilled the large holes with a 3/4 in spade bit and the small ones with a 1/2 in spade bit. After the first 3 holes I was wishing for thinner wood (the only stuff I had on hand was a full 1 inch thick!) but I kept going. And eventually made my husband finish it (it was 90 degrees and I’m pregnant!). I’m not sure if it was user error or if it can be blamed on how rough the wood was, but the bottom ended up looking like this:
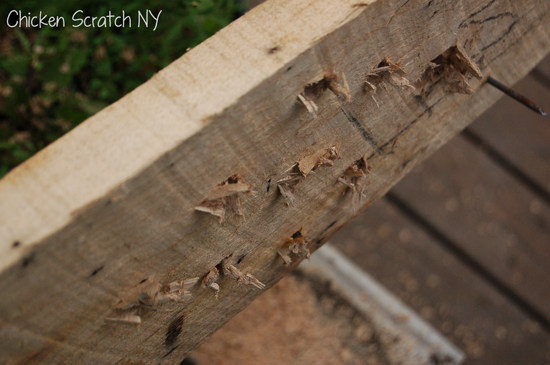
Surprisingly a few quick passes with a sanding block knocked off the splinters. I did have to dig out some of the holes with a pencil too. I’m in love with the saw lines on the wood from when it was cut.
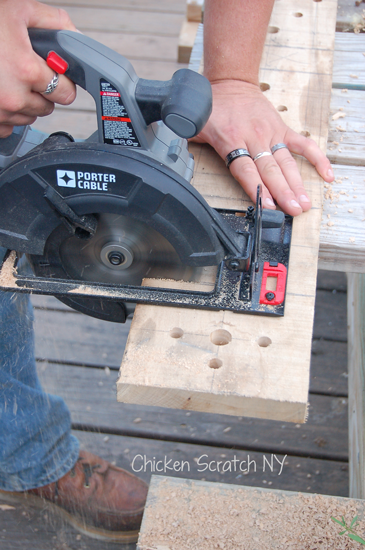
One all the holes were drilled I had my husband cut the boards apart (you can cut, then drill but I find it easier to hold the wood when it’s one large piece) because I was barefoot and didn’t want to find shoes. Plus, he was there since I gave up on drilling after the first 10 holes…
Then I pulled out my new baby, and nailed the whole thing together with 16 g nails. I used 2 per connection. I also did the first one backwards and ‘let’ my husband pry them apart because I AM wife of the year.
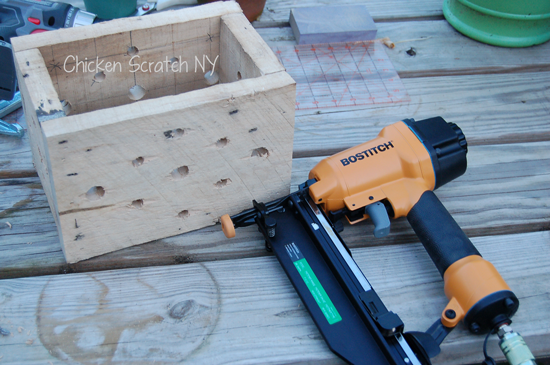
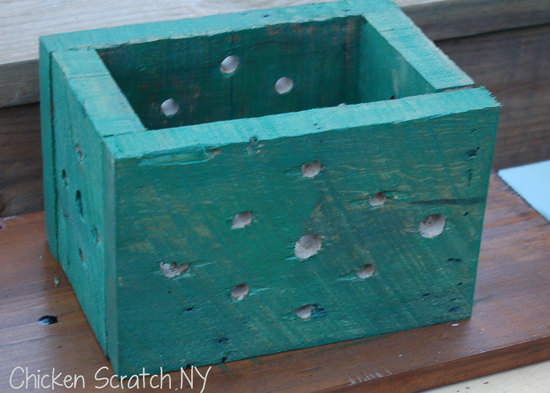
When I was done I had a cute little Swiss cheese box. I coated it all with Cabot wood stain in Fiddle head (left over from the Christmas Tree Stocking Holders) and let it dry.
Then I slapped on a quick coat of off-white DIY chalk paint.Notice how dark the picture is? Sofia decided to help herself to the corn bin and George had a minor meltdown so we had to intervene.
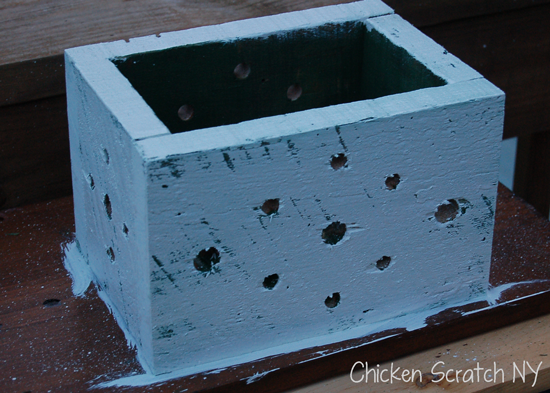
When that was completely dry I hand sanded the box to show some of the green stain and wood color.
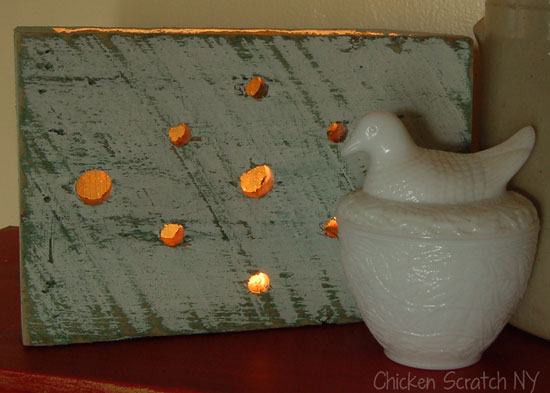
Here is how it looked when it was all done. Electric tea lights would work perfectly in this, or any electric candle. I put 4 tealights inside, always be careful when burning candles! Especially in wood. You could also put mason jars full of flowers in the box.
In case you were counting I managed to use 3 power tools for this project: drill, circular saw and brad nailer. I suppose I could have used a sander but I like more control with that step.
Alicia@ A Syncopated Home
Saturday 13th of July 2013
It's so cute! What a great idea! I love lanterns so I might just have to try this!
Christina @ I Gotta Create!
Thursday 11th of July 2013
Looks so lovely with a light in it!
Thanks so much for sharing at the party, <3 Christina @ I Gotta Create!
Cynthia L
Thursday 11th of July 2013
Love this box and I love your tools! I am always excited to pull out my tools! A nail gun - I am envious! Great project
Jonell Harrison
Thursday 11th of July 2013
IN-CREDIBLE! We think we've seen every art/crafts project under the sun & "here comes another unique" creative way using the same materials we already love
Will follow..thanks for sharing one of your favorite things. I shall return!!!!
Jonell
Audra @ Renewed Projects
Wednesday 10th of July 2013
I bet this looks lovely in the evening! Its beautiful, too, for the day. Love the color choice.
Alecia
Thursday 11th of July 2013
It leaves pretty light circles all around it when the candles are lit. I'm hoping it will work well to hide some citronella candles this weekend!