

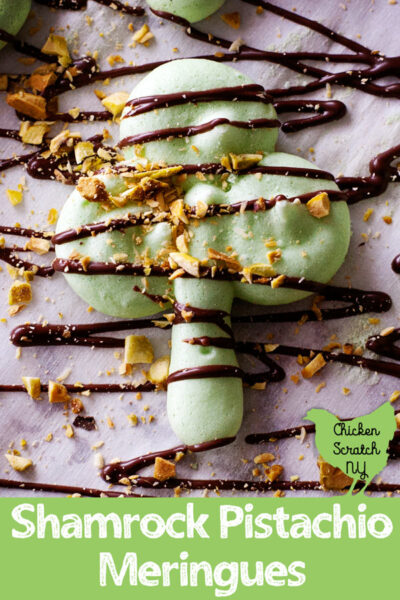
It’s shamrock time again! I’ve piped shamrock pistachio meringue cookies and now we’re going to make some out of paper.
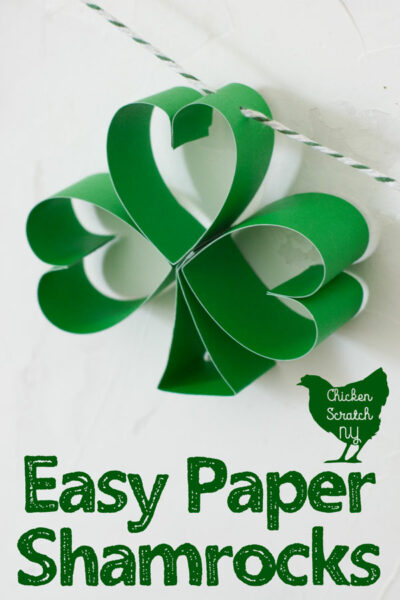

I’m going to give you two size variations, the small one is perfect for a garland but it’s a little finicky, the larger size is easier to put together and great for a kid crafting adventure. My kindergartner had it mastered by the time she finished her first.
If you can get your hands on a paper cutter this will go much faster, if not you’ll need an xacto knife or scissors and a ruler. The best paper for this is a thick cardstock, the kind you can get at Joann’s in multi-color packs. It’s always on sale.
Paper Shamrock Supplies:
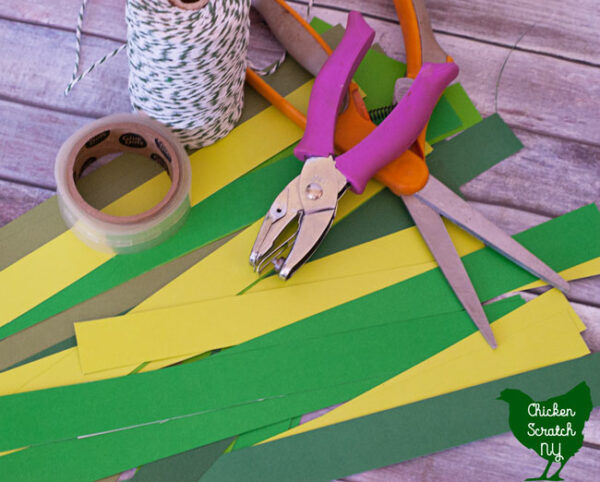

- 1 inch x 11 paper strips (2 for a small, 4 for a large)
- Glue dots or lines
- Scissors
If you want to make a garland you’ll also need:
- Twine
- Tape
- 1/8 inch hole punch
Instructions:
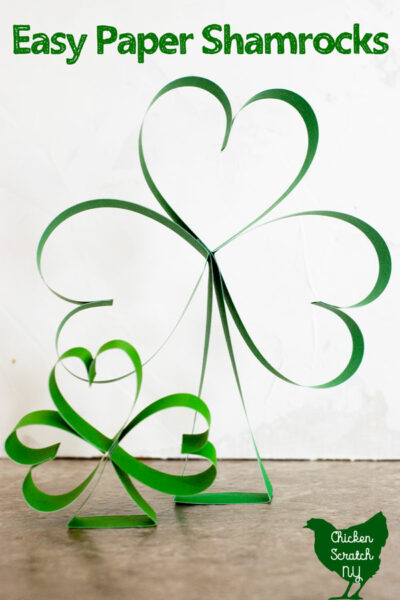

The instructions are the same for both sizes, the only difference is the strips are cut in half for the small shamrocks and left long for the large. You can use any length and width of strips for this project but longer and wider are much easier for tiny fingers.
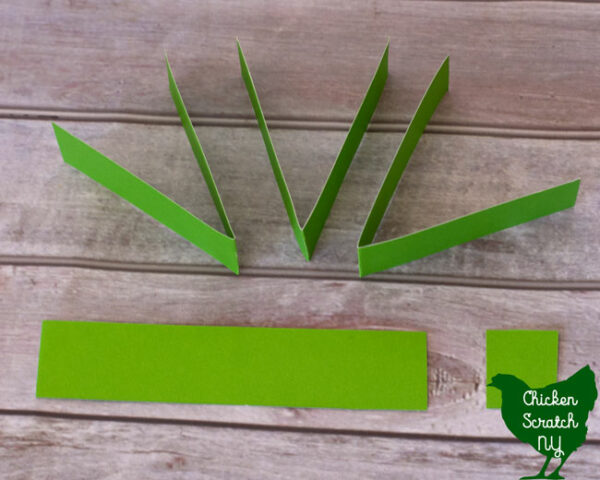

1. Fold 3 strips in half for the leaves and clip a small section off the 4th strip. The amount you remove doesn’t matter it just makes the stem a bit smaller than the leaves.
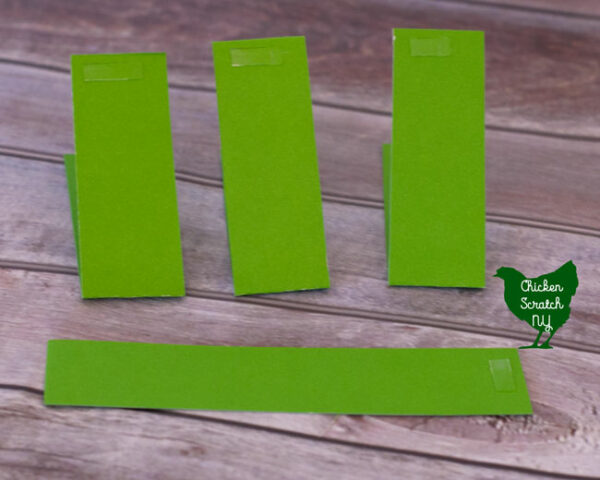
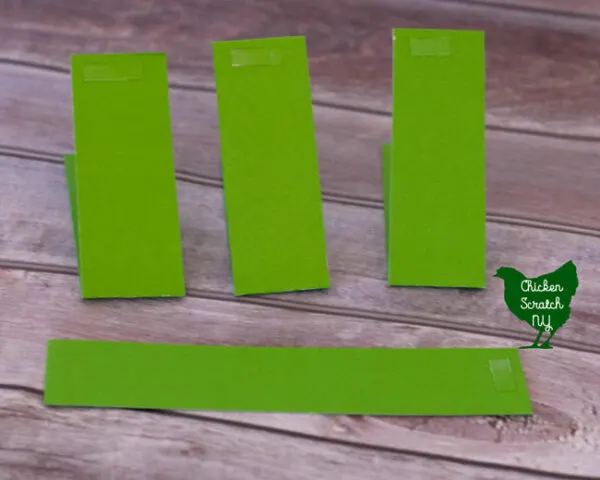
2. Apply glue dots to the outside of the folded papers and to one end of the stem piece.
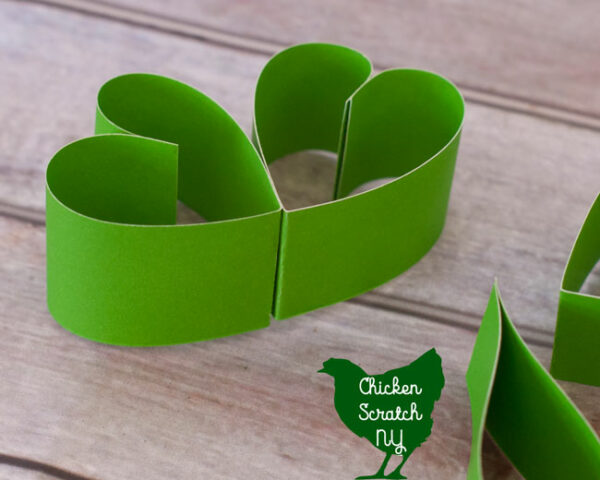

3. Roll the paper inwards so the outsides of the V are touching. This will make a heart shape, do it three times, one for each leaf.
4. Use another glue got to attach two hearts together. If your strips are uneven like mine glue the pieces together so that the front looks flat. It doesn’t matter if the back is a mess.
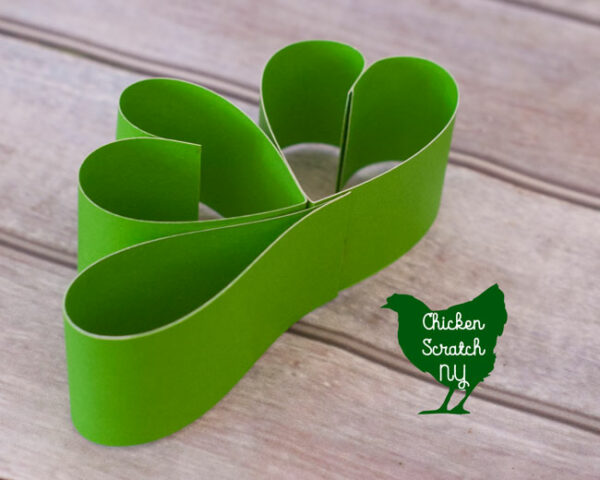

5. Fold the stem piece in half without making a hard fold. Attach it to the leaves.

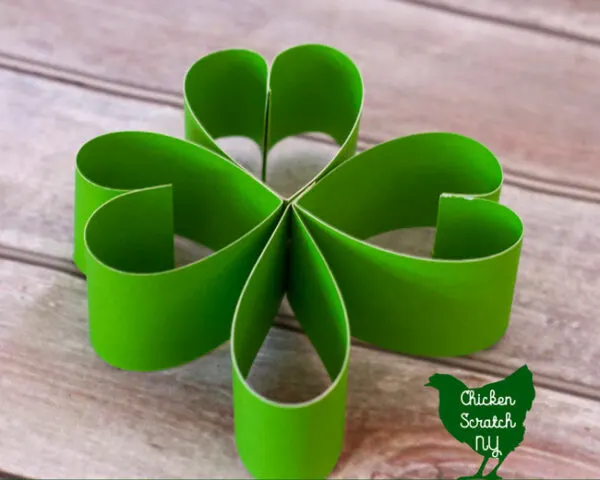
6. Add the last leaf. Bend the stem so it’s pointing down. You can leave it like this but I like to give the stem a more triangular look to set it apart from the leaves.

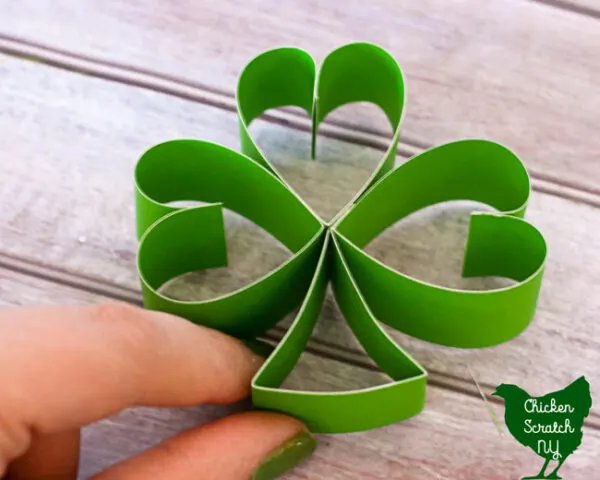
7. Use your thumbs to press up on the bottom and your pointer fingers to press down on the sides. I’m only using one hand here because I was taking the photo but I do both sides at once.
Make s Shamrock Garland

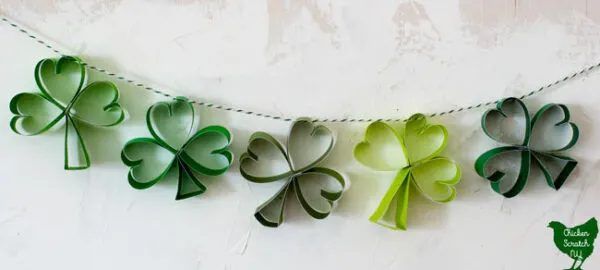
1. Use the tiny hole punch to put two holes in the top of each shamrock. I made mine on the same half of the heart so they all hung a little crooked.
2. Wrap the end of the twine in tape and then clip at an angle to make threading easier.
3. String the shamrocks on the twine and hand up. I’ve got mine strung across my giant wall calendar where I try (and fail) to organize my life.
Check out my St. Patrick’s Day Page for more ideas or start here:
Best of 2012 | Chicken Scratch
Saturday 29th of December 2012
[...] 4. Paper Shamrocks [...]
Gale
Friday 2nd of March 2012
These are lovely! If you are looking for another place to link up, I'd love if you'ld join my St. Patricks Day Blessings Party:
http://scribbleprints.blogspot.com/2012/03/st-patricks-day-journey-with-linky.html
Lindy@Itsy Bitsy Paper
Friday 2nd of March 2012
I love this project. I hope you will stop by and link up to my St. Patty's Day Project Parade.
http://www.itsybitsypaperblog.com/2012/03/st-pattys-day-project-parade-linky.html
Lisa @ Lisa's Craft Blog
Thursday 1st of March 2012
Hey Alicia!!
I just featured this project on my blog!! You can see the feature HERE!!
Thanks so much for sharing and for linking up to my party!!
~LisaLisa's Craft Blog
June Scott
Saturday 25th of February 2012
These are great, Alicia! Thanks for sharing!